The Perfect Boiled Egg: Tips and Tricks from a Professional Chef

Tips for Perfect Boiled Eggs

Blog Standard

Tips for Perfect Boiled Eggs

Boiling an egg may seem like a simple task, but there’s an art to boiling the perfect egg. Whether you’re making egg salad, deviled eggs, or just a simple snack, a perfectly boiled egg can make all the difference. In this article, we’ll share some tips and tricks from a professional chef on how to boil the perfect egg.

Read More:  Marinated Turkey Tips in the Oven: A Delicious and Easy Recipe

4 Foolproof Methods for Boiling Eggs

Here, we’ll explore four foolproof methods for boiling eggs and discuss the pros and cons of each.

Method #1: Classic Boiling

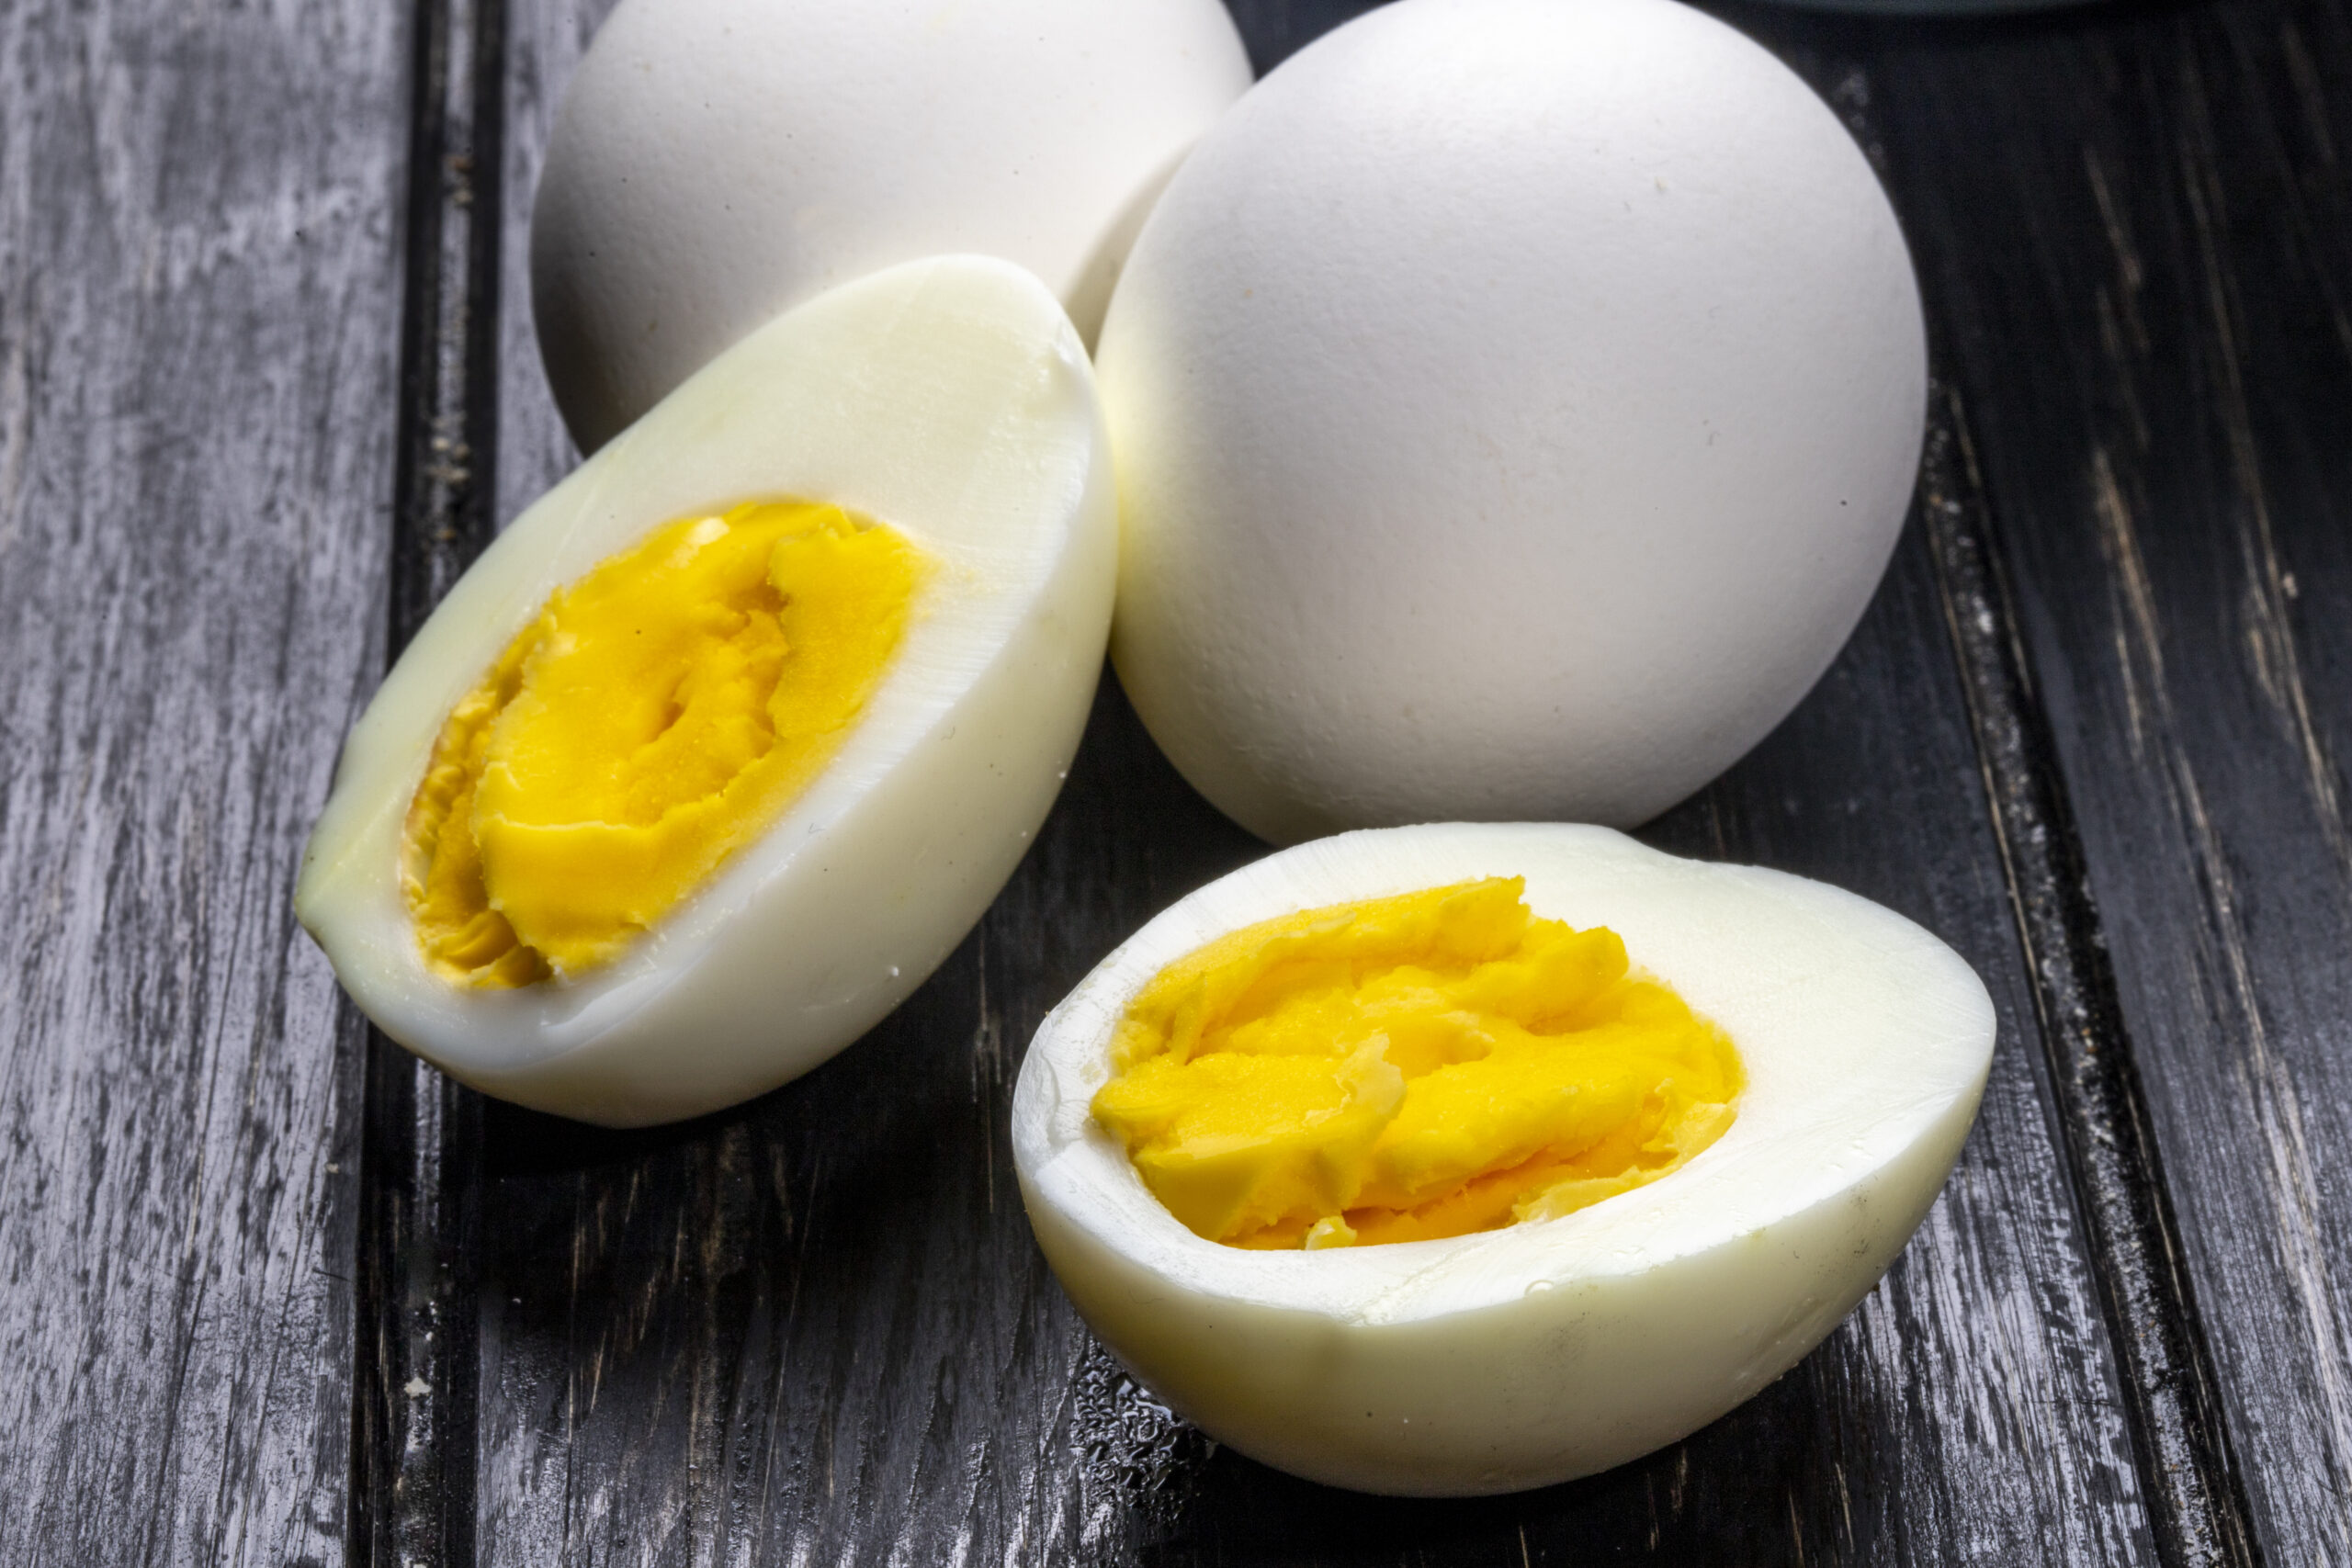
The classic method of boiling eggs involves placing them in a pot of boiling water and cooking for a specific amount of time. This method is straightforward and requires only a pot, water, and eggs. The key is to control the heat and timing to achieve the desired consistency. For soft-boiled eggs, cook for 5-6 minutes, for medium-boiled eggs, cook for 7-8 minutes, and for hard-boiled eggs, cook for 9-12 minutes.

Method #2: Steaming

Steaming eggs is a gentle cooking method that can produce consistent results. To steam eggs, place them in a steamer basket over a pot of boiling water and cover. Cook for 6-7 minutes for soft-boiled eggs, 9-10 minutes for medium-boiled eggs, and 12-13 minutes for hard-boiled eggs. Steaming eggs can yield a creamier texture and make them easier to peel.

Method #3: Sous Vide

Sous vide is a cooking technique that involves sealing the eggs in a plastic bag and cooking them in a precisely controlled water bath. This method can produce eggs with a custard-like texture and a consistent yolk. To cook sous vide eggs, set the water bath to the desired temperature (for example, 63°C for soft-boiled eggs, 70°C for medium-boiled eggs, and 75°C for hard-boiled eggs) and cook for 45-60 minutes.

Method #4: Instant Pot

The Instant Pot is a popular kitchen gadget that can also be used to boil eggs. To use the Instant Pot, add a cup of water to the pot, place the eggs on a trivet or steamer basket, and cook on high pressure for 5 minutes for soft-boiled eggs, 6 minutes for medium-boiled eggs, and 8 minutes for hard-boiled eggs. Quickly release the pressure and transfer the eggs to a bowl of ice water to cool.

Common Mistakes to Avoid When Boiling Eggs

Boiling eggs may seem like a simple task, but there are several mistakes that can lead to less-than-perfect eggs. Overcooked or undercooked yolks, difficult-to-peel shells, and off-flavored eggs are just a few of the common issues that can arise. Here are some common mistakes to avoid. 

Overcooking or undercooking the eggs
Not letting the eggs come to room temperature before boiling
Using old eggs that can have off-flavors and are more difficult to peel
Not adding enough water or salt to prevent sticking and cracking
Peeling the eggs too soon or too late for a messy or difficult-to-peel egg.

How to Boil Eggs for Optimal Nutrition?

Eggs are a nutrient-dense food that can be a great addition to a healthy diet. Boiling eggs is an easy and convenient way to prepare them, but did you know that the way you boil them can affect their nutritional value? In this article, we’ll explore the importance of nutritious eggs, how to choose the right eggs, and how to boil them for optimal nutrition.

Importance of Nutritious Eggs

Eggs are a good source of protein, vitamins, and minerals. They contain amino acids that are essential for building and repairing muscles, and choline, which is important for brain health. Eggs are also rich in antioxidants that protect the body from damage caused by free radicals. But the way you cook them can affect their nutritional value.

Choosing the Right Eggs

To get the most out of your boiled eggs, it’s important to choose high-quality eggs. Look for eggs that are labeled organic, pasture-raised, or free-range. These types of eggs are produced by hens that are allowed to roam freely and eat a natural diet, which can result in eggs with more nutrients.

Boiling Methods to Retain Nutrients

Boiling eggs can cause some nutrient loss, but there are ways to minimize it. To retain the most nutrients, use the gentlest method possible. Avoid boiling eggs for too long or over high heat, which can cause the proteins to denature and the nutrients to break down. A good rule of thumb is to simmer the eggs for about 7-10 minutes, depending on your desired consistency.

FAQs

Q: How do you boil an egg perfectly?

A: To boil an egg perfectly, start by placing the eggs in a single layer in a saucepan. Add enough water to cover the eggs by about an inch. Place the saucepan on the stove over medium-high heat and bring the water to a rolling boil. Once the water is boiling, reduce the heat to low and let the eggs simmer for the desired amount of time. After that, transfer the eggs to an ice bath to stop the cooking process. Finally, peel and enjoy your perfectly boiled egg.

Q: How long should a perfect egg boil?

A: The cooking time for a perfect boiled egg depends on your desired level of doneness. Here are some general guidelines:
– Soft-boiled eggs: 4-6 minutes
– Medium-boiled eggs: 7-9 minutes
– Hard-boiled eggs: 10-12 minutes

Q: Should you boil eggs for 20 minutes?

A: Boiling eggs for 20 minutes is not recommended, as it will result in overcooked eggs with a greenish-gray yolk and a rubbery texture. For hard-boiled eggs, a cooking time of 10-12 minutes is usually sufficient.

Q: Does it take 30 minutes to boil an egg?

A: No, it does not take 30 minutes to boil an egg. Boiling an egg for such a long time would result in an extremely overcooked egg. For hard-boiled eggs, a cooking time of 10-12 minutes is typically recommended.

Q: Is 7 minutes enough to boil an egg?

A: Yes, boiling an egg for 7 minutes is generally enough to achieve a medium-boiled egg. The yolk will be partially set, while the center will still be slightly soft. Adjust the cooking time based on your preference for a softer or firmer yolk.

Q: Should I boil eggs for 10 minutes?

A: Yes, boiling eggs for 10 minutes is a common cooking time for hard-boiled eggs. This will result in a fully cooked yolk with a slightly soft, creamy texture. Remember to adjust the cooking time based on your desired level of doneness.

Q: What’s the secret to boiled eggs?

A: The secret to boiled eggs lies in the cooking process. Start with room-temperature eggs, as they are less likely to crack when placed in boiling water. Use a gentle simmer rather than a rolling boil to prevent the eggs from bouncing around and cracking. After boiling, transfer the eggs to an ice bath to stop the cooking process and make them easier to peel.

Q: How do you boil eggs like a pro?

A: To boil eggs like a pro, follow these tips:
1. Use room-temperature eggs.
2. Place the eggs in a single layer in a saucepan.
3. Add enough water to cover the eggs by about an inch.
4. Bring the water to a gentle simmer, not a rolling boil.
5. Adjust the cooking time based on your desired level of doneness.
6. Transfer the eggs to an ice bath after boiling to stop the cooking process.
7. Gently tap and roll the eggs on a hard surface to make peeling easier.

Q: Do you boil water before boiling eggs?

A: Yes, it is recommended to boil the water before adding the eggs. Start by placing the eggs in a saucepan, then add enough water to cover them by about an inch. Place the saucepan on the stove over medium-high heat and bring the water to a rolling boil. Once the water is boiling, you can reduce the heat to low and add the eggs to start the cooking process.

Conclusion

Boiled eggs are a nutrient-dense food that can be a great addition to a healthy diet. To get the most out of your boiled eggs, choose high-quality eggs and use a gentle boiling method to retain the most nutrients. Boiled eggs can be enjoyed on their own or used in a variety of dishes for a nutritious and satisfying meal. By following these tips, you can enjoy boiled eggs that are not only delicious but also packed with nutrients.

Marinated Turkey Tips in the Oven: A Delicious and Easy Recipe

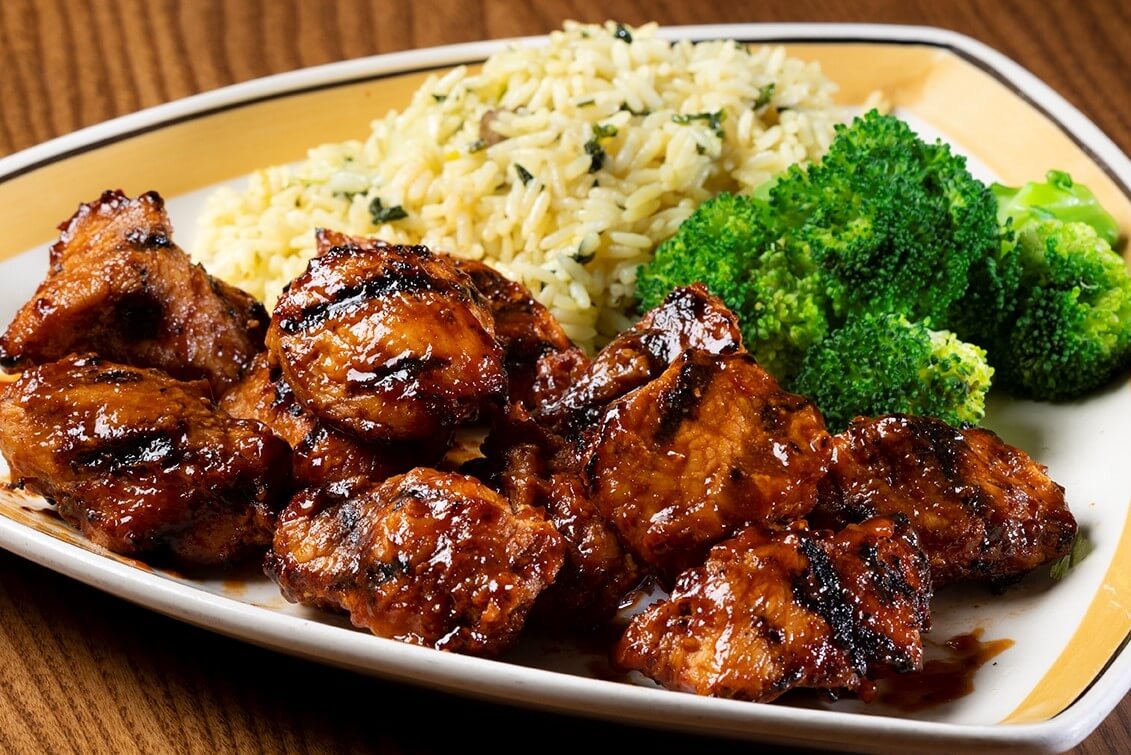
Marinated turkey tips cooking

Are you looking for a delicious and easy way to cook turkey tips? Look no further than marinated turkey tips in the oven! This recipe has become increasingly popular in recent years due to its versatility and mouth-watering taste.

One of the main benefits of marinating turkey tips is adding an extra layer of flavor to the meat. By allowing the turkey to soak up a mixture of herbs, spices, and other ingredients, you can make even the most basic cut of meat taste like a gourmet dish.

This recipe will guide you through marinating and cooking turkey tips in the oven. It’s a simple process perfect for novice cooks or busy weeknight dinners.

By the end of this recipe, you’ll have a tender, juicy, and flavorful dish that’s perfect for any occasion. So, grab your ingredients, and let’s get cooking!

🛒 Quick Tip: Want to make things easier? Grab a top-rated meat thermometer and reusable marinade bags on Amazon to nail this recipe every time. Having the right tools makes all the difference in taste and safety!

The Best Ingredients for Marinated Turkey Tips

To make marinated turkey tips in the oven, you’ll need the following ingredients:

  • 1 pound turkey tips
  • 1/4 cup olive oil
  • 2 tablespoons soy sauce
  • 1 tablespoon honey
  • 1 tablespoon Dijon mustard
  • 2 cloves garlic, minced
  • 1 teaspoon dried thyme
  • Salt and pepper, to taste

When selecting your ingredients, it’s important to choose high-quality, fresh ingredients whenever possible. Look for turkey tips that are free-range or organic, and try to use fresh herbs and spices for the marinade.

If you don’t have all of the ingredients listed above, there are a few substitutions you can make. For example, you can use maple syrup instead of honey, or grainy mustard instead of Dijon. Just keep in mind that the flavor profile might be slightly different with substitutions.

When it comes to herbs and spices, feel free to experiment with different combinations to find the flavor you like best. You can also adjust the amount of salt and pepper to your preference.

Now that you have your ingredients, it’s time to move on to the marinating process.

How to Marinate Turkey Tips for Maximum Flavor?

Marinating the turkey tips is a crucial step in this recipe, as it not only adds flavor but also helps to tenderize the meat. Here’s what you need to know about marinating the turkey tips:

The Importance of Marination:

Marinating allows the turkey tips to soak up the flavors of the marinade, making them more flavorful and juicy. It also helps to break down the proteins in the meat, resulting in a more tender and succulent dish.

How Long to Marinate the Turkey Tips:

For best results, marinate the turkey tips for at least 2 hours, and up to 24 hours, in the refrigerator. The longer the turkey tips marinate, the more flavorful they will be. However, be careful not to marinate them for too long, as the acidity in the marinade can start to break down the meat.

Tips on Creating a Flavorful Marinade:

To create a flavorful marinade, start with a base of olive oil and soy sauce. From there, you can add other ingredients such as honey, Dijon mustard, minced garlic, and dried thyme.

Step-by-Step Guide on Marinating the Turkey Tips:

  1. In a small bowl, whisk together the olive oil, soy sauce, honey, Dijon mustard, minced garlic, dried thyme, salt, and pepper.
  2. Place the turkey tips in a large resealable plastic bag or a shallow dish.
  3. Pour the marinade over the turkey tips, making sure they are completely covered.
  4. Seal the bag or cover the dish with plastic wrap and refrigerate for at least 2 hours, or up to 24 hours.
  5. Halfway through the marinating process, flip the turkey tips over to ensure that they are evenly coated with the marinade.
  6. When you’re ready to cook the turkey tips, remove them from the marinade and discard any excess marinade.
  7. Now that your turkey tips are marinated and ready to go, it’s time to prepare them for the oven.

Read More: 10 Easy Tips for Frying the Most Flavorful & Crispy Fish Ever

Preparing Turkey Tips for the Oven

How to Properly Skewer the Turkey Tips?

If using wooden skewers, soak them in water for at least 30 minutes before using them to prevent them from burning in the oven.
Thread the turkey tips onto the skewers, leaving a small gap between each piece to ensure even cooking.
Be sure to leave some space at the end of the skewer to make it easier to handle when turning the turkey tips in the oven.

Preheating the Oven and Preparing the Baking Dish:

Preheat the oven to 400°F (200°C).
Line a baking dish with aluminum foil or parchment paper to make cleaning up easier.
If desired, you can add sliced onions, bell peppers, or other vegetables to the baking dish for added flavor.

Now that the turkey tips are skewered and the oven is preheating, it’s time to move on to the cooking process.

Before cooking the turkey tips in the oven, it’s important to handle raw turkey safely to prevent the risk of foodborne illness. Here are some tips on how to prepare the turkey tips for the oven:

Quick Safety Tips on Handling Raw Turkey Safely:

Tip 1: Always wash your hands before and after handling raw turkey.
Tip 2: Use separate cutting boards and utensils for raw turkey and other foods to prevent cross-contamination.
Tip 3: Cook the turkey to an internal temperature of 165°F (74°C) to ensure it’s safe to eat.

The Perfect Temperature and Time for Cooking Turkey Tips

Now that your turkey tips are marinated and skewered, it’s time to cook them in the oven. Here’s what you need to know:

➨Tips on Achieving the Perfect Cook on the Turkey Tips:

For best results, cook the turkey tips in a single layer in the baking dish to ensure even cooking.
Avoid overcrowding the baking dish, as this can cause the turkey tips to steam instead of roast.
Baste the turkey tips with any remaining marinade halfway through cooking to keep them moist and flavorful.

➨Cooking Time and Temperature Guidelines:

Cook the turkey tips in the preheated oven for 15-20 minutes, or until they are cooked through and golden brown on the outside. The internal temperature of the turkey tips should reach 165°F (74°C) to ensure they are safe to eat.

➨How to Avoid Overcooking or Undercooking the Turkey Tips:

Tip 1: Check the turkey tips frequently while cooking to avoid overcooking or undercooking.
If the turkey tips are browning too quickly, cover them loosely with aluminum foil to prevent them from burning.

Tip 2: If the turkey tips are not cooking quickly enough, increase the oven temperature by 25°F (14°C) and check them again after a few minutes.
Checking the internal temperature for doneness:

Tip 3: Use a meat thermometer to check the internal temperature of the turkey tips.
Insert the thermometer into the thickest part of the turkey tip, making sure it doesn’t touch the skewer.

Tip 4: The internal temperature should reach 165°F (74°C) for safe consumption.

Tip 5: Once the turkey tips are fully cooked, remove them from the oven and let them rest for a few minutes before serving. This will help the juices distribute evenly throughout the meat, resulting in a more flavorful and tender dish.

Now that your marinated turkey tips are ready to serve, it’s time to enjoy!

Cooking Instructions For All Other Types Of Marinated Meats

⑴ STEAK TIPS

Grill: Begin by cleaning the cooking grates and preheating the grill to high heat. Place the steak tips on the grill and close the lid. Cook for approximately 6 to 8 minutes, turning the steaks once, until they reach your desired level of doneness. Once cooked, remove the steaks from the grill and allow them to rest for 3 to 5 minutes. It’s important to ensure that the internal temperature of the steaks reaches 145°F for safe consumption.

Oven: Adjust the oven rack to a position where the steak tips will be 3 to 4 inches away from the heating element. Preheat the oven to the “broil” setting at the maximum temperature for at least 5 minutes. Place the steak tips on a heat-safe pan and put them in the oven. Broil the steaks for 3 to 12 minutes per side, depending on your desired level of doneness. It’s crucial to check that the internal temperature of the steak tips reaches 145°F to ensure they are properly cooked.

Stove Top: Take a large skillet and lightly coat the bottom with canola oil. Heat the skillet over medium-high heat until the oil starts to simmer. Add the steak tips to the skillet, making sure not to overcrowd it. Cook the steak tips for about 3 to 5 minutes on each side, or until the internal temperature in the thickest part of the steak reaches 145°F.

⑵ CHICKEN BREAST

Grill: Start by cleaning the cooking grates and preheating the grill to medium-high heat. Place the chicken breasts on the preheated grill and cook for approximately 4 to 5 minutes on each side. Ensure that the internal temperature in the thickest part of the breast reaches 165°F for safe consumption.

Oven: Preheat the oven to 400°F. Place the chicken breasts in a heat-safe pan and bake them for 22 to 26 minutes. Alternatively, preheat the oven to 350°F and bake the chicken breasts for 25 to 30 minutes. It’s crucial to check that the internal temperature in the thickest part of the breast reaches 165°F to ensure the chicken is fully cooked.

Stove Top: Take a large skillet and lightly coat the bottom with canola oil. Heat the skillet over medium-high heat until the oil starts to simmer. Add the chicken breasts to the skillet, making sure not to overcrowd it. Cook the chicken for about 5 to 7 minutes on each side, or until the internal temperature in the thickest part of the breast reaches 165°F.

⑶ TURKEY TIPS

Grill: Clean the cooking grates and preheat the grill to medium-high heat. Place the turkey tips on the grill and cook for approximately 4 to 5 minutes on each side. Ensure that the internal temperature in the thickest part of the turkey tip reaches 165°F for safe consumption.

Oven: Preheat the oven to 400°F. Place the turkey tips in a heat-safe pan and bake them for 22 to 26 minutes. Alternatively, preheat the oven to 350°F and bake the turkey tips for 25 to 30 minutes. It’s important to check that the internal temperature in the thickest part of the turkey tip reaches 165°F to ensure it is fully cooked.

Stove Top: Take a large skillet and lightly coat the bottom with canola oil. Heat the skillet over medium-high heat until the oil starts to simmer. Add the turkey tenders to the skillet, making sure not to overcrowd it. Cook the turkey for about 3 to 5 minutes on each side, or until the internal temperature in the thickest part of the turkey tender reaches 165°F.

⑷ PORK

Grill: Clean the cooking grates and preheat the grill to medium heat. Place the pork on the grill and cook for approximately 4 to 5 minutes on each side. Once the internal temperature reaches 145°F, remove the pork from the grill and let it rest for three to five minutes before serving.

Oven: Preheat the oven to 400°F. Bake the pork in the preheated oven for 15 to 20 minutes, or until it reaches an internal temperature of 145°F. The cooking time may vary depending on the thickness of the pork pieces, so it’s essential to monitor the internal temperature for accurate doneness.

Stove Top: Take a large skillet and lightly coat the bottom with canola oil. Heat the skillet over medium-high heat until the oil starts to simmer. Add the pork to the skillet, making sure not to overcrowd it. Cook the pork for about 5 to 7 minutes on each side, or until the internal temperature in the thickest part of the pork reaches 145°F.

FAQs

Q. How do you make a turkey juicy and not dry?

To make a turkey juicy and not dry, you can try brining it before cooking, basting it with butter or broth, and using a meat thermometer to ensure it’s cooked to the right temperature.

Q. What temp should turkey tips be?

The internal temperature of turkey tips should reach 165°F (74°C) to ensure they are safe to eat.

Q. Should you cook a turkey covered or uncovered?

It is generally recommended to cook a turkey uncovered for the majority of the cooking time. This allows the skin to crisp up and the turkey to brown. However, you can cover the turkey with foil for the first part of cooking to prevent excessive browning, and then uncover it for the last part to achieve a golden brown color.

Q. How long should I bake my turkey?

The baking time for a turkey depends on its weight. As a general guideline, you can estimate about 15 minutes of cooking time per pound (0.45 kg) of turkey. However, it’s important to use a meat thermometer to determine the doneness of the turkey. The internal temperature should reach 165°F (74°C) in the thickest part of the thigh.

Q. Do I cover my turkey with foil?

Covering the turkey with foil is optional. It can be used to prevent excessive browning during the initial part of cooking. However, it’s important to uncover the turkey for the last part of cooking to allow the skin to crisp up and turn golden brown.

Q. What is the rule for baking a turkey?

The general rule for baking a turkey is to cook it at a temperature of 325°F (163°C) until the internal temperature reaches 165°F (74°C) in the thickest part of the thigh. It’s also important to let the turkey rest for about 20-30 minutes before carving to allow the juices to redistribute and make the meat more tender.

Conclusion

Overall, marinated turkey tips in the oven are a delicious and easy recipe that’s perfect for any occasion. The marinade adds an extra layer of flavor and the cooking process results in tender, juicy, and flavorful meat. Plus, the recipe is highly versatile and can be customized to your preferences.

We encourage you to try this recipe and experiment with different marinades and seasonings to find the flavor you like best. It’s a great way to add some variety to your dinner rotation and impress your friends and family with your cooking skills.

Thanks for following along with this recipe and we hope you enjoy your marinated turkey tips! Remember to always handle raw meat safely and cook it to the proper internal temperature for safe consumption.

 The Ultimate Cooking Tools List that You Need to Know

 The Ultimate Cooking Tools List that You Need to Know

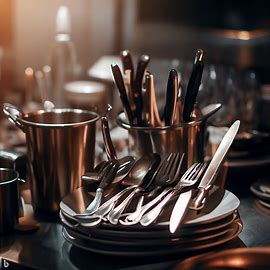
Serving Tools in Kitchen

Are you new to cooking or looking to upgrade your kitchen equipment? If so, you’ve come to the right place! Having the right cooking tools can make all the difference when it comes to preparing delicious meals with ease. From measuring cups and spoons to knives and cutting boards, there are a variety of tools that every home cook should have in their kitchen. In this article, we’ve compiled a comprehensive list of essential cooking tools that will help you equip your kitchen and elevate your cooking game. So let’s get started and discover the must-have tools for any home cook!

Read More: Common Preparatory Tools in Kitchen

Cooking Tools List that  You Need Around

1. Serving Spoons


Serving spoons are essential tools for any kitchen, as they allow you to serve food from a dish or bowl onto a plate. They come in various sizes and shapes, from small and delicate to large and sturdy. Additionally, some serving spoons have a flat end, while others have a slightly curved end to help you scoop up food more easily.

2. Serving Forks


Serving forks are another essential tool for serving meat, poultry, or fish. They typically have long tines that can easily pierce and hold onto meat, making it easier to transfer it to a plate. They come in different sizes and styles, from basic metal forks to more ornate ones with decorative handles.

3. Slad Tongs


Salad tongs are a convenient tool for serving salads or other mixed dishes. They make it easy to toss and distribute the dressing evenly throughout the salad. Salad tongs come in various sizes and materials, such as plastic, metal, or wood, to fit your needs and preferences.

Read More: Best Professional Chef Knife Set with Case

4. Cake Servers


Cake servers are specially designed to cut and serve cake or other baked goods, making them a must-have for any celebration. They typically have a long, slender blade that helps you cut slices of cake cleanly and evenly. Some cake servers also have a serrated edge, which can help you cut through harder or denser cakes.

5. Ladle

Ladles are perfect for serving soups, stews, and sauces. They have a deep bowl that makes it easy to scoop up liquid and transfer it to a bowl or plate. Ladles come in various sizes and materials, such as stainless steel or plastic, and some even have a spout to help you pour more precisely.

6. Cheese Knives


Cheese knives are specially designed for slicing and serving cheese. They come in different styles, from flat blades for soft cheeses to pointed blades for hard cheeses. Some cheese knives also have a forked end, which can help you hold the cheese in place while you slice it.

7. Pie Servers

Pie servers have a flat, triangular blade that is used to cut and serve pie. They’re essential for any pie lover and make it easy to get perfect slices of pie. Some pie servers also have a serrated edge, which can help you cut through the crust of the pie.

8. Gravy Boats


Gravy boats are small pitchers used for serving gravy or other sauces. They’re perfect for Thanksgiving dinner or any other time you need to serve gravy. Gravy boats come in different styles and materials, such as porcelain or stainless steel, and some even have a built-in spout to make pouring easier.

9. Bread Baskets

Bread baskets are perfect for serving bread or rolls at the table. They come in different styles, from woven baskets to ceramic dishes. Some bread baskets also have a cloth liner, which can help keep the bread warm and fresh.

10. Butter Dishes


Butter dishes are used to hold and serve butter or margarine. They typically have a lid to keep the butter fresh and a handle for easy carrying. Butter dishes come in different styles and materials, such as glass or ceramic, and can be simple or ornate.

11. Carving Forks and Knives


Carving knives and forks are designed to carve roasted meats, such as turkey or ham. They have long blades and tines that make it easy to slice through the meat and transfer it to a platter. Carving knives and forks come in different sizes and materials, such as stainless steel or wood.

12.Cocktail Picks 


Cocktail picks are a fun and creative way to serve small appetizers or snacks. They come in different styles, from simple toothpicks to elaborate decorative picks. Some cocktail picks also have a decorative end, such as a miniature umbrella or animal figurine, to add a touch of whimsy to your presentation.

13. Chip and Dip Set


Chip and dip sets typically consist of a large bowl for chips and a smaller bowl for dip. They’re perfect for parties or gatherings and make it easy to serve snacks and appetizers. Chip and dip sets come in different styles and materials, such as ceramic or plastic.

14. Meat Platters


Meat platters are large platters used to serve roasted meats or other large dishes. They typically have a raised edge to prevent juices from spilling onto the table. Meat platters come in different sizes and materials, such as porcelain or metal, and some even have a decorative design to add a touch of elegance to your presentation.

15. Salt and Pepper Shakers


Salt and pepper shakers are used to season food at the table. They come in different styles, from simple glass shakers to ornate ceramic sets. Some salt and pepper shakers also have a built-in grinder, which can help you adjust the coarseness of the seasonings.

16. Soup Spoons


Soup spoons are typically larger than regular spoons and have a deeper bowl, making them ideal for serving soup. They come in different styles and materials, such as plastic or stainless steel, and some even have a decorative design to match your dinnerware.

17. Sugar Bowls and Creamers


Sugar bowls and creamers are used to hold and serve sugar and cream with coffee or tea. They typically have a lid and a handle for easy carrying. Sugar bowls and creamers come in different styles and materials, such as ceramic or glass, and can be simple or ornate.

18. Trivets


Trivets are used to protect surfaces from hot dishes. They come in different styles and materials, such as silicone or cork, and can be simple or decorative. Some trivets also have a raised design, which can help improve air circulation and prevent heat from damaging your table or countertop.

19. Serving Bowls


Serving bowls are perfect for serving a variety of dishes, from salads to pasta. They come in different sizes and shapes, from round to square to oblong. Serving bowls can also come with lids, which can help keep your food warm or fresh.

20. Serving Platters


Serving platters are perfect for serving large dishes, such as roasted meats or whole fish. They come in different styles and materials, such as porcelain or glass, and can be simple or ornate. Some serving platters also have a raised design or decorative pattern to add a touch of elegance to your presentation.

21. Serving Trays


Serving trays are perfect for carrying food and drinks from the kitchen to the table. They come in different styles and materials, such as acrylic or wood, and can be simple or decorative. Some serving trays also have handles or a non-slip surface to make carrying easier.

22. Beverage Dispensers


Beverage dispensers are perfect for serving drinks at parties or gatherings. They typically have a spigot for easy pouring and come in different styles and materials, such as glass or plastic. Some beverage dispensers also have a built-in ice compartment, which can help keep your drinks cold without diluting them.

23. Ice Buckets


Ice buckets are perfect for keeping ice cold and easily accessible. They come in different styles and materials, such as metal or acrylic, and can be simple or decorative. Some ice buckets also have a built-in scoop or tongs, which can make it easier to serve ice without touching it with your hands.

24. Wine Openers


Wine openers are essential for opening wine bottles. They come in different styles and materials, such as corkscrews or electric wine openers. Some wine openers also have a foil cutter, which can help you remove the foil from the wine bottle more easily.

25. Wine Glasses


Wine glasses are designed to enhance the flavor and aroma of wine. They come in different shapes and sizes, from large, bowl-shaped glasses for red wine to narrow, flute-shaped glasses for champagne. Wine glasses can also vary in material, such as crystal or glass, and can be simple or ornate.

26. Champagne Flutes


Champagne flutes are tall, narrow glasses designed to showcase the bubbles and color of champagne. They’re perfect for celebrations and special occasions. Champagne flutes can also come in different materials, such as crystal or glass, and can be simple or decorative.

27. Beer Mugs

Beer mugs are large, sturdy glasses designed to hold beer. They typically have a handle, which can make it easier to hold the glass without warming the beer with your hands. Beer mugs can also come in different materials, such as glass or ceramic, and can be simple or decorative.

28. Shot Glasses


Shot glasses are small glasses designed to hold a single shot of liquor. They come in different styles and materials, such as glass or metal, and can be simple or decorative. Some shot glasses also have a decorative design, such as a logo or pattern.

29. Highball Glasses


Highball glasses are tall, narrow glasses designed to hold mixed drinks, such as a gin and tonic. They’re perfect for serving drinks with ice, and can also be used for non-alcoholic beverages. Highball glasses come in different styles and materials, such as glass or plastic, and can be simple or decorative.

30. Steak Knives


Steak knives are essential for cutting through meat with ease. They typically have a sharp, serrated blade that can easily slice through even the toughest cuts of meat. Steak knives come in different styles and materials, such as stainless steel or wood, and can be simple or ornate.

31. Dessert Spoons


Dessert spoons are smaller than regular spoons and are used for eating desserts, such as ice cream or pudding. They come in different styles and materials, such as stainless steel or plastic, and can be simple or decorative.

32. Soup Ladle


Soup ladles are similar to regular ladles, but they have a larger bowl to hold more liquid. They’re perfect for serving soups or stews, and can also be used for serving punch or other beverages. Soup ladles come in different styles and materials, such as stainless steel or plastic, and can be simple or decorative.

33. Corn Holders


Corn holders are small, two-pronged forks that are used to hold corn on the cob. They come in different styles and materials, such as plastic or metal, and can be simple or decorative.

34. Olive Forks


Olive forks are small, narrow forks that are used to spear olives or other small foods, such as pickles or cocktail onions. They come in different styles and materials, such as stainless steel or plastic, and can be simple or decorative.

35. Sushi Chopsticks


Sushi chopsticks are longer and narrower than regular chopsticks, and are designed specifically for eating sushi. They come in different styles and materials, such as bamboo or plastic, and can be simple or decorative. Some sushi chopsticks also have a textured tip to make it easier to grip the sushi.

36. Pasta Servers


Pasta servers are designed to serve pasta, such as spaghetti or linguine. They typically have a long, forked end for easy serving.

37. Vegetable Servers


Vegetable servers are designed to serve cooked vegetables, such as green beans or carrots. They typically have a flat, wide blade for easy serving.

38. Rice Spoons


Rice spoons are designed to serve rice. They typically have a flat, wide blade and may have a curved end for easy scooping.

39. Plates


Okay, i am not forgetting plates at all, and here we go with very basic serving tools in kitchen, i.e plates. Plates are essential serving ware in any kitchen or dining room. They provide a flat surface for serving food and are available in a wide variety of sizes, shapes, and materials. 

40. Chesse Spreaders


Cheese spreaders are small knives that are used to spread soft cheeses, such as brie or camembert, onto crackers or bread. They come in different styles and materials, such as stainless steel or wood, and can be simple or decorative.

FAQs

Q: What are all the tools for cooking?

A: The tools for cooking can vary depending on the type of cuisine and personal preferences. However, some common tools include pots and pans, knives, cutting boards, mixing bowls, measuring cups and spoons, spatulas, tongs, whisks, colanders, and baking sheets. These tools cover a wide range of cooking techniques and are essential for most recipes.

Q: What are 10 kitchen utensils?

A: Here are 10 common kitchen utensils:
  1. Chef’s knife
  2. Cutting board
  3. Mixing bowls
  4. Measuring cups and spoons
  5. Spatula
  6. Tongs
  7. Whisk
  8. Colander
  9. Can opener
  10. Peeler

Q: What are simple cooking tools?

A: Simple cooking tools are basic utensils and equipment that are commonly used in everyday cooking. These tools include items like pots and pans, knives, cutting boards, mixing bowls, measuring cups and spoons, spatulas, and wooden spoons. They are versatile and can be used for a wide range of cooking tasks.

Q: What is the most important tool for a cook?

A: While it’s difficult to pinpoint a single most important tool for a cook, a chef’s knife is often considered indispensable. A high-quality chef’s knife can handle a variety of tasks, such as chopping, slicing, and dicing ingredients. It provides precision and control, making it an essential tool for any cook.

Q: What are kitchen cutting tools?

A: Kitchen cutting tools are utensils specifically designed for cutting and preparing ingredients. Some common kitchen cutting tools include chef’s knives, paring knives, serrated knives, kitchen shears, and vegetable peelers. These tools are essential for precise and efficient cutting, slicing, and peeling tasks in the kitchen.

Q: Why are tools important in cooking?

A: Tools are important in cooking because they enable us to perform various tasks efficiently and safely. They help us chop, slice, mix, measure, and cook ingredients with precision. The right tools can enhance our cooking experience, save time, and improve the quality of our dishes. Good-quality tools also contribute to kitchen safety by reducing the risk of accidents.

Conclusion

Having the right serving tools in your kitchen can make all the difference in how you present and enjoy your food. From classic serving spoons and forks to specialized tools like sushi chopsticks and olive forks, there are many options available to suit your needs and preferences. By investing in a few essential serving tools, you can elevate your dining experience, impress your guests, and make serving and enjoying food a breeze. We hope this guide has helped you discover the must-have serving tools for your kitchen and inspired you to add some new tools to your collection. So, go ahead and experiment with different serving tools and find the ones that work best for you. Happy serving! And please let me know in the comments below if i missed any. I would love to hear. Thank you so much for reading!

10 Easy Tips for Frying Most Flavorful & Crispy Fish Ever

10 Easy Tips for Frying Most Flavorful & Crispy Fish Ever

If you’re a seafood lover, then you know that there’s nothing quite like biting into a perfectly crispy and golden fried fish. But as delicious as it is, frying fish can be a bit tricky. From getting the right temperature to choosing the right type of oil, there are many tips for frying fish that can make or break your fried fish recipe.

That’s why we’ve put together this guide with tips for frying fish that will help you achieve that perfect crispiness every time. Whether you’re a seasoned pro or a beginner in the kitchen, these tips will ensure that your fried fish recipe is a success. So let’s dive in and learn how to fry fish like a pro!

Read More:  Sirloin Grilling Tips – Grilling Sirloin to Perfection

Choosing the Right Oil

When it comes to frying fish, the oil you use makes a big difference. Peanut oil is your best bet for crisp, never greasy results.

Peanut oil has a high smoke point of 450 degrees Fahrenheit, meaning it can get really hot without burning. This allows you to fry your fish at the ideal temperature of 325 to 350 degrees to achieve maximum crispiness without overcooking the fish itself.

Other common oils like vegetable and canola oil have lower smoke points, so your breading may burn before the inside of the fish is cooked through. Olive oil is also not recommended since it has a low smoke point and a strong flavor that can overpower your fish.

So for the crispiest, most flavorful fried fish, reach for peanut oil. Preheating it to 325 to 350 degrees before adding your breaded fillets is key. Pop a deep-fry thermometer in the oil to monitor the temp as you go. If the oil begins to smoke or the temperature drops substantially when you add the fish, allow it to reheat back to the right range before adding more fillets.

By using the oil with the highest smoke point and preheating it properly, you’ll be well on your way to achieving perfectly fried fish with an ultra-crispy coating and moist, flaky meat inside – and absolutely no greasy messes. So grab that peanut oil and let’s get frying!

Preparing Your Fish

⏩First, pat the fish fillets dry with a paper towel. This will help the coating stick better. Then set up your breading station with three shallow dishes: one with flour, one with beaten egg, and one with your choice of seasoned breadcrumbs.

⏩To bread the fish, first, dredge each fillet in the flour. Shake off any excess, then dip into the beaten egg, coating both sides completely. Let the excess egg drip off, then transfer to the breadcrumb mixture and turn to coat both sides. Press the crumbs onto the fillets to help them adhere. The layer of flour helps the egg stick, and the egg helps the breadcrumbs stick. This layered coating seals in the juices as the fish cooks, keeping it moist and tender.

⏩For the breadcrumbs, use panko for the crispiest results. You can also add spices like garlic powder, onion powder, paprika, salt, and pepper for extra flavor. Grated Parmesan cheese and fresh herbs like parsley and dill work great too. Experiment with different seasoning combos to suit your tastes!

⏩Once breaded, either let the coated fish rest on a wire rack for 10-15 minutes before frying or fry it immediately for the crispiest results. Either way, following these breading techniques, will ensure a perfect, evenly coated layer that seals in moisture and maximum flavor.

Now your fish is ready for the hot oil! So grab your fillets, breading ingredients, and seasonings, and let’s batter up and fry some delicious fish.

Frying Technique

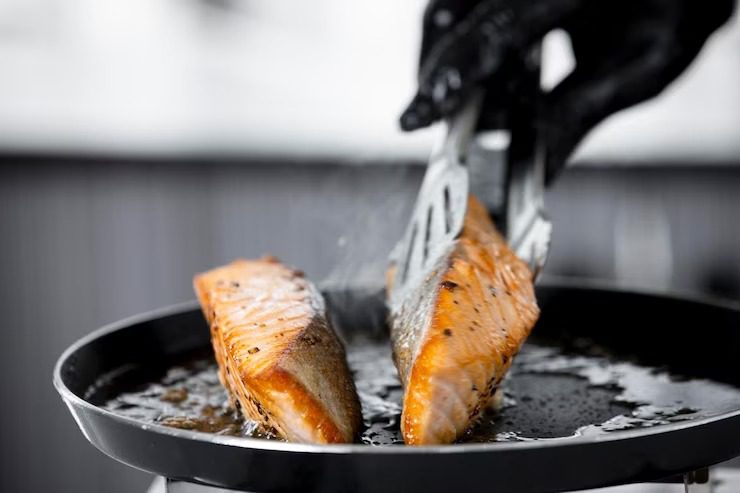
Tips for chooing the right oil for Fish frying

The key to perfectly fried fish is using the right technique. Follow these steps for crisp, never greasy results every time:

  • Preheat your oil to 325-350 degrees Fahrenheit. Peanut oil works best due to its high smoke point.
  • Gently slip the breaded fish fillets into the hot oil one by one, being careful not to overcrowd the pan. This ensures the oil temperature stays consistent.
  • Fry the fish for 3-5 minutes on each side, flipping once, until the breading is deep golden brown and crisp. Resist the urge to move the fillets too much – this can cause the breading to fall off.
  • Use a deep fry or instant-read thermometer to check that the internal temperature of the fish has reached 145 degrees F. This ensures it’s safely cooked throughout.
  • Remove the fillets from the oil and let the excess drain for 1-2 minutes on a wire rack or paper towel-lined plate. This allows the breading to crisp up even more.
  • Transfer the fried fish to a plate lined with paper towels to absorb any remaining surface oil.

Avoiding Common Mistakes

Let’s be honest – frying fish at home can easily go wrong if you’re not careful. But by avoiding common mistakes, you’ll be well on your way to perfect results.

↳A major issue is overcrowding the pan. Adding too much fish at once causes the oil temperature to drop drastically, resulting in soggy breading and fish that takes too long to cook through. To fix this, simply fry smaller batches, allowing the oil to reheat between each addition.

↳Not using a deep fry or instant-read thermometer is another common mistake. Without carefully monitoring the oil temperature, your fish can easily become either soggy or burnt. Always aim for 325 to 350°F and use a thermometer for the most accurate readings.

↳Under-draining the fried fish can leave you with an oily mess. To remedy this, allow the fillets to drain on a wire rack or layers of paper towels for at least a few minutes after frying. This will absorb much of the surface oil that can make the bread soggy.

↳Not checking the internal temperature of the fish is yet another issue. Without ensuring it’s properly cooked throughout, your fish can be unsafe to eat. So use a meat thermometer to check that fillets have reached 145°F.

By keeping an eye on these common pitfalls – like temperature control, proper breading technique, and effective draining – you can avoid many of the frustrations that come with frying fish at home. A few simple fixes will have you achieving perfectly fried fillets with crispy breading and moist, flaky meat in no time.

Draining and Serving

  • Properly draining your fried fish is key to maximizing crispness and minimizing greasiness. After removing the fillets from the oil, lay them on a wire rack set over a rimmed baking sheet or between layers of paper towels.
  • This allows the excess oil to drain away from the breading. Leave the fish undisturbed for at least 3-5 minutes to allow the coating to crisp up further.
  • To store leftover fried fish, transfer it to an airtight container once cooled and refrigerate for up to 3 days.
  • Reheat in a 300°F oven until the breading is crisp and the fish is hot throughout.

Dealing with Mess

Frying fish at home inevitably means some mess and cleanup, but there are ways to minimize it. First, line your baking sheets with paper towels to catch any excess oil as the fish drains. Next, transfer the drained fish to a plate lined with paper towels to absorb any remaining surface oil. Once the fish has been enjoyed, soak up spillage and grease on counters, stovetops, and utensils with more paper towels. Finally, add extra oil to your washing-up water to help break down the messy crumbs and particles.

Over time, you’ll get faster at breading the fillets with less mess and develop systems that make cleanup easier. But sooner or later, a little mess is just part of enjoying delicious fried fish at home.

FAQs

Q: What is the secret to frying fish?

A: The secret to frying fish lies in a few key steps. Firstly, ensure that the fish is fresh and properly cleaned. Secondly, make sure to pat the fish dry before coating it with flour or batter. This helps the coating adhere better and results in a crispier texture. Lastly, maintain the oil temperature at around 350-375°F (175-190°C) to achieve a golden-brown crust while ensuring the fish cooks evenly.

Q: How to fry fish like a pro?

A: To fry fish like a pro, follow these steps:
  1. Choose fresh fish and clean it thoroughly.
  2. Pat the fish dry with paper towels to remove excess moisture.
  3. Season the fish with salt, pepper, and any desired spices.
  4. Coat the fish in flour or batter, ensuring an even and thorough coating.
  5. Heat oil in a deep pan or skillet to around 350-375°F (175-190°C).
  6. Gently place the fish into the hot oil, being careful not to overcrowd the pan.
  7. Fry the fish for a few minutes on each side until it turns golden brown and crispy.
  8. Once cooked, remove the fish from the oil and place it on a paper towel-lined plate to drain excess oil.
  9. Serve immediately with your favorite accompaniments.

Q: How do you keep fried fish crispy?

A: To keep fried fish crispy, it’s important to follow a few tips:
  1. Ensure the fish is dry before coating it with flour or batter. Moisture can lead to a soggy coating.
  2. Use a deep pan or skillet with enough oil to fully submerge the fish. This allows for even frying and crispiness.
  3. Maintain the oil temperature between 350-375°F (175-190°C). If the oil is too hot, the coating may burn quickly, while if it’s too cool, the fish may become greasy.
  4. Avoid overcrowding the pan, as it can lower the oil temperature and result in a less crispy texture.
  5. After frying, place the fish on a paper towel-lined plate to absorb excess oil.
  6. Serve the fried fish immediately to preserve its crispiness.

Q: What not to do when frying fish?

A: When frying fish, it’s important to avoid a few common mistakes:
  1. Don’t fry fish that is not fresh or has an unpleasant odor. Fresh fish ensures better taste and texture.
  2. Avoid using too much oil, as it can make the fish greasy and heavy.
  3. Don’t overcrowd the pan or skillet, as it can lower the oil temperature and result in uneven cooking.
  4. Avoid flipping the fish too frequently while frying, as it can cause the coating to fall off.
  5. Don’t fry fish at a low temperature, as it can lead to a greasy and soggy texture.
  6. Avoid using wet fish or failing to pat it dry before coating, as moisture can prevent the coating from adhering properly.

Q: Why put fish in milk before frying?

A: Soaking fish in milk before frying is a common technique that can help improve its flavor and texture. The lactic acid in milk helps tenderize the fish, making it more succulent and reducing any potential fishy taste. Additionally, the milk can help remove any unwanted odors from the fish. After soaking the fish in milk for about 30 minutes, pat it dry before proceeding with the coating and frying process.

Q: Why put flour on fish before frying?

A: Coating fish with flour before frying serves a few purposes. Firstly, the flour helps create a crispy and golden-brown crust when fried. It adds texture and enhances the overall taste. Secondly, the flour coating helps seal in the moisture of the fish, preventing it from drying out during the frying process. Lastly, the flour provides a base for other seasonings or spices to adhere to, enhancing the flavor of the fish.

Final Thoughts

With a few simple techniques and the proper ingredients, perfectly fried fish is well within your reach. Following the tips covered in this guide – from choosing the right oil and breading recipe to monitoring oil temperature and ensuring the fish is cooked through – will help you achieve crispy results with moist, tender fillets your friends and family will go crazy for.