Did you know that cleaning your dishwasher with vinegar can prevent your appliance from becoming a breeding ground for bacteria? According to the National Sanitation Foundation, dishwashers must reach at least 150°F to kill bacteria effectively, but this won’t happen if your machine is clogged with grime.
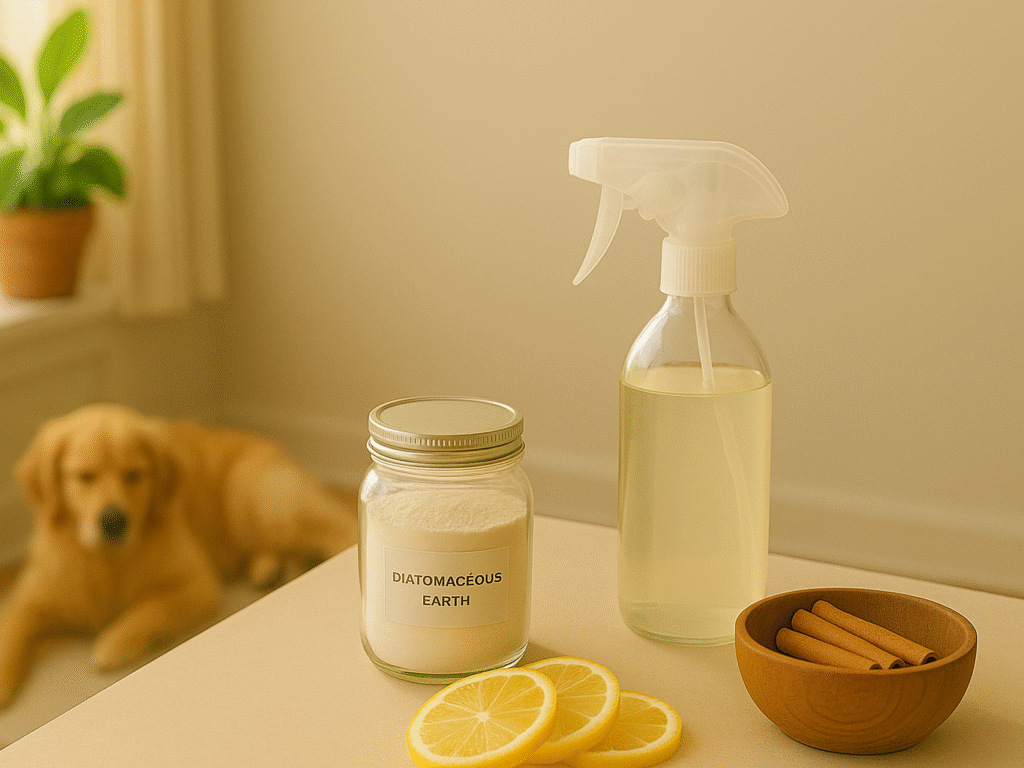
Over time, your dishwasher accumulates soapy residue, grease, and food particles, reducing its cleaning power. This buildup explains why you might notice plates with stuck-on crumbs and cloudy glassware after a wash cycle. Fortunately, learning how to clean a dishwasher with vinegar and baking soda provides an affordable solution, costing only $10-20 for the necessary supplies.
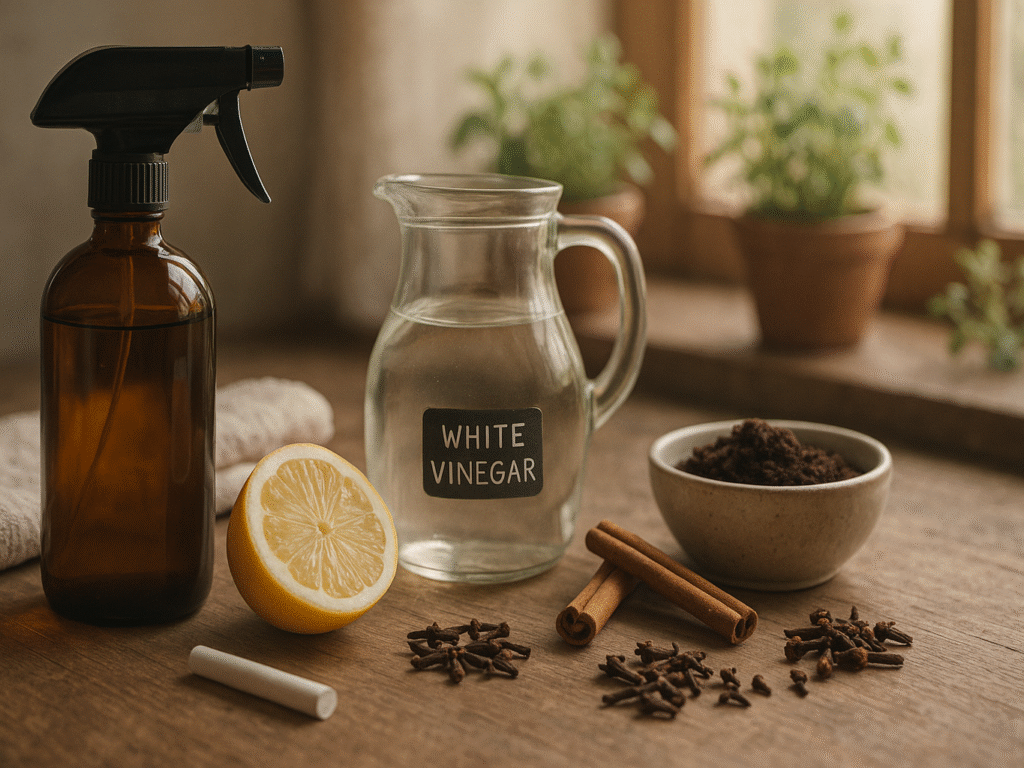
The best way to clean dishwasher components is with 2 cups of white vinegar and 1 cup of baking soda. With its highly acidic pH of around 2.0, vinegar effectively breaks down grease and grime, while baking soda helps eliminate odors and mineral buildup.
Setting up a regular cleaning schedule every 30 days prevents unpleasant smells and maintains your dishwasher’s efficiency. Furthermore, cleaning the filter after each use keeps your machine running smoothly. In this article, we’ll walk you through a simple 7-step process to get your dishwasher sparkling clean and working at its best again.
Step 1: Remove dishes and inspect the interior
The first crucial step when learning how to clean a dishwasher with vinegar is to empty it and thoroughly inspect its interior components before adding any cleaning agents.
(i) Check for leftover food or debris.
Begin by removing the bottom rack of your dishwasher to gain better access to the interior. This simple action reveals areas often hidden during everyday use. Next, carefully examine the bottom of the dishwasher tub for any visible food particles or debris that might have accumulated during previous wash cycles.
Food remnants trapped in your dishwasher can cause several problems. They often create unpleasant odors and, more importantly, can lead to redeposit, a technical term for when food particles get recycled back onto your dishes during wash cycles. Additionally, these food bits can eventually damage your appliance if left unaddressed.
Pay special attention to these critical areas:
The drain area: Use paper towels or a cloth to wipe up any visible debris from the bottom of the dishwasher tub. Look for common culprits, such as glass shards, popcorn kernels, or small pieces of paper, that might be lurking there.
Spray arms: These rotating components distribute water throughout your dishwasher. Scrutinize them for any blockages. If you notice clogged jets, clear them using toothpicks. A clogged spray arm prevents your dishwasher from spraying water effectively, resulting in dishes that are not cleaned thoroughly.
Filter system: The filter, located at the bottom of your dishwasher, requires regular attention. Many dishwasher owners forget to clean their filters, allowing food debris to accumulate rapidly. Subsequently, this debris begins to smell and often gets recycled into the dishwasher, which sticks to your glasses and plates.
Moreover, clearing the filter and drain area is especially important since food particles extracted by the hot water jets trickle down into these components. Developing a habit of checking for leftover food after each use prevents odor and unsightly buildup. Use a paper towel to remove food bits in the well or the silverware basket.
Remember that proper drainage is essential for a clean dishwasher when checking for debris. Clogs in the filter, pump, or drain can prevent water from properly exiting the machine. Therefore, a thorough inspection of these areas is necessary before proceeding with any cleaning solution.
(ii) Look for signs of mold or odor.
Once you’ve checked for debris, the next critical step is to inspect for potential mold growth or unpleasant odors. Your dishwasher creates an ideal environment for mold, dark, hot, and damp conditions that practically invite fungal growth.
One telltale sign of a moldy dishwasher is a musty, stale, or pungent odor that persists after a wash cycle. Some dishwashers emit a rotten egg (sulfur) smell right after starting. These odors indicate it’s time for a thorough cleaning.
During your visual inspection, look specifically for:
Discoloration and slimy residue: These are visible indicators of mold growth
Black, green, or white patches: These typically appear around door edges, rubber seals, and dish racks
Grime buildup in corners: Pay particular attention to areas along rubber gaskets
Moisture that hasn’t appropriately drained: This creates perfect conditions for mold growth
Regular dishwasher maintenance ensures spotless dishes and prevents buildup that affects performance. This cleaning method, which utilizes vinegar and baking soda, yields powerful, chemical-free results. Monthly cleaning helps prevent odors and extends the lifespan of your appliance. Vinegar cuts through grease, and baking soda effectively neutralizes odors and brightens surfaces.
Proper technique matters when cleaning your dishwasher. Place white vinegar in a container on the top rack. Avoid pouring into the detergent dispenser to protect rubber components. Never run vinegar cycles with dishes loaded, as it may damage silverware. Maintain efficiency and spotless results through regular care.
While vinegar and baking soda work excellently for regular maintenance, some dishwashers require more intensive cleaning methods for stubborn odors and heavy grime buildup. If you’re dealing with persistent smells or haven’t cleaned your dishwasher in months, you might need additional techniques beyond this vinegar method. For comprehensive cleaning strategies that tackle even the toughest dishwasher problems, check out our detailed guide on How to Clean Your Dishwasher: A Step-by-Step Guide to Remove Smells & Grim.e
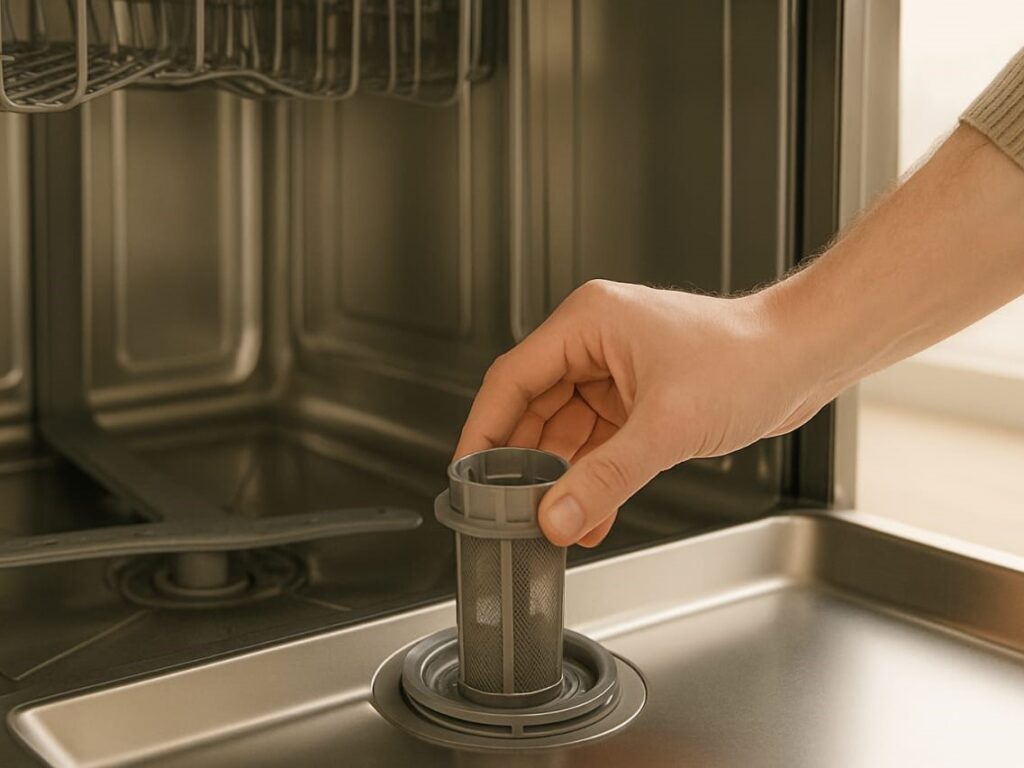
Step 2: Clean the dishwasher filter
Properly maintaining your dishwasher filter is a critical step in cleaning your dishwasher with vinegar and baking soda. The filter traps food particles that would otherwise recirculate and stick to your freshly washed dishes or clog your drain.
(i) Locate and remove the filter.
Finding your dishwasher filter is straightforward once you know where to look. First, pull out the bottom rack completely to access the floor of your dishwasher. The filter is typically located in one of two places:
At the back corner of the dishwasher tub
Around the base of the bottom spray arm
Most modern dishwashers feature a filter system with two distinct components: an upper filter assembly (cylindrical) and a lower filter (a flat piece located beneath). However, some models may only have the upper cylindrical element, so don’t be concerned if you can’t find a lower filter.
To remove the upper filter:
Look for arrows indicating which direction to turn (usually clockwise to unlock)
Please give it a quarter turn in that direction
Gently lift it upward and out
For the lower filter (if present), grasp it lightly, lift it slightly, and pull it forward to remove it completely. Handle both components carefully; a damaged filter can significantly reduce the effectiveness of your dishwasher’s cleaning.
(ii) Rinse with warm soapy water.
Once removed, your filter likely contains accumulated food particles, grease, and possibly mineral deposits. For an effective clean:
Fill your sink or a large bowl with hot water
Add a few drops of dish soap (preferably one containing a degreasing agent)
Submerge the filter components completely in this solution
Let the filters soak for several minutes to loosen stubborn debris. This soaking period is significant if your filter hasn’t been cleaned in a while or shows signs of heavy buildup. The warm, soapy water helps break down grease and softens food particles that may have hardened over time.
A thorough rinse under running water removes most soils from many dishwasher filters. Nevertheless, if you notice cloudy glasses or food particles remaining on dishes after wash cycles, your filter likely needs more attention than just a quick rinse.
(iii) Scrub gently with a soft brush
After soaking, inspect your filter for any remaining debris. For a thorough clean:
Hold the filter under warm running water
Use a soft-bristled brush to clean both the inside and outside surfaces
Pay special attention to the mesh screen, where particles often become trapped
For hard-to-reach areas, an old toothbrush works exceptionally well
Necessary: Never use wire brushes, scouring pads, or abrasive cleaning tools on your dishwasher filter. These harsh materials can damage the delicate mesh and plastic components, potentially requiring costly replacement.
Apply gentle pressure with your soft brush while cleaning for stubborn calcium deposits or particularly clingy food debris. Focus on the mesh areas where particles most commonly become lodged. Occasionally, you may need to repeat the soaking process for filthy filters.
Once clean, rinse your filter thoroughly under warm water to remove any soap residue. Check that the filter no longer feels greasy and that all visible debris has been removed. A clean filter should look noticeably brighter, and the mesh should be clear of obstructions.
To reinstall the filter:
Return the lower filter (if present) to the dishwasher tub bottom
Position it properly under the tabs so the upper filter will align correctly
Insert the upper filter into the opening on the lower filter
Turn clockwise until it slides into place and locks securely
Many manufacturers recommend cleaning your dishwasher filter every two to three months. However, monthly cleaning may be necessary if you use your dishwasher frequently or if you notice any performance issues. A telltale sign that your filter needs attention is finding food particles on supposedly clean dishes after a wash cycle.
Regular filter maintenance is a crucial component in the best way to clean dishwasher systems. A clean filter ensures proper water flow throughout your appliance, allowing the vinegar and baking soda treatment (coming in later steps) to work more effectively throughout the entire machine.
(iv) Recommended Products
Product
Description
Price
Rating
Amazon Link
OXO Good Grips Deep Clean Brush Set
Soft-bristled brushes are perfect for filter cleaning without damage
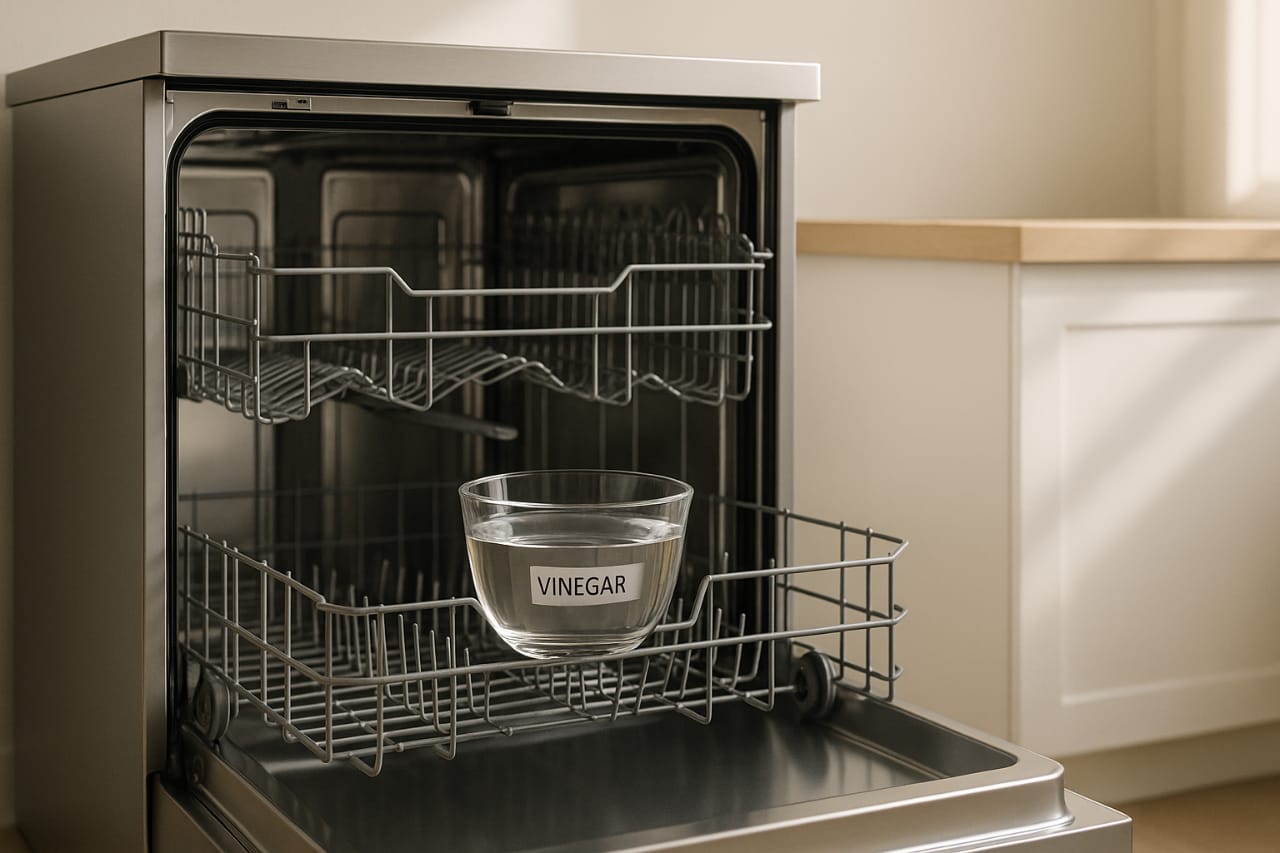
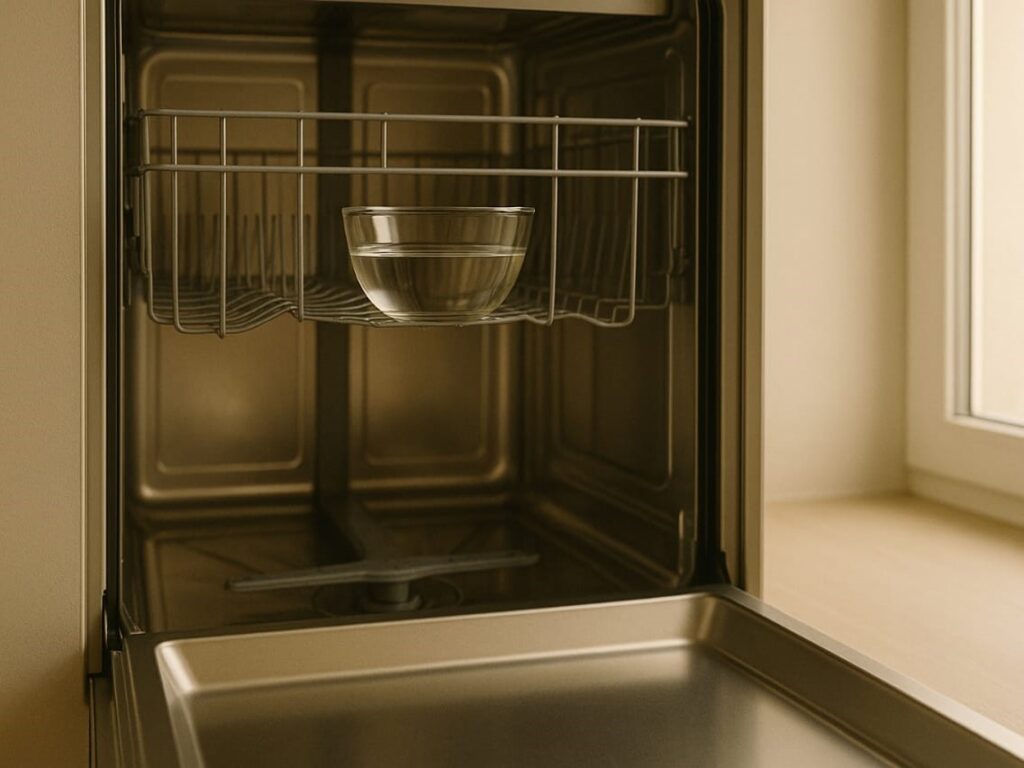
With your dishwasher empty and filter properly cleaned, it’s time to harness the power of white vinegar, your most effective ally against buildup, grease, and lingering odors. This next step forms the cornerstone of effectively cleaning a dishwasher with vinegar.
(i) Use a dishwasher-safe bowl.
First and foremost, you’ll need to select an appropriate container for your vinegar. The right vessel makes all the difference in achieving optimal results:
Choose a dishwasher-safe bowl, cup, or mug that won’t react with the vinegar’s acidity
Fill it with white vinegar (also called distilled vinegar)
Place it securely on the top rack of your empty dishwasher
Expert recommendations vary slightly regarding the amount of vinegar to use. Most sources suggest using 1 cup of white vinegar. However, you can safely use up to 2 cups if your dishwasher has accumulated significant buildup or hasn’t been cleaned in a long time.
Important placement note: Although some cleaning guides suggest placing vinegar on the bottom rack, most reliable sources recommend positioning your vinegar-filled container on the top shelf. This strategic placement allows the vinegar to disperse gradually throughout the cleaning cycle rather than immediately draining away.
The container must remain upright throughout the cycle. This controlled release ensures the vinegar works effectively without potentially damaging sensitive components. White vinegar’s highly acidic pH helps dissolve mineral deposits and break down greasy residue, precisely why it’s so effective for cleaning your dishwasher.
Where to Pour Vinegar in the Dishwasher? Many people wonder where to pour vinegar in the dishwasher for optimal results. Never pour vinegar directly into the detergent dispenser; this can damage rubber seals and reduce cleaning effectiveness over time.
The best approach for pouring vinegar in the dishwasher is to use a dishwasher-safe bowl placed on the top rack. This method ensures controlled release throughout the cycle for maximum cleaning power.
(ii) Recommended Products
Product
Description
Price
Rating
Amazon Link
Heinz Distilled White Vinegar (1 Gallon)
Pure 5% acidity, perfect for cleaning applications
Once your vinegar-filled container is appropriately positioned, it’s time to run your dishwasher:
Select the hottest water setting available on your machine
Choose a complete normal cleaning cycle
Skip adding any dishwasher detergent; the vinegar is your cleaning agent
Turn off the heat dry option if your machine has this setting
Hot water is crucial in this process, as higher temperatures help the vinegar dissolve mineral deposits and soap scum more effectively. The vinegar gradually disperses throughout the cycle, reaching areas that might otherwise remain untreated.
As the dishwasher runs, the vinegar accomplishes several essential cleaning functions:
Dissolves mineral deposits that cause spots on glassware
Removes soap scum from the dishwasher’s interior surfaces
Breaks down grease buildup on walls and racks
Eliminates odor-causing bacteria
Sanitizes the interior components
This vinegar treatment tackles issues with regular detergent misses. To protect rubber seals, keep vinegar in a container, not the dispenser. After the cycle, open the door to release steam. Vinegar offers a natural, food-safe clean that’s ideal for families looking to avoid harsh chemical residues.
For best results, run the vinegar cycle monthly. Heavy use or hard water may require bi-weekly treatment. Vinegar is just one part of a complete regimen. Follow with baking soda to complement the power of vinegar and achieve a sparkling, fresh-smelling dishwasher with consistently spotless results.
(iv) White Vinegar in Dishwasher with Dishes
Never run white vinegar in the dishwasher with loaded dishes; acidic vinegar can damage silverware finishes and leave spots on glassware. Always use an empty dishwasher for cleaning cycles.
Using white vinegar in a dishwasher with dishes present may also prevent the circulation of the cleaning solution. Empty dishwashers allow vinegar to reach all surfaces effectively, ensuring thorough cleaning and sanitization.
Step 4: Sprinkle baking soda on the bottom
After completing the vinegar cycle, baking soda becomes your next powerful ally in the battle against dishwasher grime and odors. This common household ingredient is the perfect complement to vinegar due to its remarkable cleaning properties and ability to neutralize unwanted odors.
(i) Use 1 cup of baking soda.
Once the vinegar cycle has finished, open your dishwasher and remove the empty bowl you used for the vinegar. Now it’s time to apply the baking soda treatment:
Take exactly 1 cup of baking soda.
Sprinkle it evenly across the entire bottom surface of the dishwasher.
Ensure it covers the whole floor area for maximum effectiveness.
Baking soda is a mild alkali that works differently from vinegar. It effectively tackles persistent residue left by food waste that vinegar may miss. Its mildly abrasive nature scrubs stains and discoloration, helping maintain a spotless, fresh-smelling dishwasher over time.
Baking soda also excels at naturally neutralizing stubborn odors. It’s fine powder reaches into small crevices that liquid cleaners might miss. It makes it an excellent, chemical-free choice for families seeking safer cleaning solutions for their dishwashers, leaving fresh dishes after each cycle.
For best results, distribute baking soda evenly across the bottom. For stubborn odors or stains, let it sit for 30–60 minutes before running the cycle. This step enhances the cleaning power of vinegar, but isn’t required for regular monthly maintenance, ensuring the dishwasher’s performance remains consistently high.
(ii) Recommended Products
Product
Description
Price
Rating
Amazon Link
Arm & Hammer Pure Baking Soda (4 lb)
Premium pure sodium bicarbonate, perfect for cleaning
After sprinkling baking soda along the bottom of your empty dishwasher, it’s time to run another cycle:
Close the dishwasher door securely.
Select a short or quick cycle setting.
Choose the hottest water temperature option available.
Skip adding any detergent, as the baking soda serves as your cleaning agent.
Turn off the heat dry setting if your machine has this option.
The hot water is crucial for this step because it activates the baking soda and helps distribute it throughout the interior of your dishwasher. As water circulates through your appliance, the baking soda dissolves, creating a mildly alkaline solution that effectively tackles any remaining residue.
Throughout this cycle, the baking soda works to:
Eliminate lingering odors from the vinegar and any remaining food smells
Remove stubborn stains that the vinegar treatment might have loosened but not completely removed
Break down any remaining soap scum or mineral deposits
Leave your dishwasher smelling fresh and clean
The first thing to remember is that, although both vinegar and baking soda are effective cleaning agents, they should never be used together. Always complete the vinegar cycle first, then follow with baking soda as a separate step. Using them simultaneously neutralizes their cleaning properties, making them ineffective.
Undoubtedly, one of the most significant benefits of learning how to clean a dishwasher with vinegar and baking soda is that it’s inexpensive and readily available. Once this short hot cycle is completed, your dishwasher should appear noticeably cleaner and smell fresher. Repeat baking soda treatments if stubborn stains or odors persist.
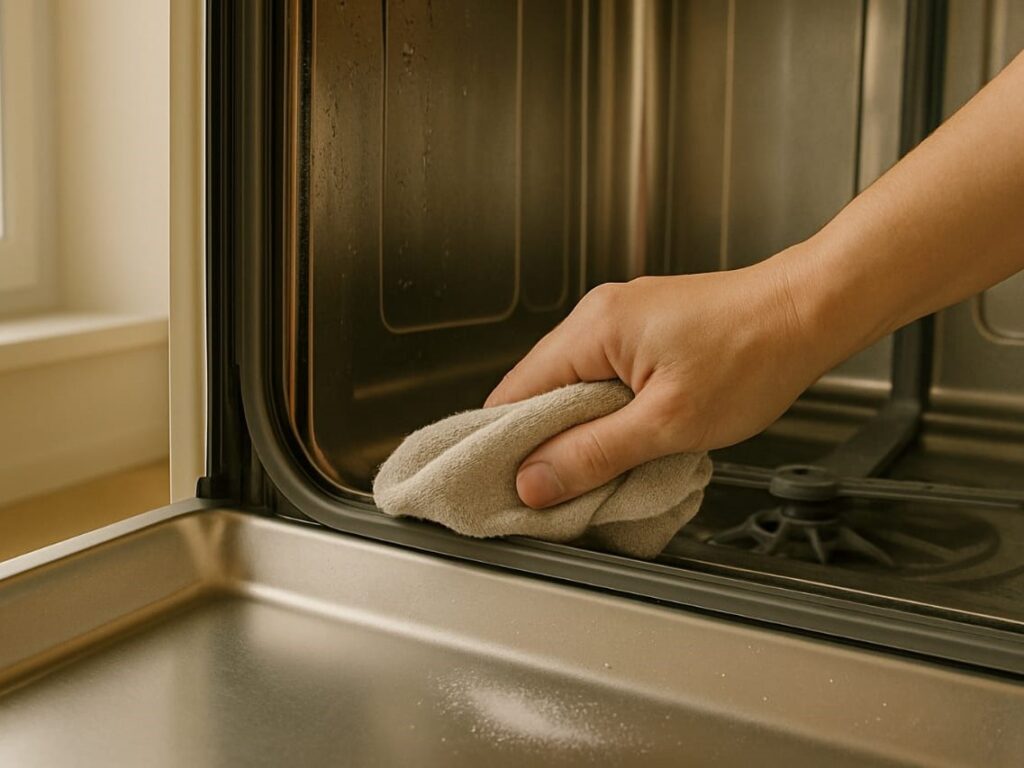
Step 5: Wipe down the door, gasket, and walls
Now that you’ve utilized vinegar and baking soda cycles, your dishwasher needs manual attention to areas that automated cleaning can’t fully reach. These often-neglected spots harbor food particles, mold, and bacteria that affect cleaning performance and appliance longevity.
(i) Use a damp cloth or soapy rag.
Microfiber cloths are the ideal tool for wiping down dishwasher surfaces. These specialized cleaning cloths can absorb up to seven times their weight in water, making them exceptionally effective at lifting away grime. Additionally, they leave surfaces streak-free, which is particularly valuable for stainless steel dishwasher exteriors.
For the cleaning solution, prepare one of these options:
Vinegar-water mixture: Mix three cups of hot water with a half-cup of vinegar
Mild soap solution: Add a few drops of gentle dish soap to warm water
Begin with the interior of the door, as it accumulates significant splatter during wash cycles. For optimal results:
Dampen your microfiber cloth with your chosen solution
Wipe the entire interior door surface, paying particular attention to edges and corners
Rinse your clothes periodically to avoid spreading grime
Follow with a dry cloth if excess moisture remains
For stainless steel exteriors, wipe in the direction of the metal grain to prevent streaking. Plastic or painted dishwasher doors can be cleaned with the same solution used for the interior of the dishwasher.
Indeed, remember not to use fabric softener when washing microfiber cloths, as it coats the fibers and reduces their ability to absorb. Equally important, avoid using bleach or heat when cleaning clothes, as these can damage the material and reduce its effectiveness.
(ii) Pay attention to the rubber seal.
The dishwasher gasket has a rubber seal around the door and requires special attention. This component forms a critical water barrier, preventing leaks during wash cycles. Food particles easily become trapped in the gasket’s edges, potentially disrupting the seal and causing leaks.
To properly clean this crucial component:
Inspect the entire gasket for food debris, mold, or black residue
Gently wipe around the rubber seal using your damp microfiber cloth
For stubborn areas, use a soft-bristled toothbrush to reach into grooves
Clean thoroughly yet gently to avoid damaging the seal
If you discover mold or significant black residue, a vinegar solution effectively disinfects these contaminants. For persistent mold issues, carefully examine the manufacturer’s guidelines; some permit the use of all-purpose cleaners for thorough cleaning.
Throughout the cleaning process, inspect the gasket for signs of damage, such as cracks, tears, or significant wear and tear. A compromised gasket requires replacement to maintain proper dishwasher function.
Besides the door and gasket, extend your cleaning to other critical components:
Interior walls and the bottom surface
Utensil holder
Detergent dispenser
Spray arm assembly access points
After completing this manual cleaning phase, wipe all surfaces with a dry microfiber cloth to remove excess moisture. This step primarily prevents water spots and reduces humidity, which may encourage mold growth.
For optimal maintenance, establish a weekly cleaning schedule that includes wiping down the door edges and gasket. This regular attention prevents buildup that can compromise the seal’s effectiveness. Furthermore, a monthly inspection ensures the gasket remains in good condition without cracks or excessive wear.
By thoroughly cleaning these manual-access areas, you complement the vinegar and baking soda treatments, ensuring your dishwasher remains in optimal functional and hygienic condition.
Step 6: Let the dishwasher air dry
After all your cleaning efforts with vinegar and baking soda, proper drying is the final crucial step in restoring your dishwasher to optimal condition. Proper drying prevents mold growth, eliminates lingering odors, and extends the life of your appliance.
(i) Leave the door open overnight.
After completing your cleaning cycles, proper air circulation becomes essential for eliminating remaining moisture. The most effective approach is surprisingly simple:
Open your dishwasher door approximately 2-4 inches as soon as the final cycle ends
This small opening allows trapped moist air to escape efficiently
Let the dishwasher remain in this position overnight or for at least 6-8 hours
Opening the door serves multiple purposes in the drying process. It releases hot, humid air, preventing condensation, mold growth, and musty odors. Some modern dishwashers, like specific Bosch models, automate this feature. Still, you can manually open the door after the cycle for similar results.
Depending on your dishwasher model, flash drying usually takes 2 to 10 minutes. Opening the door allows efficient evaporation without extra electricity. To avoid forgetting, set a phone alarm or digital assistant reminder. This final step ensures optimal results when using vinegar to clean a dishwasher.
(ii) Wipe excess moisture if needed.
You may occasionally notice excess moisture in specific areas of your dishwasher, even after proper air drying. In these instances, a quick wipe-down ensures complete drying:
When to wipe:
If you notice water pooling at the bottom of the dishwasher
When condensation remains on the interior walls
If the rubber gasket still appears damp after air drying
Before closing the dishwasher door, if you can’t leave it open overnight
Use a clean, absorbent microfiber cloth to wipe any remaining water droplets for effective moisture removal. Pay attention to corners, crevices, and the rubber door seal where moisture commonly accumulates. Proper drying is essential for maintaining lasting cleanliness and preventing the recurrence of odors or mold.
Following air drying, inspect the interior before closing your dishwasher. Check for spots needing extra attention, especially around the rubber gasket, which tends to retain moisture. Many experts recommend the air-dry cycle over the heat-dry cycle, as it’s more energy-efficient and gentler on the appliance over time.
Proper drying completes your comprehensive cleaning process. Following the method of cleaning a dishwasher with vinegar and allowing it to air dry ensures freshness and optimal performance. This final step preserves your efforts and keeps your dishwasher odor-free, ready to deliver spotless dishes with every use.
Step 7: Set a monthly cleaning schedule
Setting up a consistent schedule for cleaning your dishwasher can make the difference between an appliance that performs efficiently for years and one that frequently malfunctions. Establishing a routine maintenance plan also ensures that your vinegar and baking soda cleaning efforts are not wasted.
(i) Why regular cleaning matters
Regular dishwasher maintenance helps prevent unwanted odors and dirt from accumulating over time. Most importantly, it stops food debris and soap scum from accumulating, issues that directly affect your appliance’s cleaning ability.
Experts recommend cleaning your dishwasher monthly to maintain optimal performance. This regular attention helps prevent limescale and hard water stains from forming on interior components.
Beyond cleanliness, proper maintenance significantly extends your dishwasher’s lifespan. A well-maintained dishwasher should last well over a decade. This longevity saves substantial money on potential repairs or premature replacement.
Routine cleaning also keeps the motor seals functioning properly. These seals can deteriorate if the dishwasher is left unused for extended periods.
(ii) Adjust the frequency based on usage.
While monthly deep cleaning works for most households, consider these adjustments based on your specific situation:
Heavy usage households: If your family runs multiple loads daily, consider bi-weekly applications of how to clean a dishwasher with vinegar and baking soda.
Hard water areas: Homes with mineral-rich water supply may require more frequent cleaning to prevent calcium buildup.
After each use, clean your dishwasher filter after every cycle to maintain overall cleanliness.
Weekly minimum: Run your dishwasher at least once weekly, even with small loads, to keep motor seals functioning properly.
Warning signs: Increase cleaning frequency if you notice unpleasant odors, standing water, grime buildup, or dishes not being properly washed.
For exceptionally stubborn dishwasher buildup, commercial cleaning tablets can supplement your routine of cleaning a dishwasher with vinegar and baking soda. These products work in conjunction with your regular maintenance schedule, without compromising the effectiveness of natural cleaners.
Ultimately, creating calendar reminders or setting a specific “dishwasher maintenance day” each month helps establish this habit. Your consistent attention ensures that your appliance continues to operate at peak efficiency.
Conclusion
Maintaining a clean dishwasher ensures spotless dishes and significantly extends the lifespan of your appliance. This guide teaches you a comprehensive 7-step process for turning your grimy dishwasher into a sparkling clean machine using vinegar and baking soda.
Vinegar breaks down grease and grime while baking soda tackles stubborn residue and eliminates odors. This powerful combination costs merely $10-20 for supplies yet delivers professional-level results without harsh chemicals. Additionally, these natural cleaners prevent mineral buildup, which often causes cloudy glassware and spotted dishes.
Food particles, soap scum, and grease accumulate over time, reducing your dishwasher’s efficiency and potentially harboring bacteria. Regular monthly cleaning helps prevent these issues before they occur. Most importantly, paying attention to often-neglected areas, such as the filter, gasket, and spray arms, ensures thorough cleaning performance.
Start implementing this simple maintenance routine today rather than waiting for unpleasant odors or poor cleaning performance to signal problems. Your dishes will emerge cleaner, your appliances will run more efficiently, and you’ll avoid costly repairs: a clean dishwasher and clean dishes are a simple equation for kitchen success.
Remember, while this vinegar cleaning method works for all dishwasher brands, some models are naturally easier to maintain than others. If your current dishwasher requires constant attention despite regular cleaning, newer models offer improved designs that stay cleaner for longer periods. Frigidaire dishwashers, in particular, are known for their user-friendly maintenance features and reliable performance. Explore our detailed Frigidaire dishwasher reviews to discover models that make kitchen cleanup truly effortless.
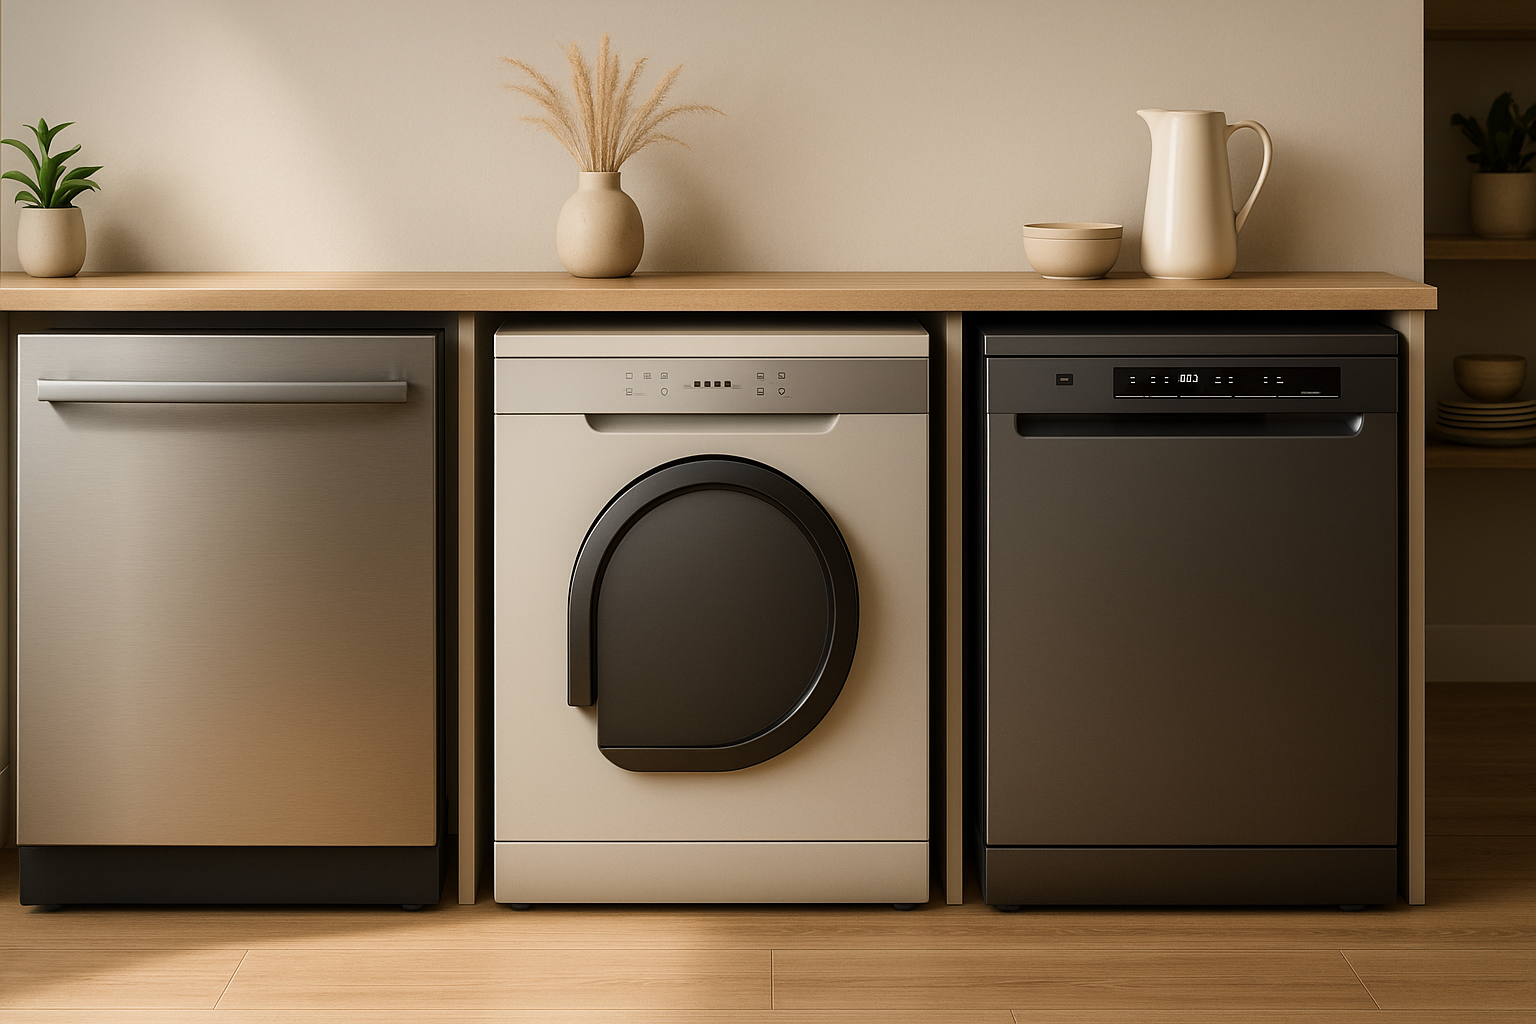
When shopping for a new dishwasher, the whirlpool dishwasher vs Frigidaire vs bosch dishwasher comparison can feel challenging, with many features to consider. Whirlpool offers reliable everyday cleaning with models priced between $500 and $1,000. Bosch sits at the premium end ($800-$1,500), known for cutting-edge innovation and ultra-quiet performance at just 38 dBA.
Whirlpool vs Frigidaire vs bosch price and noise level differences highlight essential choices. Whirlpool models strike a balance between value and function, while Bosch delivers premium features. Frigidaire positions itself as an affordable option, with models like the FPID2498SF operating at 47 dBA. Each brand caters to priorities, from performance and quiet operation to budget-friendly options.
The whirlpool dishwasher vs Frigidaire vs bosch dishwasher comparison also reveals unique features. Whirlpool offers the AnyWare basket and AccuSense Sensor. Bosch boasts CrystalDry technology. Frigidaire provides EvenDry and an affordable third rack. Understanding these options helps you find the best fit for your kitchen.
Comparison Table: Whirlpool dishwasher vs Frigidaire vs Bosch dishwasher
Feature
Bosch
Whirlpool
Frigidaire
Price Range
$800 – $2,000+
$500 – $1,200+
$400 – $1,000+
Average Lifespan
10-15 years
8-12 years
7-10 years
Noise Level
38 dBA – 50 dBA
41 dBA – 55 dBA
47 dBA – 55 dBA
Warranty
1-year limited; extended on certain components
1-year limited
1-year limited; some models offer extended parts warranty
Drying Tech
CrystalDry™ (select models), AutoAir™, PureDry™
Heated Dry, Fan Dry (select models)
MaxBoost™ Dry, EvenDry™ (select models)
Third Rack
Standard on most models (Flexible 3rd Rack or MyWay™ Rack)
Available on many models
Available on select models
Cleaning System
PrecisionWash®, PowerControl™ spray arm
TotalClean™, Sensor Cycle
Dual OrbitClean®, BladeSpray® Arm
Quick Wash Cycle
60 minutes
60 minutes
34-58 minutes
Smart Features
Home Connect® app with extensive remote control
Whirlpool® App with remote start and cycle monitoring
Frigidaire® App on select models with basic functions
Water Usage
2.9 – 3.5 gallons/cycle
3.1 – 4.0 gallons/cycle
3.2 – 4.9 gallons/cycle
Rack Adjustability
RackMatic® (multiple levels), FlexSpace™ tines
Adjustable upper rack, fold-down tines
SpaceWise® Organization System (adjustable rack, tines)
Best Value Models
100 & 300 Series
Mid-range models with Sensor Cycle
Gallery and basic models
Cleaning Performance Across Brands
Cleaning performance represents the core functionality that distinguishes Bosch, Whirlpool, and Frigidaire dishwashers. Each brand employs distinct technologies to tackle everyday messes with varying effectiveness.
1. Spray Arm Technology: OrbitClean vs. Total Coverage vs. PrecisionWash
Spray arm technology controls the distribution of water inside the dishwasher. The spray arms rotate, directing pressurized water jets at dishes to remove food particles. Different brands enhance this mechanism with advanced designs to improve cleaning efficiency and reach.
(i) Frigidaire’s OrbitClean
Frigidaire’s OrbitClean spray arm features a rotating disc at its tip. While the entire arm rotates, this disc spins separately, giving better spray angles. This dual motion covers a larger area than standard arms, but can sometimes deliver inconsistent results.
Testing shows OrbitClean’s effectiveness varies by cycle. Some runs achieve up to 99% stain removal, while others drop to 92%. Despite this, it remains an affordable option for families looking for enhanced coverage on a budget.
Dual-rotating disc + spray arm mechanism
Covers wider spray angles than traditional arms
Cleaning results can vary based on load type and cycle
For households with mixed dishwashing needs, OrbitClean offers value but lacks guaranteed consistency. It suits everyday cleaning but may struggle with stubborn, baked-on stains in casserole dishes or large pans.
(ii) Bosch Total Coverage
Bosch’s Total Coverage technology, featuring the PowerControl spray arm in 800 and Benchmark models, provides advanced precision. The arm’s intelligent targeting works in conjunction with the Home Connect app to focus cleaning power where it is needed most.
Through app controls, users can direct an intensive spray into specific dishwasher zones. This is ideal for tough cleaning tasks, like handling cookware with baked-on residue or awkwardly shaped items that standard cycles can’t fully address.
Lab tests consistently show Bosch outperforms others, removing 99.4% of stains in Auto mode and 99.7% on the Heavy cycle. Its power and precision make it ideal for demanding users wanting spotless results.
(iii) Whirlpool PrecisionWash
Whirlpool uses a reliable, three-pressurized arm system called PrecisionWash. It alternates water pressure between zones, ensuring thorough cleaning across various rack levels without leaving spots or buildup. This system performs well on typical household loads.
Alternating zone cleaning for balanced results
Consistent across different rack levels
Effective against typical food soils and everyday messes
PrecisionWash focuses on simplicity and reliability. Without app controls, it relies on proven engineering. Results show consistently clean dishes with minimal user input, which is ideal for busy families seeking ease of use and dependable cleaning performance.
Even though PrecisionWash lacks Bosch’s fine-tuned targeting, it delivers balanced cleaning across all zones. Whirlpool remains an excellent middle-ground choice, practical, effective, and well-suited for daily use without premium pricing.
2. Sensor Wash Cycles: DishSense vs Sensor Cycle vs Auto Wash
Sensor wash cycles utilize intelligent technology to detect the level of dirtiness in the dishes. These sensors measure soil levels in the water and automatically adjust wash time, water temperature, and intensity. The goal is optimized cleaning while conserving water and energy for every unique load.
(i) Frigidaire’s DishSense
Frigidaire’s DishSense technology detects soil levels and adjusts real-time cycle settings. It helps ensure dishes are cleaned adequately without wasting water or energy. However, Whirlpool dishwasher vs Frigidaire vs bosch dishwasher consumer reports found that wash results across different Frigidaire Gallery models were nearly identical, regardless of spray arm or DishSense use.
DishSense aims to optimize wash cycles based on load. The system works well for light to moderate messes but shows limited variability in performance. Heavy or baked-on stains may require manual pre-rinsing or a stronger cycle for complete removal in specific dish loads.
Adjusts cycle settings based on detected soil
Saves water and energy on light loads
Consistent results across different Gallery models
While DishSense delivers reliable cleaning, it may lack the precision of higher-end systems. For families with typical dishwashing needs, it remains a good choice for energy savings. Still, it may underperform when faced with extra-heavy soiling or complex dish arrangements.
(ii) Bosch Auto Wash
Bosch’s Auto Wash mode utilizes advanced sensors to monitor the water’s dirt levels throughout the cycle. It then dynamically adjusts temperature, spray power, and cycle duration. This real-time control helps Bosch dishwashers consistently deliver exceptional cleaning, even on heavily soiled loads or large cookware.
This precision ensures spotless results while conserving energy when loads are lighter. Bosch’s testing shows up to 99.4% stain removal with Auto Wash. It is particularly effective for varied dish loads, mixing delicate glassware with heavy pans without requiring manual intervention or guesswork about the cycle from the user.
Analyzes water-dirt levels in real-time
Adjusts heat, power, and cycle time
Optimizes energy use while maximizing cleaning
Bosch’s Auto Wash stands out for its high adaptability and impressive results across all types of dish loads. Whether handling quick dinner plates or post-holiday party messes, it provides premium, worry-free performance appreciated by demanding home cooks and families alike.
(iii) Whirlpool Sensor Cycle
Whirlpool’s Sensor Cycle relies on its AccuSense soil sensor, which monitors water clarity to adjust the cleaning time. Tailoring cycle duration and water temperature balance excellent cleaning with resource efficiency. It performs well for standard household loads, offering a dependable experience across various dishwashing scenarios.
Monitors water clarity to detect soil
Adjusts wash duration and heat as needed
Saves water and power on smaller loads
Whirlpool’s Sensor Cycle combines simplicity and reliability. While it may not match Bosch’s pinpoint precision, it offers excellent value for money. It provides consistent cleaning performance for everyday dishwashing, plates, utensils, and glassware, suiting busy families who want solid results without fine-tuning cycle settings.
3. Quick Wash Efficiency: 30 min vs 60 min vs 58 min
Quick wash cycles are designed for lightly soiled dishes when speed is a priority. They vary by brand in duration, temperature, and overall effectiveness. Whether you need dishes ready for a quick dinner party or daily convenience, understanding each brand’s strengths can help you make the best choice.
(i) Frigidaire Quick Wash
Frigidaire’s quick wash cycle typically runs 58 minutes. It focuses on speed for lightly soiled dishes. While not as hot as premium cycles, it effectively handles everyday needs. Users should lightly rinse items to optimize results without interfering with detergent or sensor performance.
In Consumer Reports testing, Frigidaire’s performance showed some variation. Heavier soils or baked-on stains may not be thoroughly cleaned during this cycle. Still, it’s an affordable and fast option for regular loads, such as plates, glasses, and utensils, when time is short.
58-minute wash cycle
Ideal for everyday light loads
Benefits of light pre-rinsing
Good budget-friendly speed option
Frigidaire’s quick wash suits busy families needing dishes fast, though it won’t match premium cycles for tough messes. It strikes a balance between convenience and affordability, making it ideal for pre-meal prep or quickly clearing the sink after casual entertaining or weeknight dinners.
(ii) Bosch Quick Wash
Bosch’s Speed60 cycle cleans and dries dishes in 60 minutes at 121°F. It strikes a balance between energy efficiency and high performance. This cycle performs well with mixed loads, making it one of the most reliable quick wash options among leading dishwasher brands today.
Bosch’s premium line, Thermador, ups the ante with an impressive 30-minute quick cycle. Running at 151°F, this ultra-fast program is ideal for emergency use. It offers unmatched speed while maintaining high cleaning standards, even on glassware or cookware used in heavy meal prep.
Lab tests show Bosch’s Speed60 delivers excellent results for lightly and moderately soiled dishes. The precision engineering, higher temperature, and drying performance put Bosch ahead for those who demand both speed and cleanliness without sacrificing dishwasher longevity or efficiency.
(iii) Whirlpool Quick Wash
Whirlpool’s one-hour wash and dry cycle offers a balanced solution for everyday use. It provides convenience for busy homes and effectively handles common dish loads. The cycle is simple to activate and delivers consistent cleaning without extra adjustments or complex programming.
1-hour quick wash and dry
Great for standard daily loads
No manual adjustments required
Reliable cleaning, user-friendly cycle
Whirlpool excels at offering approachable, effective, and quick wash cycles. While not as fast as Thermador’s 30-minute cycle, it performs well across dish types and soils. Families seeking reliable, user-friendly performance will appreciate Whirlpool’s engineering.
Though Whirlpool’Whirlpool’sh cycle runs longer than Bosch’s Thermador option, it remains an excellent value for busy households. It delivers the necessary cleaning power with minimal user input, ensuring dependable results that keep pace with daily life and modern kitchen demands.
Drying Capabilities and Technologies
Effective drying capability is a major differentiator when comparing dishwasher performance across Bosch, Whirlpool, and Frigidaire models. Each manufacturer employs distinct technologies to tackle the persistent challenges of water spots and lingering moisture.
Natural Cleaning Secret Revealed! Want to maintain your dishwasher’s performance without harsh chemicals? Discover the vinegar cleaning method that keeps your machine sparkling clean and odor-free.
Discover: How to Clean a Dishwasher with Vinegar, The Natural Way →
1. Drying Methods: Heated Dry vs MaxBoost vs CrystalDry
Drying technology varies widely across dishwasher brands. From heated dry elements to advanced mineral-based systems, each brand takes a unique approach to ensure dishes, especially plastics, come out clean and dry. Understanding these differences helps buyers select the right dishwasher for their household’s needs.
(i) Frigidaire MaxBoost Dry
Frigidaire’s MaxBoost Dry system combines hot and cold air to improve moisture removal. Introduced in mid-range models ($700–$900), this technique enhances drying without large energy consumption. While not ideal for plastics, it offers improved overall results compared to traditional heated drying alone.
Testing shows MaxBoost Dry performs well with glass and ceramic items. It remains more affordable than premium alternatives, making it attractive for families seeking improved performance on a budget. Users typically experience better drying on everyday items and a faster turnaround after washing.
Mixes hot and cold air for improved drying
More energy-efficient than heated dry
Available in the $700–$900 price range
MaxBoost is ideal for value-conscious buyers. While it won’t eliminate plastic drying issues, it represents a significant step forward compared to basic heated dry systems, making it especially appealing for households with frequent, mixed loads that require faster and more reliable drying results.
(ii) Bosch CrystalDry
Bosch’s CrystalDry system sets a new standard in drying. Using zeolite minerals that heat up when exposed to moisture, CrystalDry produces superior drying results, particularly on plastics, a common weak spot in most dishwashers. It operates without drawing extra energy, increasing efficiency.
Offered on Bosch 800 Series and Benchmark models (starting at $ 1,349), CrystalDry consistently earns top marks in industry testing. The mineral-based approach offers excellent drying while maintaining quiet operation, making it ideal for open-concept homes where noise levels are a concern during evening cycles.
For families wanting premium results, CrystalDry delivers. It excels in drying speed and completeness. Whether you’re entertaining, hosting holidays, or managing a large family kitchen, Bosch’s mineral-powered system ensures ready-to-use dishes straight from the dishwasher.
(iii) Whirlpool Heated Dry
Whirlpool relies on traditional heated drying. An electric element heats air at the bottom of the dishwasher, adding about 30 minutes to the cycle. This method dries glass and ceramic well but leaves plastics often wet or spotty post-cycle, requiring extra drying time.
Classic electric heating element
Adds ~30 minutes to cycle time
Effective on glass and ceramics
Struggles with plastics and some utensils
Heated dry offers simplicity and proven reliability. Whirlpool appeals to users, valuing easy operation without complicated settings. However, for those frequently washing plasticware, limitations in drying performance may require towel drying or selecting longer cycles for better results.
While Whirlpool’Whirlpool’sy may not match Bosch’s CrystalDry, it remains a cost-effective and dependable method. Ideal for traditional dish loads, it works well in kitchens where energy efficiency is secondary to consistency and familiar operation for all family members.
2. Plastic Drying Performance: Fan Dry vs Condensation vs Zeolite
Plastic drying is one of the toughest dishwasher challenges. Since plastic doesn’t retain heat well, many systems leave cups and containers wet. Different brands tackle this challenge with unique approaches, ranging from fan-assisted air to condensation drying and advanced zeolite mineral technology, for superior results.
(i) Frigidaire Condensation Dry
Frigidaire relies primarily on condensation drying. After a hot rinse, cooler stainless steel walls attract moisture, pulling water off dish surfaces. While energy-efficient, this method struggles with plastic items, which don’t hold heat or shed water as effectively as ceramic or glass.
Condensation drying works well for plates and glasses. But when loading plastic cups, lids, or baby bottles, users often find residual moisture. This system prioritizes energy savings over absolute drying power, a compromise that some households may accept to lower their utility costs.
Uses condensation drying
Great for energy efficiency
Struggles with plastic drying
Better for glass and ceramic items
Frigidaire’s drying performance is solid for general dishware but lacking for plastics. Families that wash a lot of plastic, such as kids’ items or storage containers, may want to supplement their efforts with towel drying or upgrade to a system with stronger plastic-drying capabilities.
(ii) Bosch Zeolite Drying
Bosch’s zeolite drying delivers industry-leading plastic performance. The system uses zeolite minerals, which generate heat by absorbing moisture. This natural reaction powers the drying cycle without extra energy, excelling at removing water from even tricky plastic surfaces and tight spaces.
Lab results confirm Bosch’s zeolite approach outperforms both condensation and heated dry methods, especially on plastics. Items like lids, containers, and utensils come out virtually dry. Its combination of innovation and efficiency makes Bosch the clear leader in this category.
For homes with a lot of reusable plasticware, such as for school lunches, storage, or meal prep, Bosch’s zeolite drying provides unmatched convenience. Dishes emerge ready to store without wiping or air-drying, helping to streamline kitchen routines and save valuable post-cycle time.
(iii) Whirlpool Fan-Assisted Dry
Whirlpool employs fan-assisted drying in select models. This system circulates heated air to enhance moisture removal across the entire dishwasher cavity. While better than basic heated drying alone, it still faces challenges when drying plastics due to lower heat retention.
The fan circulates warm air.
Improved performance on plastics
Faster drying for mixed loads
Available in upgraded models
Fan dry works well for everyday dishes. Although not as powerful as Bosch’s zeolite, it enhances Whirlpool’Whirlpool’srying capability compared to older heated dry models. It’s a good mid-range solution for families balancing price and performance when shopping for a new dishwasher.
Plastic items still retain some moisture with Whirlpool’s method. However, results have improved in newer models, making it a practical upgrade over standard heated dry. Households needing decent plastic drying without a premium price tag will find this feature helpful.
3. Cycle Duration Impact on Drying
Drying performance is closely linked to cycle length. Longer cycles allow for more thorough moisture removal, while shorter or air-dry cycles can leave dishes damp. Understanding how cycle time affects drying helps buyers choose models that strike a balance between speed and performance for everyday household needs.
(i) Frigidaire Heated Dry Cycles
Frigidaire’s heated dry adds about 30 minutes, bringing the total cycle time to 1.5-2 hours. It delivers decent drying on ceramics and glass, but leaves many plastics damp. Shorter cycles with air-dry extend overall time without significantly improving drying results, especially on mixed loads.
Frigidaire models prioritize energy savings over ultra-fast drying. While this works well for light daily use, those who frequently wash plastics or require quick turnarounds may find the performance inconsistent. Users often select longer heated dry settings to balance speed with better overall drying for best results.
Heat dry for 30 minutes.
Total cycles: 1.5–2 hours
Plastics may remain damp.
For families valuing energy efficiency over speed, Frigidaire cycles work well. However, those who need consistently dry plasticware or rapid dish readiness may prefer premium models with more advanced drying systems to minimize towel-drying after each cycle.
(ii) Bosch CrystalDry Cycles
Bosch’s CrystalDry technology optimizes both cycle time and drying quality. It completes full wash-and-dry cycles in similar timeframes to basic heated dry systems. Still, it produces superior results, especially for plastics. Even containers with crevices come out virtually moisture-free in normal cycle durations.
CrystalDry adds no significant extra time since zeolite minerals naturally generate drying heat. It makes Bosch’s total cycle times highly efficient compared to models that rely on extended air-dry phases or prolonged heated drying to reach similar moisture removal levels.
Bosch consistently delivers the best drying performance without increasing cycle length. For busy households wanting excellent results quickly, especially with challenging items like plastics, CrystalDry represents the ideal balance of speed, efficiency, and superior drying technology on the market today.
(iii) Whirlpool Cycle Durations
Whirlpool heated dry adds roughly 30 minutes to its standard cycles, yielding decent drying for glass and ceramic. Plastics remain more challenging, particularly on shorter or energy-saving cycles. Longer cycles with fan assistance help, but they still lag behind zeolite-based drying methods.
Heated dry adds ~30 minutes
Faster than air-dry options
Plastics may need extra drying.
Whirlpool cycle times remain competitive, with solid results for everyday dishes. However, when washing large quantities of plasticware or needing ultra-fast turnaround, Whirlpool’Whirlpool’sy require some manual drying, making Bosch a better fit for those specific drying priorities.
Mid-range Whirlpool models offer excellent value and reliable cycle speeds. While not matching Bosch’s plastic performance, they effectively meet most family needs. Buyers balancing their budget and seeking reasonable drying outcomes will find Whirlpool’s products practical and family-friendly.
Rack Design and Loading Flexibility
Loading flexibility is a crucial factor in the selection process for Whirlpool, Whirlpoolers frigidaire, and bosch dishwasher selection process. Each manufacturer approaches rack design with unique innovations that directly impact your daily usage experience.
1. Third Rack Availability and Depth
Third, racks expand dishwasher capacity and flexibility, offering extra space for utensils, flatware, mugs, and bowls. Different brands approach third rack design with varying depths, adjustability, and utility, offering buyers a range of choices to suit their household needs and budgets.
(i) Frigidaire Third Rack
Frigidaire offers a third rack in models priced under $799. These racks provide a simple but functional extra level for utensils and flatware. While not as deep or flexible as premium options, they add convenience to budget-friendly dishwashers, expanding loading possibilities without incurring significant additional costs.
Most Frigidaire third racks are shallow and designed for flat items, such as spatulas and silverware. There is limited adjustability, so they may not handle bowls or mugs well. Still, for value shoppers, this small third rack gives extra capacity in affordable models, enhancing overall dishwasher efficiency.
Available under $799
Shallow third rack for flatware
Basic design, minimal adjustability
Expands the budget models’ capacity
Frigidaire’s third rack adds everyday convenience. Though not designed for deep items, it provides helpful space for flatware and tools, keeping the lower racks clearer. It’s ideal for smaller households or budget-conscious buyers who want more flexibility without the expense of premium models.
Considering Frigidaire? Get Our Expert Picks! If budget-friendly performance appeals to you, explore our comprehensive Frigidaire dishwasher analysis in more detail. We’ve tested and ranked the top 5 models for performance and value.
Explore: Top 5 Frigidaire Dishwashers Reviewed for Performance & Price →
(ii) Bosch Third Rack Options
Bosch dominates third rack innovation. The Standard V-shaped rack maximizes space for flatware while accommodating tall glasses below. Its Flexible third rack, with foldable wings, allows for deeper items, improving load variety by roughly 30% compared to older designs, making it perfect for busy kitchens.
Bosch’s MyWay rack, found in premium models, is the deepest on the market. It easily handles cereal bowls, mugs, and small dishes. MyWay’s design significantly increases capacity, making Bosch an excellent choice for large families or anyone requiring maximum dishwasher flexibility.
Bosch’s third rack options consistently earn top reviews for usability. Whether you choose the Standard, Flexible, or MyWay version, Bosch offers unmatched versatility. This flexibility makes Bosch a leader in the industry, particularly for users seeking efficient, high-capacity dishwashers that simplify loading and unloading.
(iii) Whirlpool Third Rack
Whirlpool provides a 3rd Rack on select mid-range models ($700–$900). Whirlpool’s rack enhances flexibility and is designed for hard-to-fit items, such as measuring spoons, mugs, and bowls. Still, it doesn’t reach the depth or capacity of Bosch’s MyWay or Flexible designs in premium dishwashers.
Available in $700–$900 models
Fits mugs, bowls, and utensils
Moderate depth and flexibility
Great mid-range feature
Whirlpool’s 3rd rack is practical for everyday use. It enhances space for hard-to-place items and keeps utensils separate for better washing. The user-friendly design seamlessly integrates into Whirlpool’s models, offering extra value for families that require more flexible loading options.
Though Whirlpool’Whirlpool’sk isn’t as advanced as Bosch’s, it remains highly functional. For mid-tier buyers, it offers solid usability, particularly for households that frequently clean a range of dish sizes and shapes in a single load.
2. Adjustable Racks: SpaceWise vs RackMatic vs Standard
Adjustable racks enhance dishwasher flexibility, allowing users to easily fit awkward or oversized items. All three brands offer some degree of adjustability. Still, differences in design and range of configurations set them apart, impacting ease of use and overall loading efficiency.
(i) Frigidaire SpaceWise
Frigidaire’s SpaceWise system allows basic height adjustment of the upper rack. While valid for occasional large items, it lacks the multi-position flexibility of higher-end designs. SpaceWise is available on mid-range models and helps optimize space, though adjustability remains somewhat limited compared to premium brands.
Frigidaire’s rack design prioritizes simplicity and affordability. Adjustments are manual and fewer in number, which can slightly limit efficiency when loading unusually shaped cookware or tall glassware. However, it offers practical space enhancement for value-focused buyers without driving up costs.
Basic height adjustment
Found on mid-range models
Manual adjustment
Simple and budget-friendly
Frigidaire’s SpaceWise racks meet the needs of casual users. This system adds some versatility for kitchens that occasionally wash taller pots or pitchers. But buyers needing frequent, advanced adjustments may find more flexibility with Bosch or Whirlpool alternatives.
(ii) Bosch RackMatic
Bosch’s RackMatic system leads the market in adjustability. It offers three distinct height levels, creating a total of nine rack positions. It allows seamless adjustments on the fly, enabling users to accommodate everything from baking sheets to large serving bowls without sacrificing lower rack space.
RackMatic’s user-friendly mechanism enables quick, one-handed adjustments, even during mid-cycle operations. Combined with Bosch’s EasyGlide ball-bearing system, RackMatic ensures smooth operation, even when fully loaded with heavy dishes. This level of flexibility dramatically improves loading efficiency and user convenience in busy households.
Bosch’s superior engineering makes RackMatic the standout option for adjustable racks. Whether handling delicate stemware or oversized pots, users can easily reconfigure their dishwasher for optimal performance, earning Bosch top marks for flexibility and design innovation.
(iii) Whirlpool Adjustable Racks
Whirlpool offers adjustable upper racks in many models, providing functional versatility for fitting taller items. Though not as customizable as Bosch’s RackMatic, Whirlpool’s racks raise or lower with ease and pair well with their Tall Tub design for added space.
Adjustable upper rack
Extra 3 inches of interior height
Simple height change
Practical mid-range flexibility
Whirlpool’s adjustable racks provide everyday practicality. Combined with its Tall Tub, these racks help comfortably fit large pots, tall glassware, and odd-shaped items. Whirlpool delivers excellent performance without the complexity of premium systems, offering families affordable adjustability and solid loading space.
Although Whirlpool’s nine-position flexibility strikes a good balance between cost and usability, it remains to be seen how it performs in practice. For most households that require basic adjustability with good loading capacity, Whirlpool is a wise and budget-friendly choice, offering flexible performance to meet a variety of dishwashing needs.
3. Utensil Basket Placement: AnyWare vs Traditional
Utensil basket placement impacts rack space and loading flexibility. Designs vary across brands, from highly versatile to basic fixed configurations. Knowing these differences can help buyers choose a dishwasher that maximizes space for plates, cookware, and utensils with minimal compromise on convenience.
(i) Frigidaire Traditional Basket
Frigidaire primarily uses a traditional, fixed-position silverware basket. This simple design holds utensils securely but takes up lower rack space, slightly reducing flexibility for larger cookware. While functional, it lacks the placement versatility of other brands in more modern designs.
Frigidaire’s traditional basket appeals to budget-minded shoppers. It provides reliable utensil cleaning, but won’t help optimize rack space for larger loads. Those seeking maximum rack flexibility may prefer premium designs that allow relocation of the utensil basket when needed.
Fixed-position basket
Lower rack placement
Simple, functional design
No relocation options
Frigidaire’s approach keeps costs down and works well for straightforward dish loads. However, busy households washing oversized items may find the fixed basket less convenient than Whirlpool or Bosch designs, which offer greater placement flexibility.
(ii) Bosch Split Basket
Bosch offers an innovative split silverware basket. The two-piece design can be arranged in multiple positions, accommodating large cookware or custom layouts. Users can also move one-half to free up space, which maximizes rack efficiency with odd-shaped or bulky items.
The Bosch split basket provides superior flexibility without sacrificing utensil cleaning. Its smaller, modular sections fit anywhere: on the right side, left side, or center, allowing users to adjust based on the day’s load. This adaptability helps Bosch stand out in terms of practical space optimization.
For households wanting a simple way to customize rack use without complicated adjustments, Bosch’s split basket is an excellent feature. Combined with Bosch’s flexible racking systems, it easily supports a wide range of loading needs, earning high marks for user-friendly versatility.
(iii) Whirlpool AnyWare
Whirlpool’s AnyWare Plus Silverware Basket is the most versatile on the market. It can be placed in three locations: along the front rack, within the dishwasher door, or in the bottom rack. Door placement frees up 100% of the lower rack for plates and large items.
Three placement options
Door-mounted for maximum space
Optimizes rack flexibility
Excellent for large loads
The flexibility of AnyWare is unmatched. For families washing large pots or serving dishes, placing the basket in the door maximizes the use of the lower rack. It can be returned to the front rack for easy unloading, offering unmatched convenience compared to more static designs.
AnyWare enhances Whirlpool’s loading flexibility. It’s a standout feature for buyers seeking maximum space efficiency without upgrading to premium prices. This simple innovation makes Whirlpool’s Whirlpooling option for families prioritize easy adjustments and usable rack space.
Noise Levels and Energy Efficiency
Noise level and energy consumption often become deciding factors when comparing the best dishwasher brands. These practical considerations directly impact your daily living experience and long-term operating costs.
1. Decibel Ratings: 47 dBA vs 44 dBA vs 38 dBA
Dishwasher noise levels, measured in decibels (dBA), directly affect kitchen comfort, especially in open-concept homes. Lower dB means quieter operation. Across brands, Bosch leads in quiet performance, while Whirlpool and Frigidaire offer mid-range quietness, with Frigidaire typically running louder by comparison.
(i) Frigidaire (47 dBA)
Frigidaire dishwashers generally operate around 47 dBA. While quieter than older machines, they are still noticeably audible during wash cycles. This moderate noise level may occasionally interfere with conversation or entertainment in smaller homes or kitchens adjacent to living spaces.
This tradeoff is expected for budget-friendly models. Frigidaire focuses on value-driven features rather than ultra-quiet operation. For buyers prioritizing price over whisper-quiet performance, the 47 dBA level offers a reasonable balance for everyday dishwashing needs.
Average 47 dBA operation
Audible during cycles
Typical for budget models
Fine for closed kitchens
Frigidaire remains a solid choice for traditional kitchen layouts. However, those living in open-concept spaces or seeking ultra-quiet performance may want to explore Bosch or Whirlpool alternatives for improved noise control.
(ii) Bosch (38 dBA)
Bosch dominates the quiet category, with flagship models operating as low as 38 dBA, barely above a whisper. In testing, Bosch dishwashers remain virtually silent even when running heavy cycles. This level of quiet is ideal for modern homes with integrated living areas.
Bosch’s engineering utilizes advanced insulation, brushless motors, and multi-layer construction to achieve such low noise levels. This performance consistently ranks Bosch as the industry leader in quiet dishwashers, making it the top choice for buyers who prioritize noise reduction.
Living in small apartments or having guests frequently? Bosch’s ultra-quiet operation won’t interrupt movie nights, family dinners, or phone calls. It’s an excellent investment in comfort and well worth the premium price tag for households valuing peaceful kitchen environments.
(iii) Whirlpool (44 dBA)
Whirlpool models typically operate at around 44 dBA, offering an excellent balance between performance and affordability. These dishwashers remain pleasantly quiet during everyday use. They suit most households, even those with moderately open floor plans or connected kitchen areas.
Operates at ~44 dBA
Very quiet for the price
Suitable for open kitchens
Balanced noise + cost
Whirlpool’s focus is on achieving quietness that is accessible. While not as silent as Bosch, its 44 dBA models comfortably outperform older or basic units. For shoppers wanting substantial value without the full premium of ultra-quiet Bosch models, Whirlpool Whirlpoola highly competitive option.
In family homes or casual entertaining spaces, Whirlpool remains unobtrusive. It’s an excellent choice for those seeking solid, quiet performance while staying within a mid-range budget. It offers superb daily usability for the average household.
Brand
Decibel Level
Comparable Sound
Bosch
38 dBA
Library whisper
Whirlpool
41-44 dBA
Soft conversation
Frigidaire
47 dBA
Typing on the keyboard
2. Energy Star Certification Status (2025 Standards)
The 2025 Energy Star Most Efficient standards demand dishwashers use ≤225 kWh annually and ≤3.2 gallons per cycle. While Bosch, Whirlpool, and Frigidaire all meet certification on select models, energy efficiency varies greatly by brand and price point across their product lines.
(i) Frigidaire Energy Star Status
Frigidaire offers Energy Star-certified models primarily in their mid-range and premium segments (typically $700–$900). Budget models below $600 often fail to meet the latest 2025 Most Efficient criteria. Buyers seeking energy efficiency should carefully verify the specifications before making a purchase.
Frigidaire focuses more on upfront affordability. Their Energy Star models offer reasonable energy savings, but they don’t match the year-round efficiency of Frigidaire’s flagship models. Reviewing Frigidaire’s product labels remains key to selecting the right model for eco-conscious shoppers.
Energy Star in mid-premium models
Budget lines are less efficient.
Not all models meet the 2025 Most Efficient.
Check product labels carefully.
Frigidaire presents solid value for everyday buyers. However, buyers seeking the absolute best in long-term energy savings will likely opt for Bosch or Whirlpool’s most efficient models.
(ii) Bosch Energy Star Status
Bosch excels in energy efficiency. Many models, including the 800 and Benchmark Series, exceed 2025 standards with annual consumption well below 200 kWh and low water usage. Bosch’s full-size lineup strikes a balance between performance and sustainability, justifying its premium price point.
Advanced insulation, precision pumps, and innovative wash systems enable Bosch dishwashers to outperform typical models in both energy efficiency and water conservation. Buyers wanting top energy savings and long-term utility bill reductions consistently rate Bosch as the top choice.
Bosch consistently ranks on Energy Star’s “Most Efficient” lists. For buyers focused on eco-conscious living or those in regions with high electricity and water rates, Bosch delivers both superior performance and savings, which easily offset the higher upfront costs.
(iii) Whirlpool Energy Star Status
Whirlpool’s Energy Star offerings appear in mid-range and premium lines (roughly $700–$1,200). Many newer models meet the 2025 Most Efficient benchmarks, though exact specs vary by series. Budget-conscious buyers can often find strong efficiency without moving to Bosch’s top-tier pricing.
Energy Star in mid-to-premium lines
Many models meet the 2025 Most Efficient.
Affordable energy savings
Specs vary across series.
For buyers balancing budget with efficiency, Whirlpool offers excellent options. Households seeking Energy Star performance without Bosch-level costs will appreciate Whirlpool’Whirlpool’sels, which often match Bosch for savings while maintaining lower price tags.
Whirlpool remains a wise and practical choice for energy-conscious shoppers seeking modern performance without the steep investment required by ultra-premium dishwashers.
3. Water Usage Per Cycle Comparison
Modern dishwashers significantly reduce water consumption compared to hand washing, which can use up to 27 gallons per load. In contrast, today’s efficient dishwashers use between 3.2 and 4.2 gallons of water, resulting in significant annual savings on water usage and utility bills.
(i) Frigidaire Water Usage
Frigidaire’s newer models meet modern efficiency benchmarks, using about 3.5 to 4 gallons per cycle. Older units may use slightly more, so buyers should carefully check each model’s specifications if their household’s water savings are a priority.
Most Frigidaire dishwashers are designed for average family use, striking a balance between affordability and environmental responsibility. The models priced under $799 still manage to compete closely with more expensive units in terms of water use.
Uses ~3.5–4 gallons per cycle
Efficiency varies by model year.
Best performance in newer releases
Frigidaire remains a reliable choice for budget-conscious shoppers looking for respectable water efficiency without entering premium price brackets. Still, those wanting the lowest consumption might prefer Bosch or Whirlpool high-efficiency lines.
(ii) Bosch Water Usage
Bosch is the industry leader in water efficiency. Most models, especially in the 800 and Benchmark Series, consume just 3.2 gallons per cycle, meeting or exceeding Energy Star’s Most Efficient standards. It translates to superior performance with minimal water usage.
The secret behind Bosch’s efficiency lies in precision engineering and soil-sensing wash cycles. These features minimize water waste while delivering a deep clean, making Bosch the top pick for eco-conscious buyers wanting premium performance.
Over a year (approx. 95 loads), Bosch can save up to 80 gallons compared to competitors using 4 gallons per load. These long-term savings, both environmental and financial, make Bosch’s higher upfront price worthwhile.
(iii) Whirlpool Water Usage
Whirlpool models generally use between 3.5 and 4 gallons per cycle, depending on the series and features. While not as minimal as Bosch’s, Whirlpool’Whirlpool’sels strike a balance between energy efficiency and robust cleaning power.
It uses 3.5–4 gallons per load.
Efficiency depends on the model series.
Meets Energy Star in most cases
Whirlpool delivers solid water efficiency for mid-priced dishwashers. It’s a smart option for families who want reliable performance and decent savings without the cost of ultra-premium models.
Reliability, Warranty, and Service Support
Long-term ownership costs and support systems represent crFrigidairetors in the whirlpool dishwasher vs Frigidaire vs bosch dishwasher evaluation beyond the initial purchase price.
1. Average Lifespan: 5–7 Years vs 6–7 Years vs 10+ Years
Dishwasher longevity depends greatly on brand and build quality. Bosch dominates this category, with an average lifespan of 10 to 12 years. Whirlpool refrigerators typically last 6–7 years, while Frigidaire refrigerators generally provide an average of 5–7 years of reliable service.
(i) Frigidaire Lifespan
Frigidaire models typically deliver 5– 7 years of reliable performance. While affordable and easy to maintain, they may require earlier replacement in homes with heavy daily usage. Value shoppers should consider purchasing an extended warranty for added peace of mind with this brand.
Frigidaire models are ideal for households with light to medium use. They strike a good balance between cost and function, but may not match the durability of premium brands. Consistent maintenance will help extend their service life closer to the 7-year mark.
5–7 years average lifespan
Ideal for light-to-medium users
Best in the budget category
Maintenance affects longevity
Frigidaire offers a low upfront cost, often making it a popular choice. Still, investing slightly more in Whirlpool or Bosch could offer longer-term value for high-use kitchens.
(ii) Bosch Lifespan
When examining Frigidaire vs. Whirlpool dishwasher reliability, Bosch stands out as unmatched in dishwasher durability. Their premium engineering results in 10–12 years of units with basic maintenance. Even for frequent users, Bosch models consistently maintain excellent reliability and performance, far exceeding the industry average.
Bosch’s superior build quality also results in fewer repairs. Consumers report fewer major breakdowns, contributing to Bosch’s outstanding reputation for longevity and owner satisfaction across various consumer reports and reviews.
Bosch owners save money by avoiding premature replacements over the long haul. For those prioritizing lifespan and low long-term costs, Bosch is a clear winner despite its higher initial price point.
(iii) Whirlpool Lifespan
Whirlpool models strike a balance in longevity, typically lasting 6–7 years with regular household use. Their simple, repair-friendly designs make Whirlpool a choice for families looking for dependable performance without entering the luxury price tier.
6–7 years typical lifespan
Good value vs. premium brands
Affordable repairs & maintenance
Ideal for mid-range buyers
For most households, Whirlpool offers a good balance between lifespan and affordability. With proper maintenance, many users can easily extend their dishwasher’s life closer to the higher end of the 6–7-year range.
Keep Your Investment Running Smoothly! Once you’ve chosen the perfect dishwasher, proper maintenance is key to longevity. Discover our proven step-by-step cleaning method, which effectively removes stubborn odors and grime.
Read: How to Clean Your Dishwasher: A Step-by-Step Guide to Remove Smells & Grime →
2. Warranty Coverage: 1-Year vs 10-Year Tub vs 2-Year Full
Dishwasher warranty terms demonstrate the brand’s confidence in product durability. Bosch generally offers stronger coverage with 1-year full warranties and extended tub protection for up to 10 years. Whirlpool provides only a standard 1-year limited warranty, whereas Frigidaire models often feature 1– to 2–year full warranties.
(i) Frigidaire Warranty
Frigidaire typically provides 1–2 year full warranties, depending on the model line. This offers decent initial coverage but lacks the extended Tub or component protections found in premium brands. Buyers should consider extended service plans if they prioritize long-term peace of mind.
Frigidaire’s mid-range positioning reflects this basic warranty coverage. Budget-conscious consumers may accept this tradeoff, though long-term reliability expectations should be adjusted accordingly.
1–2 year full warranty
No extended tub/component coverage
Consider the service Frigidaire’s
While cost-effective, Frigidaire’s limited warranty has placed more risk on owners in the past two years. Extended protection plans can offset this concern.
(ii) Bosch Warranty
Bosch consistently provides the most robust warranty coverage. Select models include a 1-year full warranty, 5-year coverage on electronics and racks, and 10-year protection on stainless steel tubs. This comprehensive approach reflects Bosch’s premium reputation and the longevity of its products.
Such extended warranties provide buyers with long-term reassurance. With fewer repair needs and longer coverage windows, Bosch users experience lower lifetime repair costs compared to lower-tier competitors.
Buyers seeking maximum peace of mind benefit greatly from Bosch’s superior warranty protections, adding further value to these premium machines.
(iii) Whirlpool Warranty
Whirlpool offers a standard 1-year limited warranty covering parts and labor for defects in materials and artistry. Compared to Bosch’s more extensive coveraWhirlpool’sol’s warranty aligns with its mid-range market positioning.
1-year limited warranty
Covers parts & labor
No extended tub protection
Typical for mid-range appliances
For the average household, Whirlpool provides dependable initial protection. However, those expecting long-term durability may want to explore Bosch or add extended warranty options for added coverage.
3. Service Network Availability in the US
Service network strength plays a vital role in post-purchase satisfaction. Whirlpool leads with broad US coverage, enabling faster repairs in most regions. Bosch excels in metro areas but can lag in rural zones. Frigidaire offers decent nationwide support, albeit with some regional limitations.
(i) Frigidaire Service Network
Frigidaire offers moderate service coverage across the United States. While most urban and suburban areas have authorized technicians, rural support can be inconsistent. Scheduling may take longer in remote regions, so customers in these areas should verify service options before making a purchase.
Frigidaire balances affordability with decent accessibility but isn’t the most robust.
Moderate coverage
Good availability in cities
Slower rural service
Scheduling varies by region.
Frigidaire remains a viable option for areas with reliable local service, but may require patience in other locations.
(ii) Bosch Service Network
Bosch maintains strong service in major metro markets with excellent technician quality. However, rural customers may experience delays or fewer provider options. A customer-friendly warranty process enables direct technician contact, often bypassing the lengthy call center interactions that are common with other brands.
Urban buyers benefit most from Bosch’s superior network. Bosch’s strong urban support and simplified service channels make it a top choice in cities. However, rural buyers should research local availability to ensure they find the best options.
(iii) Whirlpool Service Network
Whirlpool offers one of the most extensive service networks in the US. Even in smaller towns, finding an authorized technician is relatively easy. This widespread access results in faster repairs and higher customer satisfaction than smaller service networks.
Broad national coverage
Quick repair scheduling
Reliable technician availability
Strong rural presence
Whirlpool’s extensive infrastructure ensures consistent service quality across diverse regions, making it an ideal choice for buyers nationwide.
Smart Features and Connectivity
Innovative connectivity options represent another dimension when comparing these leading dishwasher brands, with stark differences in how each manufacturer approaches modern technology integration.
1. Wi-Fi Support: Whirlpool App vs. No Connectivity vs. Home Connect
Wi-Fi-enabled dishwashers offer remote start, monitoring, and maintenance alerts via smartphone apps. Bosch and Whirlpool Whirlpoolpack with reliable smart features. Frigidaire, however, lags in this category, lacking consistent connectivity across its product range —a feature many smart home enthusiasts now expect in 2025.
(i) Frigidaire Wi-Fi Limitations
Frigidaire has not fully embraced Wi-Fi support. Most models, especially those under $900, lack app control. Few premium models offer limited innovative features, but adoption remains inconsistent. Users wanting seamless smart integration will be disappointed with Frigidaire’s current lineup of connected dishwashers.
Smart connectivity is absent in most models.
No robust app or third-party integration.
A select few premium models are equipped with Wi-Fi.
Poor, smart home compatibility overall.
Frigidaire’s weak showing in Wi-Fi features leaves little appeal for tech-savvy buyers who value connectivity and control.
(ii) Bosch Home Connect
Bosch excels with its advanced Home Connect platform. Standard on 500 Series and higher connects via 2.4GHz Wi-Fi, offering deep remote functionality: start cycles, monitor progress, receive alerts, or adjust settings. It integrates seamlessly with Alexa and Google Home, enhancing the smart kitchen experience.
Bosch continuously updates Home Connect, keeping features current. Setup is simple and stable, while the app enables innovative diagnostics and usage tracking. Voice control remains responsive, allowing homeowners to manage dishwasher operations remotely while away.
For connected households, Bosch’s Home Connect delivers industry-leading innovative features, automation, and app stability that far surpass most competitors, making Bosch an excellent choice for bright kitchens.
(iii) Whirlpool Smart Dishwasher App
Whirlpool utilizes its proprietary app across various models, starting at approximately $700. The setup is user-friendly through Scan-to-Connect, which provides quick pairing with smartphones. Once connected, users can remotely begin cycling, delay start times, and monitor performance from their mobile devices, providing daily convenience.
Simple Scan-to-Connect setup.
The app is compatible with iOS and Android.
Compatible with Alexa integration.
Good app reliability with fast pairing.
Whirlpool balances functionality and ease of use with its app. Although it offers fewer advanced customisations than Bosch, it excels in covering core innovative functions very well. For families seeking reliable app features without technical complexity, Whirlpool is an excellent and affordable choice.
2. Innovative Functions: Auto Maintenance, Cycle Downloads, Replenishment
Smart-enabled dishwashers offer more than app control. Advanced features include auto-maintenance reminders, detergent reordering, and downloadable cycles. Bosch Whirlpoolpool offer practical and innovative tools in this space. Frigidaire lacks these enhancements, placing it at a disadvantage in adapting to modern smart home demands.
(i) Frigidaire Smart Features
Frigidaire’s smart functionality remains rudimentary or absent. Most models lack auto-maintenance or detergent tracking features. No built-in capability for Amazon Replenishment exists, nor are downloadable cycles available. The brand trails Bosch and Whirlpool in offering comprehensive, innovative tools for convenience and cleaning customization.
Lacks maintenance alerts.
No detergent auto-replenishment.
There are no downloadable cycles.
Limited app ecosystem.
Without advanced innovative functions, Frigidaire dishwashers appeal less to users who want app-based convenience and evolving features.
(ii) Bosch Home Connect Features
Bosch Home Connect offers advanced, innovative features, including maintenance alerts, detergent level tracking, and seamless Amazon Smart Reorder functionality. Specialty cycles can be downloaded, and wash options can be customized to suit your needs. Detailed diagnostics improve troubleshooting. These powerful tools elevate Bosch’s innovative dishwasher lineup beyond simple app control.
Users can remotely download cycles, tailoring cleaning performance to load type. The system integrates with Alexa and Google Home, providing voice-enabled interaction. Maintenance reminders also help extend the dishwasher’s lifespan, preventing issues through proactive alerts.
Bosch’s robust, innovative features, paired with downloadable cycles and supply management, create a superior connected dishwasher experience that leads the premium market.
(iii) Whirlpool App Capabilities
Whirlpool’s app features innovative functions, including auto maintenance alerts and detergent tracking. Amazon Replenishment is supported in newer models, ensuring detergent never runs out. Whirlpool also offers cycle downloads, expanding beyond basic wash presets to meet a variety of cleaning demands.
Auto maintenance alerts are included.
Amazon detergent replenishment.
Downloadable specialty cycles.
Alexa voice integration is supported.
Whirlpool balances simplicity with key innovative features. Its app offers meaningful functionality, covering the needs of most users. Though not as customizable as Bosch, it remains an excellent option for households seeking intelligent dishwasher management.
3. LED Indicators and Interior Lighting
Lighting plays a surprising role in dishwasher usability. LED indicators help track cycles and save energy, while interior lighting improves visibility during loading. Bosch stands out with premium models offering full chamber iFrigidairen. Whirlpool and Frigidaire offer fundamental LED indicators without interior lights in most configurations.
(i) Frigidaire Interior Lighting Features
Frigidaire dishwashers generally feature exterior LED indicators that display active cycles. However, interior lighting is missing in nearly all models, including those in the Gallery series. It can make loading harder in dim conditions or kitchens with limited natural light.
Most models lack interior lighting.
Cycle status is shown via LED indicators.
There are no ambient assist lighting options.
The focus remains on basic energy efficiency.
Frigidaire opts for cost-saving simplicity. Without interior lights, it lacks the premium feel and practicality found in high-end Bosch models.
(ii) Bosch LED and Lighting Capabilities
Bosch integrates sophisticated LED indicators and optional interior lighting in higher-end lines. Models in the 800 and Benchmark series include multi-point LED lighting that activates automatically when the door opens, enhancing visibility and helping prevent broken glassware or missed utensils.
Bosch’s signature InfoLight beams a red dot onto the floor to show that the machine is running, an elegant solution for ultra-quiet models. TimeLight, in premium models, projects remaining cycle time for extra clarity.
Superior visibility, elegant floor lights, and ambient chamber lighting position Bosch far ahead of competitors in terms of both functionality and user convenience.
(iii) Whirlpool Lighting and Indicator Features
Whirlpool dishwashers include standard LED indicators for cycle updates. Interior lighting is not standard, even in many mid-range models. Select premium models may offer better visibility, but Whirlpool’s mechanical reliability surpasses lighting enhancements.
Basic cycle status LED indicators.
Most models do not have interior lights.
Focuses more on performance and value.
Smart indicators are available via a mobile app.
Whirlpool offers lighting, it also features reliable cycle indicators and app-based status tracking, making it a sensible middle-ground choice for budget-conscious smart home users.
Price and Value for Money
Price considerations ultimately drive many purchasing decisions, regardless of the impressive features highlighted in manufacturer marketing materials. When examining Whirlpool, Frigidaire, and Bosch dishwashers side by side, distinct value propositions emerge at each price tier.
1. Entry-Level Pricing: Under $500 vs $600 vs $800
Frigidaire offers the most accessible entry point, with basic models starting around $400-$500, typically featuring plastic tubs and standard cleaning cycles. Whirlpool follows closely with entry-level options priced from $450 to $600, providing slightly better build quality for a minimal additional investment. Bosch maintains a premium position even at the entry-level, with its 100 Series starting at around $800, representing the minimum investment required to access Bosch’s engineering expertise.
Expect fundamental differences in construction at these price points. Entry-level Whirlpool and Frigidaire models typically feature plastic tubs rather than stainless steel, operate at higher decibel levels, and offer fewer adjustable components.
2. Mid-Range Options: $700–$900 Comparison
Industry experts identify $500-$1000 as the ‘sweet spot’ in tFrigidaireol dishwasher vs Frigidaire vs bosch dishwasher price range, where performance and features reach optimal balance. Whirlpool offers impressive value within this range, with its mid-tier models featuring stainless steel tubs, adjustable racks, and quieter operation (47 dBA). Frigidaire’s mid-range lineup ($700-$900) introduces improved drying systems and third rack options.
For approximately $800 to $900, Bosch’s 300 Series delivers significantly quieter operation, superior build quality, and more refined washing performance compared to similarly priced competitors.
3. High-End Models: Features vs Cost Trade Off
Premium dishwashers exceeding $ 1,000 introduce advanced features such as Wi-Fi connectivity, specialized wash cycles, and ultra-quiet operation. At these price points, Bosch distinguishes itself with models operating at whisper-quiet 38dBA levels and specialized drying technologies.
High-end models justify their cost through energy efficiency, saving over $ 100 annually on utility bills compared to older models.
4. Best Value Pick for Budget-Conscious Buyers
For a maximum value-to-price ratio, mid-range Whirlpool models ($700-$800) consistently deliver excellent cleaning performance, moderate noise levels, and respectable durability, all at a non-premium price. These models often include stainless steel tubs, adjustable racks, and sensor-based washing, essential features without extravagant cost.
First-time buyers or those prioritizing initial cost over long-term Frigidaire’s should consider Frigidaire’s entry-level options. Those planning for 10+ years of ownership find Bosch’s higher initial investment offset by its extended lifespan and reduced repair frequency.
Choosing the Right Dishwasher for Your Needs
After this comprehensivFrigidairel dishwasher vs Frigidaire vs bosch dishwasher analysis, distinct strengths emerge. Bosch leads in reliability, lasting 10-12 years, while Whirlpool and Frigidaire average 6-7 and 5-7 years, respectively. Though Bosch comes at a higher price, its longevity offers excellent long-term value for discerning buyers.
Frigidaire appeals to budget-conscious shoppers, with models starting at $400 to $500. Whirlpool balances cost and performance in the $700-$800 range, offering stainless steel tubs, sensor washing, and reasonable noise control. Consumer needs also shape choices; Bosch’s quiet 38 dBA operation suits open-concept homes, and its CrystalDry technology excels with plastics. Whirlpool’s mid-range models effectively cater to the needs of the average family
Feature differences also matter. Bosch’s RackMatic system provides top-tier flexibility, while Whirlpool’s AnyWare basket offers daily convenience. Smart integration of Frigidaire and Whirlpool, with Frigidaire trailing in connected features.
Therefore, your ideal choice depends mainly on specific priorities:
Choose Bosch when seeking premium quality, the quietest operation, and the most extended lifespan
Select Whirlpool Whirlpoolced performance at moderate prices with everyday cleaning
Pick Frigidaire when working with tighter budgets, while still wanting decent performance
Regardless of brand, modern dishwashers significantly outperform their predecessors in terms of energy efficiency and cleaning capability. Consequently, upgrading from an older model virtually guarantees improved results and lower utility costs.
Did you know natural ant-repellent options hide in plain sight throughout your home? Ants leave scented pheromone trails when they walk, creating invisible maps that lead other ants directly to your food sources. Surprisingly, everyday household items like vinegar, lemon juice, and cinnamon can disrupt these trails and keep ants at bay. What is a natural ant repellent exactly? It’s any non-toxic substance that deters ants without harsh chemicals.
You have numerous options, from natural ant-repellent sprays made with peppermint oil to diatomaceous earth powder, which is safe for indoor use. Additionally, food-grade diatomaceous earth dehydrates ants upon contact while remaining safe for humans and pets. Suppose you’re searching for the best natural ant repellent safe for dogs. In that case, many essential oil solutions and powder barriers can be strategically placed to protect your home without endangering your furry friends.
Whether you’re dealing with black garden ants attracted to sugary substances or invasive species that require stronger deterrents, this guide will teach you how to repel ants naturally using simple, practical methods that won’t harm your family or the environment.
Understanding Why Ants Invade Your Home
Ants march into your home for three primary reasons: food, water, and shelter. Understanding their motivations before applying any natural ant repellent helps you target the root causes of infestations rather than just treating symptoms.
1. What attracts ants indoors?
Food is the most powerful attractant for ants seeking to sustain their colonies. These tiny foragers are particularly drawn to sugary substances, but they also happily collect proteins, carbohydrates, and fats. Even minor spills or crumbs provide enough nourishment for these resourceful insects. Notably, ants leave pheromone trails that guide other colony members directly to food sources, creating those familiar marching lines across your kitchen counter.
Moisture serves as another powerful lure, especially during dry seasons. Leaky pipes, condensation around air conditioning units, or even a damp bath mat can provide enough water for an entire ant colony to thrive. Consequently, rooms with water sources, such as kitchens and bathrooms, tend to be the most susceptible to ant invasions.
Furthermore, ants seek shelter, particularly as temperatures change. Your warm home becomes increasingly appealing during colder months, while moisture-damaged areas offer ideal nesting conditions year-round. Carpenter ants specifically target damp, rotting wood to establish their colonies, making water-damaged areas of your home particularly vulnerable.
2. Common entry points and nesting spots
Ants require surprisingly little space to enter your home. They can squeeze through gaps as small as 1/64 of an inch, making complete exclusion challenging. The most common entry points include:
Cracks in foundation walls and siding
Gaps around windows and door frames
Openings where utility lines enter your home
Spaces under floorboards or carpet
Damaged seals around pipes or vents
Tree branches touching your roof or walls
Once inside, ants establish nests in hidden, protected locations. They commonly build colonies behind appliances, within wall voids, under floorboards, and inside cabinets. Moisture-loving species prefer areas near water sources, such as under sinks or bathroom fixtures. Carpenter ants typically nest in damp wood that has been affected by leaks or condensation.
Understanding these patterns helps you select the best natural ant repellent. This knowledge is essential for households with pets since specific repellent options may be unsafe for dogs and other animals. Instead of using chemical treatments that could harm your pets, you can target entry points with pet-safe deterrents, such as diatomaceous earth or specific essential oil barriers, applied where pets cannot reach them.
You can implement effective, targeted prevention strategies by identifying what attracts ants to your home and how they get inside, rather than resorting to potentially harmful chemical solutions. This knowledge forms the foundation for using natural ant repellents throughout your home.
How to Repel Ants Naturally Using Household Items
Your kitchen cupboards and pantry likely contain everything you need to create practical barriers without chemical solutions. These natural repellents disrupt the pheromone trails ants follow and create barriers they avoid crossing.
1. Vinegar and dish soap spray
White vinegar is one of the most effective natural ant deterrents due to its strong odor that masks ant pheromone trails. To create a potent vinegar spray:
Mix equal parts white vinegar and water in a spray bottle
Add two tablespoons of liquid dish soap for enhanced effectiveness
For more potent formulations, add two tablespoons of baking soda
The acidic nature of vinegar effectively eliminates the scent trails that guide other ants to food sources. Moreover, the dish soap component breaks down the ants’ exoskeletons, causing them to suffocate upon contact. This combination kills visible ants and prevents others from following the same path.
Apply this solution generously to entry points, window sills, countertops, and any other surfaces where you’ve spotted ant activity. Reapply after cleaning or when you notice ants returning.
Citrus-based repellents provide a fresh-smelling alternative to vinegar sprays. Ants avoid citrus due to the d-limonene compound found in the peels and oils, which disrupts their sensory receptors and prevents them from following pheromone trails.
To harness citrus power against ants:
Mix one part lemon juice with three parts water in a spray bottle
Apply to common ant pathways, entry points, and problem areas
Rub fresh citrus peels along baseboards and window sills for added protection
Unlike some other natural ant repellents, this method creates an effective barrier and leaves your home with a pleasant scent. The acidity in lemon juice may additionally interfere with ants’ exoskeletons upon direct contact, albeit to a lesser degree than vinegar solutions.
3. Cinnamon, cloves, and cayenne pepper
Many spices contain compounds that ants find irritating or overwhelming, making them excellent natural ant repellents indoors. Cinnamon stands out among these options as it’s generally safe around pets.
For spice-based ant control:
Sprinkle ground cinnamon, cloves, or cayenne pepper around entry points
Create barriers using these spices near problem areas
For more potent effects, make a paste with water and apply to cracks and crevices
Despite their powerful impact on ants, these spices pose minimal risk to humans and pets, making them ideal for households with animals. Yet, use cayenne pepper cautiously in homes with dogs, as they might experience irritation if they directly contact the spice.
Product Description
Description
Key Features
Price Range
Amazon Link
Organic Ground Cinnamon
Premium spice for an ant deterrent.
1 lb container of Ceylon cinnamon, certified organic.
Used coffee grounds offer a dual benefit: they repel ants while helping your garden. Ants dislike the strong smell of coffee and will avoid areas where grounds are present. Similarly, chalk creates a barrier that ants rarely cross because the calcium carbonate disrupts their scent trails.
To implement these methods:
Place fresh coffee grounds around entry points and ant-prone areas
Draw chalk lines across thresholds and near windows where ants enter
Reapply coffee grounds frequently, as they lose potency when dry
Although the chalk barrier method is featured in many viral videos, it is essential to remember that it offers only temporary protection. Ants are resourceful and will eventually find alternative routes around these obstacles. Therefore, chalk works best as part of a comprehensive approach rather than a standalone solution.
Combining several of these natural repellents creates the most effective defense against ant invasions. Alternate between methods to prevent ants from adapting, and always address the root causes of infestations by eliminating food sources and sealing entry points.
Natural Ant Repellent Sprays and Powders That Work
For persistent ant problems, specialized natural repellents deliver more concentrated protection than basic household remedies. These solutions create more substantial barriers and target entire colonies without introducing harmful chemicals into your home environment.
1. DIY essential oil sprays
Essential oils are powerful allies in ant control, offering potent repellent properties through their natural compounds. First and foremost, peppermint oil confuses ants by disrupting their scent trails and irritating their sensory receptors. Meanwhile, clove oil contains eugenol, a compound that acts as a repellent and a natural insecticide for ants.
To create an effective essential oil spray:
4 ounces of water
4 ounces of witch hazel
2 teaspoons liquid castile soap
50 drops of citrus essential oil (orange, grapefruit, or lemon)
30 drops peppermint essential oil
20 drops of clove essential oil
Combine all ingredients in a spray bottle and shake well before each use. This mixture works by erasing the chemical trails ants leave behind. Citrus oils contain 80-95% d-limonene, which is toxic to ants. Spray liberally around entry points, baseboards, and areas where ants are active.
Indeed, this solution serves as both a disinfectant and a general surface cleaner. Nevertheless, exercise caution around pets; many essential oils can be harmful to cats, which are unable to process these compounds effectively. For homes with dogs, limit application to areas your pets cannot access directly.
Diatomaceous earth (DE) is a fine powder made from fossilized diatoms and algae that works through mechanical action rather than chemical toxicity. When ants walk through DE, the microscopic sharp edges damage their exoskeletons, causing them to dehydrate and die.
For safe and effective indoor application:
Purchase only food-grade diatomaceous earth, never pool-grade, which is toxic
Wear a dust mask during application to avoid respiratory irritation
Sprinkle a thin layer around baseboards, window sills, and entry points
Apply under sinks, in cabinets, and in other dark, moist areas that ants favor
This natural powder remains effective even when wet, making it suitable for damp areas. Subsequently, exposed ants may die in 12 to 24 hours, with full results visible within several days. In contrast to chemical treatments, ants cannot develop resistance to DE because it works physically rather than chemically.
Diatomaceous earth (DE) is an exceptionally safe option for households with pets. Food-grade DE poses minimal risk to dogs and other animals while effectively controlling ants and other insects, including spiders, cockroaches, and bed bugs.
Baking soda traps offer a simple yet effective method for eliminating ants throughout your home. The key to this approach is combining baking soda with attractants that entice ants to return to the mixture and carry it back to their colony.
To create a basic baking soda trap:
Mix equal parts baking soda and powdered sugar (1:1 ratio)
Place the mixture in small containers with lids near ant trails
For protein-seeking ants, mix baking soda with peanut butter
For sugar-loving ants, combine baking soda with syrup
The sugar attracts ants while the baking soda remains invisible to them. Once consumed, the sodium hydrogen carbonate in baking soda reacts with acids in the ant’s body, causing dehydration of its exoskeleton and ultimately leading to the ant’s death. For instance, placing this mixture in strategic locations allows worker ants to carry it back to their colony, potentially affecting the entire population.
For households with pets, baking soda traps remain relatively safe as they’re only harmful to pets if consumed in large quantities. To further ensure pet safety, place traps in areas inaccessible to animals or use containers with small openings that allow ants to enter but keep pets out.
Ultimately, these natural repellent options provide effective, non-toxic alternatives to chemical pesticides, keeping your home ant-free without compromising your family’s health or harming the environment.
Pet-Safe Natural Ant Repellents for Indoors
Pet owners face unique challenges when battling ant invasions, as many commercial products contain chemicals that could harm furry family members. Fortunately, several natural options effectively repel ants while keeping pets safe.
1. Best natural ant repellent safe for dogs
Food-grade diatomaceous earth (DE) is one of the most effective pet-safe ant repellents. This fine powder consists of fossilized remains of aquatic organisms, with silica as the primary ingredient. The FDA considers it “generally recognized as safe,” making it suitable for use in homes with pets. DE works by dehydrating the ants’ exoskeletons upon contact without harming mammals.
Equally compelling is a simple, soapy water solution. Mix 1/8 teaspoon of dish soap into 16 ounces of water in a spray bottle. It creates a potent contract killer that removes pheromone trails. Both Dawn dish detergent and Dr. Bronner’s work well for this purpose.
A vinegar-water solution (made up of equal parts of each) offers another pet-friendly option. The first thing to remember is that vinegar effectively masks ants’ pheromone trails while posing minimal risk to animals.
The most compelling evidence suggests that several essential oils can be harmful to pets, particularly cats, which lack the enzymes necessary to metabolize these compounds. Accordingly, avoid using:
Tea tree oil
Citrus oils (orange, lemon, lime)
Pennyroyal oil
Pine oil
Cinnamon oil
Clove oil
Eucalyptus oil
Before using any essential oil, even those considered safer, consult a veterinarian. Symptoms of essential oil toxicity often include difficulty breathing, wobbly walking, drooling, lethargy, muscle tremors, vomiting, and skin irritation.
3. How to apply repellents safely around pets
To keep both pets and your home safe, strategic application proves crucial:
Apply diatomaceous earth in thin layers along baseboards and entry points, focusing on areas pets cannot access
Place any baits or traps behind appliances, furniture, or inside cabinets where pets cannot reach them
When using sprays, allow surfaces to dry completely before allowing pets back into treated areas
Always test solutions in small areas first to monitor pet reactions
As can be seen, effective ant control doesn’t require choosing between pet safety and an ant-free home. You can achieve both goals by selecting appropriate natural repellents and applying them thoughtfully.
Long-Term Prevention for an Ant-Free Home
Sustainable ant control relies on consistent preventative measures rather than reactive treatments. Creating a truly ant-free environment requires adopting systematic approaches that address both indoor habits and outdoor conditions.
1. Daily cleaning habits that deter ants
Maintaining cleanliness is the first line of defense against ant invasions. Promptly clean up food spills, especially those containing sugary substances like honey, maple syrup, and soda, which are particularly attractive to ants. Store all food, including pet food, in airtight containers to eliminate tempting scents. Additionally, empty garbage regularly and ensure bins have tight-fitting lids. Equally important, weekly wipe down kitchen surfaces with vinegar to disrupt existing pheromone trails.
2. Sealing gaps and fixing screens
Ants can squeeze through openings as small as 1/64 of an inch, making thorough sealing essential. Carefully inspect your home’s exterior for cracks in the foundation, gaps around utility lines, and spaces under doors. Use caulk or expanding foam to seal these entry points effectively. Replace worn weather stripping around doors and windows, and repair damaged screens promptly. For optimal protection, conduct seasonal inspections focusing on areas where pipes and wires enter your home.
3. Landscaping tips to reduce outdoor nests
Your yard management has a significant impact on ant populations around your home. Trim tree branches and shrubs at least a few inches away from your house to eliminate natural bridges for ants. Avoid piling mulch directly against your foundation, as this creates ideal nesting sites. Instead, consider using less attractive materials, such as stone or rubber mulch, near your home. Indeed, maintaining proper drainage around your property reduces moisture that attracts many ant species.
Don’t Let Ants Ruin Your Garden Too!
Now that you’ve mastered indoor ant control, discover eight proven natural methods to protect your outdoor plants from ant damage. From coffee grounds to strategic herb planting, learn how to cultivate an ant-free garden without resorting to chemicals.
4. Treating houseplants and soil
Indoor plants often harbor ant colonies or provide food sources through aphid infestations. Regularly wipe plant leaves to remove honeydew, which resembles a white scale and attracts ants. For persistent problems, consider repotting plants in fresh soil after cleaning the container with a bleach solution. Alternatively, potted plants containing a small amount of cinnamon or peppermint oil can be placed on saucers. Both natural ant repellents are safe for dogs when used appropriately.
Conclusion
Natural ant repellents provide a safer alternative to harsh chemicals, protecting your home, pets, and environment. Every day, household items like vinegar, lemon juice, and cinnamon interrupt ant scent trails. At the same time, essential oil sprays and diatomaceous earth offer stronger solutions. These remedies are budget-friendly and non-toxic when used correctly.
Pet owners benefit from natural options that don’t compromise safety. Food-grade diatomaceous earth eliminates ants without harming dogs. At the same time, vinegar-water and soapy solutions are gentle yet effective. However, be cautious with essential oils, especially around cats, as some may cause adverse reactions even in small quantities.
Preventing ant invasions long-term requires more than quick fixes. Regular cleaning, secure food storage, sealing entry points, and yard upkeep all help reduce attractions. Consistent use of natural repellents, paired with regular maintenance habits, creates an environment that ants avoid, offering peace of mind without compromising the health of your family or pets.
Disclosure: This post may include affiliate links. I may earn a commission if you purchase through my links, at no additional cost to you.
Did you know your fish tank smells bad primarily because of decomposing biological material? A well-maintained aquarium actually shouldn’t have an overpowering odor.
If your fish tank smells like urine, you’re likely dealing with an ammonia buildup resulting from overstocking or inadequate filtration. However, if it has that distinctive rotten egg scent, anaerobic bacteria in low-oxygen environments might be the culprit. These unpleasant fish tank smells often result from common mistakes, such as overfeeding (which promotes bacterial growth) or neglecting to remove dead fish that hide in tank corners.
Importantly, regular maintenance prevents these issues before they start. Weekly water changes of 10-20% can help prevent the accumulation of odor-causing compounds. At the same time, activated carbon effectively removes existing smells when placed in your filter. Proper stocking levels (one gallon per inch of tropical fish or three gallons per inch for goldfish) significantly reduce the risk of developing fish tank odor.
Throughout this guide, you’ll learn how to eliminate fish tank odors and establish a long-term maintenance routine that keeps your aquarium fresh and healthy.
Step 1: Find Out Why Your Fish Tank Smells
Determining the exact cause of the smell in your fish tank requires detective work. To solve this smelly mystery, you’ll need to identify the source of the odor first and then address the underlying cause.
1. Common causes: Why does my fish tank smell
A missing or deceased fish is often the primary culprit behind bad tank smells. When dying, fish can hide in out-of-the-way corners, and their decomposing bodies release proteins and oils that float to the surface, creating strong odors.
Overfeeding ranks as another frequent offender. When food remains uneaten, it sinks to the bottom, promoting excessive bacterial growth. These bacteria release waste gases with distinctly foul odors. Similarly, decaying plant material produces a noticeable stench. Look for plants turning slimy brown or black.
Overcrowding your tank also contributes to odor problems. Too many fish in too little water means more waste than your filtration system can handle. Additionally, overdosing on a water conditioner introduces sulfur compounds that produce a rotten-egg smell.
Overcrowding isn’t just about numbers. Incompatible tank mates can stress fish, leading to excess waste and foul odors. If you keep bettas, avoid these 5 species that often trigger aggression and poor water conditions.
Underneath your substrate, anaerobic bacteria thrive in low-oxygen environments, particularly in fine sand or densely packed gravel, producing that rotten egg odor.
2. How to spot signs of decay or waste
Begin by accounting for all your fish – any missing fish likely indicates decomposition somewhere in the tank. Next, examine the water itself. Cloudy, murky water suggests the breakdown of organic material, while foamy, lingering bubbles on the surface indicate excess mucus in the water.
Check tank furniture and decorations, especially underneath and inside hollow ornaments, where debris can accumulate. Slimy growth on the substrate or white fuzzy clumps indicate fungal growth on decaying food.
Fish behavior also offers valuable clues. Water quality may be compromised if fish gasp at the surface or exhibit a decreased appetite. Rapidly breathing fish with dull-colored gills often signal nitrite toxicity.
3. When to test your water quality
Test your water immediately whenever you detect unusual odors. Test ammonia, nitrite, and nitrate levels for newly established tanks every 2-3 days. Once parameters stabilize, monthly testing becomes sufficient for established aquariums.
Increase testing frequency during these situations:
After adding new fish
When fish show signs of illness
Following environmental changes like tank relocation
During or after stressful events
When you notice visual water changes
Remember: zero ammonia and nitrite levels are the only safe values, while nitrates should remain below 20 mg/L.
Step 2: Clean the Tank the Right Way
Proper cleaning is the cornerstone of eliminating fish tank odors. Once you’ve identified the source of the smell, taking swift action will restore freshness to your aquarium environment.
1. Remove dead fish or plants.
When you spot a dead fish, remove it immediately from the tank. This is the first step in removing the smell from a fish tank. Dead fish rapidly decompose in warm, bacteria-laden water, releasing proteins that create strong odors and potentially spread disease to other fish. Never flush dead fish down the toilet, as this can introduce exotic species and diseases to local waterways. Instead, seal the fish in a plastic bag before disposing of it in the trash or bury larger specimens to prevent odors.
Similarly, decaying plant matter must be promptly removed. Brown or blackening leaves indicate decomposition and contribute significantly to tank odors. Use aquarium tweezers to carefully extract dead plant material, focusing on slimy or discolored stems.
2. Vacuum the gravel and substrate.
Debris trapped in substrate often appears as “gunk” or brown matter that collects between gravel pieces or on sand. To clean effectively:
Turn off heaters and filters before beginning
Position your gravel vacuum just above the sand or directly into the gravel
Work systematically in rows (like mowing a lawn)
Pay special attention to areas under decorations where waste accumulates
Hold the vacuum slightly higher (about half an inch above) for sand substrates and create a gentle swirling motion to lift debris without removing the sand itself. With planted tanks, leave a 2-inch radius around plant stems as they benefit from some organic matter.
3. Vacuum the Gravel and Substrate: Recommended Products
Product Name
Description
Price
Links
Aqueon Aquarium Vacuum Gravel Cleaner
Self-priming, intake tube with nozzle. Separates debris from gravel.
Filters collect debris much like vacuum cleaners and require regular maintenance. Rather than cleaning filter media under tap water (which kills beneficial bacteria), swish it gently in a bucket of tank water. For sponge filters, squeeze them in the tank water until the water no longer turns brown.
To preserve bacterial colonies, replace only about half of the biological filter media at a time. Disposable filter components, such as carbon or filter floss, can be completely replaced as they primarily provide chemical and mechanical filtration, rather than biological support.
Step 3: Fix Water Quality Issues
Once you’ve cleaned your tank, addressing water quality issues becomes crucial for eliminating persistent fish tank smells. Poor water quality directly contributes to unpleasant odors; however, these straightforward fixes can help restore freshness to your aquarium.
1. Do a 25% water change.
Regular partial water changes are fundamental for maintaining a healthy, odor-free aquarium. Most experts recommend replacing 25% of your tank water weekly to prevent ammonia and nitrate buildup. You might opt for 10-15% weekly changes for smaller tanks, while larger tanks benefit from 20% weekly changes.
When performing a water change:
Fill a clean bucket with lukewarm tap water (never use soap-washed containers)
Add an appropriate water conditioner to the new water
Let it sit until it reaches room temperature
Remove about 25% of the old tank water
Slowly add the treated water to the aquarium
Remember that removing more than 25% at once can harm the beneficial bacteria colony, potentially causing a mini-cycle and exacerbating odor problems.
2. Use activated carbon in the filter.
Activated carbon effectively absorbs odor-causing molecules and is essential for removing the smell of fish tank water from your tank. This filtration medium removes several dissolved contaminants, including chloramine, chlorine, tannins (which cause water discoloration), and phenols (which contribute to unpleasant odors).
For optimal odor control, replace your activated carbon monthly, as it eventually becomes saturated and loses effectiveness. If your tank water begins to yellow or smell, regardless of the schedule, it’s time for a carbon change.
Note that carbon doesn’t remove ammonia, nitrite, or nitrate, so it complements rather than replaces regular water changes.
Activated carbon isn’t just for aquariums—it’s also a powerful odor absorber for stubborn smells like gym clothes. Learn how to stop gym stink here.
3. Activated Carbon in the Filter: Recommended Products
Product Name
Description
Price
Links
Premium Activated Carbon
Granular charcoal, specifically designed for fish tanks, effectively removes odors and toxins.
While water conditioners are essential for neutralizing chlorine and chloramine in tap water, excessive use can contribute to tank odors. Some conditioners contain sulfur compounds that, when overused, create that distinctive rotten-egg smell.
Administer the dose precisely according to the manufacturer’s instructions, typically 1 mL per 10 gallons. Most conditioners need only 2-5 minutes to neutralize harmful chemicals, making them quick-acting but powerful tools when used correctly.
Consider using water conditioners that temporarily detoxify ammonia for tanks with persistent odor issues. However, avoid using these as a substitute for proper tank maintenance.
5. Water Conditioners: Recommended Products
Product Name
Description
Price
Link
API Stress Coat+ Water Conditioner
Removes chlorine/chloramine and adds a protective slime coat
Preventing fish tank smells is far easier than trying to eliminate them once they have developed. With a few proactive habits, you can maintain a fresh-smelling aquarium indefinitely, keeping your aquatic pets healthier in the process.
1. Feed your fish properly.
Overfeeding is the primary cause of fish tank smells. Generally, feed only what your fish can consume in 2 to 3 minutes. Begin with a tiny quantity, observe how quickly they eat it, and adjust accordingly. For most aquarium fish, feeding once or twice daily provides adequate nutrition. Large predatory fish don’t need daily feeding, whereas herbivores benefit from smaller, more frequent meals 2-3 times daily.
Always remove uneaten food after five minutes using a siphon or net. Chronic overfeeding creates organic rotting sludge that inevitably produces foul odors. Watch for warning signs, including cloudy water, foam on the surface, quickly clogging filters, and excessive algae growth.
2. Stick to a cleaning schedule.
Consistent maintenance prevents the accumulation of odor-causing compounds. Create a routine that includes:
Daily tasks: Check that pumps, filters, and lights function properly; remove excess food; top off evaporated water with treated water; monitor water temperature
Weekly tasks: Change 10-20% of the water; lightly vacuum the substrate to remove waste
Monthly tasks: Test water quality parameters; clean filter components in tank water (never tap water); check plant health and remove loose leaves
For heavily stocked tanks, consider more frequent water changes. Most importantly, maintain good water flow through your filter; clogged filters reduce oxygen levels and promote the growth of bacteria that cause odors.
3. Monitor fish health and behavior.
Daily observation helps identify problems before they become serious. Missing fish often decompose in hidden areas, becoming primary sources of odor. Furthermore, sudden changes in fish behavior, reduced appetite, gasping at the surface, or unusual swimming patterns typically indicate deteriorating water quality.
Proper stocking remains crucial for preventing odors. Overcrowded tanks produce excessive waste that even diligent maintenance cannot fully address. Invest in a high-quality water testing kit to regularly check ammonia, nitrite, nitrate, and pH levels. This proactive monitoring enables you to detect and resolve issues before they produce unpleasant odors.
Conclusion
Maintaining a fresh-smelling aquarium starts with understanding that odor is a warning sign, not just a nuisance. Smelly tanks often result from the presence of dead fish, rotting plants, or uneaten food. Identifying and removing these sources promptly prevents more significant issues. A healthy tank should never stink; odor always indicates an underlying problem.
Routine maintenance is your best defense. Weekly 10–25% water changes remove excess waste before it accumulates. Vacuuming the substrate during cleanings eliminates hidden debris. These small but consistent habits significantly reduce fish tank odors and maintain high water quality. Skipping them allows smells and stress to build up silently.
Proper fish care matters as much. Only feed your fish what they eat within 2–3 minutes, and remove any leftovers immediately. Avoid overcrowding to reduce waste production. A balanced ecosystem means less work and fewer smells. With diligence, your aquarium becomes a fresh, thriving space that brings calm and beauty to your home.
Disclosure: This post may include affiliate links. I may earn a commission if you purchase through my links, at no additional cost to you.
About Spoons.wiki
At Spoons.wiki, we tackle everyday problems faced by people, offering practical solutions and product recommendations to make life easier. From household cleaning hacks like removing coffee stains and eliminating pet hair to personal care tips for dry skin and stress relief, each topic is designed to provide actionable advice. Dive in to discover how small changes and the right tools can solve big problems!