How to Clean Tarnished Silverware: 3 Proven Methods That Work

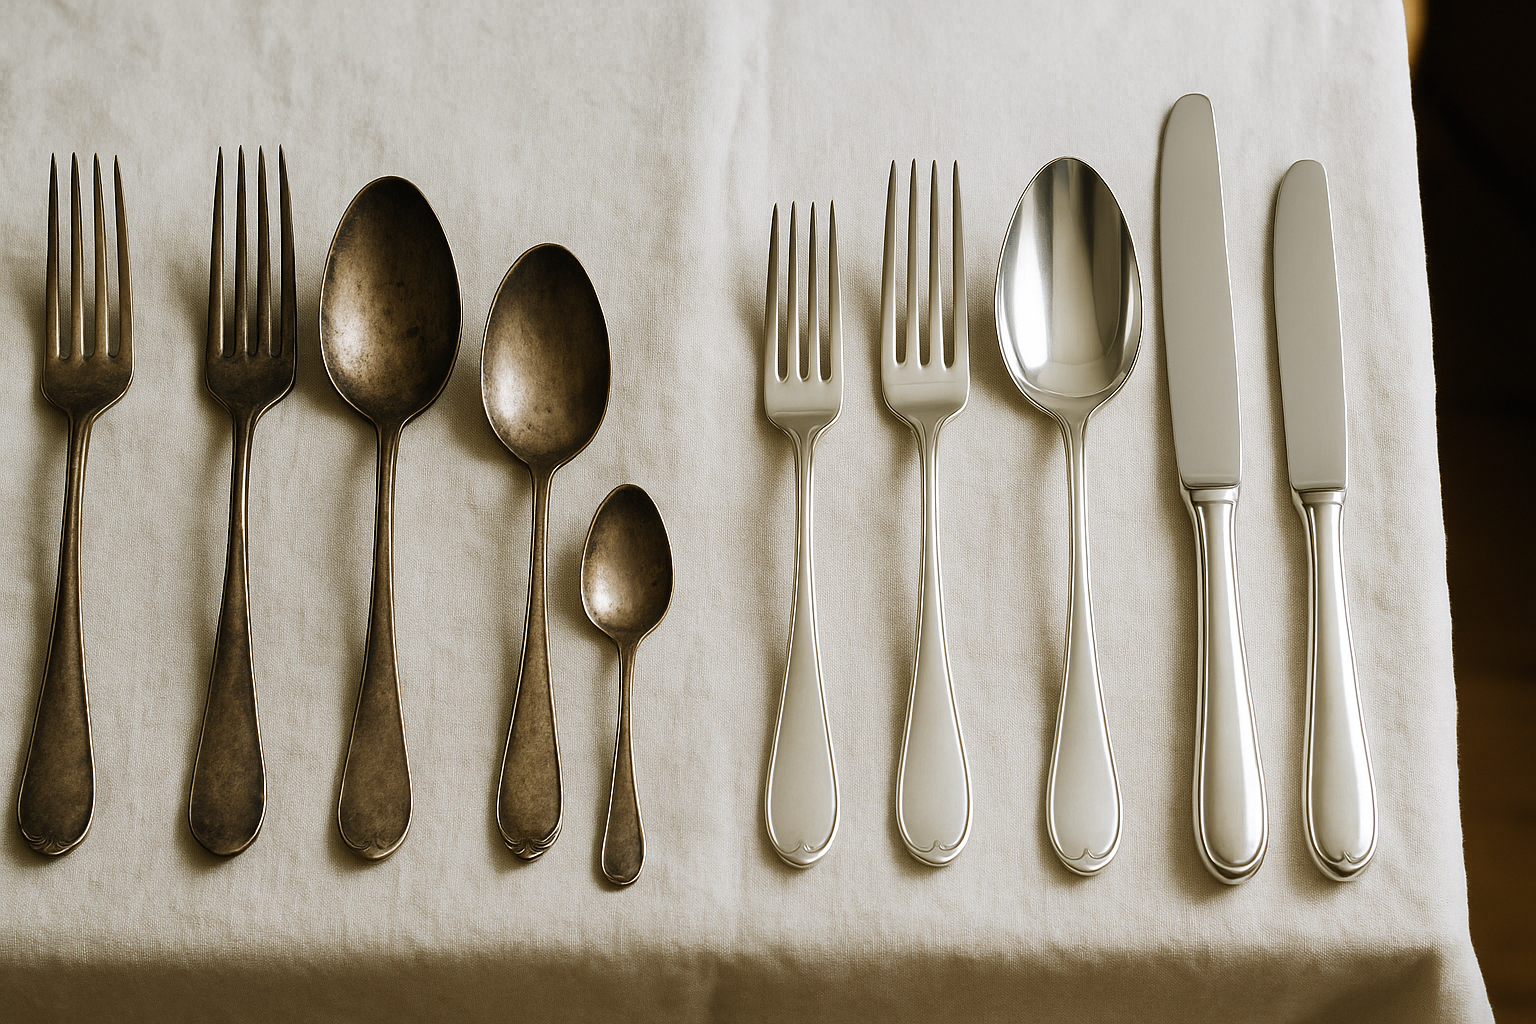
Before and after of tarnished and polished silverware on a white tablecloth, showing restored shine for a blog on cleaning silverware

There’s nothing quite like the sinking feeling of pulling out your good silverware for a special dinner, only to find it dull, spotted, and tarnished. I’ve been there, staring at family heirlooms or wedding gifts that have lost their luster, wondering if they’ll ever shine again. After years of trial and error (and more than a few cleaning disasters), I’ve finally mastered how to clean tarnished silverware without damaging these precious items.

Whether preparing for holiday entertaining or simply wanting to restore your everyday flatware, this guide covers everything from gentle DIY solutions to professional-grade products. I’ll walk you through the science behind tarnish, share step-by-step cleaning methods that work, and reveal expert secrets to keep your silver gleaming for years.

What Is Silver Tarnish?
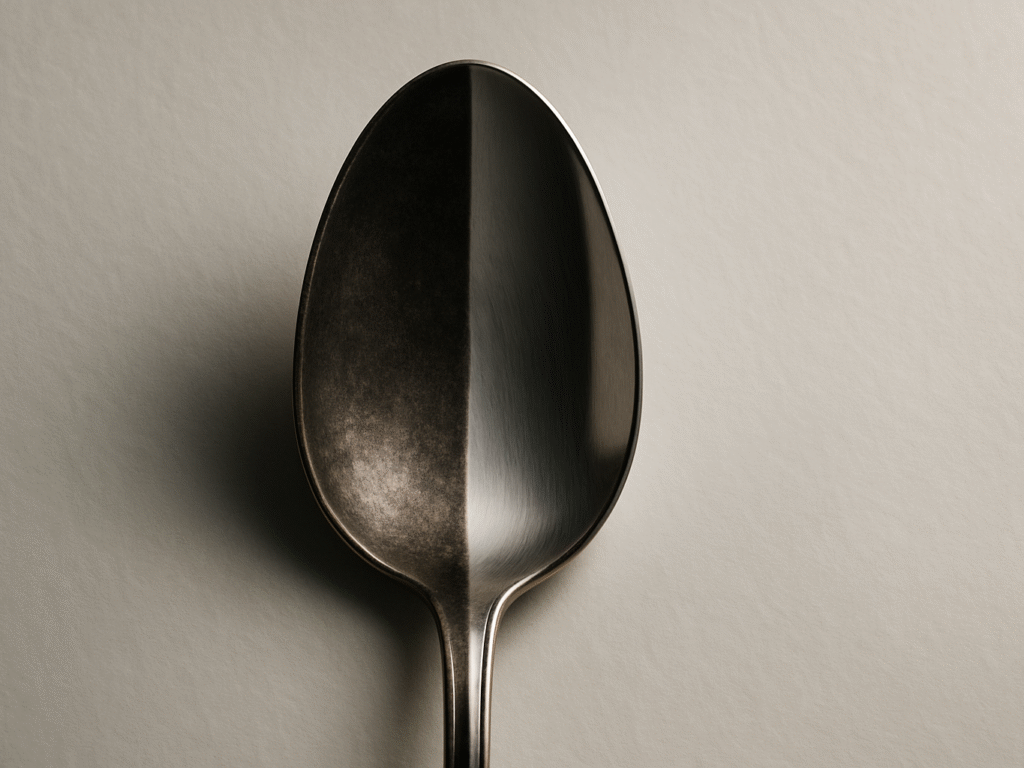
Close-up of a silver spoon showing half tarnished and half polished, illustrating the effects of silver tarnish for an educational blog post.

That dull, blackish coating on your silverware isn’t dirt; it’s a chemical reaction. Tarnish forms when silver reacts with sulfur compounds in the air, creating silver sulfide. According to Dr. Sarah Jenkins, a metallurgist at Cornell, even cooking eggs or using rubber bands can cause this.

The good news? Tarnish is usually just a surface issue. The bad news? It can wear down silver-plated items if left unchecked, thinning the top layer. High humidity speeds up tarnishing, so storing silver in bathrooms or basements can be a big mistake.

Sterling silver (92.5% pure silver) tarnishes more slowly and evenly than silver plates, which may develop blotchy patches or reveal the base metal underneath. Knowing how to keep silverware from tarnishing through smart storage and gentle handling saves effort and preserves your pieces longer.

Pre-Cleaning Preparation

Before diving into any cleaning method, proper preparation is crucial. Gathering the right materials and taking safety precautions will make the process easier and protect you and your silverware.

You’ll need:

  • Aluminum foil
  • Baking soda
  • White vinegar
  • Soft microfiber cloths
  • Rubber gloves
  • A shallow pan or dish (glass or plastic, not metal)
  • Cotton swabs for detailed areas
  • Soft-bristled toothbrush

Safety first: Always work in a well-ventilated area, especially when using commercial cleaners containing ammonia or other chemicals. Wearing rubber gloves protects your hands and, importantly, prevents oils from your skin from transferring to freshly cleaned silver.

“Before attempting any cleaning method on precious or antique silverware, always test on a small, inconspicuous area first,” advises Julia Koenigsberg, silver restoration specialist at the Metropolitan Museum of Art’s conservation department. “What works beautifully on one piece might damage another, depending on its age, composition, and manufacturing techniques.”

How to clean tarnished silverware properly starts with this crucial step: sorting your pieces by type and tarnish level. Heavily tarnished items might need a different approach than slightly affected ones, and silver plates should generally receive gentler treatment than solid sterling silver.

Method 1: Aluminum Foil and Baking Soda
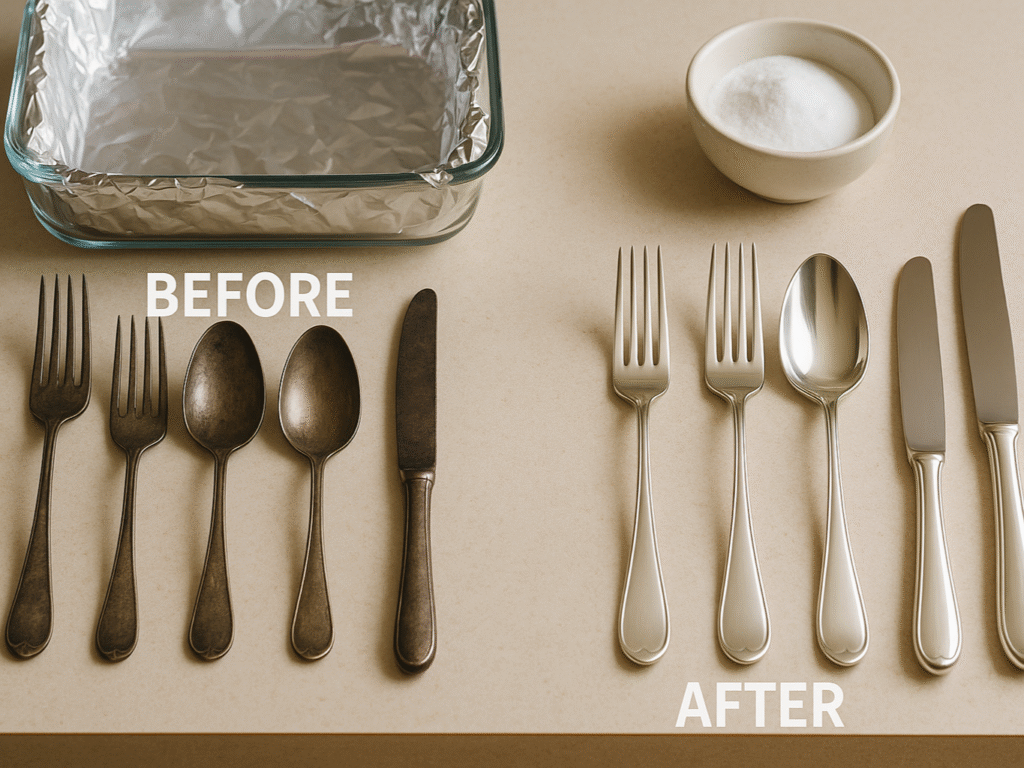
Before and after of silverware cleaned with aluminum foil and baking soda, with cleaning supplies like foil and baking soda visible on a kitchen counter.

This method is miraculous for removing tarnish quickly with minimal effort, and it’s based on fascinating chemistry. Rather than scrubbing away tarnish, this technique reverses the chemical reaction that caused it. To clean tarnished silverware with foil, follow this process:

(i) Prep the Cleaning Station

Line a glass or plastic container with aluminum foil, shiny side up. It isn’t just for looks; direct contact with the foil is essential for the reaction. Place your tarnished silverware inside, ensuring each piece touches the foil to activate the chemical process.

(ii) Boil the Cleaning Solution

Bring 2–3 cups of water to a boil. Once boiling, carefully add 1/4 cup of baking soda. It’ll fizz and bubble like a science experiment, and that’s your cue; it’s reacting. It creates the perfect electrochemical bath for your silver.

(iii) Pour & Submerge

Slowly pour the hot baking soda solution over the silverware, fully submerging each piece. The moment the solution hits the foil and silver, the tarnish begins to disappear, transferring from the silver to the foil. Let the pieces sit for 5–10 minutes.

(iv) Rotate for Full Coverage

Using wooden tongs, gently turn each piece halfway through soaking. It ensures all sides are equally exposed to the reaction. You’ll notice some stubborn tarnish melting away before your eyes. For heavier buildup, you should repeat this step or process.

(v) Rinse & Dry Thoroughly

Once the tarnish is gone, remove the silverware, rinse thoroughly under cool water, and dry immediately with a soft, lint-free cloth. Don’t air-dry; moisture can cause new tarnish. Repeat the process, especially for older or deeply tarnished silver.

For those wondering how to clean tarnished silverware with foil, this method stands out for its speed, safety, and scientific elegance. The aluminum (more reactive than silver) essentially “takes” the sulfur from the silver sulfide, leaving your silverware clean.

Method 2: Vinegar and Baking Soda Soak
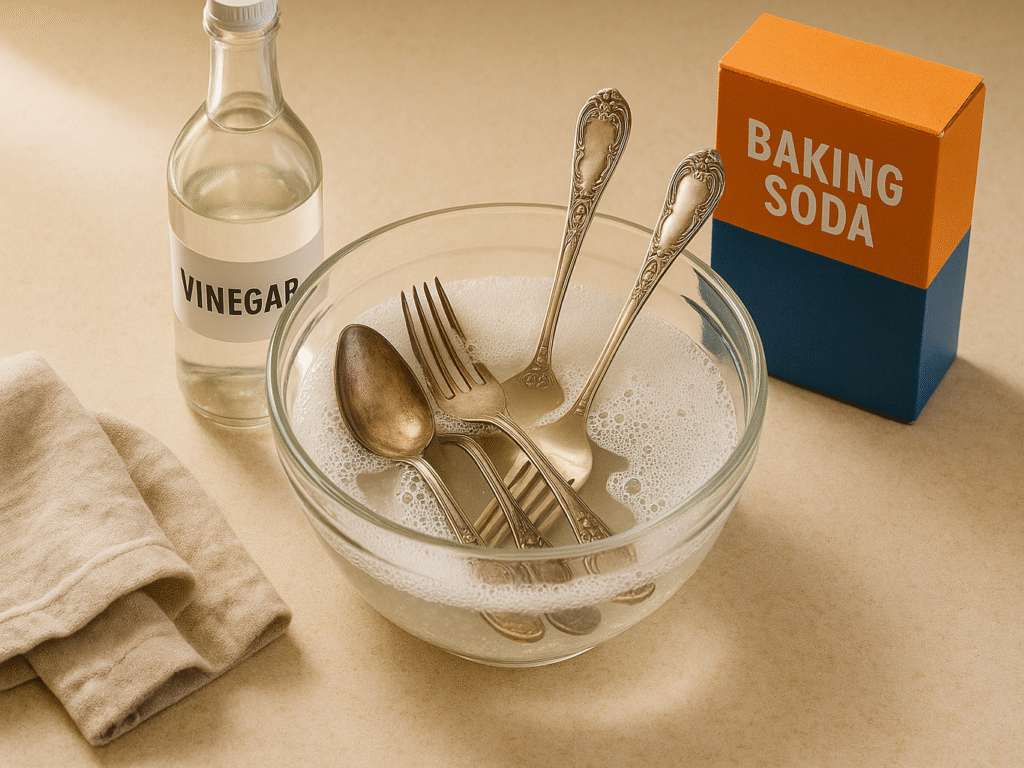
Silverware soaking in a fizzing vinegar and baking soda solution in a glass bowl, with a vinegar bottle and baking soda nearby on a kitchen counter.

A vinegar and baking soda soak offers excellent results for moderately tarnished pieces, especially those with intricate designs where the foil method might miss spots. This method is particularly effective on flatware with detailed patterns where tarnish can hide in crevices. For those wondering how to clean tarnished silverware with vinegar, this is a highly effective approach:

(i) Prepare the Cleaning Mixture

Mix 1 cup of white vinegar with 2 tablespoons of baking soda in a glass or plastic container. Add the baking soda slowly; it will fizz intensely. To increase effectiveness, stir in 1 tablespoon of salt. This solution is gentle yet powerful for tarnished silver.

(ii) Add Warm Water and Silverware

Once the bubbling calms down, add warm water until it completely covers your silverware. Submerge the pieces, making sure they’re fully soaked. The solution will begin loosening tarnish, which is especially useful for flatware with ornate or engraved designs where buildup hides in fine crevices.

(iii) Soak for 2–3 Hours

Let your silverware sit in the solution for 2–3 hours. During this passive soak time, the vinegar’s acidity dissolves tarnish while baking soda provides a gentle lift. It’s a low-effort method ideal for when you don’t want to scrub manually but want visible results.

(iv) Gently Scrub Detailed Areas

After soaking, gently scrub any remaining tarnish from hard-to-reach areas using a soft-bristled toothbrush. This is particularly useful for detailed patterns, grooves, or engraving. Don’t use a hard brush; silver is delicate, and scratching the surface can permanently dull the finish.

(v) Rinse & Buff to Shine

Thoroughly rinse each piece under clean water to remove any vinegar or baking soda residue. Immediately dry and buff with a soft, clean cloth to prevent water spots and re-tarnishing. Buffing also restores the natural shine without needing polish.

Chef Marcus Williams, culinary director at the prestigious Culinary Institute of America, explains: “Restaurant professionals know that vinegar’s mild acidity works wonders on tarnished silver without damaging it. We use this method weekly in high-end restaurants to maintain the silverware used for service. The key is the proper dilution; too strong and you risk damage; too weak and it won’t be effective.”

For anyone curious about how to clean tarnished silverware with vinegar, this method offers a perfect balance of effectiveness and gentleness, ideal for restoring shine without abrasive polishing.

Method 3: Baking Soda Paste
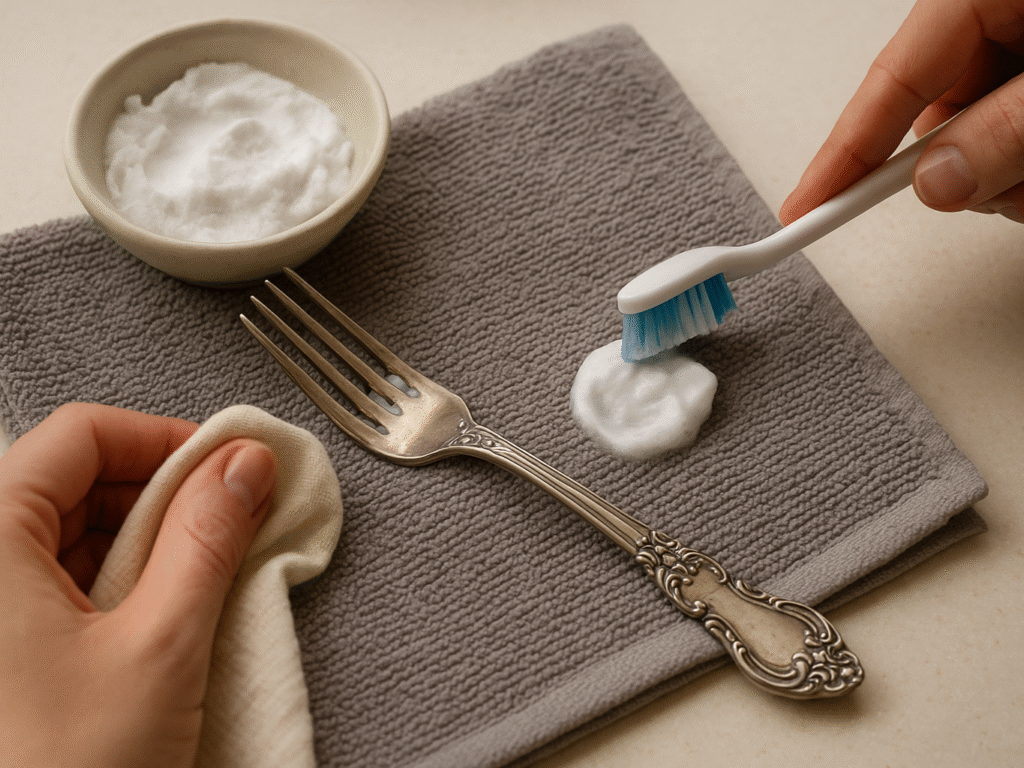
Hands applying baking soda paste to tarnished silverware with a cloth and toothbrush, with a bowl of paste and a soft towel on the counter.

A baking soda paste offers precision and control for the targeted cleaning of delicate pieces with moderate tarnish. This method allows you to focus on specific areas without submerging entire pieces. To clean tarnished silverware with baking soda paste:

(i) Mix the Paste

In a small bowl, combine 3 parts baking soda with 1 part water to form a thick, spreadable paste. It should resemble toothpaste in texture. This mild abrasive mix is safe for silver and ideal for precise, hands-on cleaning without submerging the entire item.

(ii) Apply the Paste Gently

Apply the paste directly to tarnished areas using a soft cloth or your fingers (wear gloves). Gently rub in circular motions, following the silver’s natural grain if visible. This targeted method helps clean problem spots without affecting already-polished surfaces or mixed materials.

(iii) Detail Hard-to-Reach Areas

Dip a soft-bristled toothbrush or cotton swab into the paste for corners, engraved lines, or intricate designs. Gently scrub those crevices to lift tarnish that’s settled in detailed patterns, especially useful for vintage silver or jewelry with delicate filigree.

(iv) Let It Sit (Optional)

For areas with stubborn tarnish, allow the paste to sit on the silver for about 10 minutes before rinsing. It gives the baking soda time to break down tarnish chemically without damaging the surface. Avoid letting it dry completely, especially on sensitive items.

(v) Rinse, Dry & Buff

Rinse each item under warm running water to remove all residue. Immediately dry with a soft microfiber cloth and buff lightly to enhance the shine. Don’t skip drying; lingering moisture encourages tarnish to return. Patience and consistency will protect your silver’s long-term beauty.

This method gives you precise control, making it perfect for pieces with a combination of tarnished and clean areas or for silver with mixed metal components where submersion methods might cause damage.

If you’re tackling detailed or mixed-material silverware, mastering how to clean tarnished silverware with baking soda in paste form gives you control without risk of overexposure to liquid cleaners.

Tackling Badly Tarnished Silver-Plated Pieces

When facing a severely blackened silver plate, you should bring in the big guns. Silver plate requires special care because aggressive cleaning can wear through the silver layer to the base metal below.

So, how do you clean badly tarnished silver plate without damaging it? The key is to start with commercial products specifically formulated for the job:

1. Choose the Right Polish

Select a high-quality silver polish labeled safe for silver plate. Apply it to a soft cloth, not directly to the item, and work in straight lines using light pressure.

2. Tackle Stubborn Tarnish

For heavy tarnish, let the polish sit for 5 minutes before wiping. Avoid scrubbing; allow the product to do the work.

3. Double-clean if Needed

Use aluminum foil to eliminate any lingering tarnish after polishing. Rinse thoroughly and dry completely.

4. Final Protection

Buff with an anti-tarnish cloth to restore shine and slow down future tarnishing.

For pieces with significant tarnish buildup in detailed areas, dampening a soft toothbrush with water and dipping it in baking soda can help reach crevices. Always brush gently and keep it aligned with the design, not across it.

Professional restorers often recommend alternating between chemical and mechanical cleaning methods for the best results on badly tarnished pieces. The commercial polish provides targeted cleaning power, while the gentler foil method handles the finishing work.

Preventing Future Tarnish

The best way to deal with tarnish is to prevent it from forming in the first place. With simple habits and storage solutions, you can dramatically reduce how often you need to clean your silver.

Here’s how to prevent silverware from tarnishing

1. Store properly

Keep silver in anti-tarnish cloth bags or chests lined with anti-tarnish fabric. These materials contain materials that absorb sulfur compounds before they can react with your silver.

2. Control humidity

Silver tarnishes faster in humid environments. Use silica gel packets in your storage containers in a humid climate.

3. Avoid damaging materials

Never store silver with rubber bands, wool, felt, or newspaper, all of which contain sulfur compounds that accelerate tarnishing.

4. Use it regularly

Believe it or not, silver used and washed regularly tarnishes more slowly than pieces stored for long periods. The friction from gentle use and washing helps remove tarnish-causing compounds before they can react.

5. Wash properly

Hand wash with mild dish soap and dry immediately and thoroughly. Never put sterling or silver plates in the dishwasher, as detergents can cause spotting and damage.

Antiques appraiser Michael Flanigan from PBS’s Antiques Roadshow notes, “The biggest mistake I see collectors make is improper storage. Silver wrapped in plastic or regular cloth will tarnish much faster than pieces stored properly in anti-tarnish materials. It’s a small investment that saves countless hours of cleaning.”

Product Recommendations

While DIY methods work wonderfully for regular maintenance, sometimes you need the power of commercial products for thorough cleaning or preservation. Here are three excellent options at different price points:

1. Budget: Wright’s Silver Cleaner and Polish Cream 8 oz ($11.64)

Best Overall Silver Polish for Everyday Use

Buy on Amazon

Key Features

  • Ammonia-Free Formula: Safe for use on silver, chrome, pewter, porcelain, and stainless steel.
  • Restores Shine: Effectively removes tarnish, bringing silver back to its original luster.
  • Protective Coating: Leaves behind a barrier that helps prevent future tarnishing.
  • Included Accessories: Comes with a polishing cloth for easy application.
  • Trusted Brand: Wright’s has been a leader in silver care since 1873.

Pros

  • Gentle on delicate items; does not scratch surfaces.
  • Easy to use with quick results.
  • Suitable for a variety of metals and items.
  • Highly rated by users for effectiveness.

Cons

  • It may require some manual effort for heavily tarnished pieces.
  • The included sponge may not be durable for long-term use.

Ideal For

  • Individuals seeking a reliable, everyday silver polish.
  • Those with a variety of silver items, from jewelry to flatware.
  • Users prefer a gentle, ammonia-free cleaning solution.

Customer Feedback

With over 18,000 ratings on Amazon and an average of 4.7 out of 5 stars, users praise Wright’s Silver Cream for its effectiveness and ease of use. Many highlight its ability to restore shine to tarnished items without harsh chemicals. Some users note that while the product works well, the included sponge may not be the most durable.

2. Mid-Range: Weiman Jewelry Polish and Tarnish Remover ($17.98)

Top Pick for Convenient Jewelry Cleaning

Buy on Amazon

Key Features

  • Ammonia-Free Formula: Safe for silver, gold, brass, copper, aluminum, and jewelry with diamonds or gemstones.
  • Restores Shine: Effectively removes tarnish, rejuvenating dull jewelry to a brilliant shine.
  • Protective Coating: Leaves behind a barrier that helps prevent future tarnishing.
  • Convenient Wipes: Pre-moistened wipes allow easy, mess-free application without additional tools.
  • Trusted Brand: Weiman has been a leader in surface care since 1941.

Pros

  • Quick and easy to use, ideal for on-the-go cleaning.
  • Suitable for a variety of metals and jewelry types.
  • Leaves a protective layer to delay tarnish formation.
  • Highly rated by users for effectiveness and convenience.

Cons

  • It may not be as effective on heavily tarnished items.
  • The scent may not appeal to all users

Ideal For

  • Individuals seeking a quick and convenient solution for light to moderate tarnish.
  • Those with a variety of jewelry pieces, including items with gemstones.
  • Users prefer a mess-free, wipe-based application.

Customer Feedback

With over 400 ratings on Amazon and an average of 4.6 out of 5 stars, users praise Weiman Jewelry Wipes for their convenience and effectiveness. Many highlight the ease of use and the immediate improvement in their jewelry’s appearance. Some users note that while the wipes are excellent for regular maintenance, they may require additional effort for heavily tarnished pieces.

3. Goddard’s Silver Care Liquid Dip 10 oz ($60)

Best for Quick and Effective Silver Tarnish Removal

Buy on Amazon

Key Features

  • Instant Tarnish Removal: Quickly eliminates tarnish from silverware, jewelry, and small silver items without scrubbing.
  • Ready-to-Use Formula: No mixing is required; dip the item, rinse, and dry it for immediate results.
  • Safe for Silver: Designed specifically for sterling silver and silver-plated items; not recommended for stainless steel.
  • Professional Strength: Trusted by professionals for its powerful cleaning capabilities.

Pros

  • Effortless Application: Dip, rinse, and dry; no polishing is required.
  • Effective on Intricate Designs: Reaches into crevices and detailed patterns where clothes can’t.
  • Restores Shine: Leaves silver items looking bright and renewed.

Cons

  • Not Suitable for Stainless Steel: Contact with stainless steel can cause damage.
  • Strong Odor: Some users report a noticeable chemical smell during use.

Ideal For

  • Individuals seeking a fast and efficient solution for tarnished silver items.
  • Those with silverware, jewelry, or decorative pieces require regular maintenance.
  • Users prefer a dip method over manual polishing.

Customer Feedback

Goddard’s Silver Care Liquid Dip has garnered positive reviews for its effectiveness and ease of use. Customers appreciate the quick results and the ability to clean intricate silver items without damage. Some users note the importance of following instructions carefully to avoid potential issues.

Conclusion
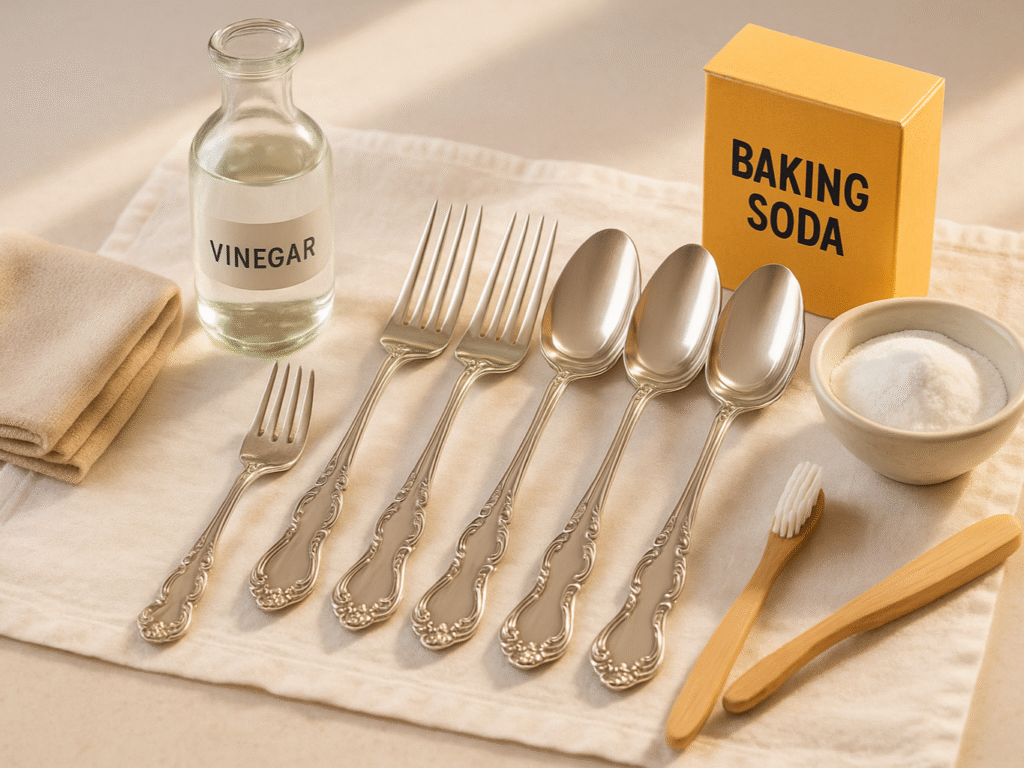
Polished silverware laid out on a linen cloth with cleaning supplies like baking soda, vinegar, and a soft cloth nearby, symbolizing silver care and restoration.

Mastering how to clean tarnished silverware isn’t just about aesthetics; it’s about preserving pieces that often carry significant monetary and sentimental value. From the chemistry-driven aluminum foil method to the precision of baking soda paste, you now have multiple proven techniques to restore your silver’s natural beauty.

Remember that consistent care is far easier than occasional deep cleaning. Proper storage solutions and handling practices will dramatically reduce tarnish formation, saving time and protecting your silver in the long run.

Whether you inherited your grandmother’s sterling flatware, invested in silver for entertaining, or want to maintain the stainless look of your everyday table setting, regular maintenance using these methods will keep your pieces looking their best for generations to come.

Ready to give your tarnished treasures new life? Start with the aluminum foil method for quick results, invest in proper anti-tarnish storage, and consider trying one of the recommended polishes for your most precious pieces. Your silverware and anyone who dines at your table will thank you for the extra effort.
Affordable Mold-Free Coffee Options That Don’t Compromise on Quality or Taste

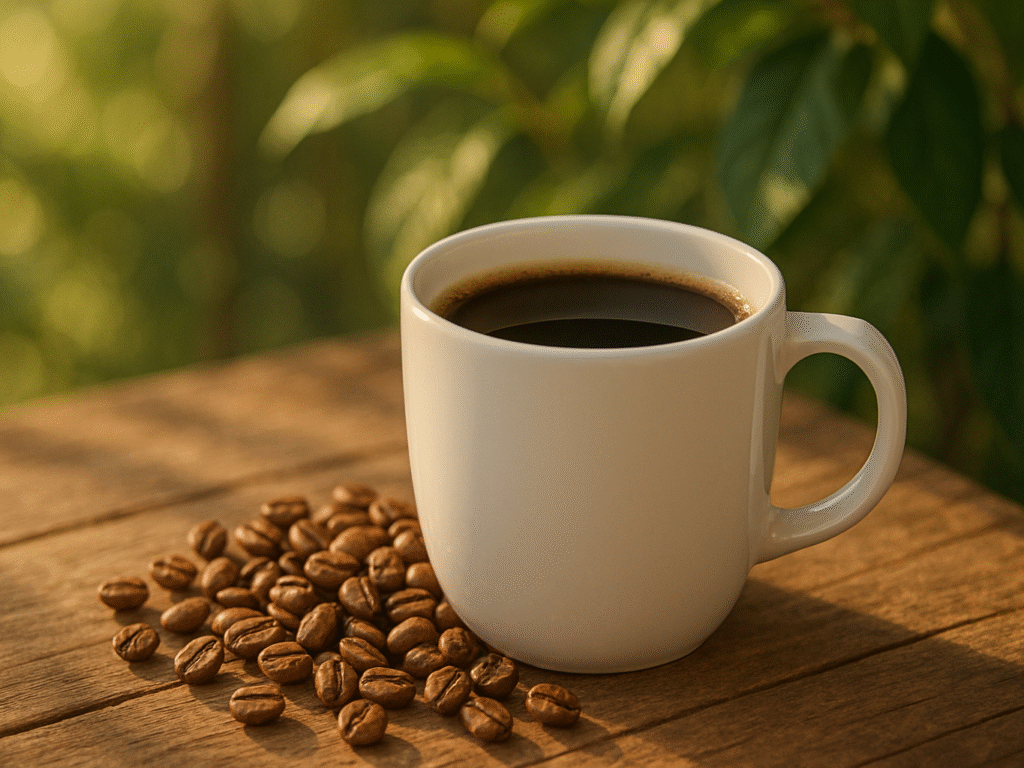
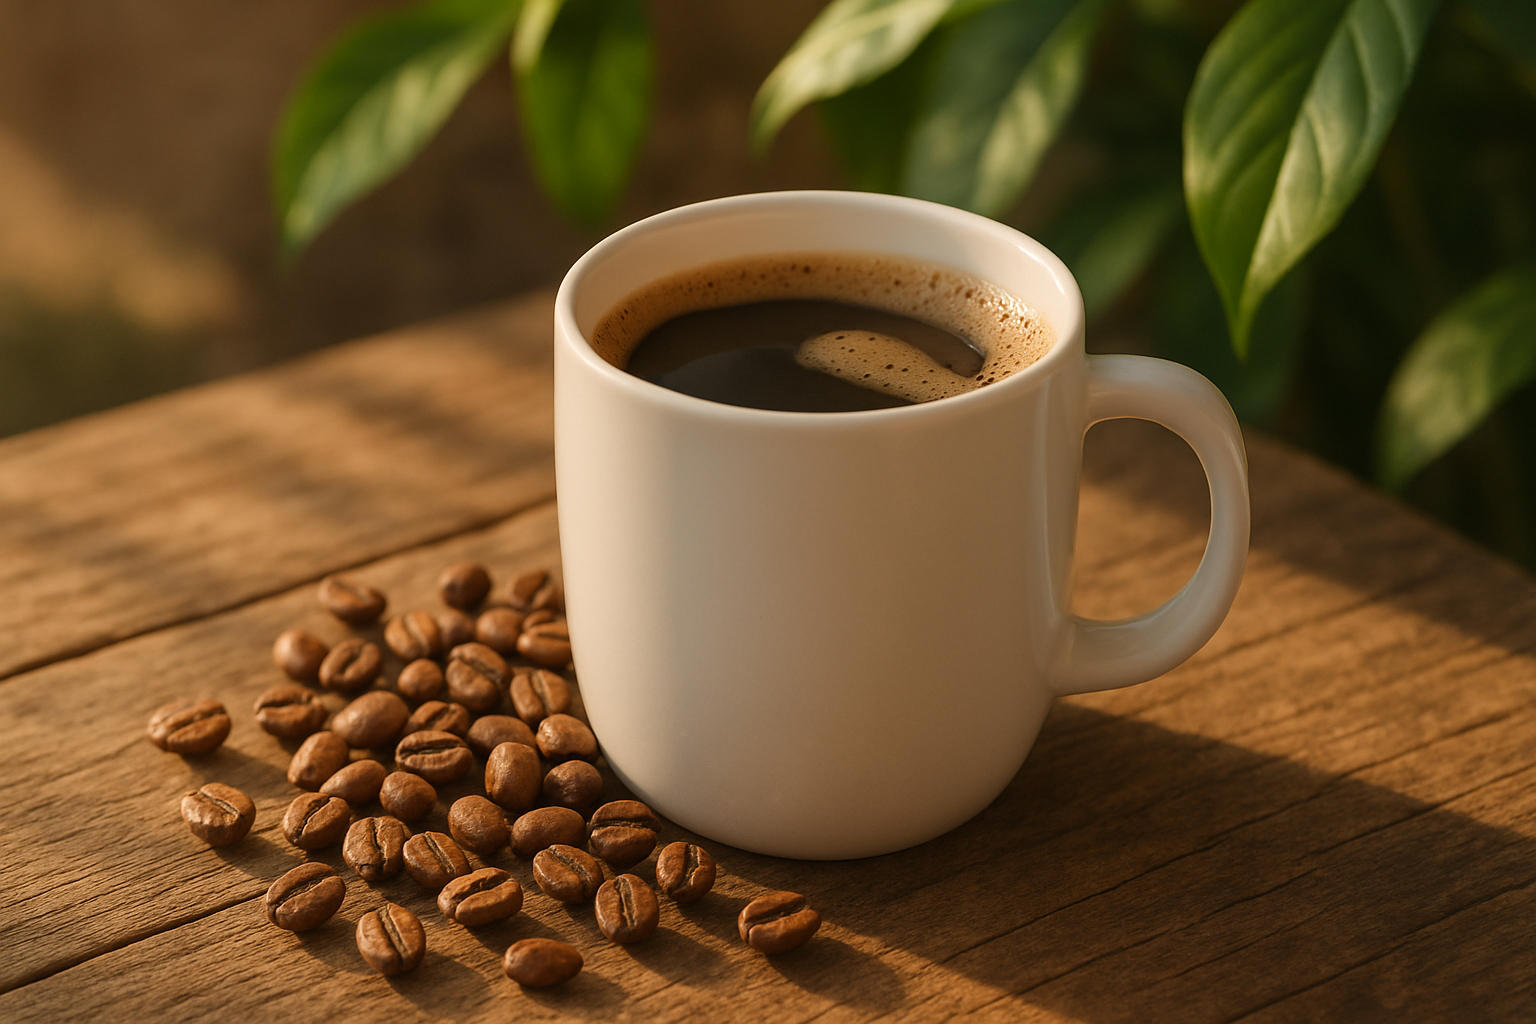
A clean, inviting cup of steaming coffee on a rustic wooden table, surrounded by fresh coffee beans and greenery, symbolizing purity and natural quality.

According to a post by Everyday Health, over 90% of commercial coffee is contaminated with mold, and most companies do not conduct third-party testing to ensure their coffee is free of harmful toxins. It means your daily cup could be exposing you to mycotoxins, dangerous compounds that can cause nausea, skin inflammation, digestive issues, chronic fatigue, and immune dysfunction.

However, coffee itself isn’t the villain. When clean, moderate coffee consumption (2-5 cups daily) has been linked to lower risks of type 2 diabetes, heart disease, and even Parkinson’s disease. That’s why searching for nontoxic coffee has become increasingly crucial for health-conscious consumers. The cleanest coffee brands prioritize strict quality controls, with specialty-grade coffees (scoring 80+ points) significantly reducing your exposure to harmful toxins. 

If you’re wondering what mold-free coffee is or whether coffee without mold is worth the investment, this guide will help you understand the crucial differences and why they matter for your health. Plus, this guide will show you some affordable mold-free coffee options that don’t compromise quality.

What Is Mold-Free Coffee and Why Does It Matter

A clean, artisan-style cup of coffee on a wooden surface, surrounded by handpicked coffee beans and greenery, symbolizing mold-free, high-quality processing and natural health benefits.

Mold-free coffee represents a growing segment in the specialty coffee market, addressing concerns about harmful compounds found in conventionally processed beans. Understanding what makes coffee truly “clean” requires looking at how coffee beans are harvested, processed, and tested before reaching your cup.

1. Definition of mold-free and mycotoxin-free coffee

Mold-free coffee beans refer to beans that have been carefully processed to prevent or eliminate the growth of fungi that produce harmful compounds called mycotoxins. These toxins develop when coffee beans are improperly handled during harvesting, processing, or storage. The most common mycotoxin in coffee is ochratoxin-A, which can develop over time if beans aren’t regularly tested and properly stored.

As highlighted in Gurl Gone Green, mold-free coffee goes beyond the absence of visible mold, and it’s about ensuring that beans contain minimal or undetectable levels of harmful mycotoxins. Research cited in the article reveals that 26.6% to 45% of commercially tested coffee brands contained mycotoxins. While roasting can reduce ochratoxin A levels by up to 96%, many health-conscious consumers still opt for specifically tested coffee certified as mold-free.

It’s important to note that organic certification alone doesn’t guarantee freedom from mold. Even organically grown coffee can harbor mycotoxins if poorly processed or stored. It explains why some companies now go beyond organic to include specific testing for mold and mycotoxins.

2. Why clean coffee is gaining popularity

The rise in popularity of mold-free coffee stems primarily from increasing awareness about the potential health implications of mycotoxin consumption. Short-term exposure to mycotoxins may cause gastrointestinal discomfort, headaches, dizziness, and unexplained fatigue. More concerning are the potential long-term effects, which, according to some sources, may include the following:

  • Immune system suppression
  • Chronic inflammatory responses
  • Neurological symptoms
  • Potential links to serious diseases

Specialty coffee standards evolved 20-30 years ago, prioritizing quality control throughout the supply chain. Nearly 99% of specialty-grade coffee (scoring above 80/100) is mold-free, offering clearer flavor profiles. Leading brands now submit products for laboratory testing to verify the absence of harmful mycotoxins, building consumer trust.

Look beyond organic certification to processing methods and quality grade for mold-free coffee. Proper harvesting, swift drying, and moisture monitoring reduce mold risk. Unlike commodity coffees traded on exchanges, specialty coffee companies employ trained Q Graders who detect defects, ensuring better quality and safety despite higher prices.

How Mold and Mycotoxins Get Into Regular Coffee

Coffee’s journey from farm to cup offers numerous opportunities for mold contamination. Understanding these vulnerable points helps explain why finding truly mold-free coffee requires careful attention to quality and processing methods.

1. Harvesting and storage issues

The contamination of coffee begins at the farm level. Coffee cherries that remain in contact with the soil for extended periods readily become contaminated with microorganisms, including mold-producing fungi. Fallen coffee fruits are particularly susceptible, especially in humid conditions where the soil remains moist despite seasonal changes.

As highlighted in Mayorca Coffee’s blog, improper drying techniques significantly cause mold development in coffee beans. Moisture levels above 13%, especially those exceeding 18%, can promote mold growth, such as Rhizopus and Aspergillus, or lead to wet rot caused by yeasts and bacteria. To avoid this, coffee beans must ideally have less than 11% moisture content.

The timing of harvest significantly affects contamination risk. Coffee cherries harvested prematurely due to shortages or weather concerns create ideal conditions for mold growth because of their lack of maturity. Additionally, shade-grown coffee often retains moisture longer, creating favorable conditions for fungal growth unless properly managed with sufficient air circulation and ultraviolet light exposure.

2. Commodity vs. specialty-grade coffee

The distinction between commodity and specialty-grade coffee dramatically influences mold exposure risk. Commodity coffees, typically cheap blends, instant coffees, and bulk food service products, face substantially higher contamination risks. These lower-grade coffees often come from farms where economic pressures result in less rigorous quality controls throughout the production chain.

Specialty-grade coffee (scoring above 80 points on quality scales) undergoes stricter quality assessment protocols that explicitly exclude mold-contaminated beans. While almost all specialty-grade, fresh-crop washed coffees can be considered mold-free coffee beans, commodity coffees typically lack similar protections, making them more susceptible to mycotoxin risks.

Economic factors play a crucial role in this quality divide. One source explains: “When farmers are chronically underpaid, they have no incentive to care whether the coffee they sell is underripe, overripe, moldy or not.” This economic reality translates directly into quality and safety differences between commodity and specialty coffees.

3. Impact of climate and transport conditions

Environmental conditions significantly impact mold development, with mycotoxin-producing fungi thriving between 22-30°C and 70-90% humidity. Climate change threatens to increase aflatoxin-producing Aspergillus species that prefer higher temperatures, while reducing less heat-tolerant Penicillium species, altering the fungi diversity affecting coffee crops.

Transportation in permeable burlap bags and improper storage conditions increase contamination risk, especially in humid coffee-growing regions. Commodity coffee remains particularly vulnerable throughout this supply chain compared to specialty-grade alternatives. Identifying mold-free coffee requires understanding these fundamental production differences and seeking properly handled beans.

Health Risks of Mold in Coffee

The potential health effects of mycotoxins in your coffee cup extend beyond simple quality concerns. Consuming these toxic compounds produced by mold can impact your well-being in various ways, ranging from mild discomfort to more serious long-term health issues.

1. Short-term symptoms: fatigue, GI issues, inflammation

Drinking coffee contaminated with mycotoxins may trigger immediate or short-term health effects that you might mistakenly attribute to other causes. Initially, these symptoms can include gastrointestinal discomfort such as nausea, vomiting, diarrhea, and abdominal pain. Many people experience unexplained fatigue, brain fog, headaches, or difficulty concentrating after consuming moldy coffee.

Respiratory issues represent another typical reaction, manifesting as coughing, sneezing, or running nose. Moreover, some individuals report skin-related symptoms, including rashes or unexplained itchiness. These inflammatory responses typically resolve within 24-36 hours after exposure.

2. Long-term risks: immune suppression, toxicity buildup

As noted in Yahoo Lifestyle, prolonged exposure to mycotoxins, especially ochratoxin A (OTA), can pose significant health risks. OTA is classified as a potential human carcinogen by the International Agency for Research on Cancer (IARC). Chronic exposure has been linked to kidney damage and dysfunction, underscoring the importance of ensuring coffee is free from harmful levels of mycotoxins.

Furthermore, mycotoxins can suppress immune function, potentially leaving you more vulnerable to infections and illnesses. Animal studies have linked ochratoxin A toxicity to impaired immune function, kidney damage, and increased cancer risk. Aflatoxin B1, another mycotoxin sometimes found in coffee, is a known carcinogen associated with liver damage.

Long-term exposure can likewise affect neurological function, contributing to mood disorders, memory problems, and sleep disturbances. Indeed, mycotoxins may even increase intestinal permeability (“leaky gut”), which can exacerbate inflammation throughout the body.

3. Who should be most concerned?

Specific populations face higher risks from mycotoxin exposure. Individuals with existing immune system weaknesses or chronic health conditions should be particularly cautious about their coffee quality. Those with kidney or liver disease face elevated risks as these organs bear the brunt of toxin processing.

People experiencing unexplained chronic symptoms, especially those resembling mold toxicity, like persistent fatigue, cognitive difficulties, or recurring infections, might benefit significantly from mold-free coffee.

Naturally, anyone with known mold sensitivities or allergies should prioritize finding coffee without mold. Nevertheless, even for healthy individuals, reducing unnecessary toxin exposure represents a prudent health strategy, as the effects of low-level chronic exposure can accumulate over time.

How to Choose Clean Coffee Without Mold

White coffee cup with black coffee on a rustic table, surrounded by coffee beans and soft greenery in the background.

Selecting quality beans represents your first line of defense against mycotoxin exposure. Several reliable indicators can help you identify coffee without mold and make informed purchasing decisions.

1. Key certifications (USDA Organic, Specialty Grade, etc.)

Certifications serve as crucial quality markers when seeking mold-free coffee beans. First and foremost, look for USDA Organic certification, which ensures coffee is grown without synthetic pesticides or fertilizers that could compromise bean integrity. Nonetheless, organic certification alone doesn’t guarantee freedom from mold contamination.

As mentioned in Peacemaker Coffee Company, Specialty Grade certification is a key indicator of coffee quality. Coffees scoring 80+ points on quality scales are meticulously assessed for defects, ensuring that approximately 99% of specialty-grade coffee is mold and mycotoxin-free. This makes it an excellent choice for those prioritizing purity and safety in their coffee.

Other worthwhile certifications include Rainforest Alliance, which promotes sustainable environmental practices, and Bird Friendly certification, which maintains strict standards beyond organic requirements.

2. Third-party testing and transparency

Beyond certifications, third-party laboratory testing offers the most definitive assurance of purity. The cleanest coffee brands voluntarily submit their products for independent mycotoxin testing and, most importantly, make those results publicly available.

Look for companies that test for a comprehensive range of contaminants. For instance, some premium brands screen for hundreds of potential toxins, including aflatoxin, ochratoxin, mold, yeast, heavy metals, and numerous pesticides. These tests typically set regulatory limits stricter than industry standards; for example, mold should register below 1,000 colony-forming units per gram.

Before purchasing, verify that testing occurs regularly rather than as a one-time marketing claim. Companies demonstrating a genuine commitment to quality conduct batch testing and document their results.

3. Single-origin vs blends: what matters more?

Single-origin coffee typically offers superior quality control compared to blends. Like premium olive oil, coffee from a single location provides better traceability and accountability. As a result, these beans usually undergo more careful processing to preserve their distinctive characteristics.

Single-origin beans come from one specific farm or region, making quality monitoring more straightforward throughout the production chain. Therefore, these coffees typically face less risk of mold contamination than mass-produced blends that mix beans from various sources, potentially including lower-quality beans.

Even so, high-quality blends from reputable companies can maintain excellent standards using properly sourced ingredients. Many premium blends utilize carefully selected single-origin beans as their components.

Top Mold-Free Coffee Brands Worth Trying

After understanding what makes coffee truly clean, five exceptional brands deliver on the promise of mold-free beans. Whether you’re seeking premium quality or affordable mold-free coffee, these options ensure safety, flavor, and peace of mind in every cup.

Brand & ProductPriceLab TestingFlavor NotesBest For
Purity Coffee: FLOW Medium Roast$27Mold, Mycotoxins (e.g., Ochratoxin A)Smooth, balanced, freshness locked with nitrogen-flushDaily health-conscious coffee lovers
Holistic Roasters: Spree Organic Blend$20Mold, Mycotoxins, Heavy Metals (400+ toxins)Honeydew melon, bergamot, chocolateThose who love light roast, a variety of brew styles
Fabula Low Acid Coffee$30Mold, Mycotoxins, 350+ ChemicalsChocolate, caramelized sugars, and fruit undertonesSensitive stomachs, acid reflux relief
Lifeboost Espresso Ground Coffee$28Mycotoxins, Heavy Metals, 400+ toxinsBold, rich espresso with low acidityEspresso lovers, strong coffee fans
Clean Coffee Co.: Medium-Dark Roast$22Mold, Mycotoxins, 350+ chemicalsMilk chocolate, roasted almond, vanillaBalanced flavor with low acid; eco-conscious brewers

1. Purity Coffee

As noted in Sonrise Coffee Company, Purity Coffee beans contain 65% higher antioxidant levels than 46 other brands tested. This is just one of the ways Purity Coffee ensures its products stand out for quality. The company, founded by Andrew Salisbury after his wife’s health issues, rigorously tests every batch for mold and mycotoxins. Their USDA Certified Organic beans are sourced from Nicaragua, Honduras, and Colombia’s high-altitude regions. The beans also hold Rainforest Alliance certification; some varieties are Demeter biodynamic certified. Purity Coffee offers various roasts, including light-medium, medium, and dark roasts and Swiss Water Process decaf options.

Want to try it yourself? Check out this product.

Purity Coffee FLOW Medium Roast Organic Coffee

  • Lab-Tested for Mold-Free Assurance: Purity Coffee rigorously tests every batch for mold and mycotoxins like Ochratoxin A, ensuring a clean, safe brew that supports your health without compromising flavor or freshness.
  • Organic, High-Altitude Sourcing: Beans are grown organically at high altitudes where mold contamination is naturally minimized. Each batch uses specialty-grade beans, handpicked to eliminate defects and ensure mold-free Purity.
  • Nitrogen-Flushed for Long-Term Freshness: Immediately after roasting, Purity Coffee is nitrogen-flushed to remove oxygen, preventing mold growth and preserving taste, aroma, and safety throughout storage and delivery.

2. Holistic Roasters

Branded as “no compromise coffee,” Holistic Roasters (Biodynamic Coffee) offers exceptionally clean beans. Beyond standard organic practices, their coffee is Demeter-certified biodynamic, essentially “uber organic.” Based in Honduras and Brazil, these single-origin arabica beans undergo lab testing for mold, mycotoxins, heavy metals, and biological contaminants. They’re among the few brands offering raw green coffee beans for home roasting enthusiasts. At $20 for a 10.6oz bag, they provide light, medium, dark, and raw green options, plus Swiss Water Process decaf.

Explore the Spree Organic Blend from Holistic Roasters for a cleaner, smoother cup.

Spree Organic Blend  Holistic Roasters

  • Certified Biodynamic & Organic: Demeter Biodynamic and USDA Organic certified Holistic Roasters’ coffees, ensuring they are free from synthetic chemicals and grown using regenerative farming practices that enhance soil health and biodiversity.
  • Lab-Tested for Purity: Each batch undergoes rigorous third-party testing for mold, mycotoxins, heavy metals, and over 400 other toxins, guaranteeing a clean and safe cup of coffee.
  • Flavorful and Versatile: The Spree blend offers a light roast with notes of ripe honeydew melon, bergamot, and a chocolatey undertone, suitable for various brewing methods, including espresso, drip, French press, and pour-over.

3. Fabula Coffee

Born from the founders’ experience with coffee from Peru’s mountainsides, Fabula Coffee emphasizes freshness, roasting right before shipping. Their beans are 100% organic, single-origin, and lab-tested for over 350 chemical compounds, including mold and mycotoxins. Importantly, Fabula specializes in low-acid coffee, which is ideal for sensitive stomachs. They offer diverse options at $30 for 12oz ($22.50 with subscription), including light, medium, dark, espresso, and flavored varieties (vanilla, hazelnut, etc.). Swiss Water Process decaf and half-caff options are available.

You can buy this mold-free coffee on Amazon and enjoy a delicious cup at home.

Fabula Low Acid Coffee

  • Certified Mold-Free & Chemical-Free: Fabula Coffee is USDA organic and lab-tested for over 350 chemicals, ensuring each cup is mold-free, mycotoxin-free, and clean, perfect for those with sensitivities, allergies, or a health-conscious mindset.
  • Crafted for Comfort & Digestibility: With a low-acid profile and gentle roasting process, Fabula offers a smooth, flavorful experience without stomach irritation, ideal for people with acid reflux or those avoiding harsh conventional blends.
  • Altitude-Grown for Superior Flavor: Sourced from high-altitude Peruvian farms (up to 7,000 feet), these slow-ripened beans develop deep flavors and aromatic complexity, featuring rich notes of chocolate, caramelized sugars, and subtle fruit undertones.

4. Lifeboost Coffee

Founded by chiropractor Dr. Charles Livingston, Lifeboost Coffee thoroughly tests for 400+ mycotoxins, heavy metals, and pesticides. Their TrustPure process involves 15 steps from planting to shipping, ensuring mold-free coffee beans. Beans are shade-grown at elevations exceeding 5,700 feet in Nicaragua, handpicked, and sun-dried. Priced at $35 for 12oz ($25 with subscription), Lifeboost offers light, medium, dark, espresso, and numerous flavored options. Their low-acid profile makes them stomach-friendly, with pH lab testing confirming this benefit.

If you’re ready to upgrade your brew, buy Lifeboost Low Acid Coffee here.

Lifeboost Espresso Ground Coffee

  • Pure, Organic, and Ethically Crafted: Lifeboost coffee is shade-grown in Nicaragua’s mountain rainforests, hand-selected for quality, sun-dried, and spring-water washed, offering a clean, non-GMO, low-acid brew packed with naturally derived flavor and integrity.
  • Tested for Toxins, Loved by Espresso Fans: Every bag is USDA Organic and 3rd-party tested for over 400 toxins, including mycotoxins and heavy metals, making this rich, bold espresso ideal for anyone seeking mold-free coffee with uncompromising safety.
  • Slow-Grown for Bold Flavor, Not Bitterness: Grown in high-elevation shade and roasted at high temps, Lifeboost’s espresso delivers a bold taste with low acidity, perfect for those wanting a strong, dark roast that’s easy on the stomach and big on flavor.

5. Clean Coffee Co.

This Papua New Guinea blend focuses on low acidity and rigorous testing. Clean Coffee Co. tests its medium-dark roast for molds, mycotoxins, and harmful chemicals. As an affordable mold-free coffee option at $22 for 12oz, it’s designed for sensitive stomachs and features milk chocolate and roasted almonds notes. Customers appreciate the smooth, non-bitter taste and reduced acid reflux symptoms.

Give your gut a break with this low-acid coffee, a favorite among sensitive coffee lovers.

Clean Coffee Co. Low Acid Medium-Dark Roast

  • Gentle on Your Stomach, Bold on Flavor: Specially roasted to lower acidic compounds, this low-acid coffee is perfect for sensitive stomachs. It delivers a smooth, rich cup that’s satisfying and easy to enjoy every morning.
  • Clean, Lab-Tested, and Safe: Each batch is rigorously lab-tested for mold, mycotoxins, and over 350 harmful chemicals. You get a pure coffee experience that’s as safe as delicious, with no compromise on quality.
  • Eco-Friendly & Brew-Ready for Every Method: This coffee supports local communities and the planet by responsibly sourcing through sustainable farming practices. Its versatility works across French press, drip, pour-over, and cold brew for any preference.

Final Thoughts

The difference between clean and regular coffee goes far beyond marketing. Studies show nearly 90% of commercial coffee may contain mold, exposing consumers to harmful mycotoxins. These toxins are linked to digestive distress, fatigue, inflammation, and immune dysfunction. Choosing mold-free coffee beans can significantly reduce your daily toxin exposure.

Specialty-grade coffees scoring 80+ points, along with brands that offer third-party testing and clear certifications, provide greater assurance of purity. While these premium coffees often cost more, affordable mold-free coffee options are growing. Many health-conscious consumers consider the price justified, especially when symptoms improve after switching.

Ultimately, the choice depends on your health goals. If coffee triggers fatigue or digestive issues, mold-free coffee beans may offer relief. Understanding the source and testing behind your brew empowers you to make informed decisions and align your coffee habit with long-term wellness without sacrificing quality or choosing between taste and health.

Best Suede Shoe Cleaners and Kits (2025): Say Goodbye to Stains

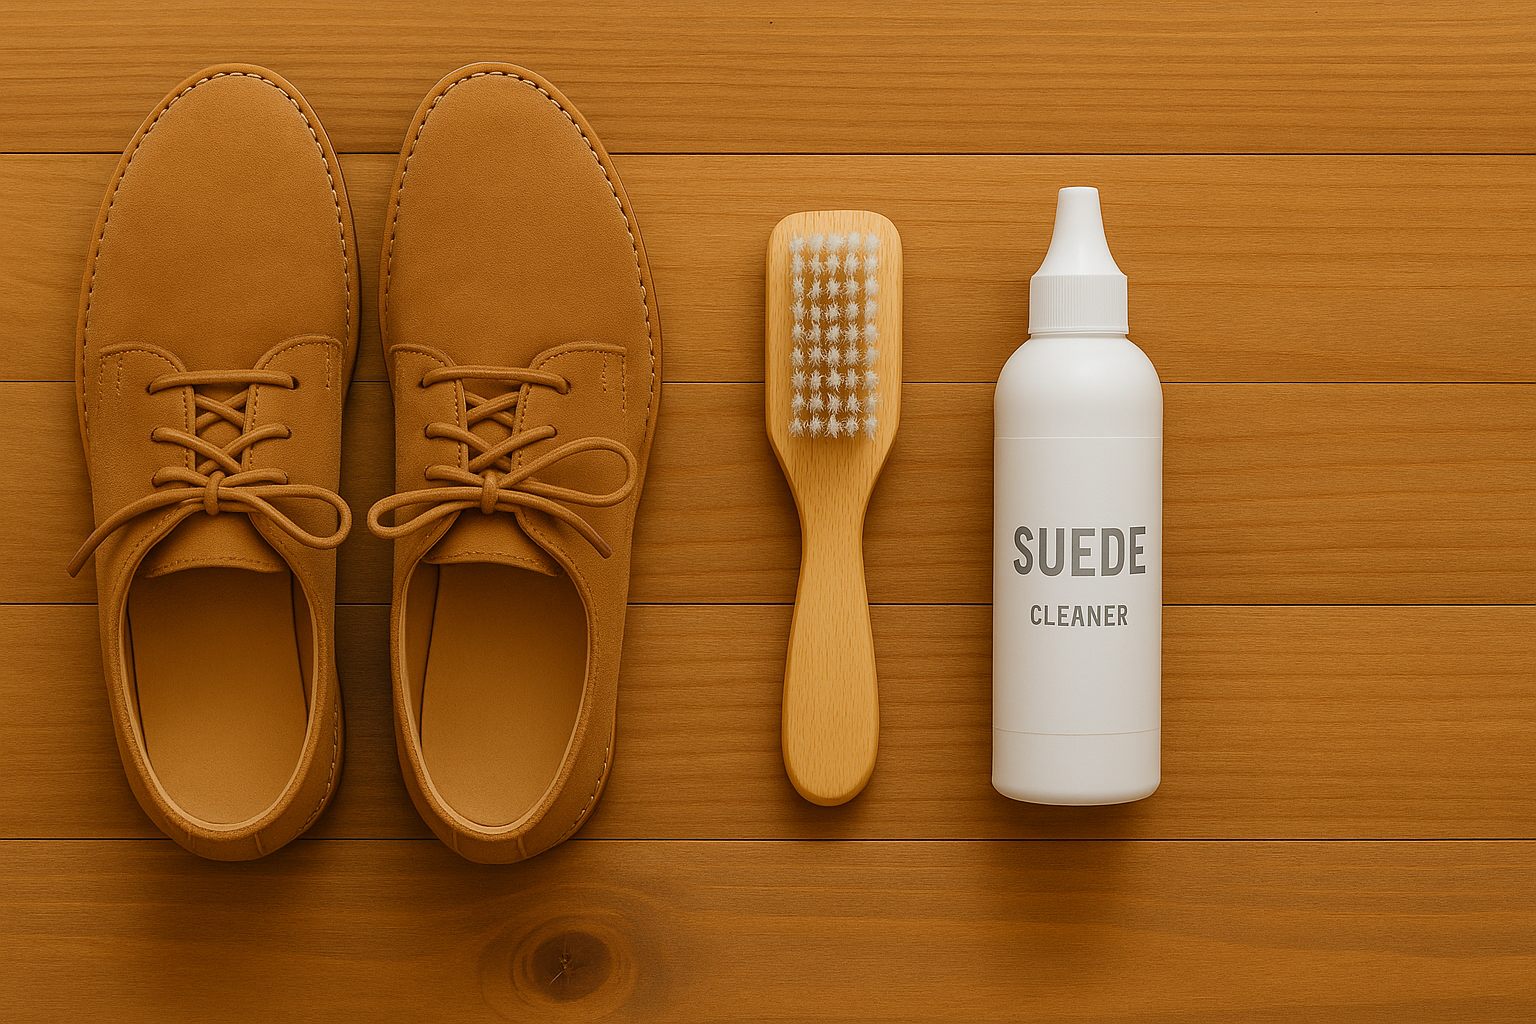
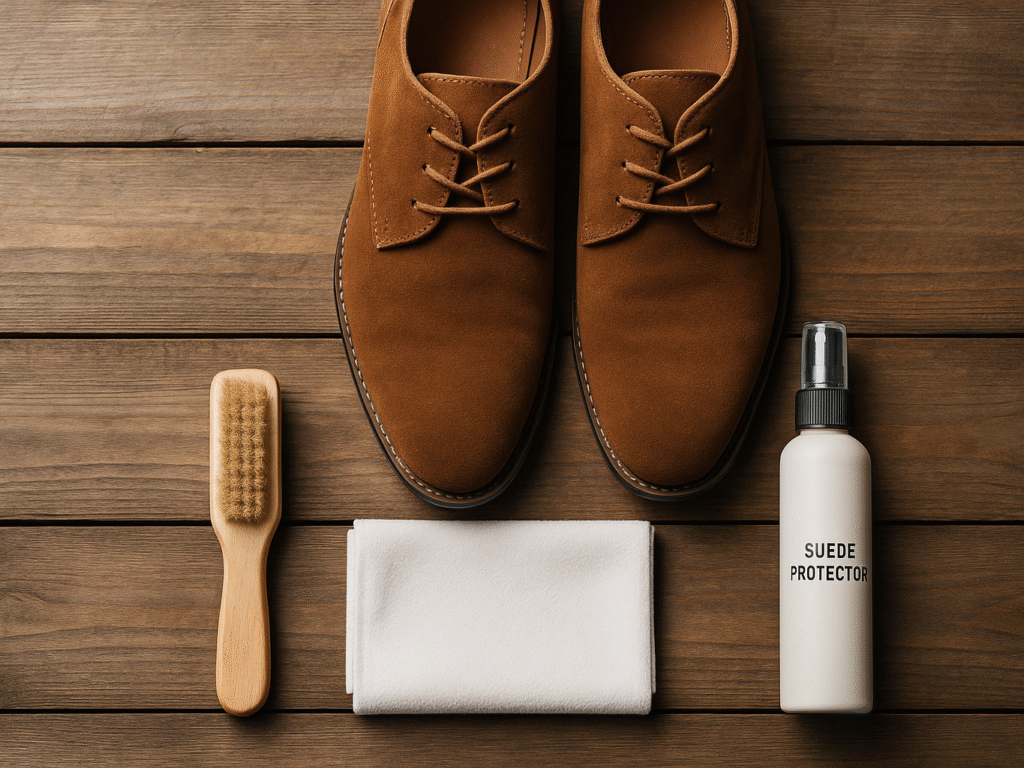
Flat-lay of suede shoes and cleaning tools on a wooden table

Suede shoe cleaners are essential for anyone with these luxurious but delicate footwear items. The material absorbs moisture easily and stains quickly, so regular maintenance becomes significant to keep your favorite pairs fresh. Regular soap or water can permanently damage the material and ruin its signature soft texture and appearance.

The best suede shoe cleaner doesn’t need to be complicated or expensive. The Pink Miracle Shoe Cleaner Kit has over 24,000 five-star ratings on Amazon, and effective cleaning solutions cost around $10. Your investment stays protected, affordable, and quick. A typical cleaning session needs only 15 minutes. This guide covers everything you need, from suede shoe cleaners to complete cleaning kits and protector combos.

Top Suede Shoe Cleaners and Kits at a Glance

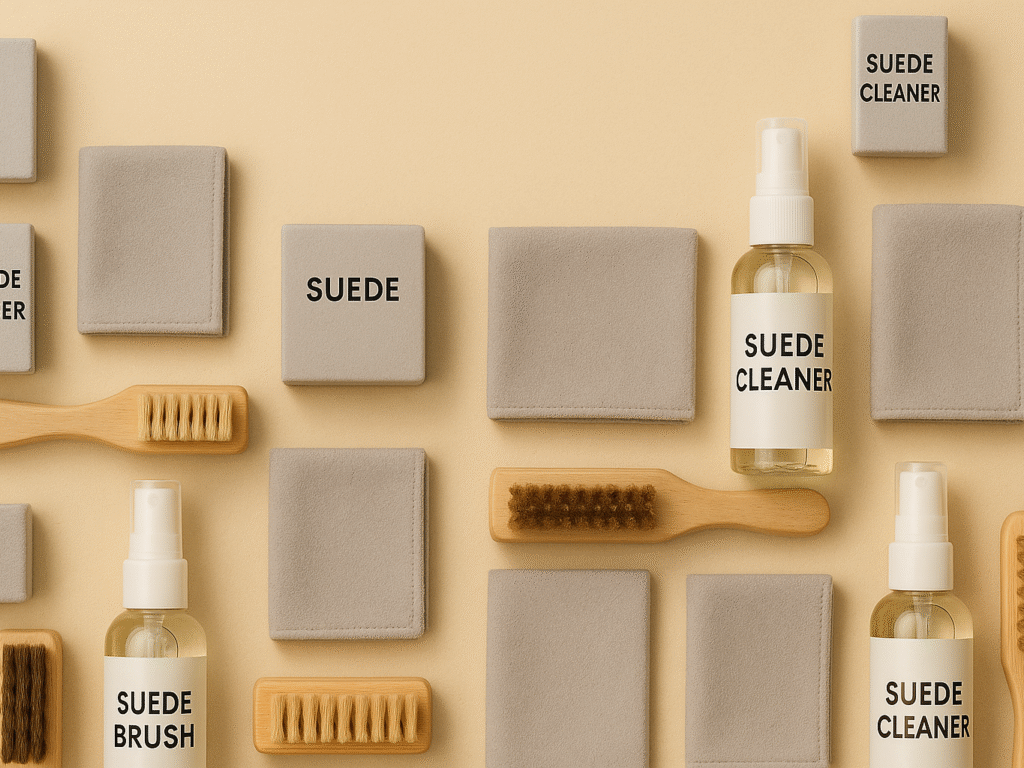
Flat lay of several suede shoe cleaner kits and bottles neatly arranged on a beige background, showing brushes, cloths, and erasers for easy comparison.

Need a reliable suede cleaner? The right product can save your favorite shoes from ruin. Here’s what stands out based on customer reviews and expert advice.

ProductBest ForFeaturesPrice
Jason Markk Suede Cleaner KitBest OverallNatural rubber eraser + Horse hair brush + Dry cleaning capability$15
Crep Protect Cure KitHeavy-duty stainsComplete cleaning solution + Specialized brush$30
KIWI Suede CleanerBudget optionSpray-on formula + Fast drying$12
Saphir Omni NettoyantDeep cleaningSuede shampoo + Gentle formula$30
Red Moose Suede KitComplete careRenewer + Water repellent + Brush + Eraser$33

Suede care focuses on dry methods, avoiding water damage. Specialists explain, “Suede is a delicate fabric that requires special care.” Top kits use soft erasers and brushes to lift dirt gently. Regular use stops damage early. Quality suede, when cared for, stays strong for years. What Makes a Good Suede Shoe Cleaner?

Picking the proper cleaning solution for suede footwear needs more thought than grabbing any product from a store shelf. Your suede shoes need special products made just for this soft material. The difference between good and bad suede cleaners can mean bringing your shoes back to life or ruining them forever.

1. Gentle but effective formula

Good suede cleaners balance gentleness with cleaning power. Suede needs special care, unlike regular leather; it needs cleaners that remove dirt without soaking or hurting the nap. Jason Markk’s premium suede cleaning products show this balance with their Ready-To-Use Foam Cleaner that delivers “a convenient and powerful clean at a moment’s notice.” The foam works well because it cleans “without oversaturating the material.”

Quality cleaners start with a dry-cleaning method. The Reshoevn8r Dry Suede Kit shows this approach well, as it’s “designed to provide an effective and gentle clean for your suede/delicate shoes.” Dry cleaning keeps suede safer than wet cleaning methods.

Stubborn stains need products with white vinegar or rubbing alcohol. These ingredients are “excellent natural disinfectants and cleaners” that remove tough marks without damaging the surface.

2. Suede-safe ingredients only

The ingredient list is a vital part of any good suede cleaner. Quality products use only ingredients that keep suede’s unique texture safe. They skip harsh chemicals that might strip color or harm the surface fibers.

Brands like Saphir use “suede-safe ingredients” that “deep clean and rejuvenate the material.” Many top brands also highlight being “PFAS-Free,” Jason Markk points out that you “don’t have to worry about breathing toxic ‘forever chemicals'” with their products.

The best formulas have these features:

  • Water-based but not oversaturating
  • Free from harsh surfactants that damage suede
  • Non-toxic and environmentally friendly
  • Specifically formulated for suede’s unique properties

Red Moose’s suede renewal solution shows this approach well, as it “works to condition and prevent dryness, cracking, and damage while preserving feel and breathability.” Quality suede care needs both cleaning and preserving.

3. Cleaner and protector combo options

Many brands now sell solutions that clean and protect together. These products give you better value and help keep suede clean longer after you treat it.

Jason Markk suggests that “for further protection, consider using a waterproofing spray, like Repel Spray,” after cleaning. Red Moose makes a solution where their “waterproofing spray creates a tough, impenetrable water barrier that not only prevents stains but also keeps out the rain and wet weather.”

These two-in-one products clean existing stains and add a water-repellent barrier. Leather Honey’s Suede & Nubuck Protector “provides a breathable layer of protection against water, dir,t and stains” while keeping the material’s natural look and feel.

4. Complete kits with brush and cloth

The best suede care comes from complete kits combining all the essential cleaning, protecting, and restoring tools. Kits like KIWI’s and Leather Honey’s include everything needed, such as brushes, erasers, sprays, and cloths, to ensure each part works together. These kits simplify suede care and deliver better long-term results than individual products alone.

Premium brushes included in kits are a key advantage. Jason Markk emphasizes starting with the right brush, like their soft hog hair brush with a walnut handle, explicitly designed for suede. Following a proper care routine, from brushing to protecting, keeps suede looking fresh, soft, and damage-free for much longer.

Best Suede Shoe Cleaners and Kits (2025)

Let’s get into the best suede care products for 2025 based on what makes them great. Here’s a look at the top cleaners and kits that match different needs and budgets.

ProductPriceTypeKey FeaturesBest For
Jason Markk Suede Cleaner Kit$15Kit (Brush + Eraser)Natural rubber eraser, Horsehair bristle brush, Dry clean without waterQuick dry spot-cleaning, restoring nap
KIWI Suede Cleaner$12Spray CleanerCleans dust and dirt, Softens suede, Great for UGG bootsBudget-friendly deep cleaning
Crep Protect Cure Kit$30Full Cleaning Kit100ml cleaning solution (98% natural), Premium brush with 17,000+ bristles, Microfiber cloth, Waterproof carry caseHeavy stains, long-term use
Otter Wax Cleaner$5–$10Spray Cleaner (Natural)Aloe vera + Vitamin C blend, Alcohol-free, Nourishes suede, No harsh chemicalsGentle cleaning and conditioning
BootRescue Wipes$10Portable Cleaning WipesNatural formula with essential oils, Quick salt stain removal, Resealable pack of 15 wipesOn-the-go cleaning, winter salt stains
Pink Miracle Cleaner$50Cleaner + ConditionerNon-toxic formula, cleans all washable materials (including suede), comes with a brush, over 30 years trusted brand.Deep cleaning premium sneakers

1. Jason Markk Suede Cleaner Kit ($15)

Jason Markk’s kit leads the pack as the best choice for suede care. This two-piece set has a natural rubber eraser and a handcrafted beech wood brush with soft horsehair bristles that work great on delicate suede surfaces.

Key features:

  • Natural rubber eraser pulls out dirt and stains
  • Horsehair bristles bring back the nap without damage
  • Perfect for dry cleaning without water

The eraser tackles tough spots while the brush brings back that soft suede texture everyone loves. People say their shoes look brand new after using them. The kit’s small size lets you clean spots right away whenever needed.

2. KIWI Suede Cleaner ($12)

KIWI gives you great results without spending too much money on suede care. The spray formula cleans dust and dirt from suede and nubuck shoes, boots, and accessories. It also softens suede and brings back its natural feel. People love how it works on UGG boots; one customer said their boots “look new again.” You’ll get the best results by using KIWI Suede Protector after cleaning.

3. Crep Protect Cure Kit ($30)

Crep Protect’s detailed cleaning solution is designed to tackle even the toughest stains, grime, and dirt on suede. It lifts away buildup carefully, helping restore your shoes’ original clean look.

What’s included:

  • 100ml ultimate cleaning solution (98% natural)
  • Premium brush with 17,000+ specialized bristles
  • Microfiber cloth
  • Waterproof carry case with built-in wash tray

One kit cleans up to 50 pairs of shoes, making it a wise long-term investment. Though sneakerheads love it, the formula works great on suede, too, with careful use. Test it on a hidden spot first, since dyed suede might bleed.

4. Otter Wax Cleaner ($5-$10)

Otter Wax’s alcohol-free formula cleans and nourishes your footwear beautifully. The spray blends aloe vera, Vitamin C, witch hazel, and castile soap to clean stains while feeding nutrients back into the material. Your suede stays healthy and crack-free, unlike with harsh chemical cleaners.

Otter Wax also sells a Cleaning Brush Set with three special brushes: a brass bristle scrub brush, a Tampico bristles cleaning brush, and a horsehair bristle buffing brush.

5. BootRescue Wipes ($10)

These convenient suede cleaning wipes are perfect for handling unexpected messes anytime. Designed for portability and quick use, they keep your suede clean and safe from stains, salt, and grime.

Standout qualities:

  • Natural formula with essential oils
  • Safe for delicate suede and nubuck
  • Resealable pack of 15 wipes
  • Quick salt stain removal

These wipes were created for harsh Canadian winters and quickly remove damaging salt stains and grime that could ruin suede permanently. The small package fits in purses or glove boxes easily.

6. Pink Miracle Cleaner ($50)

Pink Miracle has been the top choice for sneaker care since 1985 and works excellently on suede footwear. This cleaner and conditioner tackles all washable materials, including suede. The non-toxic formula removes stubborn dirt without damaging sensitive surfaces. Each bottle comes with a brush to make application easy.

Pink Miracle’s 30+ year track record speaks volumes. Users love how it handles tough stains while keeping premium materials in great shape.

How to Use Suede Shoe Cleaner Properly

The right suede shoe cleaner won’t help much if you don’t apply it correctly. Even the best cleaning products can harm your shoes when misused. Here’s how to keep your suede shoes looking great without damaging their soft texture.

1. Brush off loose dirt first

Your suede shoes need to be completely dry before you start. Wet suede makes dirt sink deeper into the material and creates harder-to-remove stains. Take a suede brush (a clean toothbrush works, too) to remove surface dirt and debris.

To get the best results:

  • Brush lightly in the direction of the suede grain
  • Use back-and-forth motions to lift flattened fibers from scuff marks
  • Press harder only on tough spots

“Using a suede brush on your shoes before applying any cleaner raises the suede, allowing you to reach every fiber,” notes suede care experts. A suede eraser can help with stubborn marks before brushing.

2. Apply cleaner gently with a brush or cloth

Now that the loose dirt is gone, it’s time to use your chosen suede cleaner. Each type needs a slightly different approach: Spray cleaners must be about 8-10 inches away from your shoes to avoid soaking them. Go for a light, even coat instead of focusing on one spot.

Foam cleansers should go on the entire surface. Scrub gently with the grain using a clean cloth or a special suede brush. Liquid cleaners work best when you dampen just the corner of a cloth with cleaner, vinegar, or rubbing alcohol. Dab the stained spots gently; too much moisture will ruin the suede.

Patience plays a vital role here. Several light applications work better than one heavy treatment. Experts suggest “massaging the shoe with a rapid side-to-side motion” after putting on a small amount of cleaner.

3. Let the shoes air dry naturally

After cleaning, your suede shoes must dry completely before you wear or treat them again. This step can make or break your shoe’s texture.

Essential drying tips:

  • Skip direct heat sources like hair dryers, radiators, or sunlight
  • Put a newspaper inside to keep the shoe’s shape while drying
  • Give them 24 hours to dry in a room with good airflow
  • Don’t wear them until they’re scorched

“Wet suede holds onto dirt and grime,” leather care specialists point out. “If you scrub wet suede, you might work the stain deeper.” Don’t worry if the suede looks flat after drying; you can fix that in the last step.

4. Use suede protector spray after cleaning

A protective spray creates a barrier against future stains and water damage. This final step removes liquids and dirt without changing how your suede looks or feels.

Get the best protection:

  • Wait until the shoes are completely dry
  • Keep the spray bottle 6-8 inches away
  • Cover the whole shoe with a light, even coat
  • Let them dry for 30 minutes to 3 hours, based on the product
  • Think about adding a second coat for extra protection

Once dry, brush with short strokes to bring back that soft, velvety texture. The core team of experts suggests this protective treatment every 3-4 weeks for suede shoes you wear often.

“Protecting your shoes is so much easier than cleaning them,” leather specialists often say. Quality suede shoe cleaner and protector combinations give your suede footwear the complete care it needs to stay in great shape.

Suede Cleaner vs Suede Shoe Cleaner Kit: Which One to Buy?

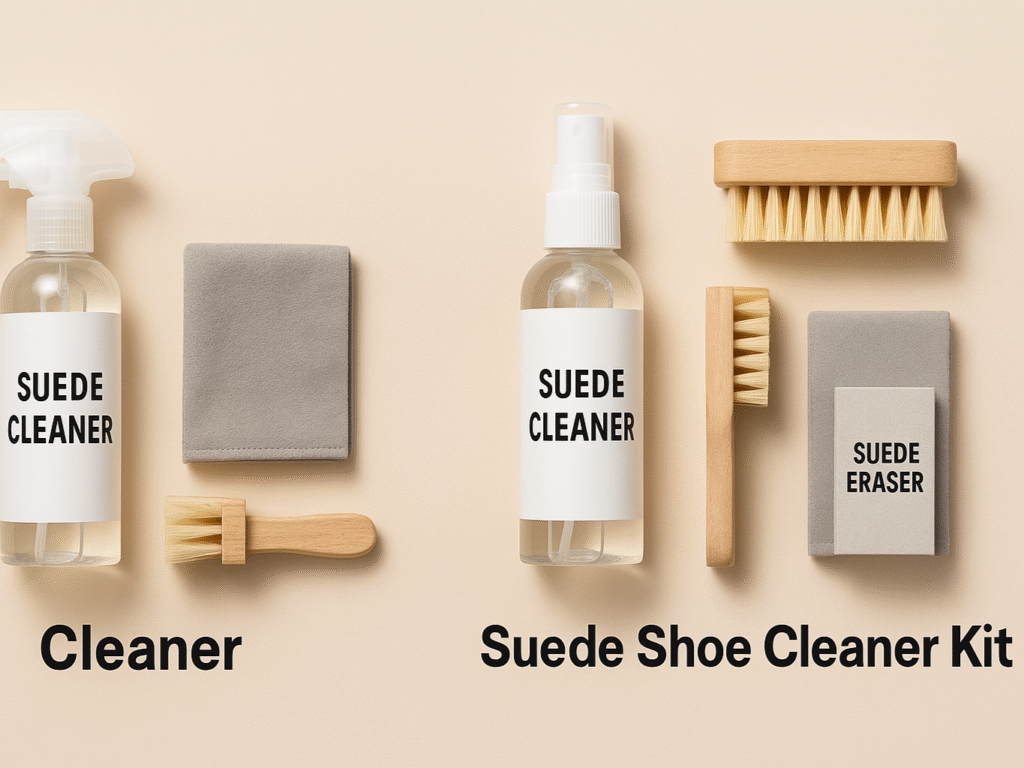
Side-by-side view of a basic suede cleaner and a full suede cleaning kit, each with labeled tools on a soft beige background.

Shopping for suede care products has two main choices: standalone cleaning solutions or detailed kits. Your specific needs and usage patterns will help you pick the right option.

A. Cleaner: Best for quick refreshes

Standalone suede cleaners provide a simple solution for minor stains and regular maintenance. However, a complete suede shoe cleaner kit often delivers better, longer-lasting results by combining cleaning, brushing, and protection in one package.

Benefits of standalone cleaners:

  • Budget-friendly original investment
  • Easy storage in small spaces
  • Great for spot-cleaning
  • Perfect if you already own suede brushes

Jason Markk Ready-to-Use Foam Cleaner stands out in this category, providing “a convenient and powerful clean at a moment’s notice.” The light, fluffy foam cleans without soaking the material, a significant factor in suede care.

Standalone cleaners work best if you wear suede shoes occasionally or need quick touch-ups between deeper cleanings. They don’t deal very well with heavily soiled shoes or complete maintenance.

B. Kit: Ideal for complete care routine

Detailed suede cleaning kits give you everything you need for proper maintenance. You’ll get cleaners, erasers, brushes, and usually protectant sprays.

Why choose a complete kit?

  • Everything you need in one purchase
  • Tools that work perfectly together
  • More value over time
  • A proper cleaning technique

Quality kits like the Jason Markk Suede Kit include “a Suede Eraser and Suede brush, for daily and weekly maintenance.” The Reshoevn8r Dry Suede Kit also has tools that work as a system, such as “use the Suede Eraser to lift the stains away, then use the Suede Brush to reset the nap of the suede.”

We started fresh with suede care kits. They give you all the right tools made specifically for delicate suede surfaces. Experts say that “choosing the appropriate cleaning brush for the task could be step number one in the cleaning process.”

When to choose a cleaner and protector combo

Products that clean and protect give you the best value for your money. These combinations clean what’s there now and prevent future stains. A suede shoe cleaner and protector combo works great, especially with regular maintenance needs. “Regular care and maintenance of your suede items with Suede Protector make them much easier to clean and care for, allowing spills and dirt to be simply cleaned away.”

Protection needs to happen “once every three months” for daily-worn items. Cleaning should happen “every two to four weeks for best results.” Using both products creates a complete care system that extends your suede footwear’s life and looks. You’ll save time and money in the long run.

Tips to Keep Suede Shoes Looking New

The best suede shoe cleaner won’t fix badly damaged footwear. Your strongest defense against stains and wear is prevention. These simple care practices will substantially extend the life of your suede shoes, and you won’t need to clean them as often.

1. Avoid water and direct heat.

Moisture is suede’s worst enemy. Water leeches natural oils from suede and can cause stiffness, weakness, and shrinkage. Quality suede has more durability than most people think, but water can ruin it by creating permanent stains.

You should always check the weather forecast before wearing suede footwear. Skip these shoes when it rains, snows, or anywhere you might encounter puddles. Quick action helps if your shoes get wet; grab a clean towel to dab the moisture and let them dry naturally.

Direct heat can harm your shoes just as much as water. Your wet suede shoes should never go near radiators or hair dryers, or sit in direct sunlight. These heat sources will damage the material and cause fading. The best approach is to stuff them with newspaper and let them dry slowly at room temperature.

2. Use cedar inserts for shape retention.

Cedar shoe trees are a great way to get proper suede care. These wooden inserts do much more than keep the shape of your shoes.

Unvarnished cedar shoe trees absorb moisture, salts, and acids from your footwear and prevent material breakdown. Natural cedar oil kills bacteria and removes odors. Cedar’s moisture absorption rate beats other woods, which makes it perfect for suede’s delicate structure.

The best results come when you put cedar shoe trees in right after removing your shoes. The leather stays warm and flexible, which helps the shoe trees smooth out creases, wrinkles, and linings.

3. Brush suede after each wear.

Regular brushing is the easiest and most effective way to maintain suede. A dedicated suede brush should touch your shoes after each wear. It removes dirt and dust before it gets deep into the material.

Brushing does two essential things: it gets rid of harmful particles and keeps the pile looking even. Gentle strokes in the direction of the grain work best. This quick habit takes seconds but means you won’t need deep cleaning as often.

Quality suede is nowhere near as delicate as people think. These consistent care habits will keep your favorite suede shoes looking luxurious for years.

Final Thoughts: Keeping Your Suede Shoes Looking Their Best

A neatly arranged flat-lay of suede shoes, suede cleaner kit with brush and spray, and a soft cloth on a wooden surface, bathed in natural light, symbolizing suede shoe care.

Quality care will extend the life of your favorite suede shoes. Many think suede demands complicated maintenance, but it’s simple with the right suede shoe cleaner. Suede needs special attention to stay luxurious. With consistent care and trusted products, your suede shoes will maintain their perfect texture and rich color for years.

Choosing a high-quality shoe cleaner kit like Jason Markk or Pink Miracle makes all the difference. Detailed kits give you essential tools to brush, clean, erase, and protect. Prevention is always easier than fixing damage later. Brushing after wear and using protector sprays helps minimize deep cleaning and keep suede looking flawless.

Suede care doesn’t have to feel like a chore. Fifteen minutes every few weeks is enough. Ready to revive your suede? Check out our recommended suede shoe cleaners and kits here! Get the best shoe cleaner kit today and make your footwear last longer in style.

How to Remove Lipstick Stains: Expert-Tested Methods That Work

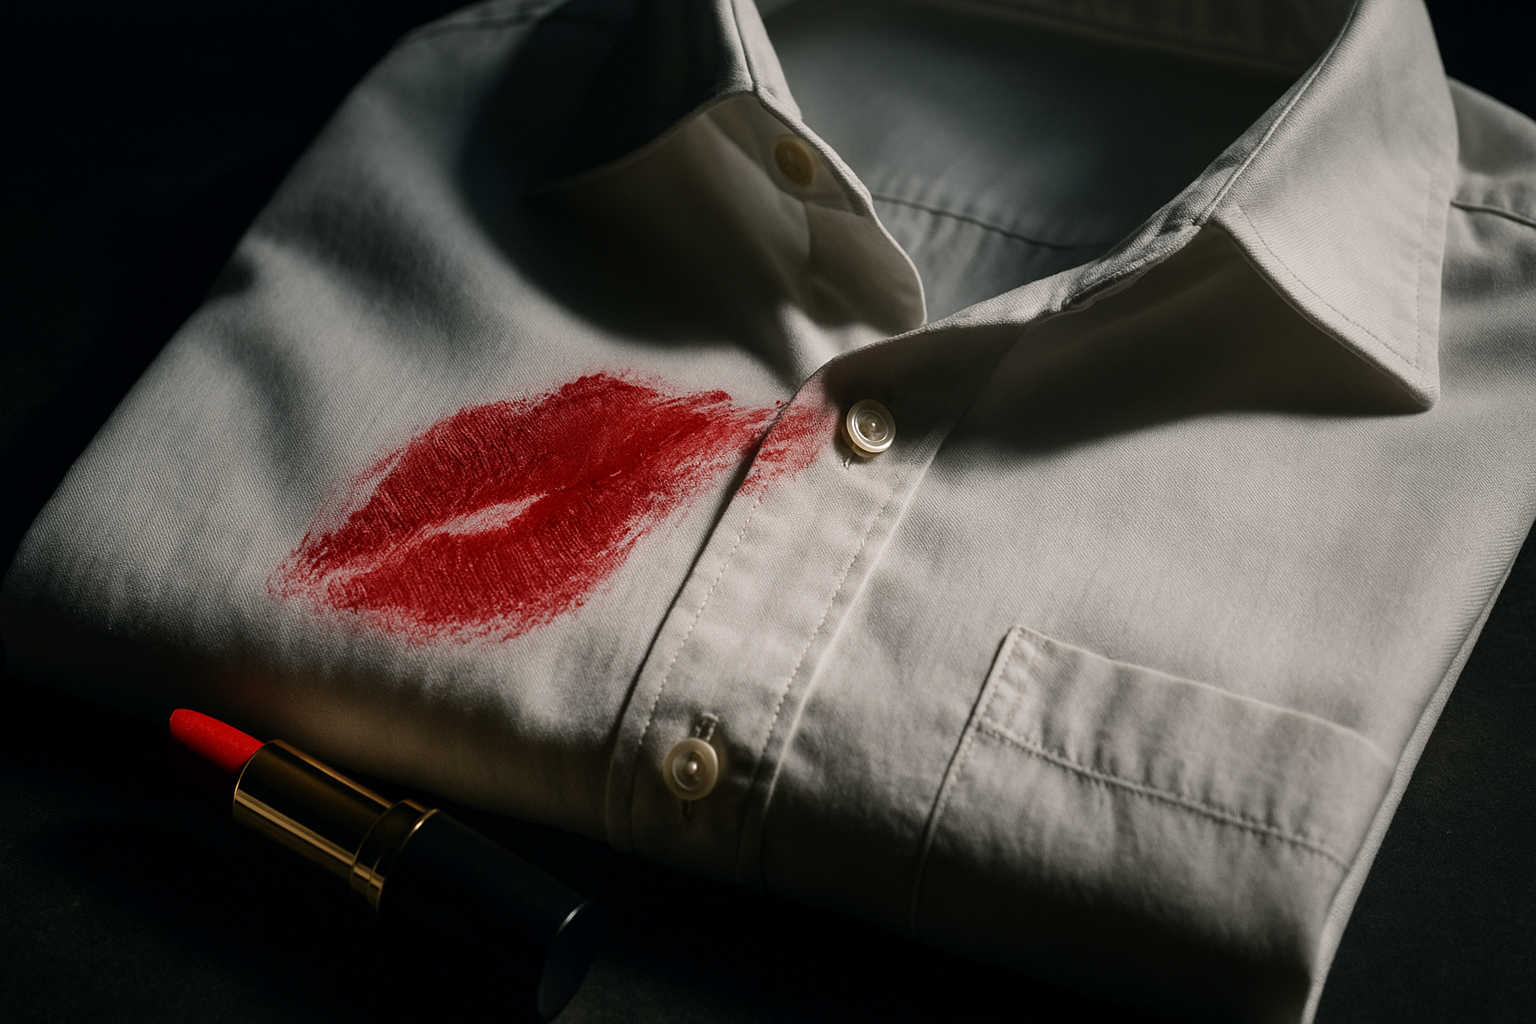
Artistic close-up of a vivid red lipstick smear across a white shirt with dramatic lighting, symbolizing a makeup mishap.

You’ve probably had that panic moment, trying to get lipstick marks off your favorite shirt after a smudge. Lipstick stains are among the most challenging to remove, as they embed colored oils and waxes deeply into fabric fibers.

These solvent-based stains mix waxes, oils, and dyes to create a tough cleaning challenge. Fresh lipstick marks are substantially easier to remove than old, set-in stains. Expert testing shows that dish soap works best to break down the greasy elements of lipstick, and soaking items overnight yields the best results. Learning the proper removal techniques can save your garments from permanent damage.

This guide walks you through proven methods to remove lipstick stains from various fabric types. Delicate materials like silk and wool need special treatment, but even dried stains can often be rescued. These expert-tested techniques will help protect your clothes and give you peace of mind.

Understand the Science Behind Lipstick Stains

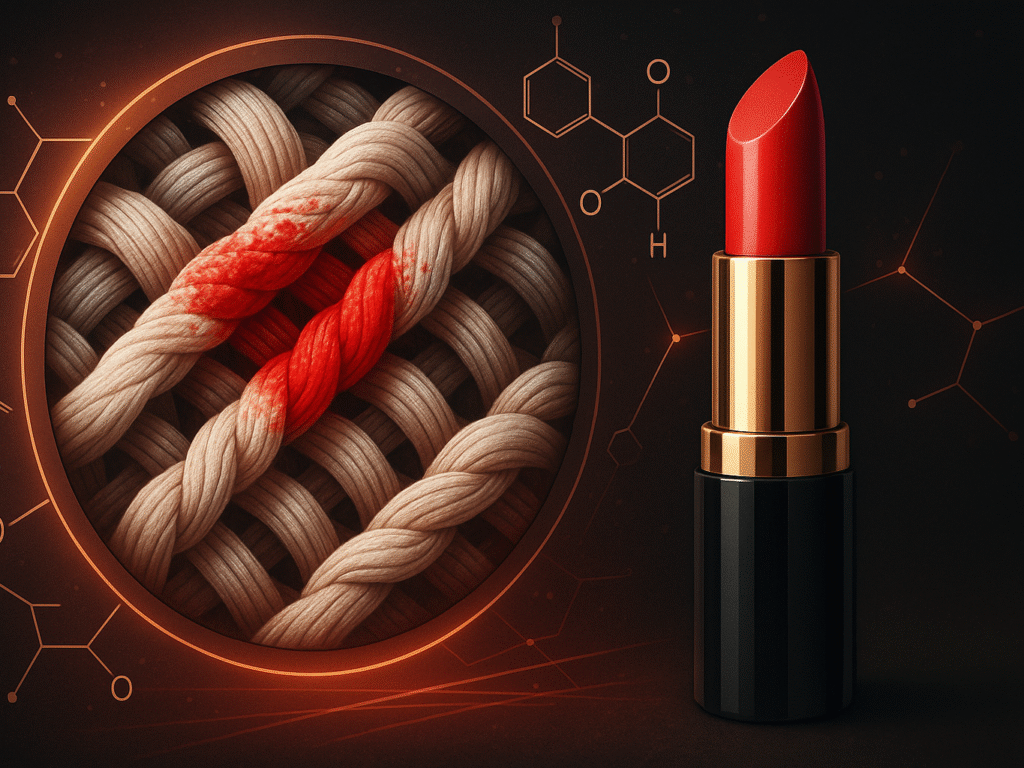
Conceptual image of red lipstick and a magnified view of fabric fibers stained with color, blending beauty and science.

Lipstick stains are challenging due to their unique chemical composition, which is comprised of oils, waxes, and pigments. Understanding this helps remove lipstick stains more effectively with the right cleaning approach for each fabric.

1. Why does lipstick stick to fabric

Your favorite lipstick is a colored stick of oil and wax that’s great for your lips but not so great for your clothes. Hayden Hill says lipsticks are “colored oil or wax” that creates two problems simultaneously. You’ll need to address both issues when a stain occurs. Even a lipstick stain that peels off can leave behind residue.

These stains are particularly challenging due to their composition. Grove.co points out that “almost all lipstick stains are solvent-based, made with waxes, oils, and dyes, which are all challenging substances when it comes to removing them from fabric.” This combination of three harsh elements makes a stain that needs special attention.

The pigments in lipstick bind to the fibers of your clothes. Tide scientist Kim Romine explains that lipstick is similar to a solid grease that acts like a glue, binding numerous colored pigments together. That’s why a regular wash won’t remove these stains.

2. Types of lipstick: matte, gloss, long-wear

Different types of lipstick leave behind distinct kinds of stains, each requiring a specific approach for removal depending on their texture, oil content, pigment levels, and how deeply they penetrate the fabric.

  • Matte lipsticks have more wax and less oil. The stains are harder to remove, but don’t spread much. Their high pigment levels create deeper stains that need extra work.
  • Cream lipsticks are oilier, leaving greasy marks that easily spread into fabric. These stains tend to spread more, but can penetrate deeper into your clothes.
  • Gloss lipsticks pack the most moisture and shine boosters. YSL Beauty mentions that glosses “can be sticky and transfer easily.” These stains spread wider but stay more on the surface, making them easier to treat with degreasers.
  • Long-wear lipsticks are the toughest to remove. NYX Cosmetics claims to provide a wash of color that lasts for hours with minimal fading. These stains resist standard cleaning methods.

Grove.co‘s tests found that matte cream, gloss, and long-wear lipsticks leave different marks on the fabric. You may need different cleaning approaches depending on the type of lipstick.

2. How fabric type affects stain removal

The material of your fabric significantly affects how lipstick stains are set and how easily they can be removed. The Spruce says, “Different fabrics react differently to lipstick stains. Delicate and porous fabrics, such as silk or chiffon, are more susceptible to absorbing the oils and pigments in lipstick, making stains more difficult to remove”. Even a lipstick stain peeling off the surface can hide deeper residue in sensitive fabrics.

Grove.co‘s tests show that dish soap works best on synthetic blends (such as polyester, nylon, and spandex), pure polyester, and cashmere. Cotton doesn’t respond as well and might keep a greasy mark.

Temperature also plays a vital role. The Spruce notes, “Hot water liquifies oils, fats, and waxes, releasing them from the fibers more easily.” Use water as hot as the fabric can tolerate, but avoid damaging your clothes.

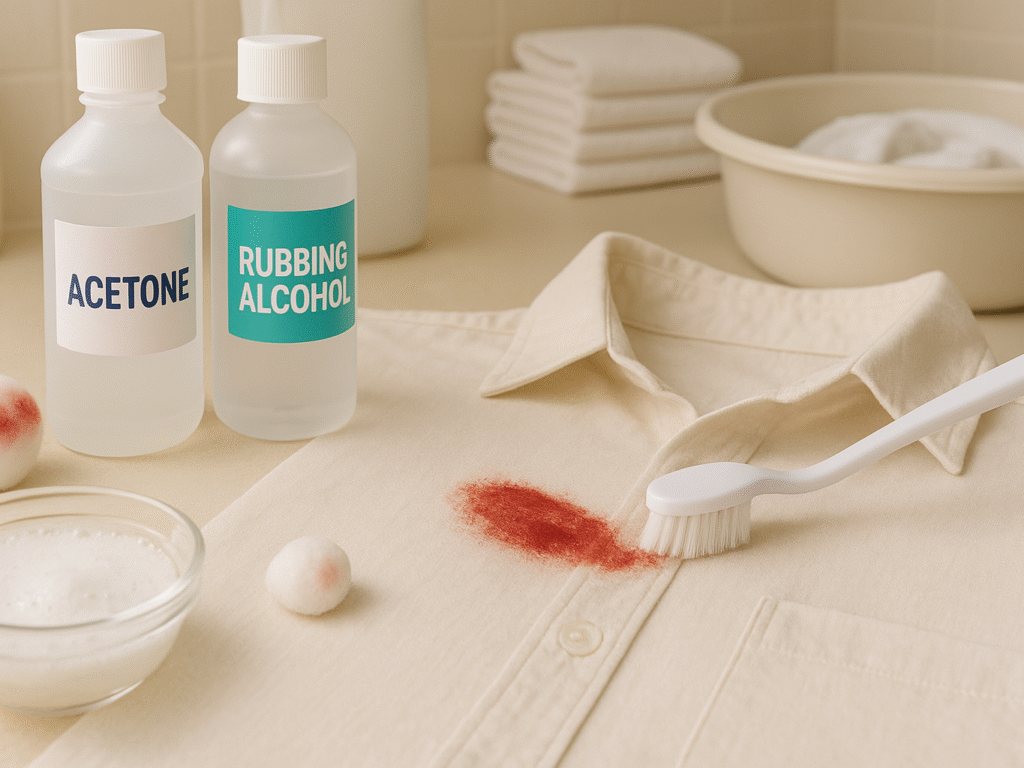
Some cleaning products can ruin certain fabrics. The Smithsonian warns that “Acetone (nail polish remover) and amyl acetate are effective in removing lipstick… However, these will dissolve cellulose triacetate fabrics (including the linings of ties) into a plastic pulp!”

Home Stuff Works suggests that identifying the stained material is the first step in removing lipstick stains. This knowledge helps you choose the proper cleaning method that is effective and safe for your clothes.

Check the Fabric Before You Start

Before removing lipstick stains from clothes, check the fabric type. Each material requires a specific cleaning method, and using the wrong approach can damage your garment irreparably.

1. How to read care labels

Care labels indicate the proper way to clean your stained clothes. Most clothes come with two tags; one shows the brand and size, while the other displays care instructions using universal laundry symbols.

These symbols tell you everything about garment care:

  • The washtub symbol indicates how to wash garments safely, including the recommended water temperature and handwashing method.
  • The square symbol indicates how to dry clothes properly, such as tumble drying, line drying, or flat drying.
  • The triangle symbol guides using bleach or other whitening products when cleaning.
  • The iron symbol indicates how to iron the garment, including the appropriate use of heat and steam.
  • The circle symbol provides instructions for dry cleaning, indicating whether it is safe or should be avoided.

The circle symbol is most important for lipstick stain removal because it indicates whether professional dry cleaning is the best option. A plain circle indicates that you should have it professionally dry-cleaned. A circle with an “X” indicates that dry cleaning will not work.

It also helps identify any “Do Not Wash” symbols (typically a crossed-out washtub). This means you cannot use water on the fabric at all. This knowledge helps you tackle lipstick stains effectively.

2. Fabrics that need dry cleaning

Some fabrics require professional cleaning when they are stained with lipstick. Dry cleaning experts advise, “Don’t attempt to remove lipstick at home on anything labeled’ dry clean only.” These items require specialized products that only professional cleaners can use to remove lipstick without damaging the fabric.

Professional cleaners should handle these fabrics:

  • Viscose (unless specifically marked washable)
  • Polyamide blends
  • Manufactured pleated items (where pleats aren’t sewn in)
  • Structured items with padding or interfacing (like blazers)
  • Suede labeled “Not Washable”
  • Leather labeled “Not Washable”
  • Fur with skin
  • Vintage fur

Silk needs special care, too. One source states, “Silk is easily damaged, so it’s best to avoid cleaning a silk blouse with harsh stain removers.” Expensive or beloved silk items with lipstick marks should be taken directly to a professional dry cleaner.

3. What not to use on delicate materials

Some treatments can permanently damage your clothes, even if they are washable at home. Never trust popular advice about using hairspray or alcohol on lipstick stains. Professional cleaners have seen too many beautiful garments ruined by attempts at removing hairspray stains.

Chlorine bleach destroys silk and wool. It breaks down natural fibers and makes fabric tear easily. Instead, use stain removers specifically designed for delicate fabrics.

Stay away from these harmful practices on delicate fabrics:

  • Using hot or warm water can set lipstick stains permanently, making them harder to remove from delicate fabrics later.
  • Rubbing stains forces lipstick deeper into the fibers, potentially damaging delicate fabrics and making stain removal much more difficult.
  • Excessive use of stain remover can weaken delicate materials, causing discoloration or fabric damage instead of helping to remove lipstick stains.
  • Applying soap directly to fresh stains can spread the lipstick further and result in stubborn marks that are difficult to remove.
  • Mixing different stain removal products can create harmful chemical reactions, which may damage or discolor delicate garments beyond repair.

Test any stain removal method on a hidden spot first. Stop immediately and consider professional cleaning if you notice any damage or color changes.

Professional cleaners offer the safest solution when you’re unsure about fabric care or dealing with stubborn lipstick stains on valuable clothes.

Best Methods for Machine-Washable Fabrics

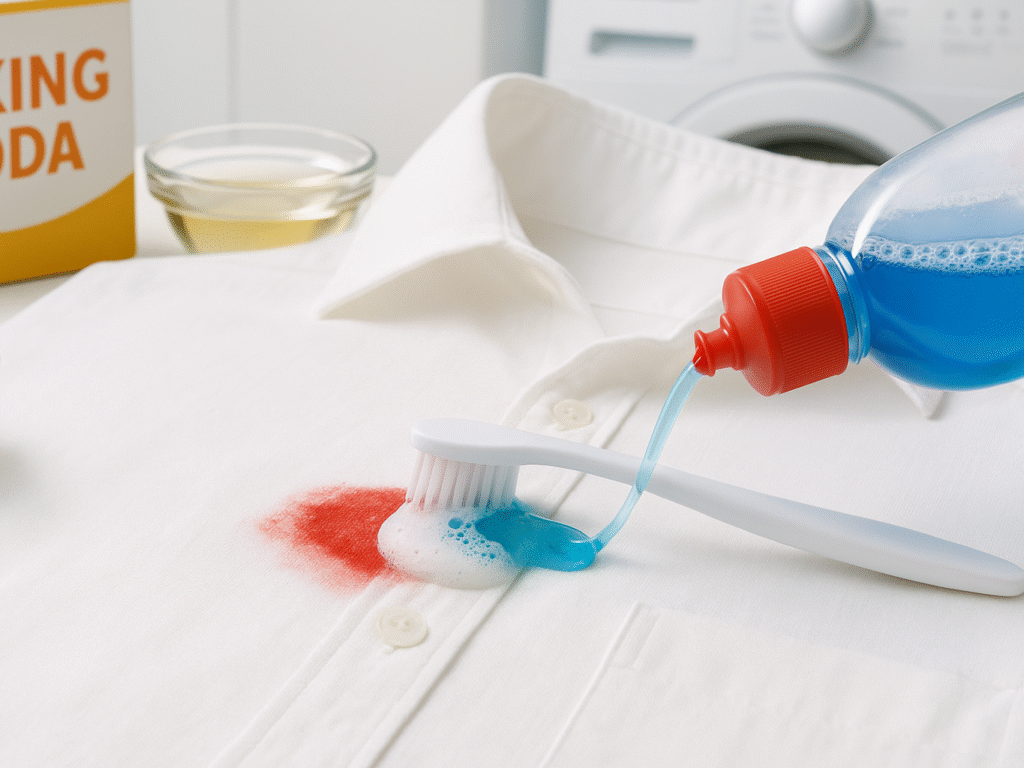
A modern editorial-style image of a red lipstick stain on a white cotton shirt being treated with dish soap, baking soda, and a toothbrush, with a washing machine and cleaning tools in the background.

After spotting machine-washable fabrics, you can remove lipstick stains from your clothing with several proven methods. Dish soap stands out as the champion among household cleaners for washable fabrics.

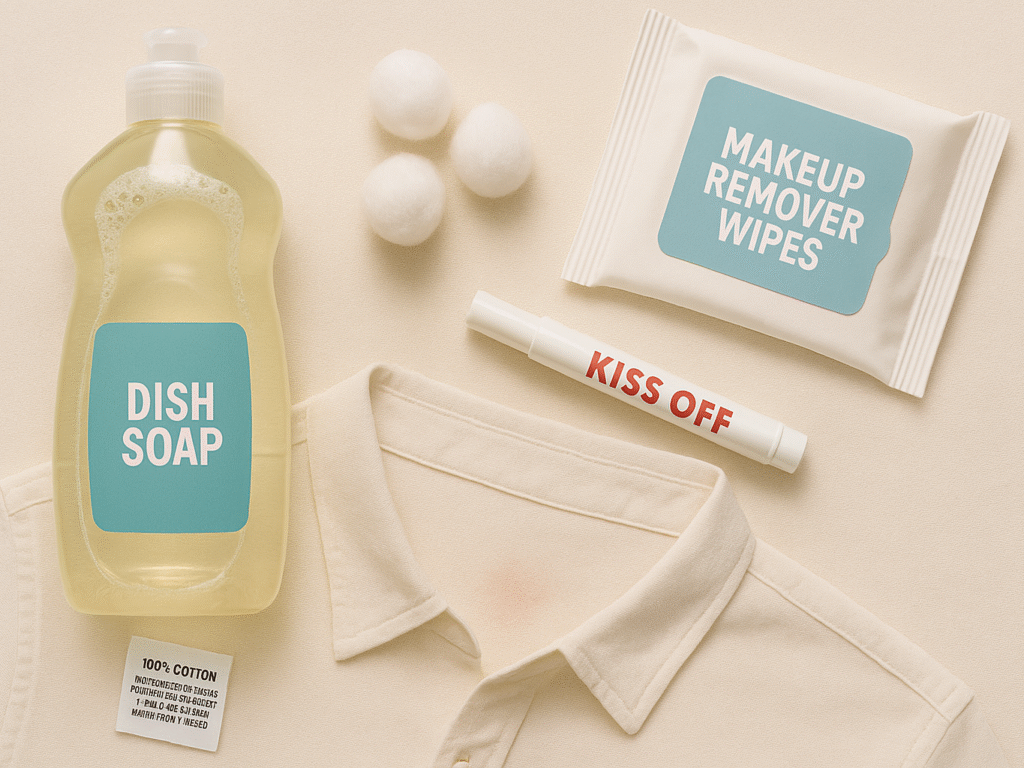
1. Using dish soap and warm water

Dish soap works remarkably well on lipstick stains due to its grease-fighting properties. Martha Stewart advises that this method works best when you tackle those stains immediately.

Here’s how to get rid of lipstick stains with dish soap:

  • Use a dull-edged knife to scrape off extra lipstick without pushing it deeper into the fabric
  • Put about one teaspoon of liquid dish soap on both sides of the stain
  • Let the soap sit for 30 minutes without touching it
  • Mix another teaspoon of dish soap with warm water in a bowl
  • Soak the garment thoroughly for at least an hour; you’ll get better results if you leave it overnight

The secret to success is giving it enough time to soak. Clothesline recommends soaking for at least 60 minutes, and Whirlpool notes that “an overnight soak is ideal for removing lipstick stains.” This long soak helps break down lipstick’s stubborn, oily, and pigmented components.

2. When to use baking soda or vinegar

Baking soda and vinegar make a powerful natural cleaning duo that can help if dish soap isn’t doing the trick.

The baking soda method is simple:

  • Apply baking soda directly to the lipstick stain to gently break down the color and oil.
  • Use a soft-bristled toothbrush to gently scrub baking soda into the fabric, avoiding damage to the delicate fibers.
  • Add three to four drops of white vinegar to activate the baking soda and help lift the lipstick stain.
  • Watch for the fizzing reaction; this chemical process helps loosen and lift the lipstick from the fabric’s surface.
  • Use a clean cotton ball to gently blot the area, absorbing the stain and cleaning mixture without rubbing.

White vinegar can also tackle lipstick stains. The Spruce suggests using a cotton ball to dab vinegar on the spot instead of rubbing it. Grove.co found that vinegar worked great on cashmere.

Rubbing alcohol offers another option. Just dab; never rub the stain with a cotton ball soaked in alcohol until the lipstick transfers over. Switch to a fresh cotton ball once it picks up too much color.

3. How to use a soft brush without damaging fabric

Your brushing technique is crucial in removing stains without damaging your clothes, regardless of your chosen cleaning solution. Martha Stewart’s method suggests using a soft-bristle brush on the stain after soaking. Remember to work from the edges toward the middle of the stain so it doesn’t spread further.

Clothesline stresses being gentle: “Avoid rubbing the stain, as this spreads the lipstick particles deeper into the fabric fibers.” Try pressing down and lifting straight up with your brush or cotton ball, rather than dragging it across the fabric.

Be sure to rinse out all cleaning products thoroughly before adding them to the washing machine. Check the care label and use the hottest water that is safe for your fabric; hot water helps dissolve oils and waxes more effectively.

Add ½ cup of baking soda to your wash load as an extra boost for white cotton items.

How to Remove Lipstick from Delicate or White Clothes

Delicate fabrics, such as silk, wool, and cashmere, require special care to remove lipstick stains without causing permanent damage. These precious textiles need gentler approaches than machine-washable materials. You must strike a balance between effective stain removal and fabric preservation.

1. Safe methods for silk, wool, and cashmere

Silk creates a unique challenge as it “is easily damaged, so it’s out of the question to clean a silk blouse with harsh stain removers.” Here’s how to safely remove lipstick stains from silk:

  • Start with transparent or masking tape, lay it over the stain, smooth it down, and quickly pull it off. Do this several times to lift surface pigment.
  • Use a makeup remover, but test it in an inconspicuous area to ensure it’s safe for the fabric.
  • Dab talcum powder or cornflour lightly on any leftover residue to help absorb oil.
  • Lastly, a dry cleaning solvent, such as K2R, is applied to a soft cloth, and then a dry spotter, such as Kleenrite, is used.

Woolmark recommends gently dabbing from the edge of the stain with a cloth soaked in white spirit or a spot-cleaning spray for wool and cashmere. Press with an absorbent cloth to absorb excess solvent before washing with a Woolmark-approved detergent.

Stubborn lipstick stains on cashmere may require just one drop of vegetable glycerine on the stain. Rub well to allow the glycerine to penetrate. Leave for about an hour. After that, wash using a “wool cycle” with reduced spinning (maximum 600 rpm).

2. How to remove lipstick stains from white clothes

Lipstick stains appear more on white garments, so they need extra care. Oxygen bleach works great for white cotton fabrics. Unlike chlorine bleach, oxygen bleach is safe for any white, colored, or print materials.”

To treat white clothing:

  • Mix oxygen-based bleach with cool water, following the package instructions to ensure the solution has the correct strength.
  • Submerge the stained white garment completely in the solution, ensuring the entire stained area is fully immersed.
  • Let the item soak for at least eight hours, giving the oxygen bleach enough time to lift the stain.
  • If the lipstick stain remains, create a fresh oxygen bleach solution and repeat the soaking process for better results.

Rubbing alcohol provides an alternative option for cleaning white items. “Moisten a clean white cloth with rubbing alcohol, blot the stain with alcohol to remove the lipstick, and rinse with water.” This method works quickly and dries fast so you won’t see any wet spots.

3. Avoiding discoloration and fabric damage

Safety comes first during any treatment. “Always test any stain removal method on an inconspicuous area of the fabric first to ensure it won’t cause harm.” This simple check prevents damage to your favorite clothes, especially when dealing with a lipstick stain on white clothes, where discoloration is more noticeable.

Additionally, it is crucial to avoid machine-drying delicate fabrics after treating stains. “Do not dry the garment in a dryer because the heat will set any remnants that may not be visible when the silk is wet.” Don’t iron until the stain is completely gone.

Very valuable items may require professional help, especially if you are unsure about removing the stain yourself or if the garment is expensive. Tell the cleaners about the lipstick stain so they can use the correct treatment methods.

Note that enzyme detergents, while great for many stains, should “not be used on protein fibers, such as silk, wool, cashmere, or angora.” These natural materials can get damaged.

How to remove lipstick stains from clothes after drying

A close-up of a dried red lipstick stain being treated with acetone and rubbing alcohol on a light-colored shirt, featuring tools like a cotton ball, soft toothbrush, and baking soda paste in a laundry room setting.

A lipstick stain you find days later might seem impossible to remove. The good news is that you can still remove dried lipstick marks with specific techniques that break down and lift these tough stains.

1. Why are dried stains more challenging to treat

Dried lipstick stains are more difficult to remove because the oils penetrate deeply into the fabric fibers. Maytag explains, “Dried lipstick is more difficult to remove from clothing as the oils have had time to set into the fabric.” When lipstick dries, its waxy parts harden, and the pigments bond tightly with the fabric.

These oil-based pigments don’t respond well to regular water-based cleaning. The stain becomes more stubborn the longer it remains, and regular washing may not be enough to remove it.

2. Step-by-step for reactivating and lifting old stains

Here’s how you can remove dried lipstick stains:

(i) Apply a Pre-Treatment

Dab nail polish remover (acetone-based) or white vinegar directly on the stain. Use a soft-bristled toothbrush to scrub the area in circular motions gently. It loosens up lipstick pigments and helps break down waxy residue.

(ii) Rinse with Rubbing Alcohol

Soak a cotton ball with rubbing alcohol and blot the stained area. You’ll notice color transferring onto the cotton. Repeat until the fabric stops releasing pigment. Alcohol is excellent at dissolving oils and cosmetic dyes.

(iii) Create a Cleaning Paste

Mix white vinegar and baking soda directly on the stain. The fizzy reaction helps lift stubborn pigments from the fibers of the fabric. Let it sit for 5–10 minutes before scrubbing gently and rinsing with cool water.

(iv) Soak Overnight

Fill a basin with warm water and add a bit of your favorite liquid detergent. Let the stained clothing soak overnight. This extended exposure helps break down lipstick components, including oils, waxes, and coloring agents.

(v) Wash Normally

Complete the process by washing the garment in the warmest water permitted by the care label. Use a strong detergent. Check the stain before drying; heat from the dryer can permanently set any leftover residue into the fabric.

Small circular dabbing motions work better than scrubbing, which can push stains deeper into the fabric. If you’re trying to remove lipstick stains from clothes after they’ve dried, this technique becomes even more crucial; scrubbing can worsen set stains. Heat from the dryer will set any remaining lipstick permanently, so avoid drying if stains are still visible.

Natural and No-Wash Lipstick Removal Options

Lipstick stains can be tricky when you can’t wash your clothes immediately. The good news? You have several no-wash solutions that can rescue your clothing in a pinch, plus some natural ways to get lipstick off your lips.

1. How to remove lipstick stains from clothes without washing

A lipstick stain emergency away from home doesn’t have to ruin your day. These quick fixes can help:

Hairspray does wonders on liquid foundation, liquid lipstick, and self-tanner. Begin by conducting a spot test to check for discoloration. Spray the stain directly and focus on the affected area. Strong-hold hairspray works best since its chemicals effectively grab makeup particles.

Makeup removers can tackle fresh lipstick stains before they set into the fabric. Just dab some oil-free, non-flammable makeup remover wipes on the stain and launder it later.

Hand sanitizer can be your unexpected hero in these situations. The alcohol in it breaks down the oils in lipstick on fabric, making it a quick and effective fix.

2. Using makeup remover wipes or vinegar

Makeup remover wipes are ideal for quickly treating lipstick stains. Grove.co‘s testing showed that vinegar ranked second most effective among lipstick stain removal methods.

Here’s the quickest way to use vinegar:

  • Apply vinegar to a small, hidden fabric area to ensure it won’t cause discoloration or weaken the material over time.
  • Pour enough plain white vinegar onto a cotton ball so that it becomes saturated, but avoid over-soaking to prevent a dripping mess.
  • Press the cotton ball on the stain using soft blotting motions; rubbing can worsen the situation by spreading the lipstick.
  • Use a cloth soaked in cool water to gently blot the area, lifting any remaining vinegar and residue from the fabric.
  • Set the fabric aside and let it air dry thoroughly; avoid using heat, as it may set in any remaining stains.

Makeup dissolver sprays can also do the trick: spray the stained spot, wait a few minutes, and then wipe it away.

3. How to remove lipstick from lips naturally

Natural oils are great at removing lipstick from lips without harsh chemicals:

Petroleum jelly (Vaseline) is impressive for stubborn lip color. Apply a small amount to your lips, wait 2-3 minutes, then gently wipe with a cotton pad. Board-certified dermatologist Joshua Zeichner explains that petroleum “dissolves the makeup and removes it as it’s wiped off.”

Coconut, olive, or almond oil can cleanse and moisturize the skin. Put 3-4 drops on your lips, let them sit for about 2 minutes while the color melts away, then clean them off.

Celebrity makeup artist Jillian Dempsey suggests mixing equal parts brown sugar, olive oil, and honey for those rigid long-wear formulas. She says, “Brown sugar provides exfoliation, while olive oil hydrates, and honey helps slide the makeup off the lips.”

Product Recommendation

Learning different ways to remove lipstick stains is helpful; specialized stain removal products make the job easier. These products are convenient and work well at different price points.

1. Budget: General Pencil Kiss Off Stain Remover ($7)

General Pencil Kiss Off Stain Remover delivers excellent results at an affordable price. This compact stick resembles a lip balm and fits perfectly in your purse or pocket. You can apply the solid formula to the stain, let it sit briefly, and then blot it away with a clean cloth.

This budget-friendly option stands out because its formula is specifically designed to target makeup stains. Many users say it works well on fresh marks and stubborn dried lipstick stains. The small size allows for precise application without wasting product on the surrounding fabric.

2. Mid Range: Stain Remover Pen On The Go Stain Remover ($24)

The Stain Remover Pen On The Go earns its mid-range price through versatility and ease of use. The pen’s precision tip delivers a stain-fighting solution exactly where you need it.

This option works well even when you can’t wash your clothes immediately. The formula breaks down lipstick’s waxy parts and holds the pigments until you can properly wash the item. The slim design fits easily into purses, desk drawers, or travel bags, allowing you to tackle stains quickly.

3. Premium: Miss Mouth’s Messy Eater Stain Remover ($37)

Miss Mouth’s Messy Eater Stain Remover is the premium choice for tough lipstick stains on your favorite clothes. The price might seem high, but this professional-grade formula proves its worth, especially with delicate fabrics that other removers might damage.

The product excels at removing dried and set-in lipstick stains. The non-toxic, biodegradable formula works without harsh chemicals that could harm your clothes or skin. It works great on white clothing, where lipstick stains show up the most, and provides professional results without the need for dry cleaning costs.

These specialized products work better than household remedies, regardless of which price point aligns with your budget.

Final Thoughts

A flat lay of various lipstick stain removal tools—including dish soap, makeup remover wipes, cotton balls, and a stain remover pen—arranged next to a care label and a shirt with a faded lipstick mark, symbolizing successful cleaning.

Lipstick stains are challenging to clean due to their complex composition of oils, waxes, and pigments. The good news is you can save your favorite clothes from these marks with the right approach. Quick action works best; fresh stains come out much easier than dried ones.

Your fabric type decides the treatment method. Check care labels first before trying any cleaning technique. Dish soap works great on machine-washable fabrics. Silk and cashmere need a gentler touch to avoid damage. Dried stains require specialized methods to break down and lift the adhered pigments.

Makeup remover wipes or hand sanitizer can help with surprise lipstick marks when you’re out. You can also stock up on budget-friendly stain removers, such as General Pencil Kiss Off, or premium ones, like Miss Mouth’s Messy Eater, to make your stain-fighting job easier.

Patience is key when removing these stains. Stubborn marks might take several tries before they disappear. Notwithstanding, your clothes can look new again if you stick to these expert-tested methods. Note that heat from dryers or irons can permanently set any leftover stain, so wait until the mark is completely gone.

The science behind lipstick stains is relatively straightforward. These proven techniques will help you handle lipstick accidents without damaging your clothes.