Lace fabric has graced our homes for centuries, bringing an elegant touch to everything from window treatments to table settings. However, this delicate material requires special care when it comes to cleaning and maintaining lace fabric. Whether you’ve inherited your grandmother’s vintage doilies or purchased modern lace curtains, understanding proper care techniques will help preserve their beauty for years to come.
The intricate patterns and delicate fibers that make lace so appealing also make it vulnerable to damage during cleaning. Many people make the mistake of treating lace like regular fabric, only to discover tears, shrinkage, or discoloration afterward. According to Ice Fabrics, “proper cleaning techniques are essential to maintain the beauty and longevity of lace,” as traditional washing methods can easily damage these delicate materials.
This guide presents four effective lace fabric cleaning methods, including hand washing, machine washing, dry cleaning, and spot cleaning. You will also learn how to revive yellowed white lace using natural solutions and oxygen bleach, and find creative ideas for repurposing old lace in your home decor.
Understanding Different Types of Lace Fabric
Not all lace is created equal. This section explores key differences between cotton, synthetic, vintage, and hand-made lace fabrics. Learn how to identify your lace type and tailor your cleaning approach to protect delicate textures, preserve antique details, and safely maintain lace in both decorative and functional home uses.
1. Cotton Lace vs. Synthetic Lace
The first step in proper lace care involves identifying your fabric type. Cotton lace, made from natural fibers, tends to be more durable but requires gentle handling to prevent shrinkage. This traditional option often appears in vintage pieces and can withstand slightly more aggressive cleaning methods than synthetic alternatives.
Synthetic laces, including polyester and nylon varieties, offer different care requirements. These modern alternatives are often more colorfast and less prone to yellowing over time. However, they can be more susceptible to heat damage and may melt if exposed to high temperatures during cleaning or ironing.
2. Vintage and Antique Lace Considerations
Vintage lace requires extra special care due to its age and potential fragility. According to Sammy D Vintage, “Hand washing is often the safest and most gentle method for cleaning delicate vintage lace items.” These pieces may have accumulated years of dust, oils, and environmental damage that make them particularly vulnerable to aggressive cleaning methods.
- Avoid wringing or twisting vintage lace when wet
- Use a soft mesh bag if machine soaking is necessary
- Test a hidden corner with water before full cleaning
Before attempting any cleaning on vintage pieces, examine the fabric carefully for signs of weakness, discoloration, or previous repairs. Some antique laces may be too fragile for any cleaning at all and should be preserved as-is rather than risked through washing.
3. Machine-Made vs. Hand-Made Lace
Machine-made lace typically features more uniform patterns and may be sturdier than hand-crafted varieties. These pieces often tolerate gentle machine washing better than their hand-made counterparts. You can usually identify machine-made lace by its consistent tension and regular pattern repetition throughout the fabric.
Hand-made lace displays unique characteristics like slight pattern variations and irregular tensions. These pieces require the most delicate handling and should almost always be hand-washed or professionally cleaned to prevent damage to the intricate handiwork.
4. Common Lace Fabric Applications in Home Decor
Lace serves various purposes in home decoration, from functional window treatments to decorative accents. Understanding how your lace is used helps determine the appropriate cleaning frequency and method. Curtains and table runners experience more wear and environmental exposure than do display doilies or occasional-use items.
- Regularly dust or gently vacuum lace window treatments to prevent buildup
- Rotate table runners and doilies to minimize uneven wear
- Store occasional-use lace items in breathable fabric bags to avoid yellowing
Different applications also affect the cleaning approach you’ll need. Items used regularly may require more frequent gentle cleanings, while display pieces might only need annual maintenance to remove dust and prevent yellowing from occurring.
How to Clean Lace Fabric: 4 Proven Methods
Lace fabric cleaning requires gentle care to maintain its delicate structure and beauty. This guide explores four effective methods: hand washing, machine washing, dry cleaning, and spot cleaning, tailored for different types of lace. Learn safe, practical steps to clean and preserve lace without causing damage.
1. Hand-Washing Method for Delicate Lace
Hand washing is the gentlest and safest way to clean delicate lace fabric, especially vintage or hand-made pieces that require extra care. This method helps preserve the lace’s intricate patterns and prevents damage caused by harsh machines or chemicals.
- Prepare the Wash Solution: Fill a clean basin or sink with lukewarm water. Add a small amount of mild detergent specifically designed for delicate fabrics, and avoid bleach or harsh chemicals that can weaken lace fibers.
- Soak the Lace: Submerge the lace item gently in the water, allowing it to soak for about 10 to 15 minutes. Avoid rubbing or scrubbing, as this can cause tears or distort the lace pattern.
- Gently Clean and Rinse: If needed, lightly press the fabric to release dirt. Drain the soapy water and refill the basin with clean, lukewarm water. Rinse the lace thoroughly until no soap residue remains, changing the water as necessary.
Lay the lace flat on a clean, dry towel. Roll the towel gently to remove excess water; never wring or twist the fabric. Then, lay the lace flat on another dry towel or a drying rack, reshaping it carefully. Avoid hanging, which can stretch delicate lace.
2. Machine-Washing Technique for Sturdy Lace
While most delicate laces call for hand washing, some modern synthetic laces are designed to withstand gentle machine washing. When handled carefully, cleaning lace fabric using a machine can save time and still protect your lace items from damage.
- Check the Care: Before using your washing machine, always verify the label’s care instructions. Some synthetic laces, like polyester or nylon blends, tolerate machine washing better than delicate cotton or vintage lace.
- Prepare the Lace for Washing: Place the lace piece inside a mesh laundry bag to prevent snagging or tangling with other garments and the machine’s agitator. This extra layer of protection reduces friction that can cause tears.
- Select the Right Cycle and Detergent: Use the shortest and gentlest cycle available, usually labeled “delicate” or “hand wash,” and set the water temperature to cold. Avoid fabric softeners, as they can leave residues that diminish the lace’s softness and brightness. Use a mild liquid detergent formulated for delicate fabrics.
- Post-Wash Care: Remove the lace item promptly once the cycle finishes to prevent wrinkles or stretching. Lay it flat to dry on a clean towel or drying rack, reshaping it carefully. Avoid tumble drying or hanging, which can distort the lace.
As ClothesLyne notes, “some modern synthetic laces are specifically designed to withstand machine washing,” but always err on the side of caution to maintain your laces’ quality and longevity.
3. Dry Cleaning Process for Vintage Pieces
For valuable vintage or antique lace, professional dry cleaning is often the safest and most effective lace fabric cleaning method. Experts in textile care understand the unique fragility and special requirements of delicate lace fabrics, something home cleaning methods may not adequately address. Dry cleaning can also help restore lace garments or items with intricate decorations that might be damaged by water or manual handling.
When selecting a dry cleaner, be sure to clearly communicate that your item is vintage or made of delicate lace. Some cleaners specialize in historic textiles and have the knowledge and tools necessary to treat these precious fabrics with extra care. It’s important to disclose any existing damage, such as tears, discoloration, or previous repairs, so that the cleaner can take appropriate precautions.
Professional dry-cleaning minimizes the risk of shrinkage, stretching, or color loss that can occur during home washing. Although it may be more costly, this option provides peace of mind and often prolongs the life of your cherished lace pieces. Always seek out reputable cleaners with experience in handling antique textiles to ensure the best results.
4. Spot Cleaning for Minor Stains and Touch-ups
When dealing with isolated stains or small areas of dirt on lace, spot cleaning is a gentle way to refresh the fabric without subjecting the whole piece to a full wash. Start by mixing a small amount of mild detergent with cool water to create a gentle cleaning solution. Using a clean, white cloth, carefully dab the stained area without rubbing, which could spread or embed the stain deeper.
- Always test your cleaning solution on a hidden part of the lace first to check for any adverse reaction.
- Work from the outside of the stain inward to prevent it from spreading further.
- Blot gently instead of rubbing to protect the delicate fibers.
- Rinse the treated area thoroughly with clean, cool water to remove detergent residue.
- Let the spot air dry completely before storing to avoid mildew or watermarks.
For grease or oil-based stains, Homes & Gardens recommends sprinkling a small amount of cornstarch onto the stain and letting it sit for about 30 minutes before cleaning. The cornstarch absorbs the grease, making the stain easier to remove with gentle washing.
How to Clean White Lace Fabric and Remove Yellowing
White lace often yellows over time, but gentle techniques can restore its brightness. This guide covers natural whitening methods, safe oxygen bleach treatments, and smart storage tips. Whether you’re refreshing vintage lace or preserving heirlooms, learn how to clean white lace fabric effectively and protect delicate white lace fabrics.
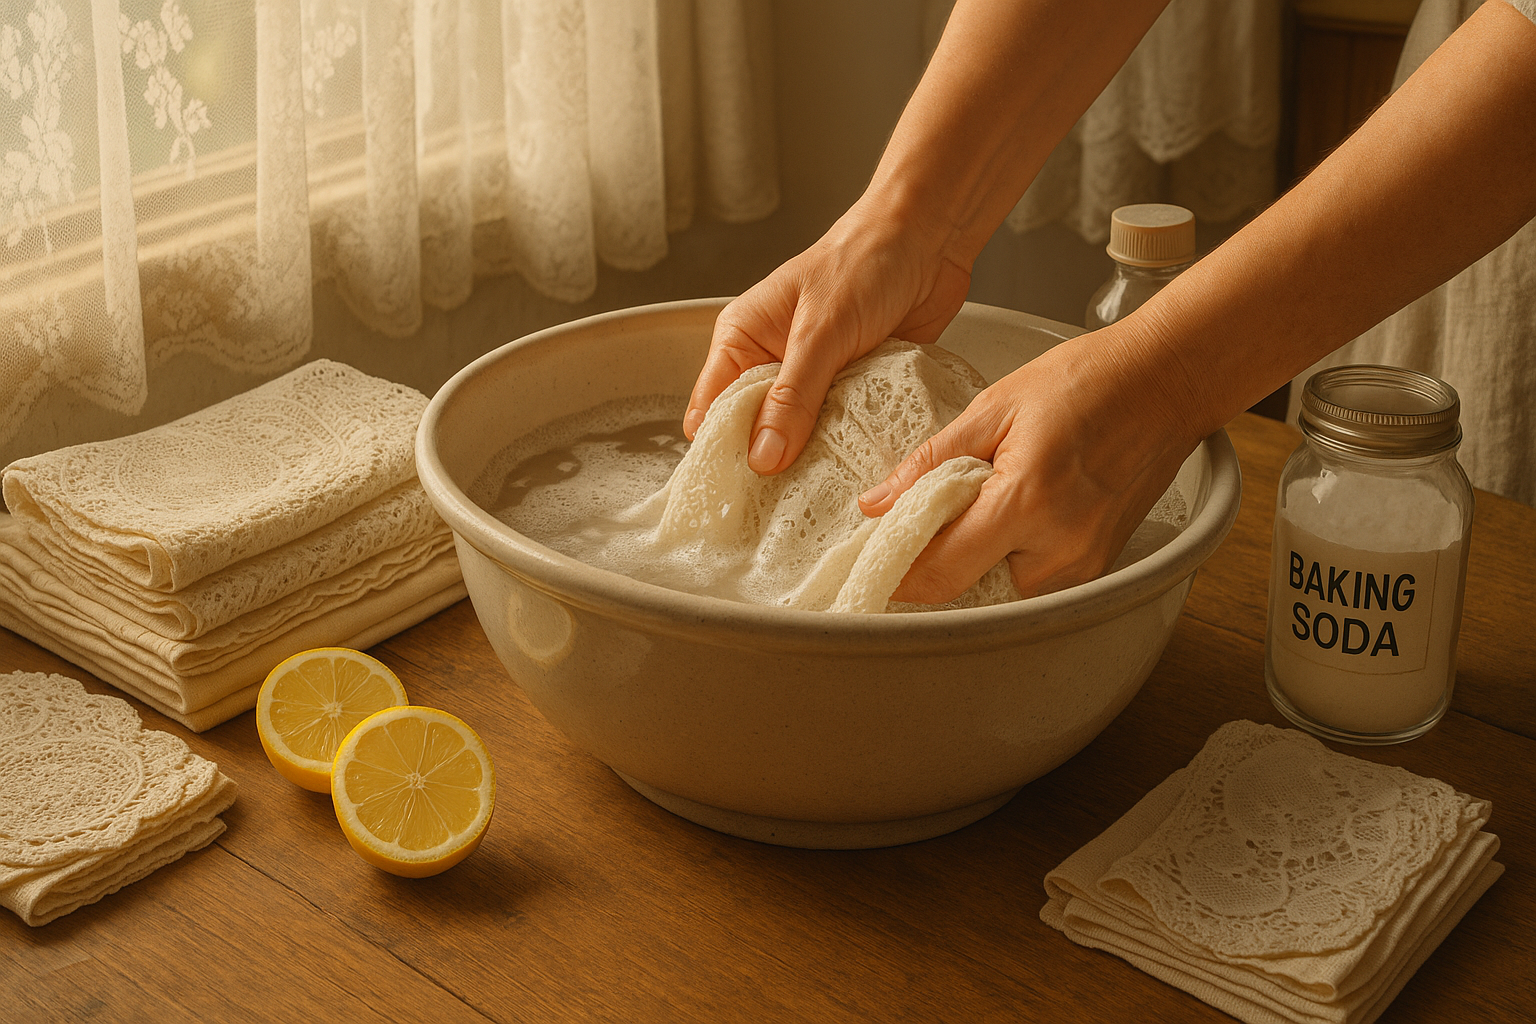
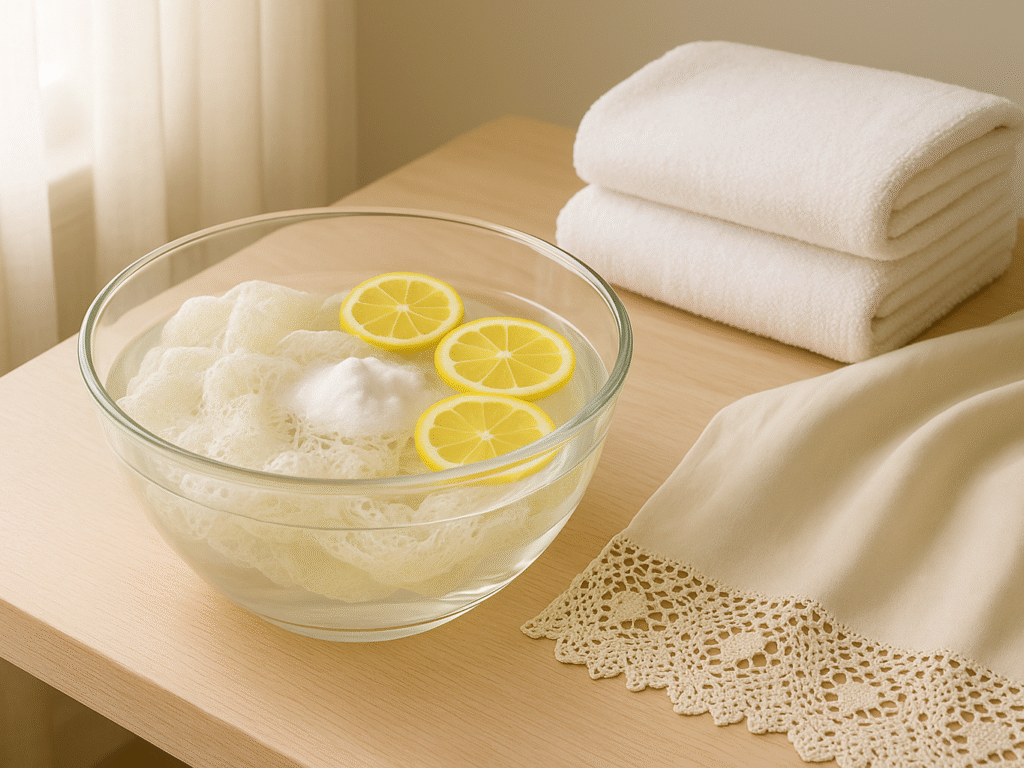
1. Natural Whitening Solutions (Lemon, Baking Soda)
White lace fabric can lose its bright, fresh look over time, often developing yellowing due to age, exposure to light, or storage conditions. Natural whitening solutions like lemon juice and baking soda offer gentle yet effective ways to restore that crisp whiteness without harsh chemicals.
a. Lemon Juice:
Lemon juice acts as a natural bleach and brightener thanks to its mild acidity. To use, mix fresh lemon juice with cool water in a basin, then soak your white lace item for 30 minutes to an hour. After soaking, rinse thoroughly with cool water and air dry away from direct sunlight to prevent further yellowing.
b. Baking Soda:
Baking soda is an excellent deodorizer and whitening agent. Create a paste by mixing baking soda with a little water, then gently apply it to yellowed areas of the lace. Let it sit for 15-20 minutes before rinsing carefully with cool water. Alternatively, add half a cup of baking soda to a basin of cool water and soak the lace for up to an hour before rinsing.
Tips for Best Results:
- Always test on a small, hidden section before applying it to the entire piece.
- Avoid hot water, which can set stains and yellowing permanently.
- Combine lemon juice and baking soda for tougher yellowing, but never mix them directly in a container to prevent fizzing; apply them sequentially instead.
Natural whitening is gentle enough for vintage or delicate white lace, making it a safe choice to brighten fabric while preserving its integrity.
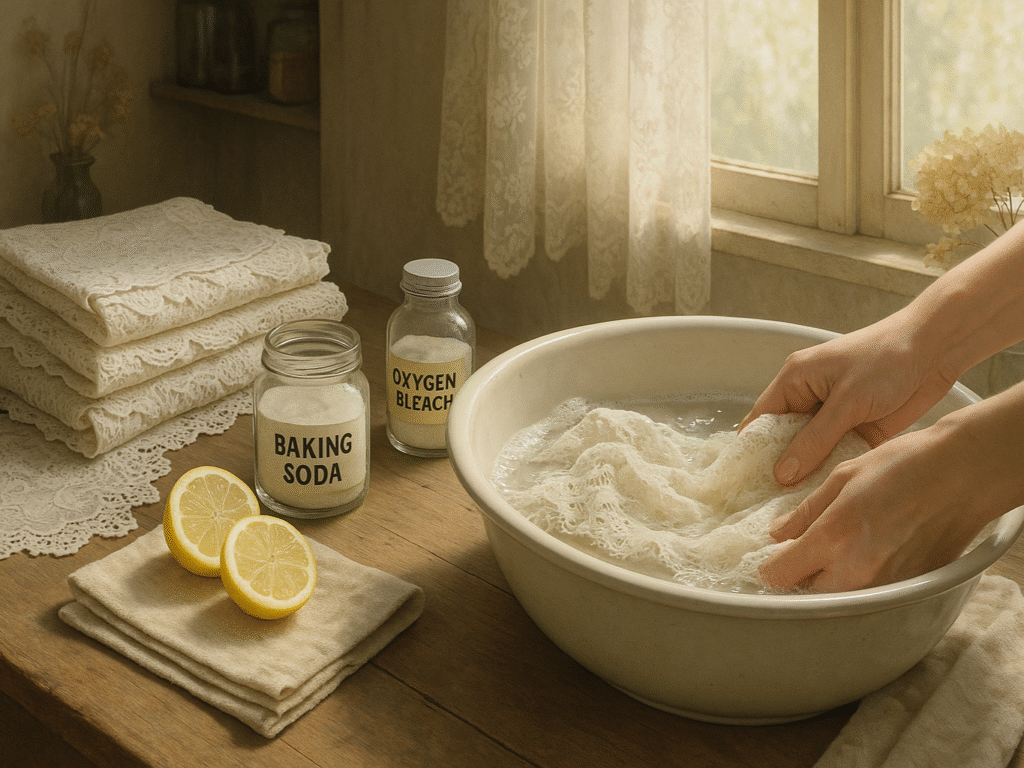
2. Oxygen Bleach Treatment for White Lace
Oxygen bleach is a safer, gentler alternative to chlorine bleach when it comes to whitening delicate lace fabrics. Unlike harsh chemicals that can weaken fibers, oxygen bleach works by breaking down stains and discoloration without damaging the fabric’s structure.
To use, mix the oxygen bleach solution according to the manufacturer’s instructions and soak your lace item for the recommended amount of time. Always test a small, hidden area first to ensure the fabric reacts well. Follow these key precautions to protect your lace:
- Always test oxygen bleach on an inconspicuous spot before full treatment
- Carefully follow dilution ratios as specified by the product
- Never mix oxygen bleach with other cleaning chemicals
- Rinse the lace thoroughly after soaking to remove all residue
When used properly, oxygen bleach brightens your white lace safely without compromising its delicate fibers. Still, handle the process with care to get the best results without any damage.
3. Preventing Future Discoloration
Prevention proves more effective than treatment when it comes to maintaining white lace. Store white lace items in acid-free tissue paper or muslin bags to prevent environmental yellowing. Keep stored items away from direct sunlight, which can accelerate discoloration and fiber degradation over time.
Regular, gentle cleaning prevents the buildup of oils and dirt that contribute to yellowing. Even infrequently used items should be cleaned annually to remove accumulated dust and environmental pollutants. According to Sammy D Vintage, you should “store your vintage lace items in a cool, dry place, away from direct sunlight and moisture.”
4. Restoring Antique White Lace Items
Antique white lace presents unique restoration challenges that may require professional expertise. Years of improper storage or environmental exposure can create complex staining patterns that resist standard cleaning methods. Sometimes, the yellowing has become part of the fabric’s character and shouldn’t be completely removed.
Before attempting restoration, research the item’s history and value. Some antique pieces may be worth professional conservation rather than home cleaning attempts. Document the item’s condition with photographs before beginning any restoration work for insurance or historical purposes.
Essential Products for Lace Fabric Care: Top 5 Recommendations
Caring for lace requires the right tools for lace fabric cleaning. This table highlights five essential products that protect, clean, and maintain delicate lace fabrics. From gentle detergents to acid-free storage solutions, these items help extend the life of your lace garments while preserving their beauty and structure.
| Product Name | Type | Suitable Lace Fabrics | Key Benefits | Safety Notes | Price | Where to Buy |
| Woolite Delicates | Gentle Detergent | Cotton, synthetic, vintage | Gentle cleaning prevents shrinkage | Avoid hot water, test on fabric first | $8 – $12 | Amazon |
| OxiClean White Revive | Oxygen Bleach | White cotton and synthetic lace | Whitens and removes yellowing | Test the hidden area, do not mix with bleach | $10 – $15 | Amazon |
| Eucalan Fine Fabric Wash | No-rinse Wash | All lace types, especially vintage | Gentle, no rinse needed, odor removal | Avoid direct heat, keep away from your eyes | $12 – $18 | Amazon |
| The Laundress Delicate Wash | Gentle Detergent | Cotton, synthetic, hand-made | Eco-friendly, protects fibers | Use cold water, test on an inconspicuous spot | $15 – $20 | Amazon |
| Grandma’s Secret Spot Cleaner | Spot Cleaner | All lace fabrics | Removes small stains without a full wash | Avoid rubbing, test first | $6 – $10 | Amazon |
Preparing Lace Fabric for Cleaning
Proper preparation is key to safely cleaning lace fabric. This section covers how to inspect for damage, pre-treat stains, sort lace types, and set up a safe cleaning environment. These steps help protect delicate fibers and ensure effective results without risking further harm to your lace items.
1. Inspecting for Damage and Weak Areas
Before beginning any cleaning process, thoroughly examine your lace item for existing damage or weak areas. Look for loose threads, small tears, or areas where the pattern appears distorted. These vulnerable spots require special attention during cleaning to prevent further damage from occurring.
Use good lighting and magnification if necessary to identify all problem areas. Mark or note the locations of damage so you can handle these areas with extra care during the lace fabric cleaning process. Sometimes, minor repairs should be completed before cleaning to prevent small problems from becoming major ones.
2. Pre-treating Stains and Discoloration
Address visible stains and discoloration before general cleaning for best results. Different stain types require different treatment approaches, so identify the stain source when possible. Food stains, makeup, or environmental spoiling each respond to different pretreatment methods and products.
- Treat fresh stains immediately before they set into the fabric
- Use appropriate stain removal techniques for different stain types
- Allow pre-treatment products adequate time to work before washing
- Test all pre-treatment products on inconspicuous areas first
Work from the outside edges of stains toward the center to prevent spreading. Blot rather than rub to avoid pushing stains deeper into the fabric structure.
3. Sorting Different Lace Types
When cleaning multiple lace items, sort them by fiber content, color, and cleaning requirements. Wash similar items together to ensure appropriate water temperature and cycle selection. Separate white items from colored ones to prevent color transfer during the cleaning process.
Consider the age and value of different pieces when grouping items for cleaning. Vintage or antique pieces should be cleaned separately from modern items to allow for more careful handling and monitoring throughout the process.
4. Creating a Safe Cleaning Environment
Set up your cleaning area to minimize risks to delicate lace items. Use clean basins, fresh towels, and an organized workspace to prevent contamination or damage during the cleaning process. Remove jewelry and ensure your hands are clean and free from lotions or oils.
Prepare all necessary supplies before beginning the lace fabric cleaning process. Having everything ready prevents the need to search for items while handling wet, vulnerable lace pieces. According to GZ Henry Textile, you should “always handle lace with clean, dry hands to prevent oil and dirt transfer.”
Drying and Storing Lace Fabric Properly
Drying and storing lace fabric correctly is vital for preserving its delicate beauty. This section explores safe air-drying techniques, careful ironing practices, and optimal long-term storage conditions. Learn how to prevent distortion, creasing, and fiber damage while ensuring your lace remains pristine for years.
1. Air Drying Techniques to Prevent Damage
Proper drying techniques are crucial for maintaining lace fabric integrity after washing. Never wring or twist wet lace, as this can permanently distort the delicate patterns and damage the fiber structure. Instead, gently press the excess water out using clean, absorbent towels before beginning the drying process.
Lay the lace item flat on a clean, dry towel placed on a flat surface away from direct sunlight or heat sources. Reshape the item to its original dimensions while still damp to prevent shrinkage or distortion. As mentioned in ClothesLyne, “air-drying is the only safe method for lace,” and you should avoid hanging or using mechanical dryers.
- Use multiple towels beneath the lace item for better water absorption
- Change towels if they become saturated during the drying process
- Avoid hanging lace items, which can cause stretching and distortion
Turn the item periodically during drying to ensure even moisture evaporation. Complete drying may take 24-48 hours, depending on humidity levels and fabric thickness.
2. Pressing and Ironing Delicate Lace
When pressing is necessary, use extreme caution to avoid damaging delicate lace fibers. Set your iron to the lowest temperature setting and test on an inconspicuous area first. According to Silver Bobbin, “your iron should be set to its lowest setting to begin with, and the steam off, then you can gradually raise the temperature to a cool-medium setting at the end.”
Place a clean towel between the iron and the lace to protect it from direct heat contact. Never leave the iron in one position for extended periods, and use quick, light movements to prevent scorching or melting synthetic fibers.
- Always use a pressing cloth between the iron and lace fabric
- Start with the coolest setting and increase the temperature gradually if needed
- Turn off the steam function to prevent water spots or excessive moisture
Consider using a fabric steamer instead of traditional ironing for better results with less risk. Steamers provide a gentler heat application and don’t require direct contact with the delicate fabric surface.
3. Long-term Storage Solutions
Proper storage prevents damage and reduces the need for frequent cleaning of lace items. Clean all lace thoroughly before storage, as soil and oils can attract insects and promote deterioration over time. Use acid-free tissue paper or muslin cloth to wrap items, avoiding plastic bags that can trap moisture.
Store folded items with acid-free tissue paper placed along fold lines to prevent permanent creasing. For valuable pieces, consider rolling them around acid-free tubes instead of folding them to eliminate crease formation. Keep stored items in cool, dry locations away from temperature fluctuations.
4. Humidity and Temperature Considerations
Maintain stable environmental conditions in storage areas to preserve the lace fabric’s condition. High humidity promotes mildew growth in natural fibers, while very low humidity can make fibers brittle and prone to breakage. Aim for relative humidity levels between 45% and 55% for optimal fabric preservation.
- Monitor storage area humidity and temperature regularly
- Use dehumidifiers or humidifiers to maintain optimal conditions
- Avoid storage in attics, basements, or other areas with extreme conditions
- Check stored items periodically for signs of deterioration or pest activity
Temperature fluctuations can cause expansion and contraction in fabric fibers, leading to structural damage over time. Maintain consistent temperatures in storage areas whenever possible.
Creative Ways to Reuse Lace Fabric Around the House

Lace isn’t just for clothing; this section explores imaginative ways to reuse lace fabric in home décor. From romantic window treatments to elegant table runners, cozy cushions, and even lampshade accents, discover how to give old lace new life while adding charm and personality to your living space.
1. Window Treatment and Curtain Ideas
Give your windows a fresh, elegant makeover with beautiful lace treatments that softly filter sunlight while preserving your privacy. You can layer delicate lace panels over existing curtains to add depth and texture or hang lace alone for a light, romantic vibe. Vintage lace tablecloths also make charming window coverings when draped on decorative rods.
For kitchen or bathroom windows, try making café curtains from leftover lace scraps. The semi-sheer quality of lace lets natural light in while keeping your space private. As Mod Podge Rocks highlights, there are plenty of “cute lace crafts for décor and gifts” that can effortlessly elevate your home’s style.
- Use tension rods for quick, no-fuss installation.
- Mix and match different lace patterns for a layered, artistic look.
- Pair lace with solid fabrics to balance texture and opacity.
- Consider your room’s lighting when choosing lace sheerness.
Get creative with how you hang your lace: softly gathered for a romantic feel or flat and streamlined for a modern touch. These simple tweaks let you tailor your window treatments perfectly to your space.
2. Table Runner and Placemat Projects
Repurpose larger lace pieces into functional table accessories that add elegance to dining experiences. Long lace panels work perfectly as table runners for special occasions or everyday use. Cut damaged lace tablecloths into individual placemats, finishing edges with careful stitching to prevent fraying.
Layer lace runners over solid tablecloths for dimensional interest, or use them alone on bare tables for minimalist elegance. Different lace patterns can coordinate with various dinnerware styles and color schemes throughout your home.
3. Decorative Pillow and Cushion Covers
Give tired throw pillows new life with lace covers that add texture and visual interest to any room. Use lace as overlay material over solid fabric backings, or create entirely lace pillow covers for lightweight, airy accessories. Vintage doilies work perfectly as decorative elements on larger pillow surfaces.
- Select lace patterns that match your home décor style.
- Choose durable lace for pillows that will be used often.
- Use pillow inserts to keep pillows in shape and provide support.
- Regularly clean lace pillow covers to avoid dirt accumulation.
According to Cozylace, there are “over 15 creative ideas about elegant and lovely lace products you can make by yourself” without significant expense or complex techniques.
4. Lampshade and Light Fixture Accents
Enhance lighting fixtures with lace accents that create beautiful light patterns throughout your room. Wrap lace around plain lampshades for instant elegance, or use structured lace pieces to create entirely new shade covers. The intricate patterns in lace cast fascinating shadows when backlit.
Small lace doilies work perfectly as pendant light covers for rustic or vintage-inspired lighting schemes. Ensure all lace applications maintain safe distances from heat sources to prevent fire hazards or fabric damage.
Repurposing Old Lace Fabric into New Home Décor
Breathe new life into old lace by turning it into chic home décor. This section explores clever upcycling ideas, from framed lace art and vintage-style coasters to embellished clothing and creative gift wraps. Discover stylish ways to showcase lace’s timeless beauty throughout your living space.
1. DIY Wall Art and Framed Displays
Transform beautiful lace pieces into stunning wall art by mounting them in decorative frames. This approach works particularly well for damaged lace items that remain visually appealing despite structural issues. Choose frames that complement both the lace pattern and your room’s décor style.
Create shadow boxes displaying collections of small lace items like doilies, handkerchiefs, or trim pieces. Layer different lace textures and patterns for visual depth and interest. According to Architecture Art Designs, “lace-making is an ancient craft” that deserves preservation and display in modern homes.
- Choose frames with suitable depth for thicker lace.
- Use acid-free backing materials to avoid discoloration.
- Position lighting to accentuate lace patterns.
- Arrange framed pieces together for gallery walls.
Experiment with different backing colors to enhance lace visibility. Dark backgrounds make white lace patterns more dramatic, while light backgrounds create subtle, elegant displays.
2. Vintage-Style Doilies and Coasters
Repurpose damaged larger lace pieces into functional smaller items like doilies and coasters. Cut around undamaged sections of the original pattern, finishing edges carefully to prevent unraveling. These smaller pieces work perfectly for protecting furniture while adding decorative touches.
Stack multiple small lace pieces to create layered coasters with interesting visual depth. Use fabric stiffeners to help maintain shape and improve durability for functional applications.
3. Clothing and Accessory Upcycling
Give plain clothing items new life with lace accents and embellishments. Add lace trim to sleeves, necklines, or hemlines for feminine touches that update basic garments. Vintage lace works particularly well for creating unique fashion accessories like headbands, belts, or decorative scarves.
- Select lace weights that match the base garment weight.
- Test wash compatibility between lace and base fabrics before application.
- Employ sewing techniques tailored for delicate materials.
- Factor in the garment’s care instructions when incorporating lace.
According to Brit + Co, “Lace isn’t just for wedding dresses and lingerie, it’s actually an awesome, stylish material that can be used to upgrade your garden, jazz up your boots, or add a little flirty femininity to a pair of denim cutoffs.”
4. Gift Wrapping and Craft Applications
Incorporate lace into creative gift wrapping for special occasions or holiday presents. Layer lace over plain wrapping paper, or use larger lace pieces as an alternative wrapping materials entirely. The delicate patterns add elegance to any gift presentation while providing reusable wrapping options.
Small lace pieces work perfectly for craft projects like greeting cards, scrapbook accents, or jewelry making. Their intricate patterns add visual interest and texture to various creative applications throughout the year.
Troubleshooting Common Lace Fabric Cleaning Problems
The lace fabric is delicate, and cleaning mishaps are common. This section covers how to fix shrinkage, stretching, tears, and lingering odors. Learn practical repair methods and when to call in professionals, ensuring your treasured lace stays beautiful, functional, and preserved for years to come through proper lace fabric cleaning.
A. Dealing with Shrinkage and Stretching
To address lace shrinkage after cleaning, gently stretch the damp item back to its original size, pinning it to a flat surface to air dry. Prevention is key: use cool water and avoid agitation. Air dry flat on a towel; do not hang or machine dry. Act quickly, stretch evenly, and consider professional help for severe shrinkage of valuable items. Support wet lace fully to prevent stretching during drying. Document original measurements before cleaning.
B. Fixing Tears and Holes in Lace
Small tears in lace can often be repaired using careful stitching techniques that follow the original pattern lines. Use a thread that matches the original fiber content and color as closely as possible. Work from the back of the fabric when possible to hide repair stitches.
For larger damaged areas, consider patching with similar lace fabric or incorporating the damage into new design elements. Sometimes, strategic trimming can remove damaged sections while maintaining the item’s functionality and appearance.
C. Removing Stubborn Odors
Persistent odors in lace items may require multiple treatment approaches beyond standard cleaning. Baking soda treatments can help absorb trapped odors, while white vinegar rinses neutralize many odor sources. Allow items to air dry thoroughly in fresh air to eliminate remaining odor traces.
- Identify odor sources to select appropriate treatment methods.
- Use multiple gentle treatments rather than aggressive single applications.
- Allow adequate time between treatments for complete evaluation.
- Consider professional cleaning for valuable items with persistent odors.
Some odors may be permanently embedded in vintage pieces and should be accepted as part of the item’s character rather than aggressively treated.
D. When to Seek Professional Help
Recognize when lace fabric cleaning problems exceed home treatment capabilities and require professional expertise. Valuable antique pieces, severely damaged items, or those with complex staining should be evaluated by textile conservation professionals before attempting home cleaning methods.
Professional cleaners have access to specialized equipment and products not available for home use. They also possess expertise in handling challenging cleaning situations that could result in permanent damage if attempted incorrectly at home.
Final Thoughts
Caring for lace demands patience and the correct techniques for each unique situation. Whether preserving family treasures or revitalizing modern pieces, understanding proper cleaning safeguards these delicate items, maintaining their beauty for future generations to appreciate and enjoy.
Success in lace care hinges on aligning your methods with the fabric’s specific requirements and state. Dedicate time to pinpoint fiber composition, evaluate any damage, and choose suitable lace fabric cleaning procedures instead of rushing. This focused care avoids costly errors and guarantees the most favorable results.
Remember that not all lace requires frequent cleaning. Often, gentle dusting and careful storage prevent the necessity for intense cleaning sessions. When cleaning becomes essential, begin with the mildest approach and only intensify if dealing with persistent issues.
Disclosure: This post may include affiliate links. I may earn a commission if you purchase through my links, at no additional cost to you.