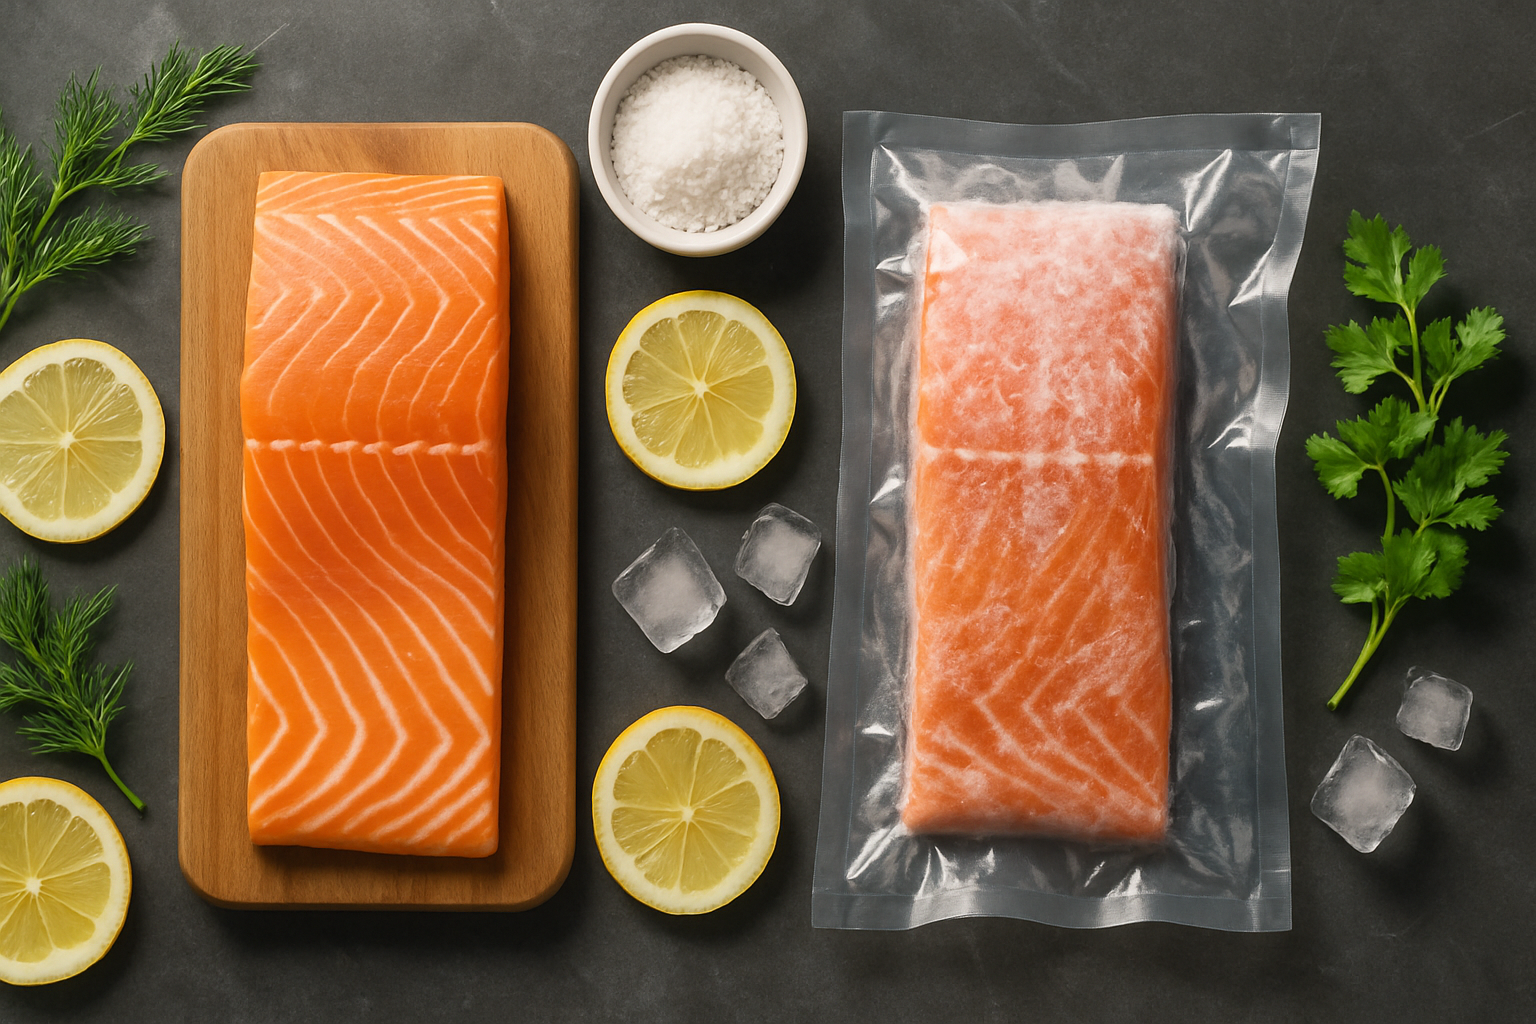
Did you know the best frozen salmon might be fresher than the “fresh” salmon at your grocery store? Surprisingly, a 2019 study found that most consumers couldn’t distinguish between fresh and frozen seafood, and many preferred frozen. It challenges everything you might believe about buying salmon. Fish quality diminishes each day it remains thawed, so flash-freezing just hours after catching preserves texture, taste, and freshness remarkably well.
According to the Wild Alaskan Company, approximately 23% of supermarket seafood is wasted, while properly stored frozen salmon lasts 9-12 months in your freezer. When comparing the best frozen salmon vs fresh, you’re faced with a choice that affects not only your wallet but also flavor and convenience. Despite common misconceptions, frozen salmon retains its nutritional content, with protein, vitamins, and minerals remaining intact after freezing.
Additionally, you can cook frozen salmon directly without thawing, using methods that take less than 30 minutes. So before you automatically reach for “fresh” salmon during your next shopping trip, let’s examine whether frozen salmon vs fresh truly deserves your money.
What ‘Fresh’ Salmon Means
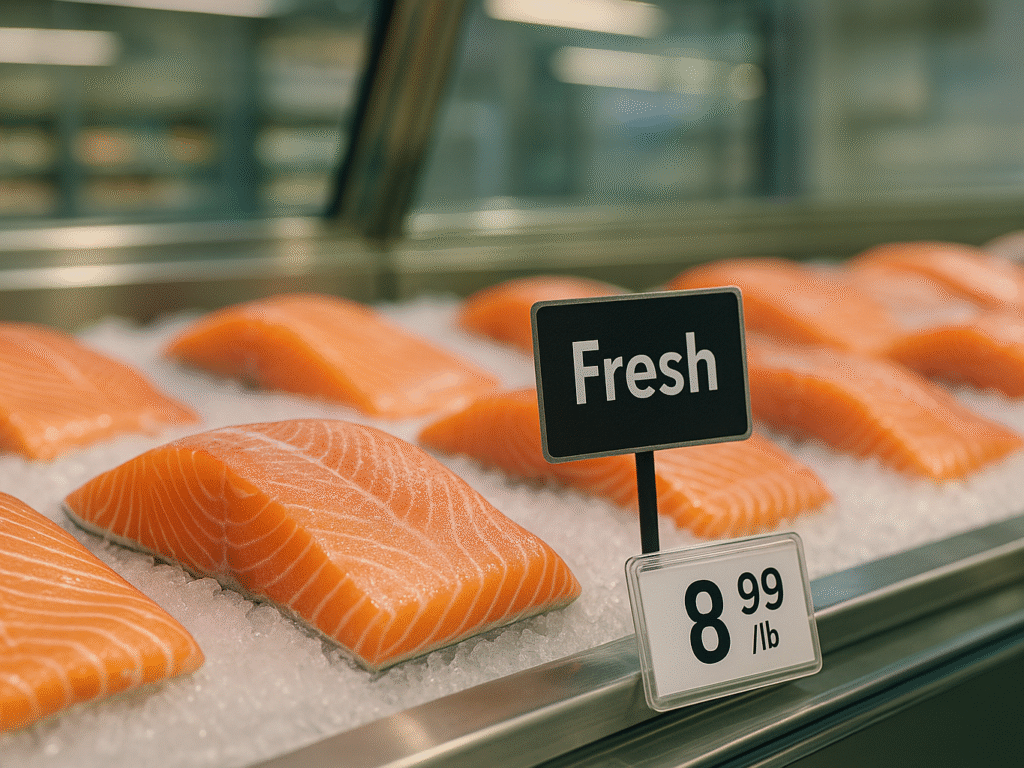
When you spot “fresh” salmon at your local grocery store, the reality might shock you. Contrary to popular belief, that glistening salmon filet in the seafood case has likely been frozen and thawed at least once, sometimes multiple times, before reaching the display case.
1. Grocery Store Salmon: Previously Frozen or Truly Fresh?
Unless you live near fishing ports or coastal areas, most “fresh” salmon at supermarkets has undergone freezing at some point. Noted by the Wild Alaskan Company, Many boats flash-freeze their catch immediately after harvesting. This frozen fish is then thawed for display, creating an illusion of freshness.
The journey from the ocean to the grocery store involves a complex supply chain. Remarkably, United States fisheries export about 70% of their salmon catch, with much of it sent to China for cheaper processing before being reimported. This circuitous route means your “fresh” salmon might have traveled thousands of miles over several weeks before reaching your local store.
2. How Long Does Fresh Salmon Stay Fresh
Truly fresh salmon has a minimal shelf life. Raw salmon remains safe for only 1-2 days in your refrigerator. Indeed, after the first day of being caught, fish begins losing quality in both taste and texture.
Once you purchase fresh salmon, the clock starts ticking immediately. Signs of spoilage include:
- Strong, ammonia-like odor
- Gray or dull coloration
- Slimy or sticky texture
- Visible mold or unusual discoloration
3. Why ‘Fresh’ Often Misleads Consumers
The term “fresh” lacks a clear regulatory definition. The Food and Drug Administration has no official standards for using this term in seafood marketing. Consequently, many retailers label previously frozen salmon as “fresh” merely for marketing purposes.
Highlighted by the Los Angeles Times, Seafood inspection is minimal; the FDA visits fish processing plants approximately once every four years. In contrast, meat processing facilities receive daily inspections. This oversight gap enables misleading practices to continue.
Several lawsuits have targeted major retailers for deceptive “fresh” and “sustainable” labeling claims. Although “fresh never frozen” exists, even these products might not have seen water recently since industry standards consider fish caught up to 10 days ago as “fresh.”
For genuinely high-quality salmon, flash-frozen varieties often preserve flavor and nutrients better than misleadingly labeled “fresh” options.
Flash-Frozen Salmon: How It Preserves Quality
Flash-freezing technology has completely changed how salmon is served on your dinner plate. Unlike conventional freezing methods, flash-frozen salmon undergoes an intense cooling process that preserves its quality remarkably well.
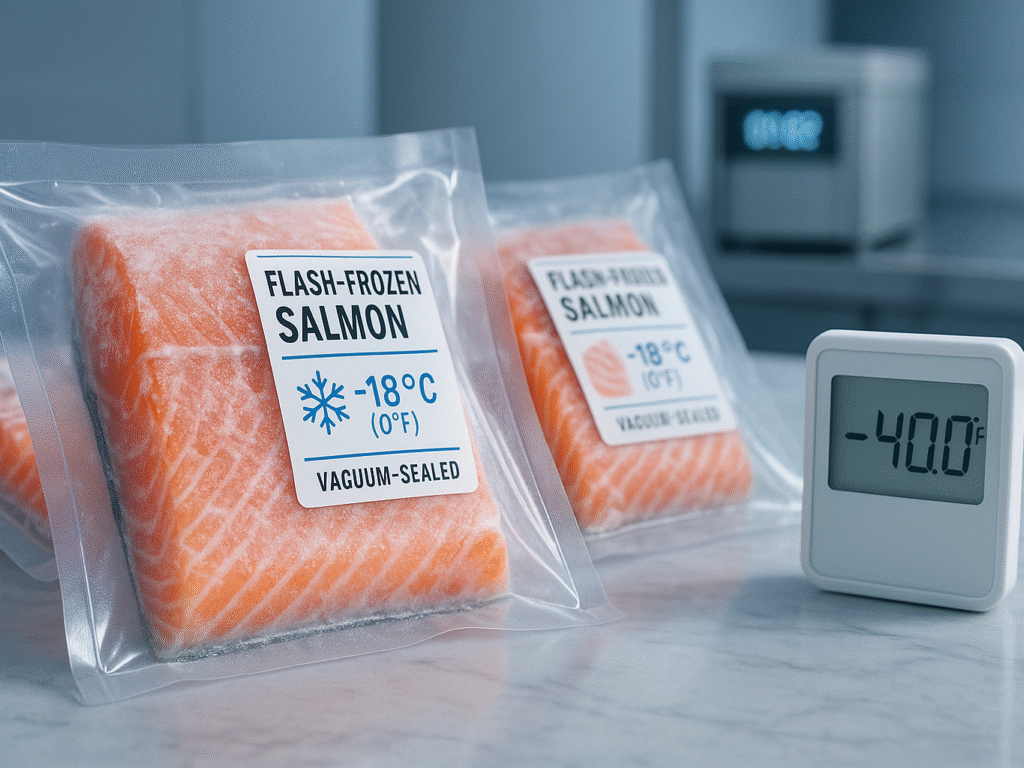
1. Flash Freezing Process: Locking in Freshness
Explained by Alaska Gold Brand, flash freezing subjects salmon to extreme temperatures of -40°F to -160°F immediately after catching. This rapid cooling process happens within minutes or hours of harvest, stopping decomposition at the cellular level. The key scientific principle is that faster freezing creates smaller ice crystals that cause minimal damage to the fish’s cell structures. This preservation method is particularly effective because it locks in the salmon’s ocean-fresh flavors and maintains the fish’s natural color and firmness.
2. Texture and Taste: Frozen vs Fresh
The texture difference between flash-frozen and poorly frozen salmon is significant. Through flash freezing, salmon retains its firm texture and vibrant red coloring. Initially, many consumers worry about quality loss. Yet, blind taste tests frequently show that properly flash-frozen salmon is indistinguishable from fresh-caught fish.
Research indicates that freezing affects salmon quality primarily through:
- Water crystallization within muscle tissues
- Changes to protein structure
- Potential oxidation of fats over time
Nevertheless, high-quality flash-frozen salmon experiences minimal deterioration in these areas compared to conventional freezing methods.
3. Shelf Life: 3 Days vs 9 Months
The shelf life comparison is striking. Fresh salmon remains safe in your refrigerator for only 2-3 days, beginning a rapid quality decline. Conversely, properly flash-frozen salmon maintains peak quality in a standard freezer for 9-12 months. Some processors even stamp their vacuum-sealed products with a two-year freezer shelf life.
Researched by North Coast Seafoods, this extended storage capability eliminates food waste, a significant issue considering that approximately 23% of supermarket seafood is discarded. Equally important, flash-frozen salmon gives you the flexibility to enjoy premium salmon year-round, regardless of fishing seasons or your proximity to coastal areas.
Nutritional Value: Is Frozen Salmon as Healthy as Fresh?
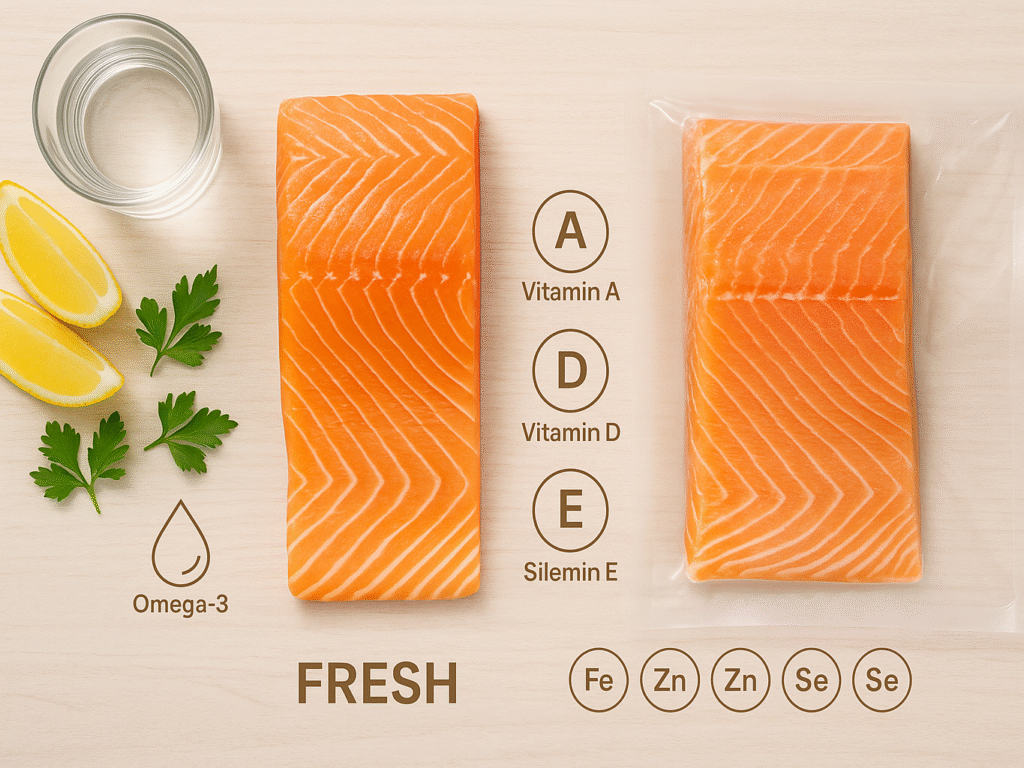
Many shoppers wonder if frozen salmon sacrifices nutrition for convenience. Science offers surprising answers. Salmon stands out as an exceptional source of nutrients, including protein, lipids, vitamins, and minerals. According to ScienceDirect, A typical 100g portion contains approximately 1800mg of EPA and DHA omega-3 fatty acids, making it a powerhouse of essential nutrients regardless of its preservation method.
1. Vitamin and Mineral Retention After Freezing
Modern industrial freezing methods are crucial for maintaining salmon’s nutritional profile. Once properly frozen, moisture, taste, and nutritional value remain completely preserved. However, research shows that specific vitamins may diminish during extended frozen storage. Highlighted by a study on PMC, an examination of fish storage over six months found significant decreases in vitamins A, D3, and E concentrations. In contrast, minerals, including iron, zinc, and selenium, showed no significant changes.
Notably, freeze-dried salmon samples stored at -20°C maintained stable levels of 11 out of 16 vitamins analyzed, including thiamin, riboflavin, niacin, biotin, cobalamin, vitamins A1, D3, E, and K. This stability indicates that properly frozen salmon retains most of its essential nutrients.
2. Omega-3 Fatty Acids: Do They Survive Freezing?
Omega-3 fatty acids, primarily EPA and DHA, are among salmon’s most valuable nutritional components. These essential fatty acids support brain development, reduce inflammation, and promote heart health. The good news is that when salmon is flash-frozen immediately after catching, these precious omega-3s remain stable.
Nevertheless, extended storage can affect fatty acid stability. Studies indicate that polyunsaturated fatty acids (PUFAs) may decrease as storage time increases. It occurs because PUFAs are more susceptible to oxidation than saturated fatty acids, potentially reducing nutritional value over time.
3. Water-Soluble Nutrient Loss During Thawing
The thawing process can impact specific nutrients in salmon. Water-soluble vitamins like vitamin C may experience minimal losses during freezing and thawing. Additionally, thawing methods can affect vitamin retention; one study found significant changes in vitamin A concentrations depending on the method used.
Protein denaturation during extended frozen storage can decrease protein solubility, though the protein content remains relatively stable. It explains why flash-frozen salmon, which minimizes cellular damage, generally maintains better nutritional integrity than conventionally frozen options.
Convenience, Cost, and Cooking Flexibility
Beyond taste and nutrition, practical concerns often guide our food choices. Frozen salmon offers significant advantages in everyday use that might surprise even the most dedicated fresh fish enthusiasts.
1. Storage and Food Waste: Frozen Wins
According to EatingWell, properly stored frozen salmon lasts an impressive 9-12 months in your freezer, contrasting with fresh salmon’s brief 1-2 days of refrigerator life. This extended shelf life directly translates to less waste; households generate over 40% less food waste with frozen products than with non-frozen alternatives. For the environmentally conscious, frozen salmon transported by boat produces approximately 20 times fewer CO2 emissions than air-shipped fresh salmon.
2. Cooking from Frozen vs Thawed
One of the best-kept culinary secrets: you can cook salmon directly from frozen. Using a simple “Cook It Frozen” technique, you can transform rock-solid salmon into a delicious meal in about 15 minutes. Start with a hot pan (around 400°F), brush the frozen filet with high-heat oil like olive or grapeseed, and cook uncovered for 3 minutes until browned. After flipping, add seasonings, cover, and cook for 6-8 minutes more until opaque. This approach saves time and yields better results, but quick cooking makes it harder to overcook your salmon.
3. Price Comparison: Fresh vs Frozen Salmon
Your wallet will notice the difference between fresh and frozen options. Fresh salmon commands premium prices due to its limited shelf life and complex temperature-controlled shipping. By contrast, frozen salmon typically costs less because retailers don’t need to build in margins for potential spoilage. For example, while fresh whole sockeye salmon wholesales for $6.00-$8.00/lb, frozen sockeye filets retail at $9.00-$9.60/lb, reflecting the retail markup and processing costs.
4. Buying in Bulk and Portion Control
Frozen salmon often comes individually portioned and vacuum-sealed, typically in 4oz, 6oz, or 8oz servings. This packaging approach offers remarkable flexibility; you can prepare exactly what you need without thawing excess fish. Most processors follow strict standards, maintaining precise portion weights (typically targeting 4.0oz with limits of 3.5-4.5oz), making meal planning more consistent. These individually wrapped portions simplify storage, minimize waste, and allow you to capitalize on bulk pricing without compromising quality.
Our Favorite Best Frozen Salmon Fillets on Amazon
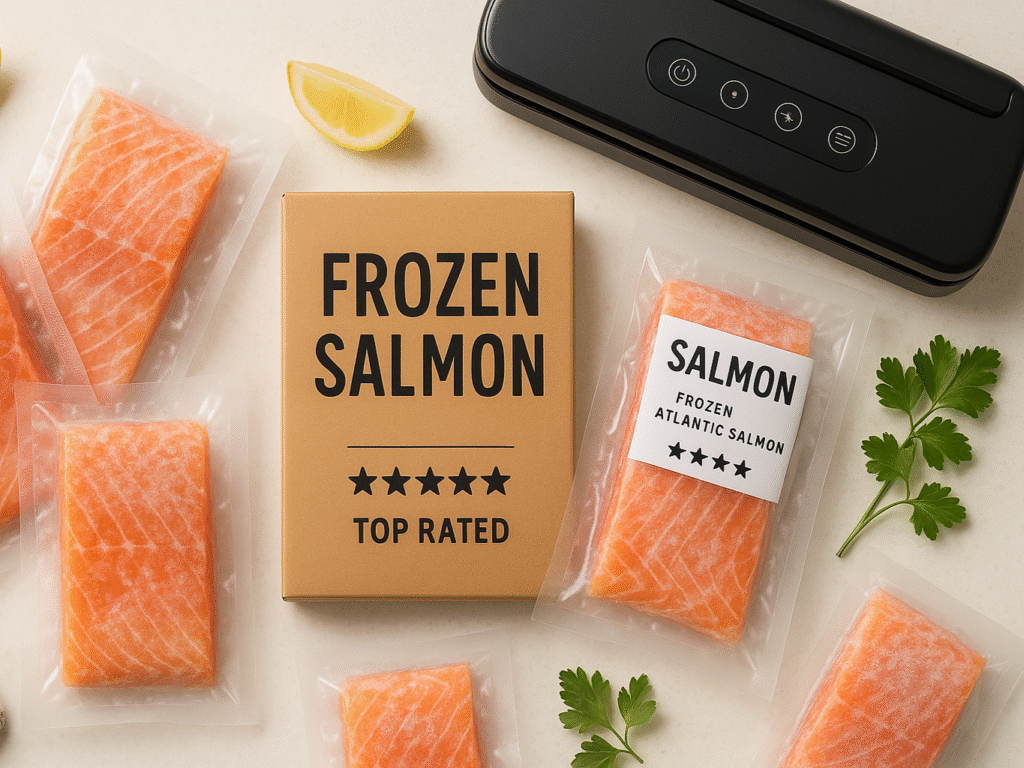
Discover our favorite frozen salmon fillets available on Amazon. When it comes to frozen salmon vs fresh, these flash-frozen picks preserve flavor, texture, and nutrients. Ideal for busy weeknights or meal prep, quality, convenience, and taste are shipped straight to your kitchen.
1. Fresh Brand Wild Caught Pink Salmon
This premium wild-caught pink salmon is vacuum-sealed in convenient portions, making it perfect for meal planning. Flash-frozen to preserve freshness and omega-3 content, each fillet delivers restaurant-quality taste at home. The resealable bag format offers excellent value for families seeking healthy, convenient protein options.
Top Features:
- Individual vacuum-sealed portions prevent waste and ensure freshness
- Wild-caught from sustainable fisheries with no artificial additives
- Ready to cook from frozen in under 20 minutes
- 1-pound bag provides multiple servings for meal prep
Price Range: $12-15 per pound
Who It’s Best For
It’s perfect for busy families, meal preppers, or health-conscious individuals who want convenient access to wild salmon without frequent grocery trips.
For reliable quality and convenience at an unbeatable price, Amazon’s brand delivers. [Click below to add this to your cart and start eating healthier tonight].
2. New York Steak & Seafood Frozen Salmon Fillets
These premium Atlantic salmon fillets from Norway represent the gold standard of the best frozen salmon. Each 8-oz portion is flash-frozen and vacuum-sealed immediately after harvest, locking in rich, buttery flavor and firm texture. Enjoy restaurant-quality meals from the comfort of home.
Top Features:
- Premium Atlantic salmon sourced directly from Norwegian waters
- Flash-frozen within hours of catch at optimal temperatures
- Perfect 8-oz portions are ideal for dinner plates
- Vacuum-sealed packaging maintains quality for 12+ months
Price Range: $45-55 for 4-piece set
Who It’s Best For
Perfect for special occasion dinners, salmon enthusiasts, or anyone wanting restaurant-quality fish at home without the premium restaurant price.
When you want the absolute best frozen salmon money can buy, this Norwegian Atlantic variety delivers every time. [Order your premium salmon set here and taste the difference.]
2. FoodSaver Vacuum Sealer Machine (FM2100)
This compact vacuum sealer transforms how you store salmon and other foods, extending freshness up to five times longer than traditional storage methods. It’s one-touch operation makes it incredibly user-friendly, while the compact design fits easily on any countertop. It is essential for anyone serious about reducing food waste and maintaining quality.
Top Features:
- Extends food freshness up to 5x longer than regular storage
- One-touch vacuum sealing operation for effortless use
- Prevents freezer burn that destroys salmon’s texture and taste
- Includes starter pack of bags and sealing roll
Price Range: $60-80
Who It’s Best For
Perfect for bulk salmon buyers, meal preppers, or families wanting to reduce food waste while maintaining premium quality.
If you’re buying salmon in bulk or want to preserve quality like the pros, this vacuum sealer pays for itself quickly. [Get yours and start saving money on groceries].”
3. FoodSaver FM2435 with Bonus Handheld Sealer
This advanced vacuum sealing system perfectly handles wet and dry foods, making it ideal for fresh salmon preparation. The removable drip tray effectively manages moisture, while the bonus handheld sealer adds versatility for containers and bags. Professional-grade performance meets home kitchen convenience.
Top Features:
- Dual functionality handles wet foods like salmon without issues
- Removable drip tray makes cleanup effortless after sealing
- Bonus handheld unit for sealing containers and specialized bags
- Professional sealing strength maintains vacuum integrity long-term
Price Range: $120-150
Who It’s Best For:
Perfect for serious home cooks, fishing enthusiasts who process their catch, or families wanting professional-grade food preservation.
This professional-grade system handles everything for serious salmon storage and food preservation. [Upgrade your kitchen with this complete sealing solution].
Comparison Table: Best Frozen Salmon vs Fresh
Easily compare frozen and fresh salmon side by side. Our table highlights key differences in shelf life, taste, nutrition, cost, and sustainability, helping you decide which option best fits your lifestyle, budget, and cooking preferences.
| Characteristic | “Fresh” Salmon | Flash-Frozen Salmon |
| Storage Life | 1-2 days in the refrigerator | 9-12 months in the freezer |
| True Freshness | Often previously frozen and thawed multiple times | Flash-frozen within hours of catch at -40°F to -160°F |
| Quality Retention | Begins to lose quality after the first day | Maintains original texture, taste, and freshness |
| Nutritional Value | Not specifically mentioned | Retains most nutrients; some vitamin loss is possible during extended storage |
| Omega-3 Retention | Not specifically mentioned | Remains stable when flash-frozen immediately |
| Cost | Commands premium prices | Generally lower priced |
| Food Waste Risk | ~23% of supermarket seafood is wasted | Minimal waste due to longer storage life |
| Cooking Flexibility | Must be used quickly | Can be cooked directly from frozen in ~15 minutes |
| Transportation Impact | May travel thousands of miles thawed | Lower CO2 emissions (20x less than air-shipped fresh) |
| Portion Control | Not mentioned | Available in precise pre-portioned sizes (4-8oz) |
The Verdict: Best Frozen Salmon vs Fresh
Flash-frozen salmon is a smart alternative to “fresh” options often found in stores. Most so-called fresh salmon have already been frozen and thawed multiple times. When considering frozen salmon vs fresh, flash-freezing preserves the fish’s texture, flavor, and nutrients while extending shelf life to 9–12 months, minimizing food waste, and offering year-round access to high-quality seafood.
Economically and nutritionally, frozen salmon wins. It generally costs less than fresh varieties, as retailers don’t need to factor in rapid spoilage. More importantly, it retains essential nutrients like omega-3 fatty acids. Even with minor vitamin loss over time, its overall nutritional value stays intact, making it a healthy, budget-friendly choice for everyday meals.
Best frozen salmon also excels in convenience and sustainability. You can cook it straight from the freezer, which reduces prep time and prevents overcooking. Individually portioned filets help with portion control and meal planning. Plus, frozen salmon shipped by boat produces far fewer CO2 emissions than air-freighted fresh fish, offering an environmentally responsible alternative.
Disclosure: This post may include affiliate links. I may earn a commission if you purchase through my links, at no additional cost to you.