Ants in your garden present a fascinating dilemma for any gardener seeking a natural ant repellent for garden solutions. While these tiny creatures can benefit your garden by aerating soil, controlling certain pests, and even pollinating flowers, they can quickly become unwelcome guests when they start damaging plants or farming crops.
You might notice ants forming massive colonies with millions of individuals near your precious plants, creating a challenging situation. Fortunately, you can effectively keep ants out of garden areas without resorting to harmful chemicals. From coffee grounds that affect ants’ nervous systems to citrus peels containing oils that break down their exoskeletons, natural ant killer options for outside use are both abundant and surprisingly effective.
This guide explores eight proven methods to protect your garden from problematic ant invasions while respecting the ecological balance using natural ant repellent for garden techniques. These solutions range from common household items, such as diatomaceous earth and peppermint oil, to strategic planting techniques, helping you maintain a thriving garden without introducing toxic substances to your outdoor space.
Why Ants Appear in Your Garden

Understanding what brings ants to your garden is the first step in developing effective natural ant-repellent strategies. These industrious insects don’t arrive by accident; they’re drawn by specific attractants and play complex roles in your garden’s ecosystem.
1. Common attractants for ants
Sugary substances top the list of what lures ants into garden spaces. The primary attractant is honeydew, a sweet liquid excreted by sap-feeding insects like aphids, mealybugs, soft scales, and whiteflies. If you notice a sudden appearance of ants in your garden or a line of ants moving up and down a tree, it typically indicates the presence of these honeydew-producing pests.
The relationship between ants and these sap-suckers is remarkably sophisticated:
- Ants actively stroke the insects with their antennae, triggering them to release the sweet honeydew
- They store this liquid in a special holding stomach called the crop
- The collected honeydew is brought back to share with the queen and other worker ants
Beyond honeydew, ants are particularly drawn to:
- Nectar from flowers and extrafloral nectaries
- Seeds from plants such as cabbage, heather, viola, and radish
- Food waste, especially sugary items like fruit and fruit juice
- Protein-rich sources, which become particularly attractive to specific species in spring
Interestingly, different ant species show preferences for various food types. While Argentine ants prefer sweet baits year-round and protein baits primarily in spring, other species, like thief ants and Pharaoh ants, favor protein or greasy baits throughout the year.
Ants Moving Indoors? We’ve Got You Covered!
While protecting your garden, don’t forget about your home’s interior. Discover pet-safe, non-toxic solutions to eliminate ants from your kitchen, bathroom, and living spaces using simple household items.
[Read: Natural Indoor Ant Repellent 100% Safe & Effective →]
2. How ants interact with garden ecosystems
Despite their reputation as pests, ants play numerous beneficial roles in garden ecosystems. Of the approximately 200 ant species known in California, only a few are typically considered pests. Likewise, more than 30 species exist in Britain, but only a handful commonly appear in gardens.
Ants contribute positively to gardens by:
- Improving soil conditions through their tunneling activities
- Serving as predators of harmful garden pests
- Pollinating flowers while gathering food
- Distributing seeds throughout the garden landscape
Nevertheless, when seeking natural ant killer options for outside use, it’s essential to understand their complex interactions with plants. Ants form various relationships with garden flora, including mutualistic defenses with plants that produce extrafloral nectar. In these arrangements, ants consume the sugary nectar and, in exchange, protect the plants from herbivores.
Furthermore, ants facilitate seed dispersal through a process called myrmecochory. They’re attracted to the lipid- and protein-rich appendages on seeds, carrying them to nutrient-rich locations ideal for germination. This dispersal helps plants reproduce while keeping seeds out of reach of predators.
Gardeners seeking to eliminate ants organically face a challenge when ants protect and “farm” sap-sucking insects. Ants can indirectly increase plant damage by defending aphids and honeydew-producing insects from natural predators, such as ladybugs. Their nest-building activities can sometimes disturb the soil around plant roots or bury low-growing plants.
Understanding these ecological relationships helps you develop targeted, natural ant repellents for gardens and vegetable gardens, and other planting areas. These repellents address problematic behaviors while preserving beneficial interactions.
When Ants Become a Problem
While ants can be beneficial garden residents, certain behaviors signal that it’s time to consider a natural ant repellent. Knowing when to intervene requires understanding how these tiny insects can harm your plants.
1. Signs of ant damage to plants
The most visible indicator of problematic ant activity is a parade of ants traveling up plant stems or tree trunks. It typically signals they tend to be honeydew-producing insects rather than just passing through. Look for small black ants, such as the Argentine ant species, forming soil mounds around your plants; these sandy, granular piles indicate underground nesting activity.
Some ant species cause direct damage to plants:
- Leafcutter ants can destroy garden foliage by eating away at plant leaves
- This leaf loss hinders photosynthesis and reduces crop yields
- A diligent group of ants chewing on a plant’s stem can eventually girdle and kill the plant
Moreover, soil disturbance is another telltale sign. Ants excavating nests often deposit soil on the surface, covering delicate plants in pots and rockeries. These anthills also create unsightly spots in lawns, making mowing more difficult.
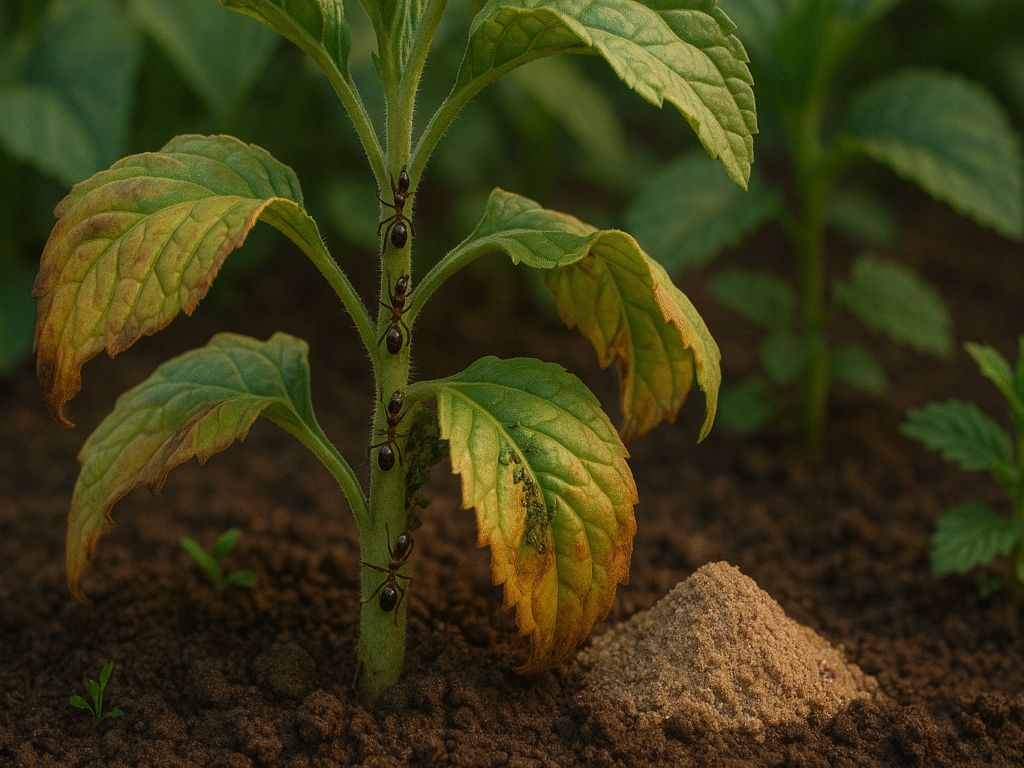
2. Aphid farming and its impact
Perhaps the most fascinating yet problematic ant behavior is their sophisticated relationship with aphids. This symbiotic arrangement bears a striking resemblance to human agriculture in several ways. Ants “milk” aphids by gently tapping their abdomens with their antennae, prompting the aphids to produce honeydew droplets.
The farming relationship works like this:
- Ants actively protect aphids from natural predators like ladybugs and lacewings
- They herd aphids to the juiciest parts of plants, maximizing honeydew production
- Some ant species even carry aphids into their nests at night and during winter
- Certain ants will transport aphid eggs when establishing new colonies
Consequently, plants infested with ant-protected aphid colonies suffer increased damage. Aphids continuously suck plant sap, weakening the plant and causing its leaves to curl and discolor. Eventually, honeydew deposits may develop into black sooty mold, resulting in unsightly leaves and stunted growth.
3. Ant nests in plant roots
The most serious yet least visible damage occurs below ground. Invasive ant species that nest around plant roots can threaten entire ecosystems. Research has shown that plants with ant nests around their roots demonstrate significantly higher baseline water stress.
Greenhouse and field experiments have revealed that invasive ants, such as big-headed ants (Pheidole megacephala), can reduce a tree’s photosynthesis by more than half and limit carbohydrate availability. The root structure integrity becomes compromised, putting plants “closer to drying out.”
Additionally, saplings with ant nests show impaired growth, jeopardizing their chances for survival to adulthood. It is particularly concerning since invasive ant colonies can spread remarkably, up to 50 meters per year.
Identifying when to use natural ant killers outside becomes crucial when you notice these warning signs. Addressing ant problems early with organic methods helps maintain garden health without the use of harmful chemicals, preserving beneficial insects while protecting plants from these sometimes problematic garden residents.
Proven ways to protect plants without chemicals
Below are the eight proven ways to protect plants without chemicals, helping you manage ant infestations naturally. These methods use everyday items and strategic planting to repel ants while preserving your garden’s health, biodiversity, and overall ecosystem balance.
1. Coffee Grounds
Your morning coffee habit might offer a simple solution for garden ant problems. When used strategically, coffee grounds, a standard household waste product, can be a natural ant repellent for garden spaces.
(i) How Coffee Disrupts Ant Trails
Coffee grounds don’t necessarily kill ants, but they can disrupt ant behavior in several ways. According to entomologists, coffee grounds contain compounds that interfere with ants’ communication through their pheromone trails. This interference makes it difficult for ants to follow their usual paths, confusing them and potentially redirecting their activity away from your plants.
The effectiveness of coffee grounds varies by situation. Some experts note that particular ant species show reluctance to cross coffee ground barriers. This resistance appears to stem from:
- The pungent aroma of coffee, which can mask the scent trails ants rely on for navigation
- The physical barrier the grounds create, particularly for smaller ant species
- Potentially irritating compounds in the coffee that ants find unpleasant
However, scientific opinion remains divided on the long-term effectiveness of coffee. Research by Texas A&M entomologist Wizzie Brown found that when coffee grounds were applied to fire ant mounds, the colonies relocated 1-2 feet away from their original location. Similarly, other gardeners have observed ants eventually finding ways around coffee ground barriers or moving the grounds out of their path.
Interestingly, experiments show that ants walking up to coffee grounds stop, turn around, and find an alternative route. It suggests they actively avoid the grounds rather than being harmed by them.
(ii) Where and how to apply it
Placement matters significantly for optimal results when using coffee grounds to eliminate ants organically in the garden. Here are the most effective application methods:
- Create barriers around plants: Form a protective ring of coffee grounds approximately 2 inches wide around vulnerable plants. It creates a perimeter that many ants hesitate to cross, protecting your plants from potential invasion.
- Target ant trails: When you spot ants marching in a line through your garden, sprinkle coffee grounds directly on their path. It disrupts their scent trail, confusing the ants and making them lose their way.
- Treat anthills directly: For established ant colonies, you can either:
- Cover the anthill with a generous layer of coffee grounds.
- Mix the grounds with hot water and pour the mixture directly onto the anthill.
- Establish garden perimeters: To prevent ants from entering these spaces, create a 2-inch-wide coffee ground barrier around the entire garden area or along your home’s foundation.
Although the jury remains out on coffee grounds as a permanent solution, they offer an accessible starting point for naturally removing ants from the garden. Many gardeners report temporary success, with ants initially avoiding treated areas.
Keep in mind that coffee grounds may attract other insects, potentially creating secondary pest issues. Therefore, monitor your garden after application and be prepared to try additional natural methods if needed.
Fresh coffee grounds typically work better than older ones, as the stronger aroma significantly disrupts ant pheromone trails. For best results, apply grounds when they’re still somewhat moist and reapply after rain or irrigation washes them away.
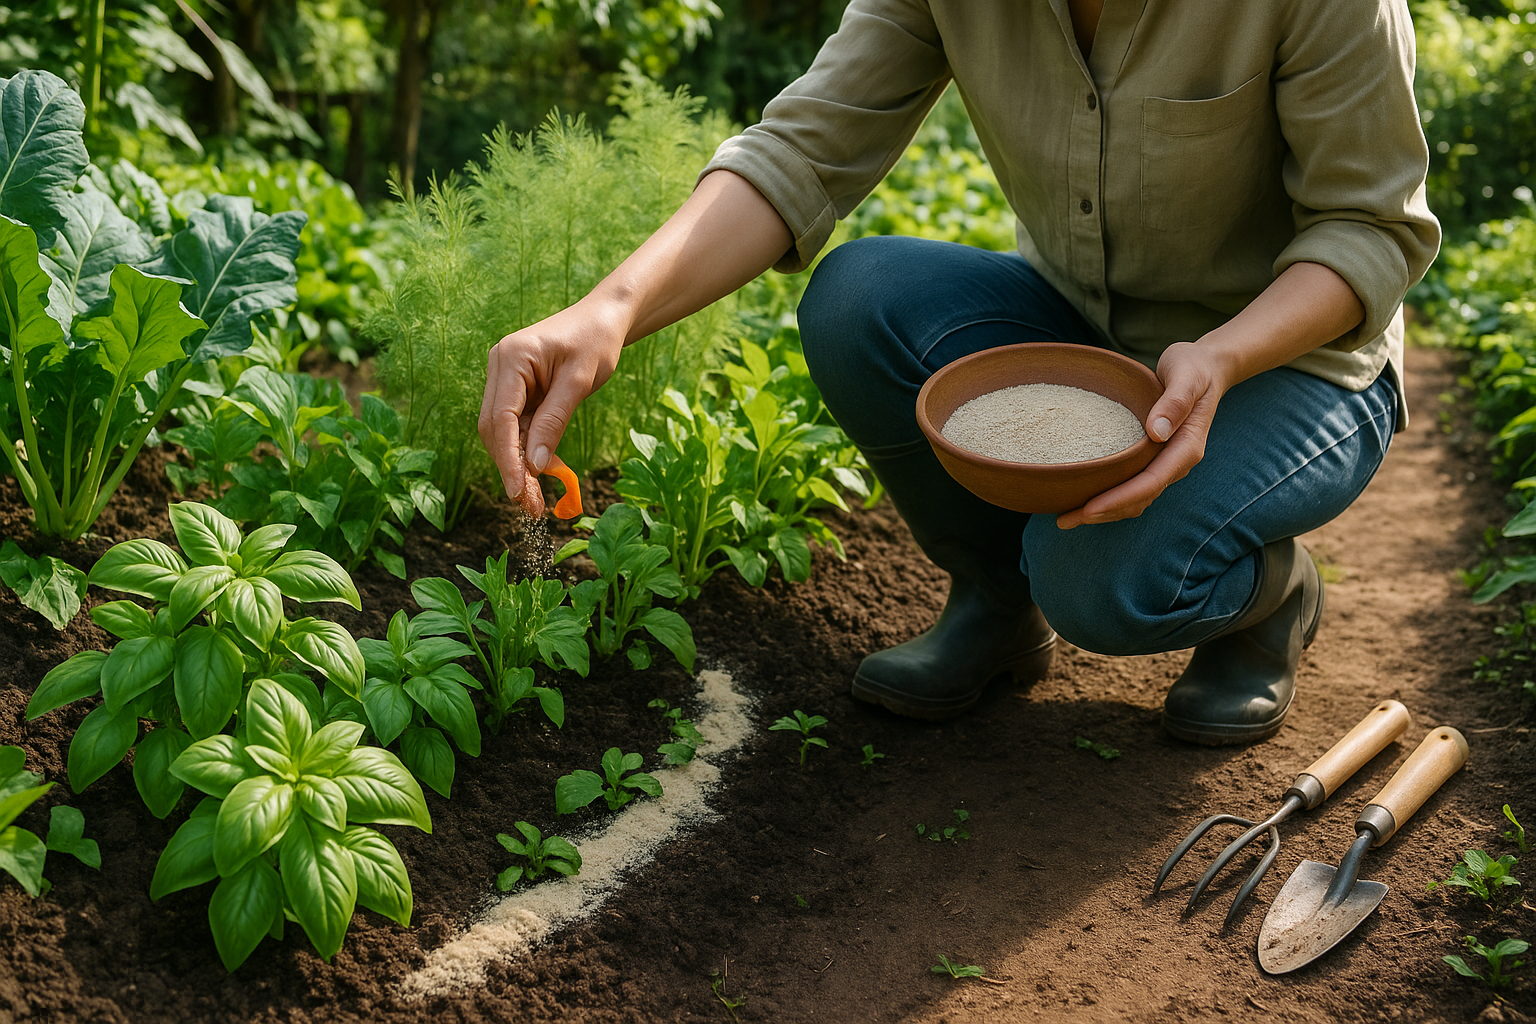
2. Diatomaceous Earth
Unlike many commercial pesticides, diatomaceous earth is a highly effective and natural way to eliminate garden ants. This fine, chalk-like powder may look harmless to the human eye, yet on a microscopic level, it’s a formidable weapon in your quest for a pest-free garden.
(i) How it works as a natural ant killer
Diatomaceous earth (DE) comprises the fossilized remains of microscopic algae called diatoms. These tiny aquatic organisms left behind skeletons rich in silica, the same substance found in beach sand. DE’s unique mechanical action, rather than chemical toxicity, makes it so effective as a natural ant killer outside.
Under a microscope, diatomaceous earth particles reveal razor-sharp edges resembling broken glass. When ants walk through DE, these microscopic sharp edges:
- Cut into the protective waxy outer layer of the ant’s exoskeleton
- Create tiny abrasions that expose the ant’s body to the elements
- Absorb lipids and oils from the insect’s exoskeleton
This dual action of physical abrasion and absorption leads to rapid dehydration. Once the protective waxy coating is compromised, moisture escapes from the ant’s body, ultimately causing death through desiccation. Most ants exposed to diatomaceous earth will die within 24 to 48 hours.
Notably, because DE works mechanically rather than chemically, ants cannot build resistance to it as they might with conventional pesticides. This makes it an excellent long-term solution for getting rid of ants organically in the garden.
Tips for safe and effective use
To get the most from diatomaceous earth as you work to keep ants out of garden areas, proper application is crucial:
First, identify the problem areas where ants are active. Follow ant trails to locate entry points and areas of high traffic. Clean these areas of clutter to maximize contact between ants and the powder.
For outdoor application, create a protective barrier by sprinkling a thin layer (about 1/8 inch) of DE around your garden’s perimeter, extending 6-12 inches from your home’s foundation. Pay special attention to known entry points and areas with visible ant activity.
Generally, less is more with diatomaceous earth; a thin, even layer works better than thick piles. If ants detect too much powder, they may avoid it altogether. Use a duster, salt shaker, or even a paintbrush for precise application in cracks and along baseboards.
Indeed, safety precautions are essential when handling DE:
- Wear a dust mask during application to avoid respiratory irritation
- Use gloves to prevent skin dryness or irritation
- Apply in calm weather to avoid drift
One limitation of diatomaceous earth is that it loses effectiveness when wet. After rain or heavy dew, reapply the powder once the area has dried completely. Alternatively, you can mix DE with water (about four tablespoons per gallon) and spray it on surfaces; once dry, it regains its killing power.
For persistent ant problems, reapplication may be necessary every few days. DE only kills the ants that come into contact with it, typically representing just a portion of the colony. As a result, the complete elimination of large ant colonies might require additional methods or professional intervention.
Compared to harsh chemical solutions, diatomaceous earth offers a safe option for homes with children and pets. It’s registered with the Environmental Protection Agency and OMRI Listed for organic use, making it an ideal choice when searching for a natural ant repellent for vegetable gardens.
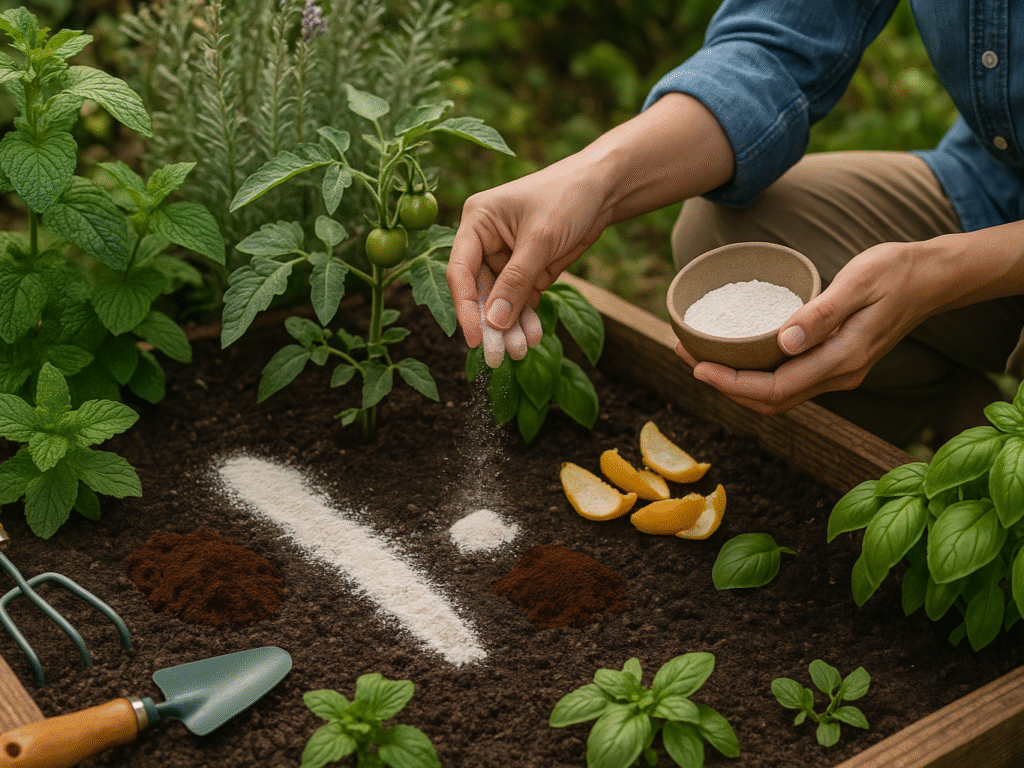
3. Citrus Peels and Lemon Juice
Fruit scraps from your kitchen offer yet another powerful natural ant repellent for your garden areas. Citrus peels, the leftover bits from oranges, lemons, and grapefruits, contain potent compounds that can effectively repel ants from your precious plants.
(i) Why ants hate citrus
Citrus fruits contain a natural compound called d-limonene that makes ants turn and march in the opposite direction. This acidic oil found in citrus peels is more than unpleasant to ants; it’s toxic to the fungi they feed on and can kill ants on contact. Most importantly, d-limonene disrupts the sensory receptors of ants, rendering them unable to detect and follow pheromone trails.
When ants encounter citrus, several things happen:
- Their communication pathways become confused
- Their scent trails get masked or broken completely
- They become disoriented and often abandon their routes
Indeed, the strong citrus smell overwhelms their sensitive antennae, making it impossible for worker ants to follow the chemical signals that typically guide them to food sources. This confusion renders their sophisticated navigation system useless, forcing them to retreat or find alternate paths.
(ii) Spray vs. peel placement
You have two main options for using citrus to eliminate ants in garden areas: placing the direct peel or making a citrus spray solution.
For quick, low-effort protection, place fresh citrus peels in strategic locations:
- Around the base of plants, ants are frequenting
- Near entry points where ants access your garden
- Directly on ant trails to disrupt their pathways
Fortunately, the peels can be surprisingly effective. One gardener reported placing peels in locations ants were frequenting and was “shocked by how well it worked.” For aesthetic purposes, curl the peels around chopsticks to make them more visually appealing and less likely to be removed during garden cleanup.
Meanwhile, a citrus peel spray typically provides more comprehensive coverage. Here’s how to make a practical solution:
- Collect peels from citrus fruits (oranges, lemons, or grapefruits)
- Place the peels in a pot and cover with vinegar or water
- Heat the mixture until steaming (not boiling) and simmer for 10-15 minutes
- Let the liquid sit for several hours or overnight
- Strain out the peels and pour the solution into a spray bottle
Before application, identify where ants are most active. Afterward, spray the solution along ant trails, entry points, windowsills, doorways, and around the perimeter of your garden. The spray kills ants on contact and obliterates their pheromone trails, preventing others from finding food sources.
For persistent ant problems, reapply the citrus solution regularly, typically every few days or after rain washes it away. You can also rub the inside of fresh peels directly on surfaces, such as thresholds and windowsills, for an extra layer of protection.
This natural method offers a food-safe approach to removing ants from the garden without exposing your plants or family to harmful chemicals. Yet, for best results, combine citrus treatments with good garden hygiene, promptly clean up food spills, and seal containers to maximize effectiveness.
4. Peppermint and Other Essential Oils
Essential oils provide a potent solution for gardeners seeking to control ant populations naturally. These concentrated plant extracts have a pleasant scent for humans and create an invisible barrier that sends ants scrambling in the opposite direction.
(i) Best oils for repelling ants
Peppermint oil is one of the most effective natural ant repellents for garden use. Its active compounds, menthol, terpene, and alcohol, act as natural fumigants that repel and kill ants when their smell receptors detect them. Peppermint creates a double defense by masking the pheromones ants use to communicate while also irritating their sensory systems.
Beyond peppermint, several other essential oils demonstrate impressive ant-repelling properties:
- Clove oil contains eugenol, a fast-acting natural insecticide that targets the nervous systems of ants. Test studies have shown that eugenol causes rapid immobilization, followed by mortality, in ants.
- Citrus oils (lemon, orange, grapefruit) contain d-limonene, which is toxic to ants and erases their chemical trails. Sweet orange oil contains an impressive 80-95% limonene content.
- Tea tree oil contains alpha-terpineol, which works in conjunction with other essential oil compounds to immobilize and eliminate ants.
First of all, the strongest advantage of essential oils is their dual action. They not only repel ants but can also kill them on contact, making them more effective than some other natural solutions.
(ii) How to make and use oil sprays
Creating your own essential oil ant repellent is a straightforward process. Here’s a basic recipe:
- Combine 4 ounces of water, 4 ounces of witch hazel, and two teaspoons of liquid castile soap
- Add 50 drops of citrus essential oil (orange, grapefruit, or lemon)
- Mix in 30 drops of peppermint essential oil and 20 drops of clove essential oil
- Pour into an 8-ounce spray bottle and shake gently before each use
A simpler mixture of 15 drops of peppermint oil, seven drops of lemon oil, and water is recommended for use in food preparation areas.
In other words, application strategy matters as much as the mixture itself. Spray liberally wherever you see ants, focusing on the following:
- Entry points around windows and doors
- Along ant trails and gathering spots
- Around the perimeter of garden beds
Above all, consistency is key; reapply the essential oils weekly, as they are volatile. For outdoor use, ensure plants can’t create “bridges” that allow ants to bypass treated areas.
In addition to sprays, you can soak cotton balls in peppermint oil and place them near entry points or mix essential oils into your regular cleaning solution (5-10 drops per batch) to create a maintenance barrier.
A word of caution: while many essential oils are safe around dogs when properly diluted, they can be harmful to cats, which process these compounds differently.
5. Vinegar and Soapy Water Mix
Two common household ingredients form a powerful alliance against garden ants. Vinegar and dish soap combine to create an effective natural ant repellent for garden use that tackles ant invasions in multiple ways.
(i) Disrupting pheromone trails
The secret behind vinegar’s effectiveness lies in its ability to interfere with ant communication systems. Ants navigate by leaving invisible chemical trails that guide other colony members to food sources. Vinegar effectively scrambles this sophisticated network.
When applied to ant pathways, vinegar’s strong acetic acid disrupts the pheromone trails, erasing the ants’ roadmap. Without these chemical signals, ants become disoriented and unable to navigate correctly. As a licensed pest control technician, Vincent Luca explains, “Its strong odor disrupts the ants’ pheromone trails, which are their means of communication and navigation.”
This disruption simultaneously prevents reinforcements from reaching your garden. Once the initial wave of ants has been deterred, others struggle to locate the same path, creating an ongoing barrier effect.
Mix equal parts white vinegar and water in a spray bottle for optimal results. This 1:1 ratio provides sufficient acidity to disrupt pheromone trails while diluting the vinegar enough to prevent damage to the plants.
(ii) Cleaning and repelling in one step
Beyond communication disruption, this solution offers remarkable versatility. Dish soap enhances vinegar’s effectiveness by breaking down the waxy coating on ants’ exoskeletons. Typically, a mixture of 2 ounces of dish soap with 32 ounces of water creates a lethal spray that suffocates ants on contact.
To apply this dual-action solution:
- Spray directly onto visible ants for immediate control
- Apply along known ant trails to erase pheromone pathways
- Treat entry points around your garden perimeter
- Clean surfaces where ants frequently travel
Moreover, you’ll notice this solution works differently from some other methods. Vinegar doesn’t kill ants in most cases, but instead changes their behavior. It remains effective only as long as the scent persists, requiring regular reapplication, especially after rainfall.
For persistent infestations, mix glass cleaner containing ammonia with liquid detergent for an even more substantial pheromone-disrupting effect. Apply this to all entry points and congregation areas, leaving a light residue.
Unlike harsh chemical treatments, this natural approach is safe around food-producing plants and will not harm beneficial insects when used as directed.
6. Cinnamon and Clove Powder
Spices from your kitchen cabinet offer some of the most accessible yet potent solutions for ant problems in your garden. Both cinnamon and clove contain powerful compounds that make them excellent natural ant repellents for garden applications.”
(i) How do these spices repel ants
First and foremost, the effectiveness of these spices comes from their natural chemical composition. Cinnamon contains cinnamaldehyde, a compound toxic to insects, including ants. This substance disrupts the nervous systems of ants and interferes with their ability to follow pheromone trails. Interestingly, while ground cinnamon primarily repels ants, highly concentrated essential oil can kill them when applied directly.
Clove powder works through similar mechanisms. Its active ingredient, eugenol, functions as a fast-acting natural insecticide. Scientists believe eugenol is neurotoxic to ants, targeting their nervous system upon contact. Beyond that, both spices emit intense aromas that overwhelm ants’ sensitive scent receptors, making it nearly impossible for them to detect food sources or follow their chemical trails.
Studies confirm that cinnamon essential oil exhibits positive results in terms of repellency and insecticidal activity, with higher concentrations delivering greater effectiveness. This combination of repelling and potential killing power makes these spices valuable tools for natural ant repellents for garden use.
(ii) Where to sprinkle them
For optimal results when using these spices to keep ants out of garden areas:
- Create barrier lines of ground cinnamon around entry points, plant beds, and along ant trails
- Sprinkle cinnamon or clove powder directly in areas of ant activity
- Place cinnamon sticks near entrances you’ve seen ants using
- Mix two tablespoons of ground cloves in warm water for a spray solution
The application method depends on your specific situation. Dry powder works well as a barrier for prevention. For active infestations, a spray solution may penetrate more effectively. Reapply these spices every few days, especially after rain or watering, as moisture reduces their effectiveness.
Remember that while household cinnamon can deter ants, it won’t eliminate entire colonies. For complete natural ant killer outside solutions, consider combining these spices with other methods for comprehensive protection.
7. Boiling Water for Ant Hills
Boiling water offers a direct and decisive approach to eliminating ant colonies at their source. This method moves beyond simple repellent strategies to destroy entire ant populations within a mound.
(i) When to use this method
Boiling water treatment proves most effective under specific conditions. The ideal time to apply this technique is during cool, sunny mornings when ants congregate near the surface of their mounds in warmer seasons. Research indicates that pouring approximately 3 gallons of hot (almost boiling) water directly onto an ant hill will eliminate about 60% of the mounds treated.
The effectiveness increases after rainfall, specifically when day and night temperatures differ significantly. Under these conditions, fire ants move their broods and queens closer to the surface to warm up, making them more vulnerable to hot water treatment. Apply the water between late morning and early afternoon when ants are concentrated in the mound for optimal results.
To be lethal to the ants, the water temperature should be at least 65°C (149°F), ideally above 82°C (180°F). The required volume depends entirely on colony size. Small colonies may need only 4 liters of hot water, whereas larger colonies might require up to 75 liters for complete elimination.
(ii) Precautions to avoid plant damage
The strategic application becomes crucial since boiling water kills all vegetation it comes into contact with. Apply the water precisely to the mound, avoiding contact with surrounding plants and grass. For improved penetration, open the mound by piercing it with a stick before pouring. It allows the hot water to flow directly into the interconnected chambers and vertical shafts, ensuring the complete nest fills quickly.
Henceforth, safety should be your primary concern when handling large volumes of hot water:
- Wear protective clothing, including closed-toe shoes, long pants, and long sleeves
- Use heat-resistant gloves to prevent burns
- Transport hot water carefully to avoid splashing
- Keep children and pets away from the treatment area
This method typically works best for isolated ant hills that are a safe distance from valuable plants. After treatment, monitor the area and retreat within 2-3 weeks if you detect renewed activity. Even with successful treatment, remember that surrounding untreated areas may eventually be recolonized, requiring vigilance and possibly repeated applications.
8. Ant-Repelling Plants and Herbs
Nature’s garden warriors stand ready to fight your ant problems through strategic planting. Beyond quick fixes, certain aromatic herbs and flowers offer long-term protection by naturally deterring ants from your garden beds.
(i) Best herbs to plant: mint, tansy, wormwood
Mint is a powerful ant deterrent. Both peppermint and spearmint contain high amounts of essential oils with strong scents that overwhelm ants’ sensitive olfactory receptors. These plants disrupt ant navigation and communication through their potent aroma. Mint grows easily in partial shade and requires about 1-2 inches of water per week, reaching 1-2 feet tall with rapid spread.
Tansy delivers exceptional ant-repelling properties through its button yellow flowers and deep root system. The leaves contain thujone, which emits a pungent, camphor-like odor that ants actively avoid. This perennial thrives in full sun with weekly watering and grows 3-5 feet tall. Be cautious, though, as tansy can become invasive in certain regions.
Wormwood (Artemisia) completes the powerful trio of ant-deterring herbs. Its silver-gray foliage contains compounds highly effective against ants, ticks, flies, and moths. The sharp, intensely aromatic oils make this plant unpleasant to ant colonies.
First and foremost, the effectiveness of these plants stems from ants’ unique sensitivity to scent. With four to five times more scent receptors in their antennae than other insects, ants become overwhelmed by the concentrated essential oils these plants produce.
(ii) How to use them as a natural barrier
Using these aromatic herbs, create strategic borders around vulnerable garden areas to protect them. Plant mint, tansy, or wormwood around the perimeter of vegetable patches and flower beds to establish a protective boundary that ants hesitate to cross.
Typically, container planting is most effective in controlling invasive tendencies, particularly with mint, which spreads aggressively. This approach allows you to position mobile ant barriers precisely where needed, while preventing unwanted garden takeovers.
For enhanced protection, combine multiple repellent herbs for added effectiveness. Additional effective plants include:
- Rosemary, lavender, and catnip
- Thyme and garlic
- Marigolds and chrysanthemums
Crushed or bruised leaves occasionally release stronger scents when ant activity increases. Over time, these living barriers provide sustainable protection while enhancing the biodiversity and beauty of your garden.
Conclusion

Protecting your garden from problematic ants requires both understanding and a balanced approach. This guide explores eight natural yet effective methods to manage ants without the use of chemicals. Coffee grounds, diatomaceous earth, and Citrus peels offer yet another powerful natural ant repellent for garden areas that’s both eco-friendly and cost-effective; these work by damaging exoskeletons, breaking pheromone trails, or deterring ants through potent, natural compounds.
Essential oils like peppermint and clove provide botanical power that repels ants. Kitchen staples like vinegar, dish soap, and cinnamon quickly respond to surprise invasions. Boiling water directly targets colonies, while planting mint, tansy, or wormwood forms a living barrier. These natural ant repellent strategies for the garden combine short-term relief with long-term ecosystem resilience for sustainable pest management.
Ants aren’t just pests; they aerate the soil, control other insects, and aid in seed dispersal. Therefore, aim for management rather than complete eradication. These natural repellents allow targeted control of harmful behavior without disturbing beneficial activity. Your garden’s health depends on this delicate balance between pest deterrence and environmental preservation.
Start with one suitable method, then combine others for a stronger defense. These solutions may require more frequent reapplication than chemicals, but they reward consistency with lasting benefits. The ultimate goal is a garden free from toxins, thriving plants, and protected pollinators. With these strategies, you can cultivate a peaceful, unmanaged garden space.
Disclosure: This post may include affiliate links. I may earn a commission if you purchase through my links, at no additional cost to you.