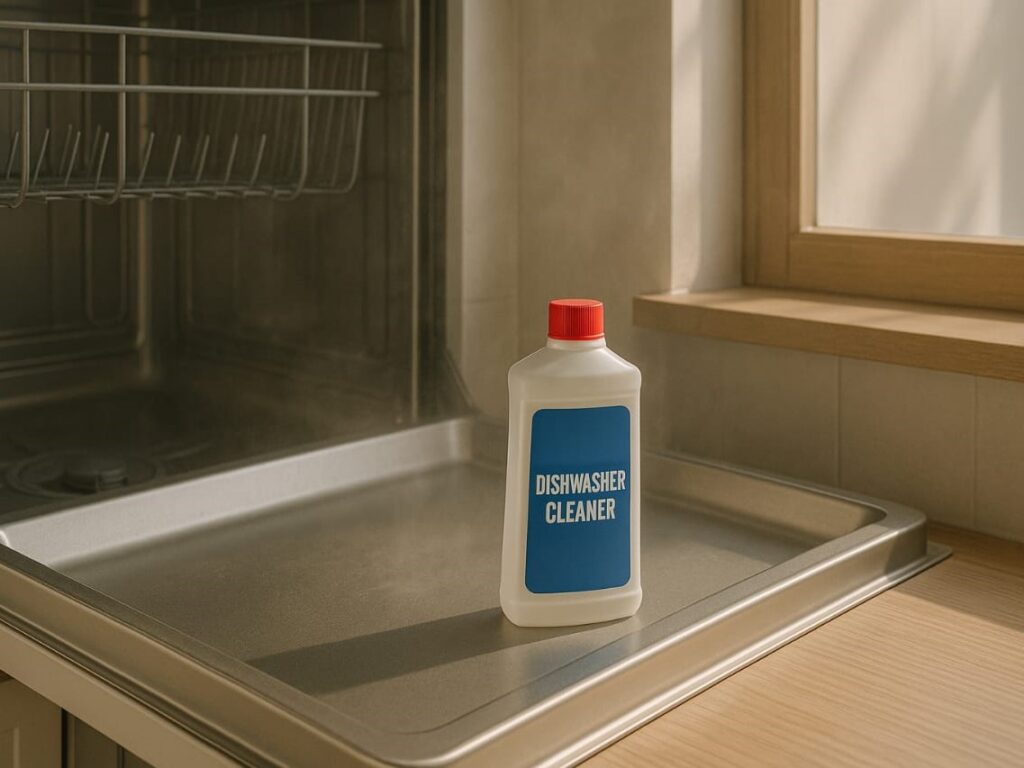
Learning how to clean dishwasher with baking soda is a simple yet effective way to maintain this essential kitchen appliance. Regularly cleaning the inside of your dishwasher prevents the buildup of detergent, minerals, and dirt that can cause your appliance not to wash correctly. Not only does neglect result in unsightly buildup and a smelly dishwasher, but the accumulated gunk can also leave an unpleasant film on your dishes.
Baking soda uses natural abrasion to scrub away grime without scratching surfaces. It also acts as a powerful deodorizer if your dishwasher has developed an unwelcome musty stench. When combined with vinegar, which dissolves mineral deposits and food residues, you have a powerful cleaning duo for your appliance. A monthly cleaning schedule can help maintain your dishwasher’s efficiency and eliminate odors.
This step-by-step guide on how to clean a dishwasher with baking soda will show you exactly how much baking soda to use in your dishwasher, how to effectively deodorize your appliance, and how to clean your dish rack with this versatile household product.
Step 1: Empty the dishwasher and remove racks
The first step in cleaning your dishwasher with baking soda begins with completely emptying the appliance. This seemingly simple task lays the groundwork for a thorough cleaning process that will help restore your dishwasher to its optimal functioning condition.
Why starting with an empty dishwasher matters
Beginning with an empty dishwasher isn’t just common sense; it’s essential for effective cleaning. For best results, the dishwasher should be empty when cleaning it with baking soda or vinegar. It ensures the cleaning agents can reach all surfaces and components without obstacles.
An empty dishwasher allows the baking soda and vinegar to fully access all areas of the machine, including hard-to-reach corners and crevices where food particles and soap scum typically accumulate. Additionally, having no dishes inside prevents potential damage to your kitchenware from the cleaning process.
Furthermore, removing everything from your dishwasher allows you to inspect the interior for any visible issues. This initial inspection can help identify problems like clogged spray arms or accumulated debris that might affect your dishwasher’s performance.
Starting with an empty dishwasher also enables you to clean components individually. Routine maintenance like this helps prevent a smelly dishwasher and the build-up of detergent, minerals, and dirt that can cause it not to clean properly. Monthly deep cleaning using baking soda is recommended for most households. However, those with hard water may need to clean more frequently to remove mineral buildup.
How to remove and clean the dish rack with baking soda
Removing the racks from your dishwasher may be tricky. Still, the process is straightforward once you understand how they’re designed. Here’s how to safely remove and clean your dishwasher racks:
Bottom rack removal: The bottom rack is typically the easiest to remove. Pull it forward along the door and lift it straight out. We’ll address this later; it gives you immediate access to the filter area and drain.
Top rack removal: For the top rack, the process varies slightly depending on your dishwasher model:
- Pull the rack forward as far as it will go until it stops
- Look for stoppers or clips at the end of the rails
- On many models, you’ll need to press tabs or clips inward to release the rack
- Some models allow you to lift the rack off the rails once it’s fully extended
Important note: Remove all dishes before removing the top rack from your dishwasher. It prevents potential breakage and makes the rack lighter and easier to handle.
Once you’ve removed the racks, it’s time to learn how to clean dishwasher with baking soda by cleaning them with this natural ingredient. Create a baking soda paste by mixing approximately 1/2 cup of baking soda with enough water to form a thick, spreadable consistency. This amount is generally sufficient for cleaning both racks.
Apply this paste to any areas with visible residue, paying special attention to:
- The tines that hold plates
- The corners where soap scum accumulates
- Areas with visible mineral deposits
For stubborn grime, apply a baking soda paste and let it sit for 15-20 minutes. Gently scrub with an old toothbrush. Baking soda’s mild abrasiveness removes buildup without scratching surfaces. It works well on plastic racks, effectively eliminating stains and lingering food odors.
After scrubbing, rinse the racks thoroughly with warm water. Dry completely to prevent mold or mildew. While racks are out, scrub the spray arms and clear the spray holes of debris. This ensures optimal water flow and prepares your dishwasher for deeper interior cleaning in the following steps.
Recommended Products
| Product Name | Brand | Size | Key Features | Price Range | Amazon Link |
| Pure Baking Soda | ARM & HAMMER | 4 lb Box | Multi-purpose cleaning, deodorizing, food-grade | $3-5 | ARM HAMMER Baking Soda |
| Pure Baking Soda (12-Pack) | ARM & HAMMER | 1 lb boxes | Convenient individual boxes, long-term supply | $15-20 | ARM HAMMER Baking Soda |
| Super Washing Soda | ARM & HAMMER | 55 oz Box | Enhanced cleaning power, laundry booster | $6-8 | ARM HAMMER Super Soda |
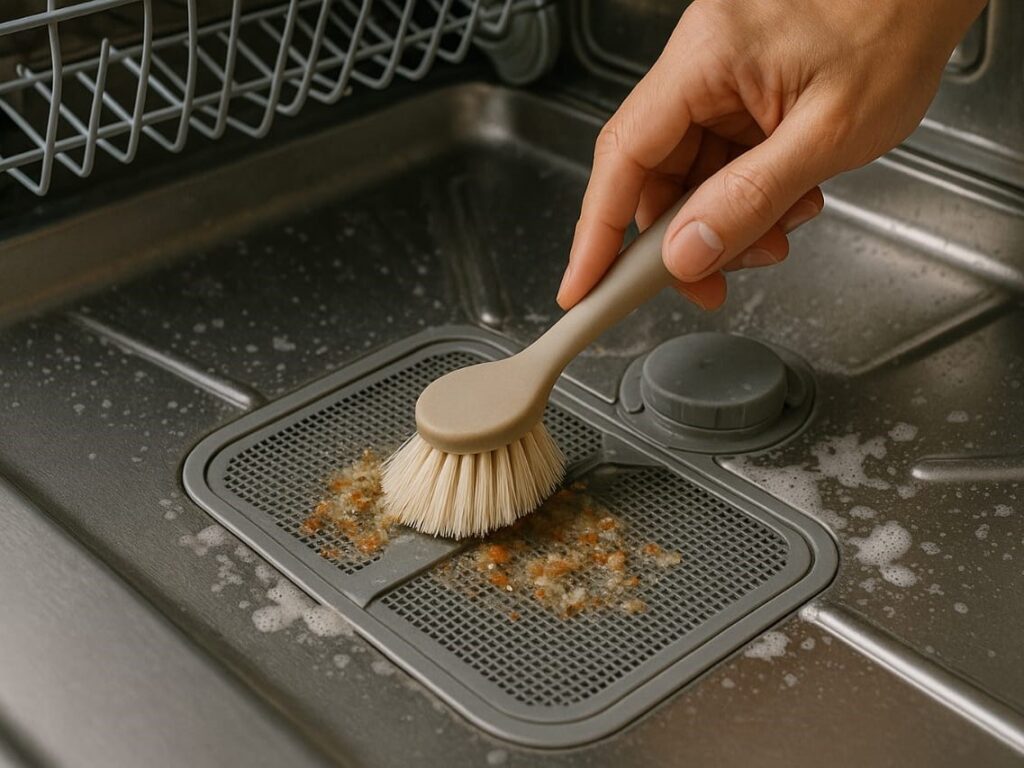
Step 2: Clean out food debris and check the drain
Now that you’ve removed the racks, it’s time to focus on one of your dishwasher’s most critical areas: the drain. Food debris accumulation is a common culprit behind dishwasher problems, from unpleasant odors to poor cleaning performance. Consequently, giving special attention to this area will dramatically improve your appliance’s efficiency.
Inspecting the drain area
Inspect the drain on the dishwasher’s floor with the bottom rack removed. Usually covered by a round screen or filter, this part prevents clogs. Standing water, slow draining, and musty smells often signal drainage issues that need quick attention.
Look for buildup or sludge around the drain cover. Food residue from unrinsed dishes can collect here, causing blockages. Over time, this leads to complete clogs and odor problems. Regular scraping of dishes helps minimize this buildup and keeps drains flowing.
If standing water is present, clear it before inspecting. Use a cup, sponge, turkey baster, or wet/dry vacuum to remove water. Place towels around the dishwasher base to catch spills and protect your kitchen floor from potential leaks.
Removing visible food particles
Once you have clear access to the drain area, it’s time to remove any accumulated debris. First, check for large food particles; things like popcorn kernels or pieces of paper labels from jars are common culprits. These larger items can significantly impair your dishwasher’s drainage capabilities.
To begin cleaning:
- Remove any visible food particles by hand (wearing gloves is recommended)
- Inspect the bottom of the dishwasher tub for food and waste buildup
- Clean the area thoroughly with a rag or sponge
- Pay special attention to the drain opening
Make a paste with 1/4 cup of baking soda and water for stubborn drain grime. Apply to soiled spots, let sit for 10-15 minutes, then scrub gently. Baking soda’s abrasiveness tackles buildup without damaging components, keeping your dishwasher clean and odor-free.
To fight odors, sprinkle 1/4 cup baking soda into the drain and pour 1/2 cup white vinegar. The foaming action loosens debris and kills odor-causing bacteria, reaching hidden spots. Also, check for broken glass fragments that may clog the drain pump outlet.
Dishwasher drains connect to your sink system, so clogged sinks can affect dishwasher performance. Busy households may need weekly drain cleaning, but monthly deep cleans usually suffice. Regular maintenance boosts your dishwasher’s lifespan. Next, we’ll tackle cleaning the filter.
Step 3: Remove and clean the dishwasher filter
The filter is your dishwasher’s first defense against food particles and debris that can clog drains and affect cleaning performance. After examining the drain area, tackling the filter is your next crucial step in cleaning your dishwasher with baking soda.
How to locate and remove the filter
Finding your dishwasher filter is relatively straightforward once you know where to look. Most dishwasher filters are located at the bottom of the appliance, beneath the bottom rack. To access them, you’ll need to remove the bottom rack and set it aside.
Once you’ve removed the rack, look for a cylindrical component in the bottom of the dishwasher tub. Depending on your model, the filter might be in the back corner of the dishwasher tub or around the base of the bottom spray arm. Many dishwashers have two filter parts: an upper filter assembly (the cylindrical piece) and a lower filter beneath it.
To remove the filter:
- For the upper filter assembly, gently turn it a quarter turn counterclockwise and lift it out
- Next, lightly grasp the lower filter, lift it slightly, and pull forward to remove it
- Handle with care; a damaged filter can lead to poor dishwasher performance
Subsequently, inspect the filter components. If you’re unsure whether your dishwasher has a manual or self-cleaning filter, note that manual filters have a mesh screen that catches food debris and requires regular cleaning. In contrast, self-cleaning filters have a grinder that pulverizes food particles.
How to clean the filter with baking soda and vinegar
Once removed, your filter likely needs a thorough cleaning. For light cleaning, rinse the filter under warm running water to remove loose particles. Nevertheless, most filters benefit from a deeper clean.
For stubborn food residue and odors, try this baking soda and vinegar method:
- First, create a cleaning solution by filling a sink or large bowl with hot water and a few drops of dish soap.
- Soak the filter for 10-15 minutes to loosen the debris.
- Meanwhile, prepare a baking soda paste by mixing 1/4 cup of baking soda with just enough water to form a thick consistency.
- Remove any remaining food particles after soaking and gently scrub the filter with a soft-bristled brush or an old toothbrush.
- For lingering odors, pour 1/2 cup of baking soda into the drain where the filter sits, followed by 1/2 cup of vinegar, and let the fizzy mixture sit for 15 minutes.
- Certainly, avoid wire brushes or scouring pads, as these can damage the filter mesh.
For particularly grimy filters, consider an extended soak in a mixture of white vinegar and warm water for at least 30 minutes. This combination helps dissolve mineral deposits and eliminate odors, making baking soda and vinegar perfect for deodorizing your dishwasher.
After cleaning, rinse the filter thoroughly under hot water to remove all cleaning agents. Ensure it’s spotless and no longer feels greasy before reinstalling. To reinstall, reverse the removal process, place the lower filter first (if your model has one), then insert and lock the cylindrical filter by turning it clockwise.
How often should the filter be cleaned?
The frequency of filter cleaning depends mainly on your dishwasher usage and habits. According to various manufacturers, you should clean your dishwasher filter:
- Every three to six months for an average household use
- Four to 12 times per year, if you don’t rinse dishes before loading
- Monthly, if you notice any warning signs of a clogged filter
Warning signs that indicate it’s time to clean your filter include:
- Visible food buildup in the filter
- Water not draining properly
- Unpleasant odors coming from the dishwasher
- Food particles remaining on clean dishes
Indeed, households that run more than 10 loads weekly or don’t scrape food before loading might need to clean their filter more frequently. Bosch suggests cleaning three to six times yearly if you rinse dishes beforehand and four to 12 times yearly if you don’t.
Regular filter maintenance prevents build-up, ensures efficient cleaning, and extends your dishwasher’s lifespan. Moreover, a clean filter helps eliminate those persistent dishwasher odors that baking soda is so effective at neutralizing.
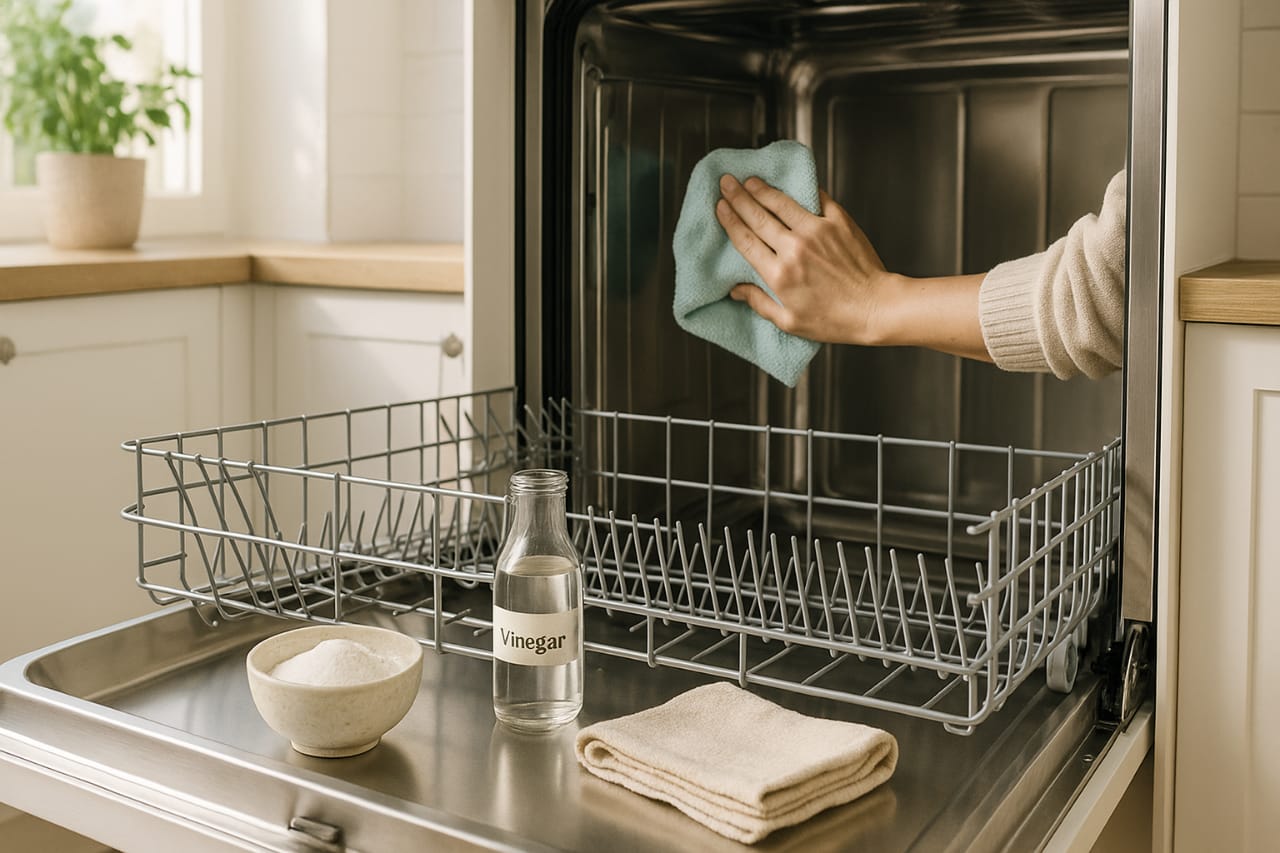
Step 4: Wipe down the interior walls and door
After tackling the filter in your how to clean dishwasher with baking soda routine, it’s time to focus on the interior surfaces where grime, mineral deposits, and limescale often accumulate. These unsightly buildups not only affect your dishwasher’s appearance but can also impact its cleaning performance and leave your glassware cloudy.
Using a baking soda paste for stubborn grime
Baking soda’s mild abrasive properties make it perfect for tackling stubborn stains without damaging your dishwasher’s interior. For best results, create a simple yet effective cleaning paste:
- Mix ½ cup baking soda with 1-2 tablespoons of water until you achieve a thick, spreadable consistency
- Apply this paste directly to areas with visible residue, mineral deposits, or discoloration
- Let the paste sit for 15-20 minutes to break down stubborn grime
- Gently scrub with a soft cloth or sponge
- Rinse thoroughly with warm water
This paste works remarkably well on interior walls, where food splatter and mineral deposits tend to accumulate over time. You should reapply the paste and let it sit longer, especially for stubborn stains.
Beyond that, if your dishwasher has developed unpleasant odors, you can deodorize it effectively with baking soda. Sprinkle one cup of baking soda along the bottom of the empty dishwasher and run a short, hot water cycle. This method eliminates odors rather than merely masking them.
In addition to cleaning visible surfaces, pay special attention to the interior of the door. Use a damp microfiber cloth or sponge to remove residue, including the door’s edges and control panel. For stainless steel interiors, avoid abrasive cleaners that might scratch the surface.
Cleaning the rubber seals and edges
The rubber gasket, the seal that lines your dishwasher door, requires particular attention during cleaning. This area is often overlooked yet tends to trap food particles and moisture, potentially leading to mold growth and unpleasant odors.
First, inspect the seal for any tears, cuts, or wear that might compromise its function. The “black stuff” sometimes observed on seals is often mold, mildew, or deteriorating rubber, especially if the seal remains wet or is frequently exposed to food residue.
For effective cleaning:
- Gently clean the gasket with a soft toothbrush to remove grime from tough-to-reach crevices without putting excessive pressure on the seal.
- Wipe around the rubber gasket with an old, soft toothbrush and three cups of hot water mixed with ½ cup of vinegar.
- Dip a toothbrush in white vinegar for stubborn mold or mildew, and scrub the gasket thoroughly.
Avoid harsh chemicals on the gasket, as they can damage the rubber and reduce lifespan. After cleaning, dry the seal thoroughly with a paper towel to prevent moisture buildup. Food particles often stick to the gasket edges, disrupting the seal and causing leaks. Regular cleaning is crucial for maintaining dishwasher performance.
Apply a baking soda paste for grimy seals or edges, let it sit for 10 minutes, and gently scrub with a soft brush. This method removes buildup without harming the rubber. Combined with routine maintenance, wiping down the interior with baking soda keeps your dishwasher efficient and sparkling clean.
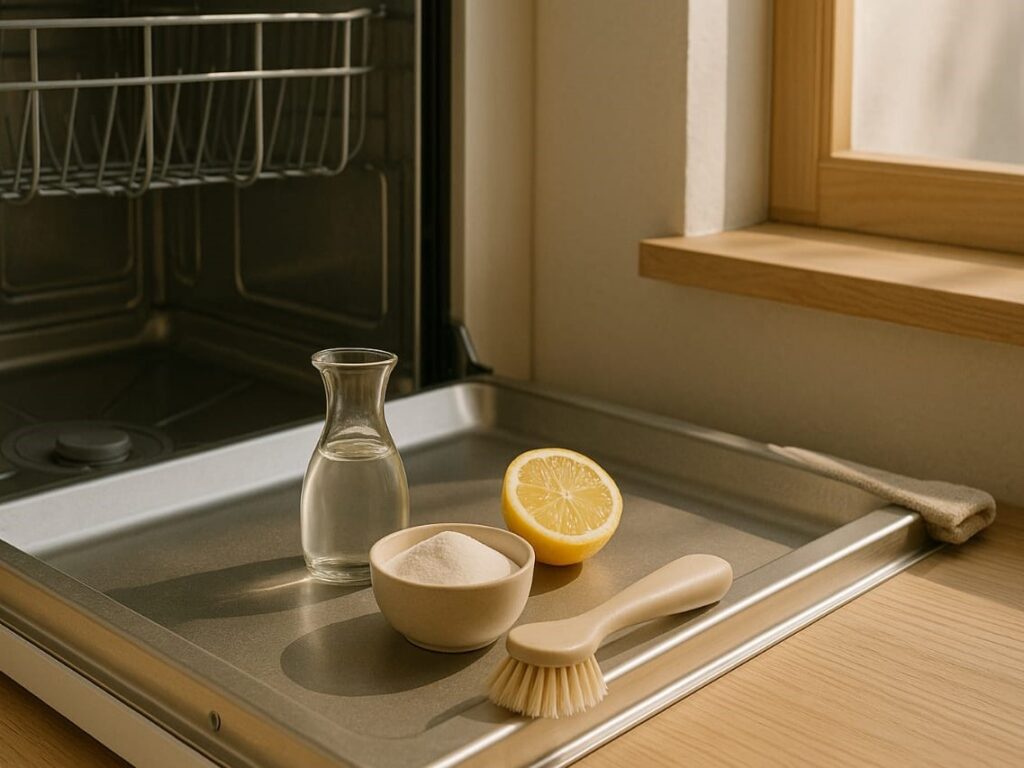
Step 5: Run a vinegar cycle to break down grease
With your dishwasher’s interior surfaces now clean, it’s time to tackle grease buildup with a vinegar cycle. Vinegar’s acidic properties make it exceptionally effective at dissolving stubborn grease, breaking down old detergent residue, and addressing mineral deposits that regular cleaning might miss.
While baking soda excels at deodorizing, you might also want to learn about how to clean a dishwasher with vinegar for even more thorough cleaning results. This powerful combination of cleaning methods ensures your dishwasher receives comprehensive maintenance that addresses both visible grime and hidden buildup.
How to place vinegar in the dishwasher
Properly placing vinegar in your dishwasher is crucial for maximum cleaning effectiveness. Instead of simply pouring vinegar directly into the base of the machine, you’ll want to use a container:
- Find a dishwasher-safe bowl, cup, or measuring jug that can withstand high temperatures
- Pour 1 cup of distilled white vinegar into this container
- Place the container securely on the dishwasher rack
There are two schools of thought regarding optimal placement. Some experts recommend placing the vinegar-filled container on the bottom rack to allow the solution to spread throughout the entire machine. Others suggest positioning it on the top rack facing upright. Both methods are effective, though top rack placement may provide better distribution during the cycle.
For extremely dirty dishwashers or those with significant buildup, consider using up to 2 cups of vinegar for the initial cleaning. Once you establish a regular cleaning routine, a single cup will typically suffice for maintenance.
Regarding the type of vinegar, distilled white vinegar is generally preferred since it doesn’t contain coloring agents that might stain your dishwasher’s surfaces. Although diluted apple cider vinegar can work, its slight color may leave residue on lighter surfaces.
Once the vinegar is placed correctly, run the dishwasher on the hottest cycle. For best results:
- Do not add any dishwashing detergent during this cycle
- Run a full, complete wash cycle
- Consider running your kitchen sink hot water for a minute beforehand to ensure hot water has reached your kitchen
- You can optionally skip the drying cycle to save energy
If you dislike vinegar’s distinctive smell, adding a few drops of essential oil (citrus or peppermint work well) to the vinegar can help diffuse the scent without compromising cleaning power.
Why vinegar is used before baking soda
Using vinegar before baking soda in your dishwasher cleaning routine follows a specific chemical logic that maximizes the cleaning power of both substances. First off, vinegar excels at:
- Cutting through grease and dissolving fatty residues
- Breaking down old detergent buildup that accumulates over time
- Tackling limescale deposits that can affect performance
- Loosening debris so it can be flushed away in subsequent cycles
Since vinegar has an acidic pH of approximately 2-3, it effectively dissolves mineral deposits and food residues that have hardened on dishwasher surfaces. This acidic action is particularly effective against alkaline soil and hard water deposits.
In contrast, baking soda (which we’ll use in the next step) is alkaline with a pH of around 9. It makes it excellent for:
- Neutralizing odors rather than just masking them
- Providing gentle abrasion for scrubbing surfaces
- Deodorizing the dishwasher interior
Using these products sequentially, vinegar first, then baking soda, creates a one-two punch against different types of dishwasher grime. The vinegar dissolves mineral buildup and grease, and the baking soda addresses lingering odors and provides additional cleaning power.
This sequencing follows the principle of “like dissolves like” in cleaning. Acidic vinegar dissolves mineral buildup, while alkaline baking soda tackles protein-based and greasy soils. The combination offers superior cleaning compared to using either product alone.
After completing the vinegar cycle, your dishwasher will be primed for the baking soda treatment in Step 6. This sequential approach ensures you’ll eliminate the visible grime and the hidden bacteria that cause unpleasant odors.
Recommended Products
| Product Name | Brand | Size | Key Features | Price | Amazon Link |
| Distilled White Vinegar | Heinz | 1 Gallon | 5% acidity, cleaning grade, removes mineral deposits | $3-4 | Heinz Distilled White Vinegar 1 gallon |
| Cleaning Vinegar | Lucy’s Family Owned | 1 Gallon | 6% acidity, stronger cleaning power | $4-6 | Lucy’s Cleaning Vinegar 6% acidity |
| White Vinegar (4-Pack) | Great Value | 32 oz bottles | Convenient multi-pack, household cleaning | $8-12 | Great Value White Vinegar 32 oz 4 pack |
Step 6: Sprinkle baking soda and run a short cycle
After completing the vinegar cycle, your dishwasher is primed for the baking soda treatment, eliminating lingering odors and providing a final cleaning boost.
How much baking soda in the dishwasher is ideal
The ideal amount of baking soda for cleaning your dishwasher is consistently recommended to be one cup. This quantity provides sufficient cleaning and deodorizing power without being wasteful. Sprinkle the baking soda directly onto the dishwasher tub’s bottom. Ensure you distribute it evenly across the floor of the appliance rather than placing it in the detergent dispenser, as this allows the baking soda to work throughout the entire machine.
Consider using slightly more baking soda for especially stubborn odors or heavily soiled dishwashers. However, one cup remains the standard recommendation across multiple cleaning guides.
How to deodorize a dishwasher with baking soda
When learning how to deodorize dishwasher with baking soda, you’ll find it excels at neutralizing odors rather than merely masking them. To effectively deodorize your appliance:
- Wait until the vinegar cycle is finished
- Sprinkle one cup of baking soda evenly across the bottom of the empty dishwasher
- Run a short, hot water cycle without adding any detergent
- Skip the drying cycle and allow the dishwasher to air dry naturally
Alternatively, for quick deodorizing between deep cleanings, you can leave a small open container of baking soda in the bottom rack overnight to absorb unwanted smells.
How to get the smell out of the dishwasher with baking soda
Persistent dishwasher odors usually indicate trapped food particles or mold growth. Alongside the standard baking soda method above, try these additional techniques:
Firstly, baking soda’s natural properties are excellent for neutralizing unpleasant, musty stenches. Unlike chemical cleaners, it eliminates odors at their source without introducing artificial fragrances.
Combining a vinegar cycle followed by a baking soda treatment creates a powerful one-two punch against odor-causing bacteria. This sequence, acid first, then base, provides superior results compared to using either product alone.
Equally important, never combine vinegar and baking soda simultaneously, as they neutralize each other’s cleaning properties. Always “clean with the vinegar first and then with the baking soda” for maximum effectiveness.
For especially stubborn smells, repeat the baking soda treatment, allowing the dishwasher to air dry thoroughly between cycles to prevent moisture accumulation that can contribute to odors.
Step 7: Clean spray arms and utensil holders
Spray arms and utensil holders often get overlooked yet play a crucial role in your dishwasher’s cleaning performance. These components require special attention because clogged spray arms can significantly reduce water pressure and cleaning power.
How to remove and rinse spray arms
Initially, locate both the upper and lower spray arms in your dishwasher. The removal process varies by model:
For lower spray arms:
- Unclip the arm and lift it away
- On some models, you’ll need to press downward to release the clip
For upper spray arms:
- Unscrew and detach the upper spray arm
- Many models require you to twist the central locking knob counterclockwise
- After removal, shake any remaining water from the arms
Once removed, thoroughly rinse the spray arms under running water. For deeper cleaning, soak them in warm water and a tablespoon of baking soda for 15-20 minutes. This solution helps dissolve food particles and mineral deposits without damaging the components.
After soaking, rinse again and shake off excess water before reinstallation. To reinstall the lower arms, press downward until they click into place. For the upper arms, twist the clip to lock into position.
Unclogging spray holes with a toothpick
Over time, food particles, grease, and mineral deposits can block the tiny openings in spray arms, reducing water pressure and cleaning power. To unclog these holes:
- Examine each spray hole for visible blockages
- Use a toothpick, straightened paper clip, or thin wire to remove debris from each hole gently
- Take your time with this process, ensuring every spray hole is clear
- For stubborn clogs, use the toothpick with a twisting motion to dislodge trapped particles
For utensil holders, food debris easily gets trapped in the grid design. Clean these thoroughly with a small brush and mild dish soap, paying special attention to crevices. Additionally, baking soda and water paste can be effective on stubborn stains in utensil holders.
Finally, once reinstalled, spin the spray arms by hand to ensure they rotate freely. This crucial step confirms proper functioning after cleaning.
Step 8: Wipe exterior and polish if needed
The final step in your baking soda dishwasher cleaning routine focuses on the exterior, the part everyone sees. A sparkling clean interior deserves an equally impressive exterior to complete your thorough cleaning process.
Cleaning stainless steel surfaces
For stainless steel dishwashers, proper cleaning techniques preserve both appearance and longevity. First, identify the grain direction in your stainless steel, the subtle lines running horizontally or vertically across the surface. Always wipe in the direction of this grain to avoid scratches and achieve optimal shine.
Clean with a soft, damp cloth and mild detergent for daily maintenance. For deeper cleaning, apply a specialized stainless steel cleaner or polish with a microfiber cloth. Alternatively, cleaners containing oxalic acid, like Bar Keepers Friend Soft Cleanser, work effectively on rust, tarnish, and minor blemishes.
After cleaning, use a separate dry microfiber cloth to buff the surface in the grain’s direction, removing any streaks. This simple step transforms your appliance’s appearance dramatically.
Regular window cleaner works well on glass door panels for non-stainless exteriors, while a soft cloth with warm, soapy water suffices for plastic or painted surfaces.
Avoiding harsh chemicals on the exterior
To protect your dishwasher’s exterior finish, avoid these harmful substances:
- Bleach-containing products
- Abrasive or grainy cleaners
- Ammonia or citrus-based cleaners
- Steel wool pads or rough-textured cloths
- Glass cleaners on stainless steel (contains ammonia that may damage the finish)
Besides damaging appearances, harsh chemicals can compromise the integrity of your dishwasher’s exterior materials over time. Fourth, implement a weekly cleaning schedule to prevent dust, fingerprints, and grime buildup.
Remember the baking soda paste from earlier steps? A mild version works wonderfully on exterior stains, too. Mix one tablespoon of baking soda with just enough water to create a thin paste, then apply gently to stubborn spots on non-stainless surfaces. Rinse and dry thoroughly afterward.
Compared to interior cleaning, exterior maintenance is straightforward but equally crucial for your appliance’s overall condition and longevity. If you’re considering upgrading your appliance after this thorough cleaning, check out our comprehensive Whirlpool Dishwasher vs Frigidaire vs Bosch: 2025 Buying Guide to compare top brands and find the perfect model for your kitchen needs.
Top 5 Frigidaire Dishwashers Reviewed for Performance & Price
Discover the best Frigidaire dishwashers that combine superior cleaning power with energy efficiency. Our detailed reviews cover performance, features, and value to help you choose the perfect model for your kitchen needs.
Conclusion
Knowing how to clean dishwasher with baking soda provides a simple, cost-effective way to maintain this essential kitchen appliance. Throughout this guide, you’ve learned how one cup of baking soda sprinkled across the bottom of your dishwasher effectively eliminates odors while breaking down stubborn grime. Additionally, creating a baking soda paste offers the perfect solution for cleaning removable components like dish racks without risking scratches on their surfaces.
Remember that prevention remains your best strategy for a clean dishwasher. Scraping dishes before loading, removing visible food debris promptly, and performing quick maintenance checks help minimize buildup between deep cleanings. Consequently, your dishwasher will function more efficiently, clean dishes more effectively, and last significantly longer. After all, your dishwasher works hard to keep your kitchen running smoothly. These simple steps to maintain it with natural cleaning agents like baking soda preserve your investment and ensure your dishes emerge spotless and odor-free every time. For additional dishwasher maintenance tips and techniques, explore our complete guide on How to Clean a Dishwasher for comprehensive appliance care. A clean dishwasher ultimately means cleaner dishes, making this small maintenance effort worth your time.