
Boost Home Internet: Eliminate Dead Zones | Enjoy Faster Wi-Fi Now

A frustrated person sitting in front of a laptop with a slow internet connection, looking at a buffering screen.

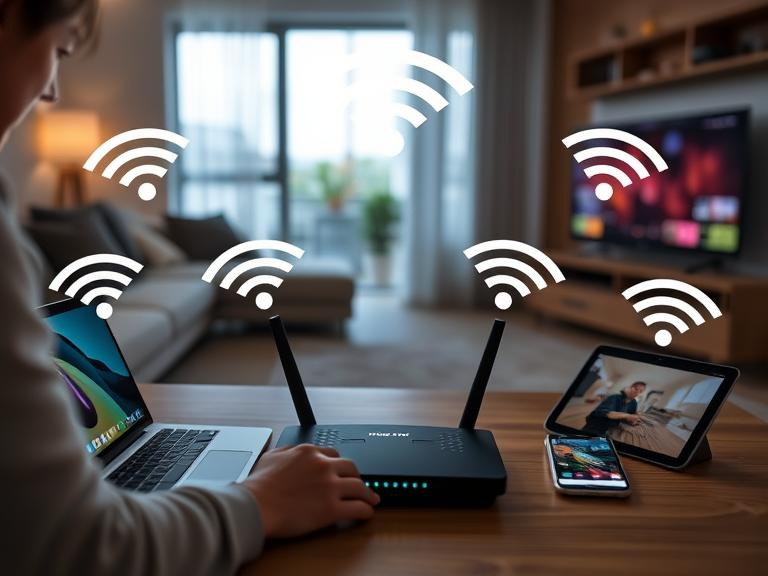
Are you dealing with slow Wi-Fi in your home? It’s annoying, right? Your internet struggles when you need it the most. Whether you are watching a movie, attending a video call, or browsing from your bedroom, these poor signals can ruin the mood, but boosting your home internet speed does not have to be challenging or costly.

From repositioning your router to buying Wi-Fi antennas and boosters, I am going to share with you simple tricks to boost your home internet connection. If those do not work, I will also share with you a few budget-friendly products that can provide stronger coverage of your internet. With a few clever adjustments, you can enjoy fast, stable Wi-Fi in your entire home, no more buffering zones or connection drops.

My Terrible Wi-Fi

I swear, my home Wi-Fi has a personal vendetta against me. Every time I sit down to watch a show, it decides to die. Not during emails. Not when I’m doom-scrolling. Just when I actually want to relax.

Last week, I finally snapped and ran a speed test. Turns out, my Wi-Fi was crawling slower than my grandma’s old dial-up. Then I checked the connected devices… someone named “John’s iPad” was leeching off my internet. I don’t even know John.

I changed the password to “NiceTryJohn123.” Problem solved.

Or so I thought. My bedroom was still a Wi-Fi graveyard. Moved the router. Updated the firmware. Nothing. Finally, I caved and got a Wi-Fi booster. And guess what? It actually worked. Full bars, no buffering.

Now, I feel unstoppable. Except last night, mid-stream, my power went out. Because, of course, it did.

7 Ways to Boost Home Internet and Improve Your Wi-Fi Signal

A person adjusting a Wi-Fi router, surrounded by devices connected to the internet, symbolizing improved connectivity.

There are several things you can do to get a little extra performance out of your signal, many of them free. These methods range from internal solutions, such as testing your actual speed, to external solutions, such as buying a Wi-Fi booster.

1. Check Your Internet Connection with a Speed Test

The first step to fix a slow Wi-Fi connection is you need to run a speed test. This will help you find that the real issue lies with your Wi-Fi or your internet service provider (ISP), saving you time troubleshooting the wrong problem.

To check your speed:

  • Use online speed tools: You can search “Internet Speed Test” on Google, and after that, start with a wired connection. Plug your Ethernet cable into your modem or router. This will help you identify the problem if your ISP is providing the speed you are paying for.
  • Compare your wired and Wi-Fi speed: Try testing again, but this time while connected to the internet, once near the router and next from your usual work area. It will help you find if the problem is signal strength or something else.

So if your Ethernet speed is slower than what you are paying for, most likely the issue lies with the service provider, or it can also be an outdated modem. If your speed is only fast when you are standing near the router, you may need to reposition it to boost home internet performance. But even if the speed is slow near the router, the router itself may be outdated or faulty.

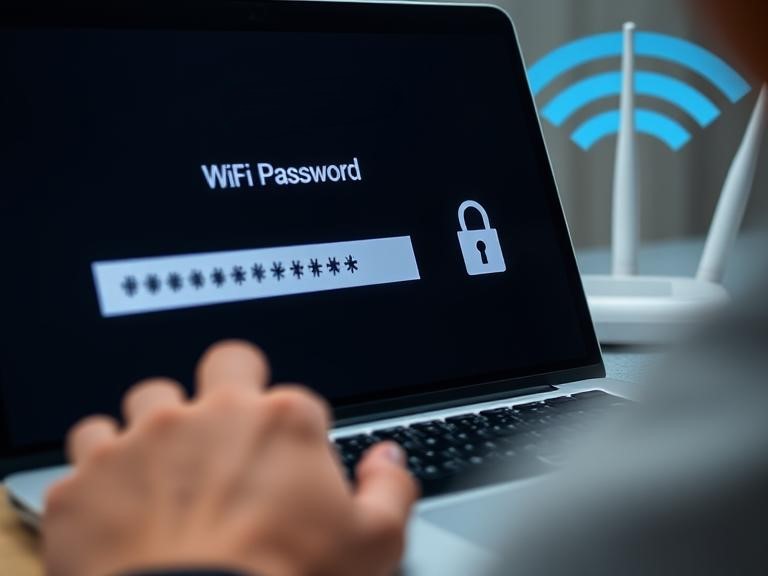
2. Create a Strong Wi-Fi Password

A secure Wi-Fi password is essential to keep unwanted users off your network (yes, even that neighbor who “accidentally” connects). A weak password can lead to slower speeds and potential security risks, so it’s worth taking a few minutes to strengthen it.

Most routers offer two security options: WPA2 (Wireless Protected Access 2) and WEP (Wired Equivalent Privacy). Always choose WPA2 if available, it’s far more secure than WEP.

A person typing a secure Wi-Fi password on a laptop screen, with a lock icon symbolizing security.
  • Use a mix of characters. Include uppercase and lowercase letters, numbers, and symbols.
  • Make it long and unpredictable. Aim for at least eight characters and avoid obvious choices like “password123” or your pet’s name.
  • Keep it private. Avoid using personally identifiable information, like your birthday or address.

To make things easier, consider using a password manager like NordPass to generate and store unique passwords securely. That way, you won’t have to remember complex combinations, your network stays safe, and you stay stress-free. 😊

3. Change Your Wi-Fi Channel for a Faster Connection

If your internet slows down, especially in certain areas like your internet bedroom, it could be due to Wi-Fi interference. Like walkie-talkies, routers use channels to broadcast signals. Too many devices on the same channel can cause congestion, reducing speed and reliability.

  • Check your router’s settings to find the Wi-Fi channel option. Look in the manual or search online for instructions based on your model.
  • Enable the auto setting if available. Many modern routers automatically select the least crowded channel for better performance.
  • Manually switch channels if needed. If auto mode isn’t helping, try selecting a different channel. Some trial and error may be required, but once set, you won’t need to adjust it often.
  • Use Wi-Fi antennas and boosters. If changing channels doesn’t help, external antennas or a Wi-Fi booster can strengthen the signal, especially in areas like your internet bedroom where the connection may be weak.

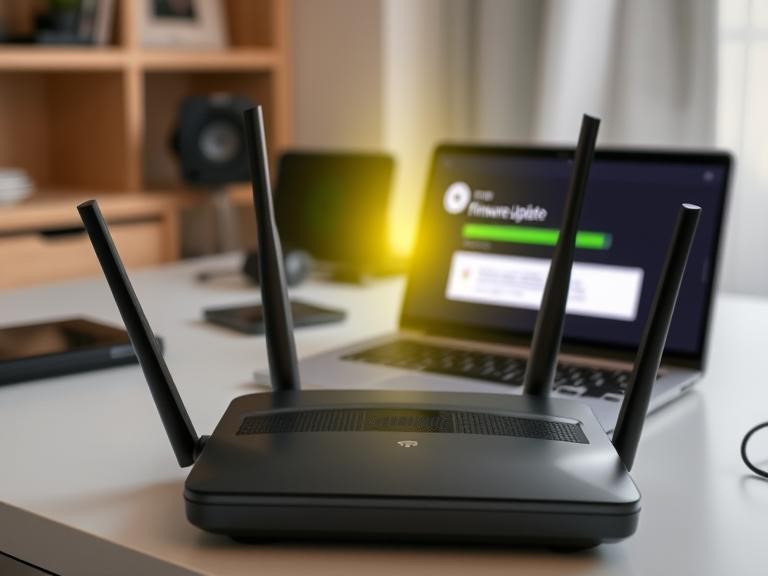
4. Keep Your Router’s Firmware Updated

Keeping your router’s firmware up to date is crucial for maintaining security, improving speed, and ensuring your network runs smoothly, especially if you’re using Wi-Fi antennas and boosters to extend coverage in your internet bedroom. Manufacturers frequently release updates to fix bugs, enhance performance, and prevent security vulnerabilities.

A router with a progress bar on a laptop screen indicating a firmware update in progress.
  • Use your router’s built-in update tool for quick and easy updates. Most modern routers have an automatic update feature within the settings menu. Simply log into your router’s admin panel, navigate to the firmware section, and install the latest version. This ensures your device is always running efficiently without manual intervention.
  • Manually update older routers by downloading the latest firmware. If your router lacks an automatic update feature, visit the manufacturer’s website, download the newest firmware file, and upload it via the router’s settings. While this requires extra steps, it’s essential for keeping your internet stable and secure.

By keeping your router’s firmware updated, you can avoid connectivity issues, improve security, and maximize the performance of your Wi-Fi antennas and boosters, ensuring a reliable connection throughout your home, including your internet bedroom. 

5. Try Rebooting Your Router

It may sound too simple, but rebooting your router can fix a surprising number of internet issues. Just like computers, routers handle complex hardware and software processes that can sometimes glitch, leading to slow speeds or dropped connections. A quick restart resets everything, often resolving temporary issues.

A person unplugging a router to restart it for better internet connectivity.
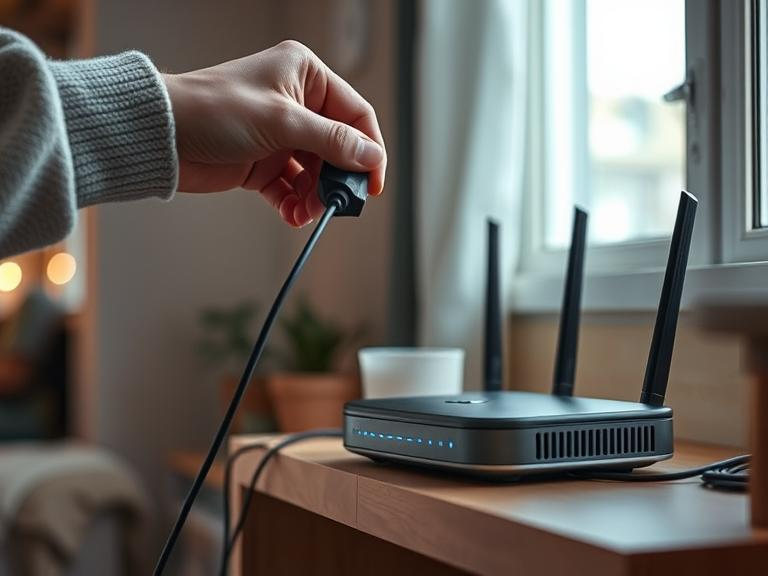
  • Turn your router off, wait 30 seconds, and turn it back on. This clears out memory, refreshes connections, and helps eliminate minor technical hiccups that may be slowing your network.
  • Make router reboots a regular habit, especially if using Wi-Fi antennas and boosters. If your internet slows down in your internet bedroom or other areas, scheduling a reboot once a week can help maintain a stable, strong connection.

6. Replace Your Antenna for a Stronger Signal

Your router’s Wi-Fi antennas and boosters play a crucial role in signal strength. If your router has internal antennas, upgrading to external antennas can significantly improve performance, especially in areas like your internet bedroom where the connection may be weak.

A person attaching a high-gain external antenna to a Wi-Fi router for better signal strength.
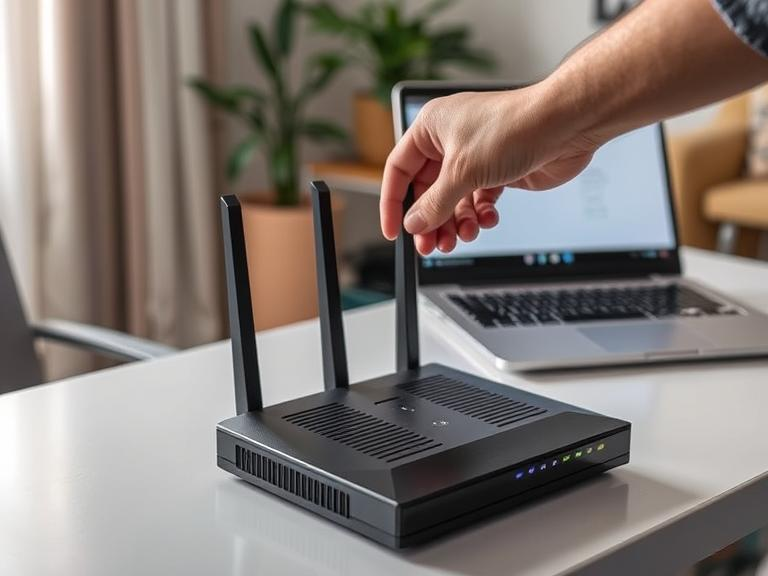
  • Check with the manufacturer for external antenna options. Some routers allow you to replace or add external antennas, which often provide better range and stability.
  • Use directional antennas for targeted signal boosting. These can be pointed toward areas with the weakest signal, helping eliminate dead zones and improve Wi-Fi coverage where you need it most.

A simple antenna upgrade can make a noticeable difference in your internet speed and reliability!

7. Buy a Wi-Fi booster

Routers have a limited range, and this range is further limited by the layout of your home. Depending on the size of the house or apartment you need to cover, it’s possible that even the stronger router won’t cut it by itself.

A Wi-Fi booster plugged into a wall socket, extending the internet range in a home setting.

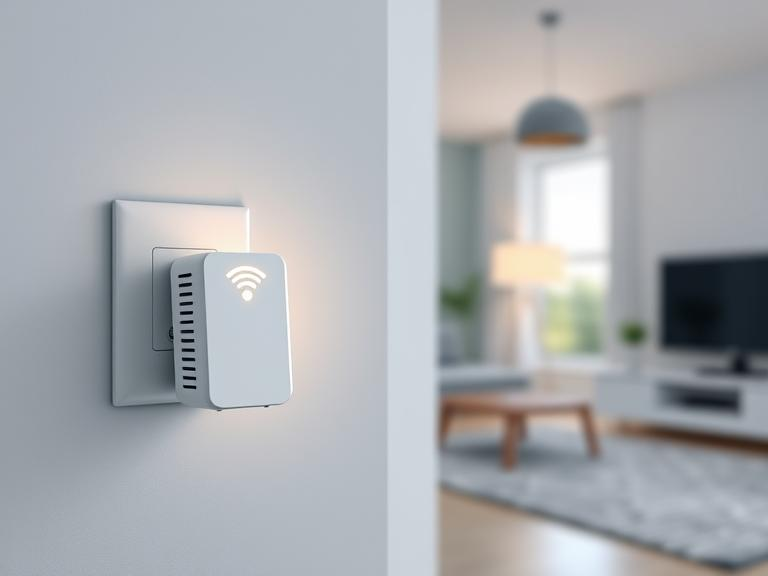
In this situation, you can add a Wi-Fi booster, also known as a Wi-Fi extender or Wi-Fi repeater. This is like a mini router that will take the signal and broadcast it again, extending its range (hence the name). These can be a cost-effective way to make your signal reach further into Wi-Fi dead zones.

(a) Budget: TP-Link N300 WiFi Range Extender (~$20)

  1. N300 Wi-Fi Speeds: Enjoy reliable internet with speeds up to 300 Mbps, ideal for browsing, streaming, and light gaming in hard-to-reach areas.
  2. Smart Signal Indicator: Equipped with LED lights that display signal strength, helping you find the perfect spot to place your range extender for optimal coverage.
  3. Easy Two-Touch Setup: Simply press the WPS button on your router and the range extender button on the TL-WA855RE for a quick, hassle-free installation in under two minutes.

(b) Normal: NETGEAR WiFi Range Extender EX3700 (~$40–$50)

  1. Extended Wireless Coverage: Expands Wi-Fi coverage up to 1000 sq. ft., supporting up to 15 devices, including laptops, smartphones, smart home gadgets, and more, perfect for eliminating dead zones.
  2. 2AC750 Wi-Fi Speed: Offers dual-band performance with speeds up to 750 Mbps, using FastLane™ technology to ensure smoother streaming, gaming, and browsing.
  3. Wired Ethernet Port: Provides a stable, high-speed connection for wired devices like gaming consoles, streaming players, and smart TVs through its dedicated 10/100M port.

(c) Premium: Google Nest Mesh WiFi System (2-pack) (~$150–$200)

  1. Whole-Home Coverage: With two router units, Nest Wifi covers up to 4400 sq. ft., ensuring fast, reliable internet in every room, ideal for large homes or multi-story spaces.
  2. Powerful Performance: Handles up to 200 connected devices while supporting multiple 4K video streams simultaneously, delivering smooth performance for busy households.
  3. Smart & Secure Features: Automatically updates for enhanced security, optimizes Wi-Fi performance in the background, and allows for easy setup, parental controls, and guest network creation via the app.

Additional Tips and Tricks for Boosting Home Internet

1. Use a Powerline Adapter for Hard-to-Reach Areas

Powerline adapters use your home’s electrical wiring to extend your internet connection. They’re ideal for basements, garages, or distant rooms where Wi-Fi signals struggle to reach. Simply plug one adapter near your router and another in the room where you need stronger internet. No extra cables required!

2. Adjust Your Router’s Antenna Position for Better Coverage

Many users overlook the angle of their router’s antennas. Positioning antennas vertically helps spread the signal horizontally, while angling them horizontally improves vertical coverage (ideal for multi-story homes). Experiment with different positions to maximize coverage.

3. Install a Mesh Wi-Fi System for Seamless Connectivity

Unlike traditional extenders that create separate networks, mesh systems provide a unified network across your home. Each mesh unit works together to maintain strong, consistent coverage, reducing dropped connections when moving between rooms.

4. Use Ethernet Cables for High-Bandwidth Devices

For smart TVs, gaming consoles, or desktop PCs that require stable and fast internet, an Ethernet cable beats Wi-Fi every time. Wired connections minimize interference and offer superior performance.

5. Enable Quality of Service (QoS) Settings

Most modern routers have QoS settings that let you prioritize certain devices or applications (e.g., video calls or gaming) for faster speeds. This ensures bandwidth goes where it’s needed most.

Final Thought

Boosting home internet doesn’t have to be complicated or costly. By applying these simple tips, from repositioning your router to upgrading with Wi-Fi antennas and boosters, you can achieve faster, more reliable internet throughout your home. Whether you’re streaming in the living room or working from your internet bedroom, these strategies can eliminate frustrating connection drops. Investing in the right tools and adjusting your setup can dramatically boost home internet performance, ensuring smooth browsing, streaming, and gaming experiences. With a few smart changes, you’ll enjoy stronger signals and faster speeds in every corner of your home.

How to Shine Your Shoe at Home: Easy Steps for a Mirror Shine

Close-up of hands holding a polished black leather shoe, showing a clear mirror-like shine with reflections on the leather.

When was the last time you looked at your shoes and thought, Wow, you’re stunning?  If your answer is “never” or “I don’t remember,” yeah, we need to talk. Scuffed, dull shoes? Like showing up to a party with spinach in your teeth. Embarrassing.

But hey. No worries. I got you. Learning how to shine leather shoes isn’t just a skill. It’s survival. Whether it’s a job interview, a date, or just walking down the street feeling like a boss, you need this. And guess what? You don’t need some fancy kit or a professional touch. I’ll show you how to shine your shoe at home, how to polish shoes to a mirror shine, and make those kicks steal the spotlight.  

Ready? Let’s do this.

The Time Wore Tragic shoes

Okay, confession time. I once showed up to a wedding with shoes so scuffed, the groom asked if I’d been hiking. Mortifying, right? I thought I could just wing it with an old rag and some toothpaste (don’t ask). Spoiler: it didn’t work. My shoes looked worse, and I spent the whole night hiding my feet under the table. That’s when I decided to learn how to shine your shoe properly. Fast forward to today, and my shoes are so shiny, people ask if I’m a secret cobbler. Moral of the story? Don’t be like past me. Learn the right way to shine your shoes, and you’ll never have to hide your feet again.

Why Shining Your Shoes Matters

Close-up of polished leather shoes reflecting light, symbolizing attention to detail and professional appearance.

Think of your shoes as the cherry on top of your outfit. Even the best suit or dress can look meh with dull shoes. Shining your shoes isn’t just about looks, it’s about respect. It shows you care about the details. Plus, regular polishing extends the life of your shoes. So, whether you’re learning how to shine leather shoes or just want to keep your sneakers fresh, it’s worth the effort.  

How to Shine Your Shoe at Home

Person shining black leather shoes at home using a cloth and polish on a wooden table.

Shining your shoes isn’t rocket science. You just need the right tools and a little know-how.

What You’ll Need

  • Shoe polish (Kiwi is great for beginners, Saphir for the fancy folks)
  • A soft cloth (old T-shirts work fine)
  • A shoe brush (for dust and buffing)
  • Water (for that mirror shine)
  • A little patience (worth it, I promise!)
Shoe shining kit with polish, brush, cloth, and leather conditioner arranged on a table.

Step 1: Clean Your Shoes Like You Mean It

First things first, get rid of the dirt. Use a dry brush to remove dust, then wipe them down with a damp cloth. Polishing dirty shoes is like putting frosting on a burnt cake, it won’t fix the problem.

Step 2: Apply the Polish (The Right Way)

Take a little polish on your clothes. Rub it into the leather in small circular motions. This step is where the magic happens. Think of it like feeding your leather, it needs moisture to stay fresh.

Hands applying shoe polish in circular motions on brown leather shoes with a cloth.

Use proper leather shoe shining techniques by choosing the right polish color. Too dark? It stains. Too light? Looks weird. Match it to your shoe color for the best results.

Step 3: Let the Polish Soak In

Patience, my friend. Give the polish 10-15 minutes to settle into the leather. Grab a coffee. Scroll social media. But don’t rush this step.

Step 4: Buff Like Your Life Depends on It

Use a clean cloth or brush and start buffing, using circular motions. Apply a little pressure. This is where the shine starts to show. The more you buff, the shinier they get.

Step 5: The Secret to a Mirror Shine (Water Trick)

Want to learn how to polish shoes to a mirror shine? Here’s the trick: add a few drops of water while buffing. Not too much, just enough to create a glass-like finish. This technique is called a “spit shine” (no actual spit required, please).

Close-up of leather shoes getting mirror shine with a water drop polishing technique.

How to Polish Shoes to a Mirror Shine: Pro Tips

Want your shoes to look like they belong in a museum? Here’s how to polish shoes to a mirror shine:

  • Use Quality Products: Invest in good polish and brushes.
  • Layer It On: Apply thin layers of polish, letting each layer dry before adding the next.
  • Water Trick: Add a drop of water to your cloth while buffing for extra shine.
  • Patience Is Key: This process takes time, but the results are worth it.  

Best Products for Shining Your Shoes

(a) Budget Pick: Kiwi Shoe Polish (~$5 per tin)

  • Deep Nourishment & Protection: A rich blend of natural waxes keeps leather conditioned and safe.
  • High-Gloss Finish: Achieves a long-lasting, mirror-like shine with minimal effort.
  • Extra-Large Tin: Giant size ensures more applications for extended use.

(b) Normal Pick: KIWI Deluxe Shine Kit (~$10–$12)

  • Complete Shoe Care Kit: Includes polish, brush, dauber, and cloth for a perfect shine.
  • Carnauba Wax Formula: Nourishes, protects, and adds water resistance to leather shoes.
  • Revive Old Shoes: Transforms worn-out shoes to look polished and new.

(c) Premium Pick: Saphir Renovateur Leather Conditioner (~$25–$30)

  • Deep Conditioning & Restoration: Nourishes leather, restoring its original color and shine.
  • Premium Formula: Mink and macadamia oil blend with waxes for cleaning, conditioning, and polishing.
  • Safe for All Leathers: Works on delicate and exotic leathers like box calf, goat, and cordovan.

How to Shine Leather Shoes Without Ruining Them

Leather shoes need extra care. Here’s how to shine leather shoes without damaging them: 

  • Always use a leather conditioner before polishing.  
  • Avoid over-polishing, as it can dry out the leather.  
  • Store your shoes in a cool, dry place to maintain their shine.  

Common Shoe Shining Mistakes to Avoid

A pair of leather shoes showing uneven polish with streaks and missed spots, highlighting common shoe shining mistakes like over-polishing and poor buffing.

Even the best intentions can go wrong. Here’s what NOT to do:  

  • Using too much polish (it creates a sticky mess).  
  • Skipping the cleaning step (dirt ruins the shine).  
  • Buffing too hard (it can scratch the leather).  

Fun Shoe Shining Hacks You’ll Love

  1. Banana Peel Trick: Rub the inside of a banana peel on your shoes, then buff with a cloth. Instant shine!
  2. Vinegar Solution: Mix equal parts vinegar and water for a DIY shoe cleaner.
  3. Hair Dryer Hack: Use a hair dryer on low heat to speed up the drying process.  

Conclusion: Shine On, You Crazy Diamond

So, there you have it, your ultimate guide on how to shine your shoe. Whether you’re mastering how to shine leather shoes,  figuring out how to shine your shoe at home, or aiming for that mirror shine, these tips will have you looking sharp in no time. Remember, your shoes are a reflection of you. Treat them well, and they’ll make you proud. Now go forth and shine!

Damage-Free Picture Hanging: Keep Walls Flawless | Easy & Secure

So, you’ve finally got that beautiful painting, your graduation photo, or that quirky cat poster you couldn’t resist. Now comes the tricky part, that is damage free hanging of the picture without turning your wall into holes.

Don’t worry, I’ve been there. One wrong move and suddenly your wall looks like someone’s been practicing darts. But hey, there’s good news: you can hang those masterpieces without leaving a single dent behind.

This is the ultimate guide on damage-free hanging, where your walls stay flawless, your pictures stay straight, and you stay sane.

Damage Free Picture Hanging

Look, hanging pictures isn’t that complex, but it definitely might feel like it when you’re attempting to minimize wall damage. Fortunately, there’s a wiser method. With the correct tools and skills, you can hang everything from lightweight prints to larger frames without drilling, hammering, or fixing holes afterward.

And guess what? I’ll walk you through it step by step, no confusing jargon, no fancy tricks, just simple, effective tips that work.

1. Picking the Perfect Spot

Finding the right spot is half the battle.

Too high? Your guests will be craning their necks like they’re birdwatching.
Too low? You’ll feel like your art is hiding from you.

Person measuring the wall height with a measuring tape to find the ideal spot for hanging a picture frame.

The sweet spot will be at eye level, around 57 inches from the floor to the middle of the picture. If you’re making a gallery wall, start with the biggest picture and build around it like you’re solving a puzzle.

Oh, and avoid hanging photographs directly in sunlight, unless you prefer seeing your precious images degrade like an old movie.

2. Choosing the Right Tools

Alright, let’s talk about tools. Picture hangers come in all shapes and sizes, and choosing the right one can save you a world of frustration.

(a) Budget Option: Command Picture Hanging Strips (~$5–$8)

  • Maximum Frame Size for Secure Hanging: Command Large portrait Hanging Strips support frames up to 24 by 36 inches and hold up to 16 pounds, assuring durable, damage free portrait hanging.
  • Versatile Surface Compatibility: These damage free picture hanging hooks stick to painted walls, finished wood, glass, tiles, and more, excellent for a clean, reliable grasp on many smooth surfaces.
  • Safe and Easy Removal: Enjoy stress-free removal by gently peeling the adhesive strips straight down, ensuring your walls stay immaculate with no sticky residue or blemishes, great for damage free picture hanging every time. 

(b) Standard Option: Command Heavy Duty Picture Hanging Hooks ($15)

  • Reliable Weight Support for Frames: Each Command Picture Hanger carries up to 4 lbs, making them excellent for tiny frames and lightweight décor, assuring stable, damage free picture hanging hooks.
  • Wide Surface Compatibility: These damage free picture hanging hooks stick safely to painted walls, finished wood, tiles, and more, delivering varied alternatives for your décor needs.
  • Simple and Clean Removal: Easily remove hooks by pulling the adhesive strip straight down, leaving no scratches or sticky residue behind, great for renters and homeowners seeking damage free picture hanging options. 

(c) Premium Option: STAS Picture Hanging System Rail Kit (~$35–$40)

  • Strong and Versatile Support: The STAS Picture Hanging System Rail Kit holds up to 110 lbs per rail, making it perfect for hanging multiple frames securely with damage free picture hanging.
  • Flexible Installation for Any Wall Type: Whether it’s brick, drywall, or wood, this system installs easily with the included kit, offering a reliable damage free picture hanging solution for various surfaces.
  • Sleek and Customizable Design: The STAS minirail is just 0.63 inches wide and can be painted to match your walls, ensuring your damage free picture hanging setup blends seamlessly with your decor.

3. Prepping the Wall (Yes, This Matters)

Now, before you start sticking things to your wall, there’s one crucial step you can’t skip: cleaning.

Person cleaning a wall with a cloth and rubbing alcohol before applying picture hanging strips.

Grab some isopropyl rubbing alcohol and wipe the wall where your hooks or strips will go. This removes dust, grease, and whatever mysterious gunk has been building up.

Trust me, this simple step makes all the difference.

4. Hanging It Right (Because Crooked Pictures Are Heartbreaking)

Here’s where the magic happens.

  1. Mark your spot. Use a pencil (lightly!) to mark where the top of the frame should go.
  2. Apply your strips or hooks. Follow the instructions on the pack, seriously, they know what they’re talking about.
  3. Press and hold. Give the adhesive a firm press for at least 30 seconds.
  4. Wait. Yep, patience is key. Give it about an hour before you hang your picture.
Person applying adhesive picture hanging strips to the back of a photo frame with a pencil mark on the wall.

Skipping the wait time is a big mistake. Rushing it is like baking cookies and eating the dough halfway through, tempting, but you won’t get the best results.

5. Removing Without Tears (Or Paint Chips)

Here’s where people mess up the most, removing the strips. DO NOT yank it off like you’re opening a stubborn pickle jar. Instead:

  • Grab the bottom of the strip.
  • Slowly pull straight down, not toward you, until it stretches long and thin.
  • Keep pulling until the strip magically pops off.

It’s oddly satisfying, like peeling off a face mask after a long day.

Gallery Wall Goals

Dreaming of that perfect Pinterest-worthy gallery wall?

Here’s the trick: Lay everything on the floor first. Play around with the layout until it feels just right.

Then grab some painter’s tape and mark those spots on the wall, it’s like connecting the dots but for grown-ups.

Laid-out frames on the floor with painter’s tape marking the wall, planning a gallery wall design.

Time to Hang Your Pictures

Now that you’ve planned your gallery wall, it’s time to bring it to life.

  • Start with the biggest frame. Position it first to anchor the layout.
  • Use a level. This keeps your frames perfectly straight, no tilting disasters here.
  • Measure your spacing. Keep frames about 2-3 inches apart for a balanced look.
  • Step back and check. Before pressing your adhesive strips firmly, take a few steps back to ensure everything looks right.

Once you’re happy with the placement, secure each piece following the product instructions. Now, your wall is ready to impress!

Conclusion: Your Walls, Your Rules

Bright cozy living room with various perfectly aligned photo frames on the wall showcasing a finished damage-free picture hanging setup.

Hanging pictures doesn’t have to be stressful. With smart tools like Command Picture Hanging Strips, Command Heavy Duty Picture Hanging Hooks, and the STAS Picture Hanging System Rail Kit, you can decorate with confidence.

So go ahead, unleash your inner interior designer. Whether you’re showcasing family photos, funky art, or that “accidental” cat collection, your walls will thank you.

Because with damage free picture hanging, you’re not just hanging pictures, you’re hanging memories.

Entryway Organization Ideas: 80% Less Clutter | Easy Hacks

Minimalist modern entryway with bench, wall hooks, and organized storage baskets.

Let’s talk about your entryway, the first impression of your home, yet often the most chaotic space. Shoes, bags, jackets, and that forgotten umbrella from last season pile up, creating a mess.

You wake up late, rushing to get out the door, and then it happens. You need your shoes, but they’re nowhere in sight. You trip over sneakers, knock down a jacket, and by the time you finally find your keys, you’re already late. Sound familiar? It’s frustrating, but it’s possible to prevent.

This is where entryway organization ideas come in. A little planning and a few smart storage solutions can turn your entryway from chaotic to calm. No more wasted time searching for essentials, and no more accidents. A tidy entryway can make your mornings easier. It also creates a great first impression for guests.

In this article, we’ll share practical ideas for organizing your entryway. We’ll cover smart ways to organize your closet and offer storage solutions. These tips will help you take back control of this often-neglected area.

Tired of Tripping Over Shoes? Let’s Fix That!

Organized entryway with a multi-tier shoe rack neatly holding various shoes and boots.

Your entryway shouldn’t feel like a chaotic obstacle course. But often, it becomes a dumping ground for shoes, bags, and jackets. The mess you see when you walk in can affect the whole vibe of your home. 

Imagine walking into a neat entryway. No more tripping on shoes or searching for your keys. That’s the power of smart entryway organization ideas. It transforms your space into a peaceful, welcoming area. And the best part? Achieving this is simpler and more affordable than you might think! Stay tuned for practical ideas to help you get started.

1. Kick the Shoe Mess Out

Shoes are everywhere, as if they’re staging a rebellion. That’s where shoe organizer ideas entryway solutions step in. A reliable shoe rack can significantly improve one’s life. No matter your budget, there are many great ways to keep your entryway tidy and organized.

(i) Budget Choice: SimpleHouseware 3-Tier Shoe Rack ($15–$20)

  • Maximized Storage: This shoe rack holds 9 to 16 pairs of shoes. It has a bottom shelf, too. This makes it a great shoe organizer for your entryway. Plus, it keeps your space neat and clutter-free.
  • Strong & Dependable: This shoe rack has a sturdy metal frame and washable 600D polyester fabric. It can hold up to 30 lbs per shelf, making it perfect for organizing your entryway.
  • Customizable Layout: The adjustable shelves let you design for boots, heels, or flats. This adds flexibility and functionality to your shoe organizer ideas in the entryway.

(ii) Mid-Range: Homfa Entryway Storage Bench with Shoe Rack ($50–$60)

  • Maximize Storage: If you want entryway closet organization ideas, consider this rustic shoe bench. It fits five to seven pairs of shoes and has three pull-out drawers for extra storage.
  • Functional Comfort: This padded bench is comfy. It also serves as a nice spot to sit when putting on shoes. It’s a great choice for anyone looking to organize their entryway closet. It blends practicality with comfort.
  • Stylish and Efficient: The warm espresso finish complements any décor. This bench is a great choice for anyone wanting to improve their space. It offers elegant and organized entryway closet solutions.

(iii) Premium Perfection: VASAGLE Hall Tree Coat Rack Shoe Bench ($80–$100)

  • Smart Entryway Organization Ideas: This 3-in-1 hall tree has coat hooks, a shoe bench, and storage shelves. It keeps everything tidy and easy to reach.
  • Durable and Stylish: This hall tree features nine sturdy hooks and a strong steel frame. It seamlessly integrates function and design for your entryway.
  • Practical Storage Solution: This compact shoe organizer is great for your entryway. It offers flexible storage for shoes and bags. Plus, it gives you a comfy spot to sit while you tidy up your space.

2. Coats, Bags, and Chaos, Tamed!

Jackets are thrown over chairs. Bags lie scattered on the floor. Scarves are tangled everywhere except around your neck. It’s pure chaos. But it doesn’t have to be. Clever entryway closet organization ideas can make your entryway neat and functional. Say goodbye to clutter and hello to an organized, welcoming space.

Entryway wall with coats, bags, and scarves neatly organized on hooks and hanging organizers.

(i) Wall Hooks: Simple, Yet Genius

Invest in sturdy wall hooks, the kind that can handle heavy winter coats or your go-to backpack without giving up halfway.

  • Space hooks 8-12 inches apart. This gives each hook enough room for jackets and bags without crowding. This prevents your entryway from feeling cluttered and gives each item its place.
  • If you install double hooks. You can store more items, twice as many, without using extra space. It’s a smart and useful choice for families or people with a lot of outerwear and accessories.
  • Position hooks at adult shoulder height. Hang them at about 5 feet for easy access. For younger kids, add lower hooks. This helps them hang or grab their things on their own.

Wall hooks are ideal for keeping quick-grab items organized and easily accessible. You can use them to hang daily jackets, ensuring they’re within reach as you head out the door. Store bags and umbrellas neatly. This keeps your entryway tidy and free of clutter. Wall hooks are perfect for dog leashes. They give your pet’s essentials a home, keeping your space tidy and functional.

(ii)  Hanging Organizers: Maximize Closet Space

Hanging organizers are a great solution for entryway organization ideas, especially in smaller spaces. Designed for shoes, they can also hold accessories like gloves, scarves, and sunglasses. This handy, space-saving tool keeps everything organized and easy to reach. It helps your entryway stay clutter-free and adds a touch of order to your home.

  • Use the pockets for gloves, scarves, and sunglasses. Hanging organizers are great for smaller accessories. They keep everything in one spot and make it easy to find what you need.
  • Roll items into a tidy arrangement to see everything at once. This maximizes space and helps you find what you need on time.
  • For families, give each person their own row or column. This keeps things organized. Personalized sections prevent clutter. Everyone can find their belongings quickly and without confusion.

Hanging organizers save closet space. They also keep your entryway neat and stress-free.

(iii) Over-the-Door Shoe Holder: The Hidden Hero

Over-the-door shoe organizers are frequently underestimated. They can transform your entryway’s organization. These organizers accommodate shoes and various accessories. Consider using them for scarves, mittens, gloves, and pet supplies. They simplify your mornings. Finding essentials quickly saves time and alleviates stress. Explore shoe organizer ideas entryway to maximize space and efficiency.

  • Roll up your scarves and tuck them into pockets. This keeps them organized and easy to grab when you head out.
  • Use pockets for small items like keys, wallets, or sunglasses. This keeps your daily essentials together. You won’t have to search frantically for them.
  • Hang mittens, gloves, or pet accessories for easy access. The over-the-door holder organizes winter gear and pet items. This keeps everything neat and within reach.

An over-the-door shoe holder is a simple way to organize your entryway. It helps you save space and reduce clutter.

3. The Mysterious Disappearing Keys

Keys have this uncanny ability to vanish exactly when you need them most. It’s as if they’re practicing for a magic trick. A few smart entryway organization ideas can help keep those small items exactly where you need them.

Wall-mounted key organizer and decorative bowl holding keys and wallets in a clean entryway.

(i) Magnetic Key Holder: The Instant Fix

A magnetic key holder by the door makes it easy to store your keys when you get home. You won’t need to fumble with hooks or trays. It’s simple, practical, and a perfect addition to any entryway organization ideas, ensuring your keys are always within reach and your entryway stays tidy.

  • No More Fumbling: A magnetic key holder lets your keys stick to the surface as soon as you walk in. This means no more hooks or trays are needed. It’s fast and convenient, especially when you’re rushing to leave.
  • Extra Storage Options: Some magnetic key holders include extra magnets. You can use these to organize items that get lost often, like scissors, bottle openers, or small tools. Store everything you need in one spot. This saves you time and keeps you from feeling frustrated.
  • Effortless Access: Once you get into the habit, you won’t need to think twice about where your keys are. Just put them on the magnetic holder. Then, you’ll always know where to find them. This makes your daily routine easier.

A magnetic key holder is a simple and effective way to organize your entryway. It makes sure your keys and other essentials are always easy to find and put away.

(ii) The Mighty Tray (or Bowl): Old-School but Effective

Sometimes, keeping it simple is the key (pun intended). Place a small tray or bowl by the door. It’s an easy way to keep your keys in one spot.

  • Designated “Key Zone”: Place a small, stylish tray or bowl near your entryway for easy access to your keys. This easy habit clears a space for your keys. It helps you avoid the stress of searching for them at the last minute.
  • Location Matters: Put the tray or bowl on a console table or shelf you pass daily. This helps you remember to drop your keys in the right spot when you enter. It makes this a smooth routine.
  • Aesthetic Appeal: Pick a colorful or uniquely designed tray or bowl. This choice helps you stay organized and adds style to your entryway. It serves both form and function.

A small key tray or bowl is an easy and stylish way to stay organized. It’s quick, effective, and will save you from losing your keys in the chaos of daily life.

(iii) Wall-Mounted Organizer: The Ultimate Key Control

Is your entryway filled with clutter like mail, receipts, and sunglasses? A wall-mounted organizer can make a big difference.

  • Clutter-Free Solution: Find a wall-mounted organizer. It should have slots for your keys, mail, and other items you need to store. This ensures everything has its own space, making the area less chaotic.
  • Extra Functionality: Some models include extra features. These can be chalkboards or cork boards for reminders. They help you remember appointments, tasks, or important notes.
  • Space-Efficient Design: Wall-mounted organizers save floor space. They can sit at eye level, making it easy to reach your items. This keeps your entryway tidy.

A wall-mounted organizer is a smart and handy way to keep your entryway tidy. It blends style and function. This helps keep your space neat, so you feel less stressed and more organized.

4. Kids, The Entryway Wrecking Crew

Kids and clutter go hand in hand, like peanut butter and jelly, but messier. If your entryway resembles a tornado that swept through a toy store, you know what I mean.

Organized family entryway with labeled baskets and kid-height hooks for backpacks and jackets.

The fix? Lots of baskets.

(i) The Basket System: Simple Yet Brilliant

Give each child their own basket to keep the entryway organized and clutter-free. Give them a basket for shoes, backpacks, and any treasures they find, like rocks or crumpled drawings. This simple solution helps maintain order while teaching kids to put their belongings in a designated spot each day.

  • Individual Storage: Give each child a basket for their shoes, backpacks, and special finds, like rocks, crumpled drawings, and leftover snacks. It keeps everything in its place.
  • Practical and Accessible: Pick strong baskets with handles. This helps kids grab what they need easily. No more searching through piles of clutter.
  • Open-Top Design: Opt for open-top baskets, so there’s no excuse for piling things on top. It encourages kids to place their items inside, keeping things neat and accessible.

Kids’ baskets keep entryways tidy. Everything has a home. It’s a simple, effective solution that gives everyone a designated space while teaching kids to stay organized.

(ii) Labels: Your Secret Weapon

Kids love labels; they provide a sense of ownership and VIP status over their belongings. When you add their name to a basket, it’s no longer an ordinary container; it becomes their special space. It’s a simple but effective way to promote responsibility and cut down on clutter. With a labeled basket, they know where to put their shoes, backpacks, and other treasures they find.

But here’s the twist, let your kids get involved in the labeling process. Give them the freedom to decorate their own labels. Using colorful markers, stickers, or drawings lets kids personalize their storage. This helps them feel a stronger sense of ownership. Kids who help organize their space are more likely to respect it. They tend to keep things tidy. This simple trick keeps things organized. It also teaches kids about responsibility and caring for their stuff.

(iii) Hooks at Kid Height: Genius Move

Add a row of low hooks at kids’ level for their jackets and bags. When they can hang their things easily, they’re more likely to do it. No climbing over shoes or clutter helps, too. This addition helps kids become more independent. It keeps the entryway organized and teaches them responsibility. Plus, it cuts down on the mess.

5. Don’t Ignore the Walls

Your walls? They are storage superheroes, ready to save your cluttered entryway. Using the right hooks, shelves, or hangers can turn vertical space into a neat, efficient area. It’s all about using what you already have – your walls can hold more than pictures.

Entryway wall with floating shelves, pegboards, and decorative hooks holding bags and scarves.

(i) Floating Shelves: Small but Mighty

Think about putting a floating shelf above your shoe rack or bench. It adds extra functionality. This raised area is perfect for keeping small items like keys, sunglasses, or mail. Use this space well to keep your entryway neat and organized. This helps create a warm atmosphere for you and your guests.

  • Mail: Keep your letters and bills organized in a single location. This practice stops paper piles from building up. It keeps the entryway tidy and welcoming.
  • Keys: Pick a spot for your keys. This keeps them close and easy to grab when you leave. It helps streamline your routine and saves time.
  • Wallets and Sunglasses: Keep your wallet and sunglasses here. They’ll be easy to grab when you’re ready to go.
  • Decorative Tray: Add a tray to organize small essentials, which will keep your entryway clutter-free and visually appealing.

Floating shelf is a versatile, space-saving solution to keep your entryway organized, functional, and stylish.

(ii) Pegboards: The Ultimate Organizing MVP

Pegboards aren’t just for tools; they can be a game changer in your entryway organization. They use creativity to help you save space. This way, everything stays neat and easy to reach. Here’s how:

  • Hats, Scarves, and Jackets: Hang hats, scarves, and jackets on the pegboard for easy access. It helps prevent clutter and ensures that everything is within reach when needed.
  • Small baskets for essentials: Use small baskets to hold dog leashes, gloves, or earbuds. This keeps everyday essentials organized and prevents them from getting lost.
  • Mini Shelves for Decor: Add mini shelves to display small plants or photos. This blends organization and decoration. It improves your entryway’s appearance and keeps it tidy.

Pegboards are versatile, offering endless possibilities for organization, style, and convenience!

(iii) Decorative Hooks: Style Meets Function

A well-organized entryway is essential for reducing stress and making mornings smoother. Using functional storage solutions helps you keep things organized and prevents daily chaos.

  • Hooks for Bags: Keep your handbags and backpacks handy. This way, you won’t waste time searching for them before you head out.
  • Key Storage: Always hang your keys or put them in one spot. This way, you won’t waste time searching when you’re in a hurry.
  • Umbrella and Leash Storage: Keep your dog leashes and umbrellas organized. This way, they are easy to grab when needed. It saves time during rainy days or busy moments.

A smart entryway cuts clutter. It makes life easier and gives you a stress-free start to your day.

Additional Tips and Tricks to Organize Your Entryway

1. The “Grab-and-Go” Basket 

A “Grab-and-Go” basket is a lifesaver when you’re in a rush. It’s an all-in-one location where you can keep all your daily essentials ready to go. Here’s how to make it work:

  • All-in-One Spot: Store keys, sunglasses, wallets, lip balm, and other small essentials in one handy place. This prevents last-minute searches and stress as you rush out the door.
  • Perfect for Busy Mornings: No more searching for your wallet or keys. Having all these essentials neatly stored in a basket near the door saves time when you’re running late.
  • Add a Notepad and Pen: You can add a small notepad and pen to your basket to jot down quick reminders for your day. This handy tool helps you stay organized, whether it’s a last-minute task, a grocery list, or something to pick up on your way home.

This easy-to-use “Grab-and-Go” basket keeps everything you need close by as you head out the door.

2. The Mail Station Hack

Mail tends to pile up quickly, turning your entryway into a clutter zone. The mail station hack helps you keep everything organized. Here’s how you can create a simple yet effective mail station:

  • Vertical File Organizer: Install a vertical file organizer on your wall near the entryway. This will help sort incoming letters, bills, and documents neatly. It prevents paper from piling up in chaos.
  • Clearly Labeled Slots: Label each slot as “To Pay,” “To File,” and “To Read.” This categorization helps you quickly sort your mail by action. So, everything stays organized and is easier to manage.
  • Junk Mail Bin: Place a small recycling bin near the mail station specifically for junk mail. Once you sort your important papers, throw away unwanted mail right away to keep the space clean.

With this simple system, you won’t have to handle random paper piles anymore. You’ll also keep track of important documents easily.

3. The Shoe Mat Solution:

Wet shoes or muddy boots shouldn’t create a mess in your entryway. The shoe mat solution helps you manage all types of footwear in a clean, organized way. Here’s what to do:

  • Water-Absorbing Mat: A water-absorbing mat placed by the door helps trap moisture and dirt from shoes, preventing it from spreading across your floors. This is especially useful during rainy or snowy days when wet boots are common.
  • Rubber Mat with Raised Edges: Choose a rubber mat with raised edges. These mats help contain water, preventing spills that could damage your floors or leave a puddle. The raised edges also keep dirt from seeping onto your clean floor.
  • Small Stones for Airflow: Place small stones or gravel in the tray to promote airflow under boots. This allows shoes to dry faster and ensures that water and dirt are effectively separated from your floors.

This shoe mat solution is a practical way to protect your floors while keeping your entryway neat and dry.

4. Foldable Storage

Ottoman Multifunctional furniture is key when maximizing entryway space. A foldable storage ottoman is an excellent solution that serves several purposes. Here’s why it’s a great option:

  • Seating Space: The ottoman provides a comfortable spot for you to sit while you put on your shoes, making it easier to get ready in the morning.
  • Hidden Storage: When you open the ottoman, you’ll find ample hidden storage for seasonal gear like hats, gloves, scarves, or even extra shoes. This is especially useful if you have limited closet space in your entryway.
  • Sleek Design: A fabric-covered ottoman can blend in beautifully with your decor. Choose one with a color and style that matches your entryway, and it will enhance your space while adding practicality.

The foldable storage ottoman adds style and function to your entryway. It has seating and hidden storage.

5. Command Center for Families

If you have a larger family, staying organized can be challenging. A wall-mounted family command center can help manage daily schedules, tasks, and important reminders. Consider adding these elements:

  • Whiteboard or Chalkboard: A whiteboard or chalkboard lets the whole family write reminders, daily tasks, and notes. Everyone can see them easily. This keeps everyone on the same page, especially when juggling various schedules.
  • Clipboards for Important Papers: Use clipboards to hold school permission slips, grocery lists, or outgoing mail. This ensures that nothing gets lost or forgotten. Clipboards provide a neat way to store important documents. They look good, too.
  • Cork Board for Photos and Notes: Place a small cork board in your command center. Use it for personal reminders, family photos, or pinned invitations. It can be a great place to showcase important moments while staying organized.

This family command center is great for busy homes. It helps keep everything organized and makes managing family matters easier.

Using these creative entryway organization ideas can change your cluttered space. You’ll have a tidy area that shows off your personal style. Use baskets for everyday items, set up a mail station, or add smart storage. These simple tricks will help keep your entryway organized and tidy., coupons, or family photos.

Final Thoughts: Entryway organization ideas

A cluttered entryway isn’t just messy; it’s a source of stress. Implement effective entryway organization ideas like shoe racks, wall hooks, and “grab-and-go” baskets. These solutions help maintain a calm and organized space. Select options that fit your budget, or opt for premium designs that complement your home’s style. With these entryway closet tips, you’ll spend less time searching for keys and more time enjoying a neat environment. Start with small steps. Stay committed, and transform your cluttered doorway into a serene, welcoming area. A tidy entryway sets a positive tone for the rest of your home.