
How to Prevent a Charger Cable from Breaking: 80% Fail Within Months | Stop Wasting Money

A neatly coiled, durable charging cable on a minimalist desk setup with soft lighting and a clean aesthetic.

Charger cables are essential, yet they often seem to break faster than they should. Picking the right cable and following smart maintenance tips can boost its lifespan. Understanding why charger cables fail is key to prevention. Frequent bending, tugging, and poor storage habits are common culprits. Cheap materials also contribute to cables wearing out faster. You can avoid these issues with a mix of protective tools, good habits, and strong cables. 

This guide shows you how to prevent the charger cable from breaking with smart DIY tricks, better cable choices, and simple habits. These tips will help your cables last longer, even with pets, travel, or daily use.

Why Do Charger Cables Break So Easily?

A damaged phone charging cable with frayed wires near the connector, showing signs of frequent bending and rough handling.

Before we jump to solutions, it helps to understand why your charger cables are so fragile.

1. Frequent Bending

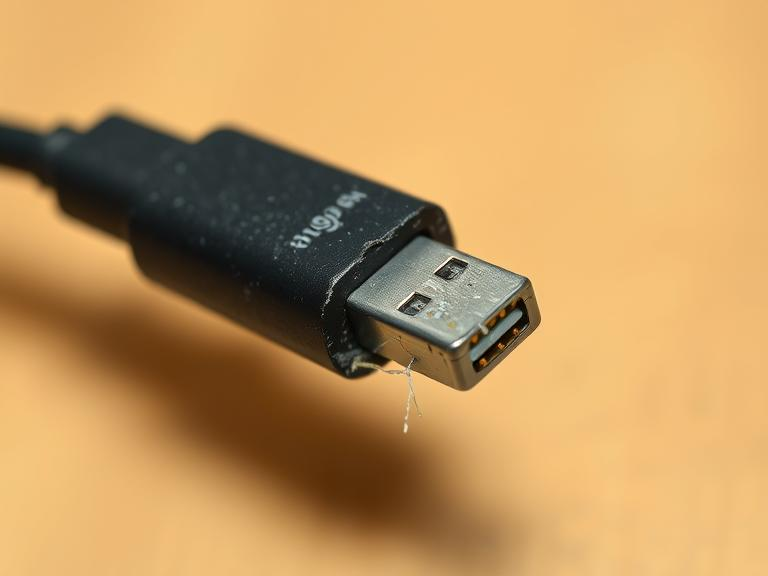
Cables often twist and bend daily, especially at the connectors. Over time, this repeated strain weakens the internal wiring, causing it to fray or snap.

2. Rough Pulling

Yanking your charger from the wall can stress the connector. It’s like starting a lawnmower. This strong pulling can harm the cable and charging port. It may also shorten your charger’s lifespan.

3. Cheap Materials

Budget cables may seem cheap, but they often have thin wires and bad insulation. These materials split, fray, or lose connectivity with minimal use.

4. Improper Storage

Storing your charger in a bag, jamming it into a pocket, or twisting it can harm the cable’s wiring. Poor storage habits can weaken connections and cause faster wear and tear over time.

Now that we know what kills cables, let’s explore how to prevent charger cable from breaking with smart tips and solutions.

Tips to Prevent Charger Cable Damage

1. Charger Cord Protector DIY

Using a Charger Cord Protector DIY approach is a budget-friendly way to extend your cable’s lifespan. Here are three effective methods to try:

(i) Heat Shrink Tubing

This tubing forms a tight fit around cables when you heat it. Slide a piece over the weak spot on your cable, like near the connector. Then, use a hair dryer or heat gun to apply heat. This creates a firm protective layer that reduces bending stress.

(ii) Spiral Wraps

These plastic coils protect cables. They act like armor against wear and tear. They’re flexible, easy to apply, and offer strong protection at common breakpoints.

(iii) Electrical Tape

A simple yet effective solution. Wrap many layers of tape around areas prone to fraying. Begin above the weak spot. Then, move downward for the best coverage.

Use these Charger Cord Protector DIY ideas to protect your cables from daily wear and tear. This way, you can save money on replacements.

2. Phone Charger Cord Protector

A Phone Charger Cord Protector helps your cable last longer. Also, smart storage habits make a big difference. Here are three effective methods to consider:

(i) Cable Organizers

Use Velcro straps, zip ties, or cable winders to keep your cables neat and untangled. This reduces stress points that can lead to internal wire damage.

(ii) Avoid Tight Bends

Avoid tightly wrapping cables around objects or folding them sharply. Loosely coiling your cable near the connector reduces strain. Using a Phone Charger Cord Protector in these areas offers extra reinforcement.

(iii) Designated Storage

When you travel, store your cables in pouches or compartments. This keeps them safe from being crushed or bent. Using a Phone Charger Cord Protector helps keep your cables safe from damage.

3. Magnetic Charger Cord Protector

Using a Magnetic Charger Cord Protector is an effective way to reduce cable damage and improve charging convenience. Here are three key benefits:

 A smartphone using a magnetic charger tip for easy, stress-free charging and cable longevity.

(i) No need to plug and unplug

Magnetic tips stay in your device’s charging port. Now, you don’t have to keep plugging and unplugging your cable. This reduces stress on the port and the connector.

(ii) Enhanced Protection

The magnetic connection pulls apart easily. This helps stop accidental yanking, which can harm the internal wiring. This is particularly useful in busy households or office spaces.

(iii) Better Cable Life

Use a Magnetic Charger Cord Protector and store cables properly. This helps prevent fraying, bending, and breaking. Magnetic tips work with Lightning, USB-C, and Micro-USB cables. This makes them a handy choice for many devices.

5. Wall-Mounted Charger Cord Protector

A wall-mounted charger cord protector helps prevent cable damage and keeps your area tidy. Here’s how it helps:

(i) Hold Steady

Wall-mounted clips keep your charging cable in place.This prevents it from hanging loosely or dragging on the floor, reducing tension on the connector and minimizing wear. 

(ii) Reduces Strain on Breakpoints

Anchoring the cable to a stable surface helps protect the plug area. This prevents excessive bending and pulling.

(iii) Perfect for Charging Areas

A Wall-Mounted Charger Cord Protector keeps your cable tidy and within easy reach. It also prevents accidental pulls. Combining this with proper storage practices can significantly extend your cable’s lifespan.

How to Protect Charger Cord from Your Animals (Pets)

 A cat near a protected phone charger cable, covered with a thick rubber sleeve to prevent pet damage.

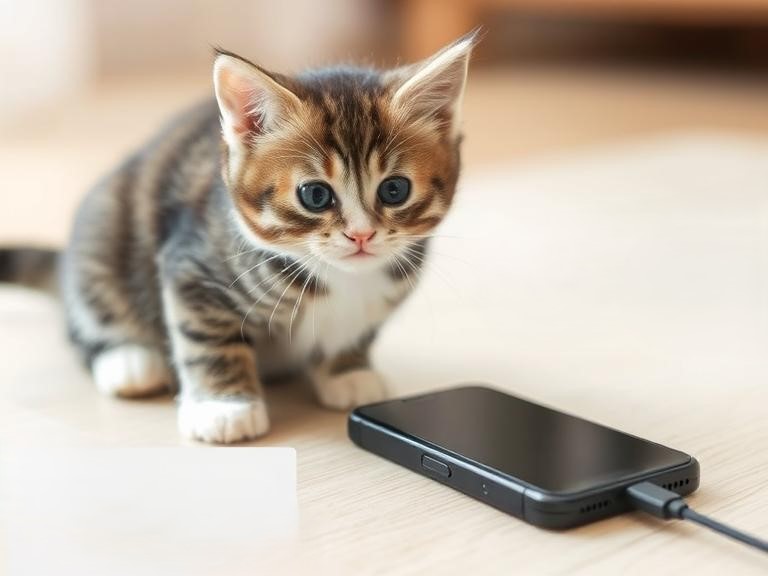
Protecting your cables from pets can be tough. A Charger Cord Protector for Animals can help prevent expensive damage. Here are three effective methods to try:

1. Cable Covers

Thick plastic or rubber covers act as a strong barrier against pets’ sharp teeth. A Charger Cord Protector Animals cover is great for keeping cables safe where pets can reach them.

2. Bitter Spray

Applying a non-toxic, pet-safe bitter spray makes cables unappealing to chew. Combining this with a Charger Cord Protector Animals wrap adds extra defense.

3. Cable Hiders

You can hide cables behind furniture or in protective conduits. This keeps cords away from your pet. Adding a Charger Cord Protector Animals cover further reduces the risk of damage.

Use these strategies with a Charger Cord Protector Animals product. This way, your cables stay safe and intact, even with playful pets around.

Best Cables to Prevent Breaking

1. Budget Option: AmazonBasics Nylon Braided Lightning Cable

  • Enhanced Durability: It has an extra protective layer at both ends. This helps reduce fraying and improves longevity. It’s perfect for users who often deal with cable damage.
  • Fast Charging Support: Thick wires and low resistance let devices charge quickly. You can get speeds up to 2.4 amps, keeping your devices powered efficiently.
  • Reliable Performance: Features Apple’s original C89 smart chip. This ensures safe and stable charging. It supports fast data transfer at 480Mbps, so syncing and file transfers are smooth.

2. Standard Option: Anker Powerline+ II Cable

  • Outstanding Durability: Engineered to endure up to 30,000 bends, this cable is designed for those tired of constantly replacing damaged cords. Its reinforced build ensures long-term reliability, making it ideal for daily use.
  • MFi Certified Compatibility: This certification guarantees seamless connectivity with Lightning devices, ensuring safe, fast, and error-free charging. No more frustrating pop-up warnings or inconsistent performance.
  • Sleek Yet Strong Design: The double-braided nylon exterior combines durability with style. It’s tough enough to resist wear and tear while remaining flexible and easy to manage. Whether you’re at home, in the office, or traveling, this cable stands up to the challenge.

3. Premium Option: Nomad Kevlar Reinforced Cable

  • Powerful Performance: This USB-C PD cable delivers fast charging power of up to 100W, ensuring your devices get powered up quickly and efficiently. With data transfer speeds of 480 Mbps, it’s perfect for syncing files and charging high-power devices like MacBooks, laptops, and tablets.
  • Built to Last: Featuring a Kevlar outer layer and durable metal alloy connector ends, this cable is engineered for durability. It’s designed to handle heavy usage, resist breakage, and maintain peak performance over time.
  • Tangle-Free Convenience: Equipped with a strong Liquid Silicone Rubber (LSR) cable tie, this cable stays neatly organized. Whether you’re packing it in a bag or storing it at your desk, you’ll enjoy hassle-free use and easy access whenever you need it.

Best Practices for Long-Term Cable Care

1. Use a stable power source

Voltage changes can harm your charging cables as time goes by. A good power adapter or surge protector keeps the current steady. This reduces stress on cables.

2. Keep cables away from heat

Heat can damage cable insulation. This makes it brittle and likely to crack. Keep cables away from heaters, sunlight, and heat sources. This helps prevent damage.

3. Handle cables with care

Avoid pulling on the cord. Instead, grip the plug tightly when you unplug it. This prevents internal wires from loosening or breaking over time.

Final Thoughts: How to Prevent Charger Cable from Breaking

Prevent charger cables from breaking with smart choices and proper care. Invest in durable options like the Anker Powerline+ II or Nomad Kevlar Reinforced Cable for improved longevity.

For added protection, try a charger cord protector DIY like spiral wraps or heat-shrink tubing. Fun charger cord protector animals can also protect cables while adding style.

Use a phone charger cord protector to reduce stress on cable ends and avoid sharp bends. Unplug by gripping the plug, not the cord, to prevent damage.

With these steps, your cables will last longer and perform better.

Motion Sickness Bracelet: 85% Relief | Travel Comfort Now

A relaxed traveler looking out the airplane window, wearing a motion sickness bracelet for motion sickness relief.

That unsettling wave of dizziness. The rising nausea. The cold sweat that creeps in just before you know you’re in trouble. Motion sickness can turn what should be an exciting adventure into a miserable ordeal. If you’ve struggled with this before, you know how frustrating it can be, especially when you’re on a long flight, car ride, or cruise. But there’s hope.

With the right techniques and a reliable motion sickness bracelet, you can stay calm, comfortable, and nausea-free. In this guide, you’ll learn how to prevent motion sickness, explore effective products like motion sickness bands and motion sickness glasses, and discover additional tips to ensure you enjoy your travels without discomfort.

A Simple Bracelet Saved My Travels

A traveler wearing a motion sickness bracelet on a train, looking content and nausea-free.

When I was a teenager, traveling was a disaster for me. Even a short 50-mile trip felt impossible because I’d end up sick every time. No matter what I tried, ginger, breathing tricks, even staring at the horizon, nothing worked. Eventually, my parents stopped taking me on long trips, and while they explored new places, I stayed home like some forgotten houseplant.

Years later, I found myself on a 2000 km train journey. The guy sitting beside me had a strange bracelet on his wrist. Curious, I asked what it was. “Motion sickness bracelet,” he said casually, like it was common knowledge. My mind was blown. At the next station, I jumped off the train, rushed to a store, and bought one.

That was eight years ago. Since then, I have never travelled without my trusty bracelet. No more nausea, no more headaches, just smooth, puke-free journeys!

What is Motion Sickness?

Why some people experience motion sickness while others don’t isn’t entirely clear. Experts believe it happens when your body’s senses send mixed signals to your brain. Imagine sitting in the backseat of a car, reading a book. Your eyes see the words on the page, suggesting stillness, but your inner ear detects motion as the vehicle moves. This mismatch confuses your brain, leading to unpleasant symptoms like:

  • Dizziness
  • Headache
  • Nausea
  • Excessive saliva
  • Sweating
  • Belching
  • A sudden awareness of your stomach
  • Vomiting
  • Fast, shallow breathing (in extreme cases)

The same thing happens on boats, planes, and theme park rides. It’s your body’s way of warning you that something feels “off,” even when you’re perfectly safe.

Medications can help manage these symptoms, but if you’re hoping to prevent motion sickness altogether, here are some useful techniques to try.

Recommended Products: Choose Your Perfect Solution

Before we even get into remedies, I want to make you check out these products. I personally use them on every trip because I tend to get motion sickness too, with headache, nausea, and vomiting. If you are going through the same, you have got to try these!

(a) Budget: Sea-Band Anti-Nausea Wristbands (~$7–$10)

Sea-Band anti-nausea wristbands are an easy and great solution for the low-price traveler. Acupressure points act upon the inner wrist P6.

1. Nausea Relief Naturally with Motion Sickness Bands

Sea-Band motion sickness bracelet aids in the imposition of acupressure on the P6 point (Nei Kuan) on the wrist, giving you a natural remedy for nausea caused by travel, morning sickness, or chemotherapy. These motion sickness bands are drug-free, thus safe for usage by adults and children alike.

2. Comfortable and Reusable for Years

Sea-Band motion sickness bracelets are washable and reusable, thus designed for years and comfort. Are you ready for those Sunday road trips, four-day cruises, or red-eye flights? Its simple yet effective design has made this an inevitable travel companion.

3. Gentle Yet Effective Relief for Motion Sickness

Inspired by traditional remedies, Sea-Band motion sickness bands allow for naturally derived relief without any of the side effects of the ingredients that cause dizziness or mental fog. They give soothing relief whether you’re in a foreign land or dealing with everyday nausea.

(b) Mid-Range Solution: Dramamine Motion Sickness Relief (~$10–$15)

Dramamine Motion Sickness Relief is a trusted solution for more serious cases of nausea.  It is formulated to provide relief while remaining non-drowsy, working quickly and making it ideal for long trips. 

1. Reliable Relief Besides Motion Sickness Bands

When it comes to minor relief, motion sickness bands and motion sickness glasses can work, but Dramamine Motion Sickness Original tablets deliver a solid bang of trusty and fast-acting relief-from severe nausea, dizziness, and vomiting-just what you need when these symptoms turn up without warning and lay a claim to your travel comfort.

2. Most Recommended At The Pharmacy

If motion sickness bands don’t provide enough relief, Dramamine is a respected pharmacy choice for ultimate relief from motion discomfort. Whether in a travel vial or a bottle, Dramamine is a true game changer when mishaps become unavoidable.

3. Dramamine adds extra assurance

That regardless of what method you’re using-whether motion sickness bracelets, motion sickness glasses, or a combination-Dramamine will prevent your trip from being smooth and free from nausea. 

(c) Premium Choice: Reliefband Classic Anti-Nausea Wrist Device (~$60–$80)

The Reliefband Classic Anti-Nausea Wrist Device uses precise electrical pulses to stimulate the median nerve, directly targeting nausea signals.

1. Powerful Support Beyond Motion Sickness Bands

While motion sickness bands and motion sickness glasses can ease discomfort, the Reliefband Classic offers fast-acting relief with advanced technology that normalizes nerve signals, providing comfort without medication.

2. A Drug-Free Alternative to a Motion Sickness Bracelet

With an impressive 85% success rate in clinical trials, the Reliefband Classic is an FDA-cleared wearable that offers natural relief when traditional motion sickness bands or motion sickness glasses may not be enough.

3. Reliable for Long Journeys

Unlike typical motion sickness bracelets, the Reliefband Classic offers 150 hours of continuous use with adjustable intensity settings, perfect for extended travel or persistent motion sickness symptoms.

How to Prevent Motion Sickness

A traveler in the front seat of a car, focusing on the road ahead to prevent motion sickness.

1. Stay in Control to Stay Well

Being a passenger does make throwing up much worse during long hours of travel in the car. Drivers suffer less from it owing to having the whole scenario in their heads, depicting where the vehicle is going and how it is going to behave at every turn. The situation is quite unlike that of the other souls who, as passengers, would be caught by surprise by movement whenever there is sudden acceleration or deceleration.

(i) Take the front seat and focus on the horizon

Sitting in the front gives a better view of the road, helping your brain sync with the car’s motion. Avoid looking at screens or reading, as that can worsen symptoms.

(ii) Use fresh air and distractions

Open a window or turn on the AC for better airflow. If you’re stuck in the back, engage in light conversation or listen to music to shift focus away from motion.

2. Curb Your Consumption

Your diet and beverages for the journey can definitely make a difference to motion sickness. Heavy or greasy or spicy food and odors may trigger nausea; in fact, overeating or drinking alcohol may worsen the symptoms.

(i) Eat light and avoid strong odors

Before you travel, eat mild, easy-to-digest foods. Spicy, fatty, or strong-smelling foods that could cause nausea should be avoided. 

(ii) Limit alcohol and smoking

Excessive alcohol intake and smoking will only worsen nausea and may lead to dehydration. Drink water or herbal teas instead.

3. Get Into Position

Above all, proper positioning helps prevent motion sickness.. Certain seats are more stable than others, and the presence of sick passengers can increase your own discomfort. Proper place and some silly remedies can make your ride more enjoyable. 

(i) Choose the most stable seat for a better ride

In airplanes, choose a seat around the wing area since this is where the turbulence is least felt. While on a ship, ask for a room in the lower center of the vessel to minimize movement. In a car, the front seat is preferred to ward off nausea. 

(ii) Wear a motion-sickness bracelet for natural relief

These bracelets put some pressure on an acupressure point on the wrist that many believe really helps relieve nausea without the use of any medicine. This is a simple, drug-free solution to consider.

(iii) Do not look at anyone suffering from motion sickness

Nothing triggers nausea more than seeing or hearing someone vomit. If you can, move away from sick passengers, and instead focus on fresh air or conversation while distracting your mind with music.

4. Equalize Your Sensory Cues

Aligning your senses can help reduce motion sickness by preventing mixed signals between your eyes and inner ear. Simple adjustments in position and focus can make a big difference in keeping nausea at bay.

(i) Adjust your position to match movement cues

If you’re on a boat, lying down can help your body sync with the motion. On a train, choose a front-facing seat to align your visual and inner ear signals. In a car, keep your eyes on the horizon to stabilize your senses.

(ii) Use motion sickness bands for extra support

These wristbands apply pressure to an acupressure point linked to nausea relief. They’re a drug-free option that many travelers rely on for reducing symptoms during car, boat, or air travel.

5. Talk Yourself Down

Vision stabilization and nausea reduction can be aided through use of motion sickness glasses, but it is equally important that your mindset helps avoid the tension. Positive self-talk and relaxation techniques will actually work wonders. 

(i) Use verbal affirmation to set expectations

Studies have shown that saying, “I won’t get carsick” can inhibit symptom perception. This mental trick, or “verbal placebo,” ensures that your brain maintains a calm state that keeps nausea at bay. 

(ii) Relax by practicing controlled breathing

Learning biofeedback techniques like some deep, slow breaths could help an individual calm their body’s response to motion. Staying relaxed tends to ease dizziness and improve overall comfort during travel.

6. Get Desensitized

Desensitization therapy fits your body, which will increasingly accept motion and symptoms gradually decrease. When you put yourself through gradual exposure to such activities, it allows the brain to adapt, making travel much more pleasant.

(i) Commence with minimal controlled exposure

Engage for just a little while in activities that provoke motion sickness, such as reading in a moving car; stop when symptoms are about to get more intense.

(ii) Gradually increase the duration

After multiple sessions of short exposure, extend the time little by little. For example, move from five minutes of reading to ten, then fifteen.

(iii) Be patient and consistent

The key to desensitization is repetition. Practicing regularly in small increments will help your body adjust, making motion-related discomfort less frequent or even disappearing over time.

7. Get in Touch with Your Pressure Points

Pressure point therapy is a natural way to ease nausea and reduce motion sickness symptoms. Applying pressure to the P6 (Neiguan) point on your wrist has been shown to help many travelers feel better.

(i) Use a motion sickness bracelet for consistent relief

These bands apply steady pressure to your inner wrist, stimulating the P6 point. Studies suggest they can help reduce nausea without medication.

(ii) Massage your wrists if you don’t have a bracelet

Gently pressing the area between your tendons for a few minutes can provide similar relief. This quick technique is easy to do anytime, anywhere.

8. When All Else Fails, Medicate

Medical treatments for severe motion sickness are known to provide help. OTC medicines give the best relief when taken before symptoms start, while prescription patches could help in longer trips. 

 Traveler holding motion sickness medication with an airplane window in the background.

(i) Take OTC medications

Before traveling-Dramamine and Meclizine could prevent nausea, if taken 30-60 minutes before exposure to motion. Do be careful though, as those can cause drowsiness.

(ii) Consider a scopolamine patch for extended relief

If you experience prolonged motion sickness, ask your doctor about this prescription patch. It lasts for days but may cause dry mouth, dizziness, or drowsiness.

Additional Tips and Tricks

Along with well-known solutions, a little-known tip or trick can sometimes prevent movement sickness. These little changes to one’s routine, diet, or environment can end up preventing nausea.

1. Supplements in Ginger

Ginger is a natural remedy for an “unhinged” stomach and less nausea. Whether in the form of a whole capsule, powdered, tea-drunk, or gummy ginger candies, it could help in stomach soothing or dizziness and discomfort while traveling.

2. Coolant Patches

With cold patches for your forehead, there is relief from nausea and dizziness because of their fresh sensation. It may work best in a warm, stale place, where headache and nausea usually increase with motion.

3. Aromatherapy with Mints

Peppermint oil always works smoothly on the tummy. The mere inhalation of its smell or dab of it on hands can instantaneously improve comfort while on travel by calming nausea.

4. Airflow Control

Fresh air often works well in relieving nausea. If possible, open a window or step outside. Direct an air vent to your face to bring the senses back into cohesion and lessen discomfort.

5. Earplug Magic

Fitting one earplug might cut down internal noise, supplementing the sensory conflict. This trick works in a noisy place as on an airplane or during a travel journey in a congested bus, where overstimulation readily initiates motion sickness.

Final Thoughts

Life is full of adventures that should not be marred by motion sickness. A little preparation can go a long way for road-trippers, cruisers, or flyers. Use methods that suit you, like proper seating, a controlled diet, and products like a motion sickness bracelet, to shield yourself from discomfort.  Try solutions such as motion sickness bands or motion sickness glasses, as well as medically advanced alternatives like the Reliefband. Hold back nothing; take charge, travel with confidence, and enjoy every journey without the fear of motion sickness dragging you down.

How to Wake Up Early and Energized: Boost Mornings by 85% | Feel Alert Fast!

A person waking up early in the morning, stretching near a window with natural sunlight streaming in, looking refreshed and energized.

Waking up in the morning mostly seems difficult. Your alarm goes off, but still your body feels heavy, your mind is foggy and tired, and the motivation to get out of your bed looks nonexistent. So you may be wondering, how to wake up early and energized, and how to wake up quickly when tired. Well, the reason changes from person to person. It can be due to poor sleep quality, disrupted circadian rhythms, mood imbalances, or dehydration.

There is a term for this sluggish feeling when you wake up—it’s called sleep inertia. It’s the drowsiness and mental tiredness, and fog that can remain for minutes or up to hours, making it difficult for you to start your day with full focus and energy.

To overcome this sluggish feeling, many people turn to using coffee or energy drinks. These can offer a quick fix, but these drinks mostly bring some ugly side effects like jitters, anxiety, and are heavily dependent on caffeine. So, there must be a better solution: improving sleep quality, maintaining proper hydration, and sticking to a consistent sleep schedule. These habits will help you wake up feeling really refreshed and energized, and no caffeine boost required.

How I Went From Sleeping Till 11 A.M. to Waking Up at 5:30 A.M

A few years ago, I was the king of hitting snooze until 11 a.m. I’d wake up feeling like I hadn’t slept at all, dragging through the day with zero productivity. Then one day, I decided to wake up at 6 a.m. for a 30-minute walk. The first few days were a struggle, but after a week, I felt surprisingly better! Now? I’m up at 5:30 a.m., like some overly enthusiastic morning person. My energy shot up, and I started looking forward to my walks. I went from a snooze-button pro to an early bird, who knew this transformation was possible?

10 Proven Tips on How to Wake Up Early and Energized Every Day

A checklist with morning routine tips for waking up early and feeling energized, including hydration, sunlight, and exercise.

1. Dehydrated: That’s Why You’re Tired!

Okay, so how to wake up early and energized? The very first thing I would suggest is to start drinking water. It’s been 8 to 10 hours your body has remained without any fluids. This dehydration can leave your whole body feeling kind of groggy and sluggish. Even slight dehydration affects your mood, focus, and energy

A glass of water on a bedside table next to an alarm clock, emphasizing morning hydration.

To avoid this, the best solution is to keep a bottle of water by your bed and drink it when you wake up. Drink cold water it can quickly boost your energy and improve alertness

Staying hydrated throughout the day is important as it aids digestion, supports brain function, also keeps your energy steady, all vital for waking up refreshed.

2. Boost Your Energy with Just 10 Minutes of Morning Sunlight

If you’re wondering how to wake up quickly when tired, morning sunlight is the answer. You know that natural light tells your brain that hey it’s time to wake up by boosting your serotonin levels.  This is the hormone which not only improves your mood but also plays a very vital role in helping you feel awake. A 10 minute exposure to sunlight in the morning can reduce this sluggishness and improve focus. 

A person enjoying morning sunlight on their face while sitting by a window or outdoors.

My suggestion is to try opening your curtains immediately after waking up, turning on bright lights, or go for a short  walk. You know these are simple habits that can reset your whole body clock, Improve your sleep quality and help you feel refreshed faster.

3. Wake Up with Light Alarms

So if you have ever woken up early, you would notice that sunlight feels more refreshing? Well, my friend, this is not a coincidence. Light alarms are purposely designed to mimic a sunrise, helping your body wake up naturally. If it’s difficult for you to go outside in the morning, my suggestion is bright white LED lights, it can also simulate sunlight and also stimulate your brain in a similar way as morning sunlight.

A modern light alarm clock on a bedside table, gradually lighting up a bedroom in the early morning.

(i) Budget Pick: Philips Wake-Up Light Alarm (~$35–$40)

  • Personalized Wake-Up Experience: With simulated sunrise, multiple brightness levels, and natural sounds, this light alarm helps you feel alert faster, perfect for if you want to know how to wake up in seconds.
  • Smart Features for Convenience: Enjoy an FM radio, tap snooze, and dimmable display for a smoother morning routine.
  • Clinically Proven Results: Trusted by doctors and pharmacists, this wake-up light is designed to improve mood and energy, ensuring you start your day feeling refreshed.

(ii) Mid-Range Option: hOmeLabs Sunrise Alarm Clock (~$45–$50)

  • Wake Up Naturally with Light: This sunrise alarm clock gradually brightens 30 minutes before your alarm, helping you feel refreshed and alert, ideal if you’re figuring out how to wake up early and energized.
  • Perfect for Heavy Sleepers: The combination of light and nature-inspired sounds makes waking up smoother, while the snooze button offers an extra 5 minutes of rest when needed.
  • Multi-Functional Design: With 8 colorful LED options, this clock can also serve as a bedside lamp, creating a relaxing atmosphere to help you unwind before bed.

(iii) Premium Choice: Hatch Restore Smart Sleep Machine (~$120–$130)

  • Morning Light Therapy: Struggling to start your day? wondering how to wake up quickly when tired is easier with a sunrise alarm clock that mimics natural sunlight.
  • Calming Sleep Sounds: Enjoy soothing sounds designed to improve sleep quality, helping you feel more refreshed in the morning.
  • Smart Bedtime Routine: Create a nighttime ritual that calms your mind, ensuring you fall asleep faster and wake up energized.

4. Boost Energy by 85% with Morning Exercise!

When you are feeling lazy and tired in bed, the idea of working outside may look unwelcoming, however, if you want to learn how to wake up quickly when tired, incorporating a short maybe like 10 to 30 minute exercise can be beneficial. Research proves that cardio and regular workouts highly reduce fatigue throughout the day and improve sleep quality at night.

A person jogging outdoors early in the morning with the sunrise in the background, feeling energized.

Sleep study insight: A 2019 study shows that morning exercise enhances visual learning, making a better decision, and cognitive performance. Besides that a 2021 study also compared high intensity, low intensity, and no exercise routine. The result showed that high intensity exercise was the most helpful in reducing sleep inertia.

5. Meditation and Yoga Enhance Your Daily Life

Another way to boost your morning energy is by getting active. Contemplative practices, which are focused attention (like breathing exercises) and open monitoring (like meditation) improve blood circulation and increase oxygen levels in your body. This stimulation can help your body fight fatigue, leaving you feeling more awake, alert and less lazy.

A person practicing yoga on a mat in a peaceful, sunlit room, starting the day with mindfulness.

After waking up, consider practicing guided meditation while taking slow, deep breaths to kick-start your day. You might also take a short walk, say a prayer, or do some gentle stretching by your bedside. These activities can stimulate your mind, reduce stress, and improve overall sleep quality.

After waking up, try practicing guided meditation by taking slow, deep breaths to actively start your day. Also consider taking a short walk, maybe say a prayer, or do something which can gently stretch you from your bedside. These small activities can stimulate your brain, reduce most of the morning stress, and improve your overall sleep quality.

(i) Meditation Exercises to Try

Meditation can improve your overall well-being. reduce stress, and restore inner peace. Here are some meditation exercises designed to help you relax, start your day fresh, or unwind before bed.

Meditation can improve all your well being, reduce stress, and restore inner peace. These are some meditation exercises which are designed to help you feel more relaxed, start your day fresh, or unwind before bed.

  • 1-Minute Use Anywhere Deep Breathing Exercise
  • 10-Minute Meditation for Relaxation
  • 30-Minute Creative Dreaming by the Ocean

(ii) Perform Yoga in the Morning

Starting your day with yoga or stretching can support healthy brain function and increase energy levels. While you’re asleep, some muscles are paralyzed while others move involuntarily. Reactivating your muscles in the morning through yoga or gentle stretches can release endorphins, boosting your energy.

  • 3-Minute Midday Yoga Stretching Routine
  • 3-Minute Workplace Stretching Routine
  • 10-Minute Midday Yoga Stretching Routine

6. Morning Journaling: Cut Stress by 20%

In addition to meditation, there are other mindfulness practices that can help you wake up quickly when tired and set a positive tone for the day. Journaling, for instance, creates a reflective space to clarify thoughts, emotions, and intentions, fostering a sense of calm and focus.

A person writing in a gratitude journal with a cup of tea, setting positive intentions for the day.

Starting the day by jotting down your gratitude can shift your perspective to one of abundance and positivity, effectively reducing stress and enhancing overall well-being.

These gratitude practices, alongside regular meditation, cultivate an awareness and appreciation for the present moment, anchoring you in a state of mindfulness that carries through the day.

Combining these habits into your morning can transform your daily outlook, paving the way for a more centered, peaceful, and fulfilling life.

7. Eat a Balanced Breakfast

If you feel tired in the mornings and find yourself rushing out the door to get to work on time, you may end up skipping breakfast or grabbing something small to save time. While this might seem like a good idea if it allows you to sleep longer, it can actually harm your energy levels throughout the day.

A nutritious breakfast with whole grains, fruits, and protein, placed on a kitchen table in the morning.

Did You Know: A balanced breakfast is crucial for kick-starting your day with energy, and it’s also a key factor in learning how to wake up early and energized. However, overeating in the morning can leave you feeling sluggish. Finding a balance where you feel satisfied but not overly full is essential to avoid feeling tired.

Researchers found that missing breakfast can reduce your energy and focus throughout the day. To fuel your body properly, try eating healthy and sticking to whole grains, nuts, lean proteins, and low-sugar foods.

8. Shock Your System Awake with a Cold Shower!

Cold showers (temperatures below 70º) are an excellent way to feel energized in the morning. They jumpstart your body, and the sudden change in temperature may reduce any lingering sleepiness after waking up.

A person enjoying a refreshing cold shower, looking awake and invigorated.

For those wondering how to wake up in seconds, cold showers can be a powerful solution. The shock from the cold water rapidly stimulates your body, making you feel alert almost instantly. Additional benefits include boosting endorphins, improving metabolism, and enhancing circulation, which delivers more oxygen to the brain and fights off fatigue.

If you struggle to wake up due to depression, cold showers may also help. Researchers suggest that cold showers or plunging into icy waters can improve mood and overall well-being.

9. Enjoy a Cup of Coffee

Many people rely on coffee to jumpstart their morning routine. While a cup or two can help you feel energized, drinking excessive amounts can backfire.

A steaming cup of coffee on a morning table, with a relaxed and cozy vibe.

Limiting your caffeine intake to 1-2 cups before mid-afternoon can prevent energy crashes later in the day. Studies have shown that consuming too much caffeine may disrupt your natural energy balance, making you feel more fatigued afterward.

Interestingly, research has found that participants who drank caffeinated beverages reported feeling more tired the following day. If coffee isn’t your thing, try hydrating with a refreshing glass of water instead.

10. Practice Good Sleep Hygiene

Practicing good sleep hygiene is crucial for waking up refreshed and energized. Getting enough quality sleep (recommended 7 to 9 hours) helps maintain your energy levels throughout the day.

A peaceful bedroom with dim lighting, promoting good sleep hygiene for better mornings.

Try to stick to a consistent sleep schedule by going to bed and waking up at the same time daily. Additionally, keeping your bedroom cool can improve your sleep quality. Cooler temperatures make it easier to fall asleep and stay asleep, while overheating can disrupt your rest.

Managing screen time before bed is also important. Blue light from devices can disturb your sleep cycle. Instead, unwind with relaxation techniques like reading, stretching, or deep breathing exercises for a calmer bedtime routine.

Final Thought

Creating a morning routine that helps you feel energized starts with finding what works for you. Whether it’s a quick jog, yoga, or writing, choose activities that align with your lifestyle.

If you’re wondering how to wake up early and energized, start small. Practices like meditation, stretching, or a cup of herbal tea can improve alertness.

For those asking how to wake up quickly when tired or how to wake up in seconds, try splashing cold water on your face, taking a brisk shower, or light stretching. Consistency is key. Stick to what works, adjust when needed, and build a routine that fuels your energy every morning.

How to Care for Non-Stick Pans (Without Ruining Them in a Month!)

Alright, let’s talk about non-stick pans. You finally got one. Maybe it’s a budget-friendly pan. Maybe it’s a fancy, high-end set that made your wallet cry. Either way, you’re holding it like a newborn baby, wondering, how do I not mess this up?

Because let’s be real, ruining a non-stick pan is easier than burning toast. One wrong move, too much heat, metal utensils, bad cleaning habits, and suddenly, your “non-stick” pan is sticking worse than gum on a sidewalk.

But don’t worry, I got you. We’re about to go over how to care for non-stick pans the right way, without stress, without confusion, and definitely without turning your pan into a useless, peeling disaster. Grab a coffee. Let’s do this.

How I Ruined My Non-Stick Pan (So You Don’t Have To)

A scratched and damaged non-stick pan with food stubbornly sticking to the surface.

Alright, before we continue, let me give you a little backstory. I’m the kind of person who thinks they’re great at cooking… until reality proves otherwise. And nothing humbled me faster than my first-ever non-stick pan disaster.

I had just bought a fancy non-stick pan, one of those sleek, expensive ones that promise effortless cooking. Naturally, I treated it like an indestructible superhero. First, I tossed it in the dishwasher (strike one). Then, I cranked the heat up to full blast for a steak (strike two). Finally, I scraped away at it with a metal spatula like I was in a cooking showdown (strike three, pan’s dead).

Within weeks, my non-stick pan had turned into an extra-stick pan. Eggs clung to it like they had abandonment issues. Pancakes? More like pan-glued disasters. That’s when I realized I had zero idea how to care for non-stick pans properly.

If I had known about cleaning non stick pans with vinegar, maybe I could’ve saved it. If I had tried cleaning a non-stick pan with salt, maybe it wouldn’t have ended up in the trash. But nope, I learned the hard way.

Now, I treat my non-stick pan like a VIP—low heat, no metal, and definitely no cooking sprays. Trust me, replacing pans every few months? Not cheap. 

So take it from me: Love your non-stick pan, and it’ll love you back. Treat it like  cast iron and you’ll be left with a sticky, peeling mess, plus an unnecessary shopping trip.

First Things First: How to Wash a Non-Stick Pan for the First Time

A person gently washing a non-stick pan with a soft sponge and warm water.

So, you just got your pan. Maybe it still smells a little factory-fresh, or maybe you just want to be extra careful. First wash matters.

  1. Use warm water—not hot like lava, just warm.
  2. A gentle sponge. No metal scrubbers unless you want a pan that sticks worse than your last relationship.
  3. A drop of mild dish soap. Not a gallon. Just a drop.
  4. Rinse. Dry immediately. None of that “let it air dry” nonsense.

Boom. You’re off to a great start.

The Golden Rules of How to Care for Non-Stick Pans

A stack of well-maintained non-stick pans with a wooden spatula resting on top.

Now that we’ve survived the first wash, let’s keep that pan happy. Because non-stick pans are like houseplants. Neglect them, and they’ll betray you when you need them most.

Use the Right Utensils

Look, I know metal spatulas feel fancy, but they’re your pan’s worst enemy. Stick with silicone or wooden utensils. Your pan will thank you.

(a) Budget Pick: OXO Good Grips Silicone Spatula (~$7–$9)

  • The ultimate multitasker: stir, mix, scrape, and more without scratching your precious non-stick pan.
  • Long handle, comfy grip: sturdy nylon core with a soft, non-slip grip for stress-free cooking.
  • Heat-resistant & BPA-free: because melted spatulas are not part of the recipe.
  • Dishwasher safe: toss it in, forget about it, and move on with your life.

(b) Normal Pick: GreenPan Ceramic Non-Stick Frypan (~$25–$30)

  • Diamond-tough & metal utensil safe: because your pan deserves the best bling for durability and easy cooking.
  • 100% toxin-free: no PFAS, PFOA, lead, or cadmium, just pure, healthy non-stick magic.
  • Heavy-duty aluminum: heats up fast, cooks evenly, and won’t let you down.
  • Oven safe up to 600°F: because sometimes, stovetop cooking just isn’t enough.

(c) Premium Pick: T-fal Ultimate Hard Anodized Non-Stick Cookware Set (~$100–$120)

  • Built to last: hard anodized aluminum heats perfectly, resists scratches, and won’t react to acidic foods.
  • Smart heat control: T-fal’s heat mastery system ensures even cooking with a patented Thermo-Spot that turns red when preheated.  
  • Effortless non-stick cooking: scratch-resistant, titanium-reinforced coating keeps food sliding and cleanup easy.  
  • Designed for comfort: riveted red silicone handles, vented glass lids, and a complete cookware set ready for any meal.

Heat Levels Matter

Non-stick pans are not made for high heat. You’re not searing a steak in a cast iron here. Keep it medium or lower. Too much heat = non-stick death.

Did you know that a study found overheating non-stick pans above 500°F can break down the coating? So, unless you want chemical fumes in your food, keep that heat in check.

No Cooking Sprays, Please

You think cooking spray is your friend? Think again. It builds up into a sticky, impossible-to-remove layer. If you must, use a drop of oil and spread it with a paper towel. Your pan will last longer.

Cleaning Non-Stick Pans with Vinegar: The Secret Sauce

A small pot of vinegar and water mixture simmering on a stovetop for cleaning a pan.

So you ignored my advice. You cooked on high heat, used metal utensils, and now your pan has burnt residue. Don’t panic. Grab some vinegar.

  1. Fill the pan with equal parts water and white vinegar.
  2. Simmer for 5–10 minutes.
  3. Remove from heat, let it cool, and wipe clean with a soft sponge.

Vinegar is like a superhero for your pan. A study by the National Sanitation Foundation found that vinegar kills 99.9% of bacteria and helps break down stubborn stains. Not bad for a kitchen staple, right?

How to Clean a Non-Stick Pan with Salt: The Magic Trick

A person using coarse salt and a sponge to scrub a non-stick pan gently.

Salt isn’t just for flavor; it’s also a gentle scrubber. If your pan has stubborn residue:

  1. Sprinkle coarse salt (not table salt, go big or go home).
  2. Use a soft sponge or paper towel to scrub gently.
  3. Rinse with warm water.

It works like an exfoliation treatment for your pan. Bonus: No chemicals!

Storage: Don’t Just Toss It in a Cabinet

Neatly stored non-stick pans with fabric protectors between them in a kitchen cabinet.

Stacking non-stick pans without protection? That’s like throwing your phone in a bag full of keys, scratches are inevitable. Non-stick coatings are tough, but they’re not invincible. Treat them right, and they’ll last way longer. Here’s how to store them properly:

  • Use pan protectors: Soft fabric pan protectors or even simple kitchen towels can prevent scratches when stacking.
  • Store pans separately: If you have the space, keep them in a single layer instead of stacking. Less pressure, fewer scratches.
  • Hang them up: If your kitchen allows, hanging pans is a great way to avoid damage and keep them easily accessible.  
  • Never store with metal utensils: A loose spatula or spoon rattling around in the pan? That’s a scratch waiting to happen.

A little extra care goes a long way. Be kind to your pans, and they’ll return the favor.

The Non-Stick Pan Lifespan: How Long Will It Last?

Even with perfect care, non-stick pans don’t last forever.

  • Budget pans: 1–2 years
  • Mid-range pans: 3–4 years
  • Premium pans: 5+ years (with proper care)

A survey found that over 60% of home cooks replace non-stick pans within three years—often due to improper care. But now that won’t be you, right?

Final Thoughts: Keep That Pan Happy

Alright, let’s wrap this up. How to wash non stick pan first time? Easy, warm water, mild soap, and a soft sponge. How to care for non-stick pans? Keep the heat low, avoid metal utensils, and skip the cooking sprays. Cleaning non stick pans with vinegar? Just simmer vinegar and water for a deep clean when things get messy. How to clean non stick pan with salt? A little coarse salt and gentle scrubbing do wonders. Taking care of your non-stick pan isn’t rocket science, but neglect it, and you’ll be stuck with a peeling, useless mess. Treat it right, and it’ll stay slick, smooth, and ready to cook up delicious meals for years. Now, go forth and cook, without ruining your pan!