Silk is the diva of fabrics. It’s luxurious, elegant, and oh-so-temperamental. One wrong move and your favorite silk blouse could end up looking like a dishrag. But don’t panic! Washing silk at home doesn’t have to be a nightmare — with the right tips, you can keep your silk looking fabulous without breaking the bank.
Did you know that 85% of people ruin their silk because they don’t know how to wash it properly? And 60% of those tragedies happen in the washing machine. Yikes.
In this guide, we’ll show you how to wash silk at home, whether you’re using a washing machine or going old-school with hand washing. Plus, we’ll spill the tea on the best detergent for washing silk and how to remove stubborn stains. Ready to become a silk-care pro? Let’s dive in!
My Personal Silk Saga: A Love-Hate Story
I was getting ready for a fancy dinner party, wearing my favorite silk dress. But as I reached for my wine glass, disaster struck. A big, red stain right on the front. Panic mode: activated.
I rushed to the sink, grabbed the first soap I saw, and started scrubbing. Big mistake. The stain spread, and the fabric started to fray. I ended up wearing jeans to the party. Not exactly the glam look I was going for.
That’s when I decided to learn everything about how to wash silk at home. Now, I’m a silk-saving superhero, and I’m here to share my secrets with you.
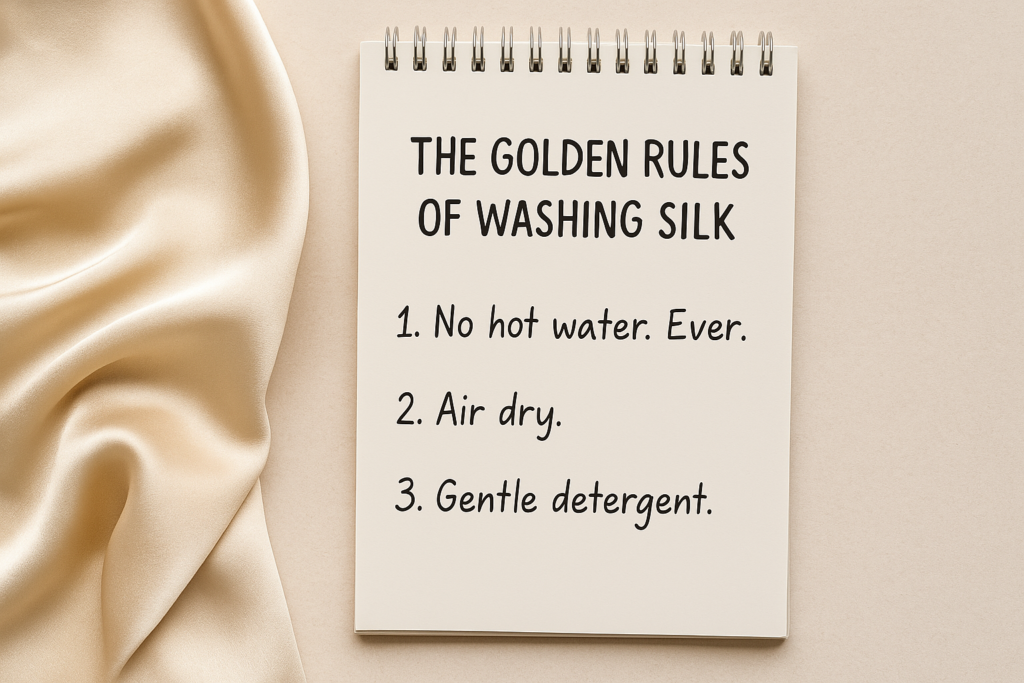
The Golden Rules of Washing Silk
No hot water. Ever. Think lukewarm or cold.
Gentle detergents only. (We’ll get to that.)
No wringing! Silk hates that.
Always air dry. No dryers. Nope. Not even once.
How to Wash Silk at Home in a Washing Machine: Step by Step
Washing silk at home? In a machine? Sounds scary, right? But trust me, it’s not. Here’s how you can do it without turning your silk into a horror story:
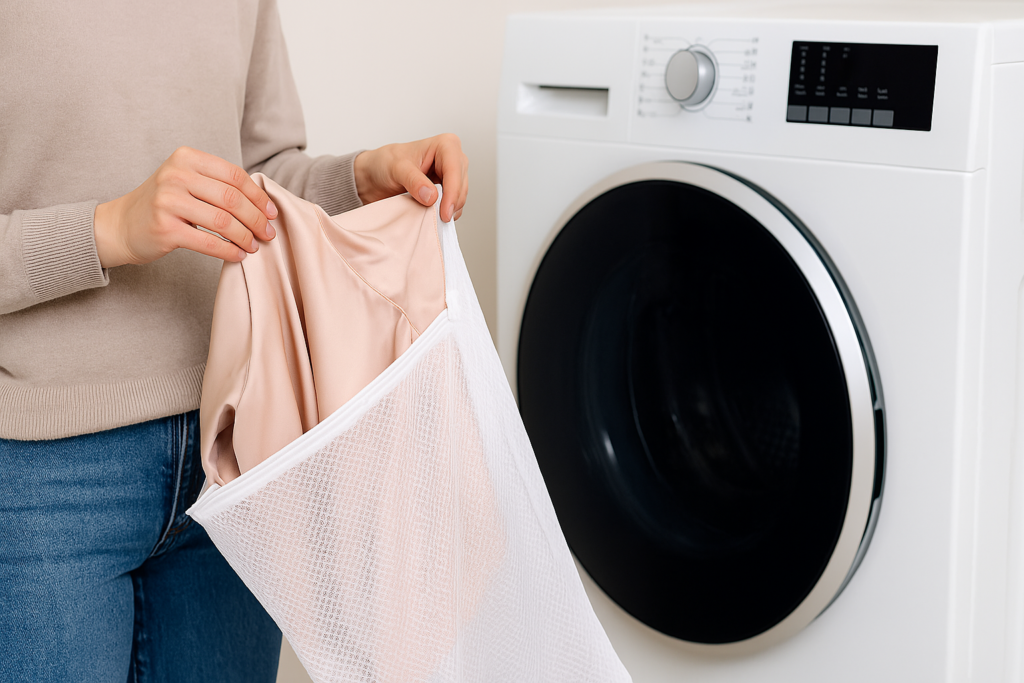
1. Grab a mesh laundry bag
Ever tried sending silk into a washing machine without one? Don’t do it — it’s like sending a toddler into a candy store alone. Bagail mesh bags are cheap and reliable. Pop your silk inside one. Zip it up.
2. Set your machine to “delicate” or “gentle” cycle
This is silk’s VIP pass. No rough handling. No crazy spins. Just soft, smooth washing.
3. Use cold water
Hot water? Big no-no. Silk hates heat. Cold water keeps it calm and happy.
4. Add a mild detergent
Woolite Delicates is perfect. Just a little bit. Too much detergent can make silk cranky.
5. Start the machine and wait
Grab a coffee. Scroll through your phone. Let the machine do its thing.
6. Add white vinegar in the rinse cycle (optional)
A splash of vinegar makes silk softer. Like adding conditioner to your hair.
7. Once done, remove silk immediately
Don’t let it sit there like forgotten laundry. Silk gets wrinkly fast. Take it out. Gently.
8. Air dry flat
No dryers, okay? Lay it flat on a towel. Let it dry naturally. It takes time, but hey, silk deserves it.
Done! Your silk’s washed. No tears. No disasters. Just soft, clean fabric. Easy, right?
Can You Dry Clean Silk?
Absolutely! Dry cleaning is often the first thing that comes to mind when you see that delicate “100% silk” label. And yes, it’s a safe option. Professionals know exactly how to handle silk without damaging its delicate fibers. They use solvents instead of water, which helps maintain silk’s softness, color, and luxurious feel. So, if you’re nervous about washing silk at home, dry cleaning is your best friend. But here’s the big question:
Do you always need to dry clean silk?
Honestly, no. While dry cleaning is reliable, it can be pricey. Imagine having to rush to the dry cleaner every time you accidentally spill a little coffee on your silk blouse. That bill adds up fast! Plus, dry cleaning chemicals, though gentle, aren’t always the most eco-friendly choice.
How to Remove Stains from Silk?
Blot the stain gently. No rubbing.
Use a mix of lukewarm water and mild detergent.
For tough stains, try a drop of white vinegar — just a tiny drop!
Grease stain? Sprinkle cornstarch and let it sit before brushing off.
Double-concentrated, bio-based formula: Eco-friendly and powerful, perfect for delicate fabrics like silk, satin, and lingerie.
Lightweight, transparent detergent: Easy, mess-free dosing with a pleasant citrus and floral scent (Lady).
Long-lasting use: Provides 31 washes per medium dose, ensuring value and gentle care for delicate items.
Can You Hand Wash Silk?
1. Check the care label
See a bucket symbol with a big ‘X’? That’s a no-go. Dry cleaner time. No arguments. But if it says hand wash? You’re good to go.
2. Test for Color Fastness
Before washing, test the fabric for color bleeding. Dampen a small, inconspicuous area and press it with a white cloth. If any dye transfers, it’s best to leave the washing to the professionals.
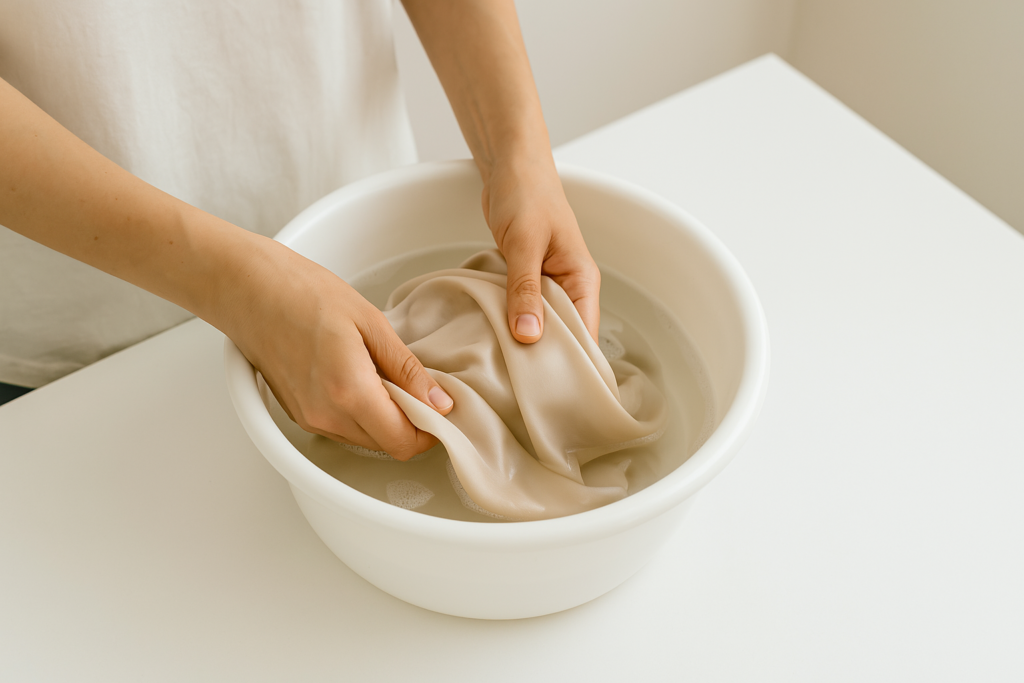
3. Soak in Lukewarm Water
Fill a basin with lukewarm water (not hot!) and add a small amount of mild detergent, like Persil Silk & Wool. Stir it gently to create a light lather. Soak your silk for no longer than 5 minutes.
4. Rinse with Vinegar
Drain the water and refill the basin with cool water. Add ¼ cup of white vinegar and swish the fabric to remove soap. The vinegar helps keep the silk soft and prevents soap residue.
5. Dry Gently
Lay the silk on a clean towel, gently rolling it to absorb excess water. Avoid wringing or twisting the fabric. Air dry flat or hang in a shaded area. Never use a tumble dryer.
Your silk will stay fresh and beautiful!
Tips and Tricks/Mistakes to Avoid
Never soak silk too long.
Avoid harsh detergents.
Don’t twist silk to dry.
Don’t expose silk to direct sunlight while drying.
Store silk in breathable bags.
Always test a small area before using any stain remover.
Iron silk on the lowest setting if needed, with a cloth between the iron and fabric.
How to Dry Silk
Never wring out your silk items or toss them in the dryer, says Whitehurst. To remove excess water, place the wet garment on a white cotton towel. Fold the towel over and gently blot. Then, using a padded hanger, hang the blouse or dress over the bathtub to drip dry.
Final Thoughts
Learning how to wash silk at home doesn’t have to be daunting. Whether you’re using a washing machine or hand washing, following the right steps will keep your silk looking fresh and beautiful. Remember, when washing silk at home in a washing machine, always use a delicate cycle, cold water, and a mild detergent like Woolite Delicates. If you’re unsure, a mesh laundry bag offers extra protection.
If you prefer the professional touch, dry cleaning is always an option, though it can be pricey. The best detergent for washing silk ensures your fabric stays soft and vibrant without any harsh chemicals. And when in doubt, always check the care label. By taking a few simple precautions, you’ll preserve your silk’s luxurious feel and extend its lifespan. So, embrace the art of washing silk at home. You’ll save time and money while keeping your fabrics looking fabulous!
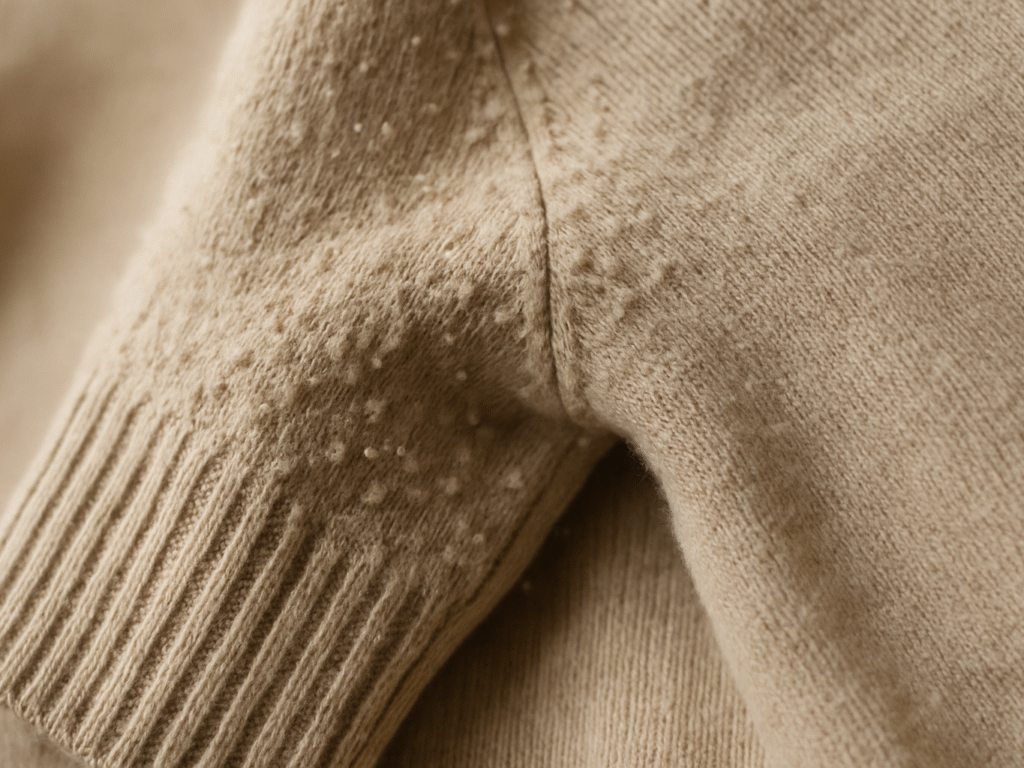
Those annoying balls of fuzz can appear even on high-quality fabrics like cashmere. The best fabric shaver might be precisely what you need to solve this common clothing problem.
Regular wear, machine washing, and dryer heat create friction that leads to fabric pilling. These pesky balls typically show up in high-friction areas like underarms and sleeves. Your favorite garments can stay fuzz-free with effective pilling solutions. Different tools work for different needs – from battery-operated fabric shavers for upholstery to electric lint removers that handle delicate materials.
Simple habits can help prevent fabric pilling. Washing clothes inside out and using lower spin speeds makes a significant difference. We’ve tested various tools to help you choose the right one for your needs. Budget-friendly options are available for under $15, while mid-range choices offer better versatility around $20. Premium models, typically priced around $30, have added features for improved performance. Our comprehensive testing covers fabric shavers suitable for everything from delicate sweaters to the best fabric shaver for couch maintenance.
Understanding Fabric Pilling and Why It Happens
Those annoying fuzz balls on your favorite sweater are more than just a nuisance; they show a textile process you should understand before buying the best fabric shaver. Let’s look at what happens when your clothes get these unsightly bumps.
1. What is fabric pilling?
Fabric pilling creates small, fuzzy balls that show up on textile surfaces. These pills (some people call them bobbles or fuzzballs) form when broken or loose fibers get tangled up in tiny knots.
The process has four stages: fuzz formation, entanglement, growth, and wear-off. Fibers start breaking or loosening because of regular friction. These loose fibers tangle together and form small clusters. These clusters catch more loose fibers and become noticeable pills that make your clothes look shabby.
Pills usually show up in areas that get the most rubbing during regular wear, such as underarms, collars, cuffs, between thighs, and on the rear of pants. You’ll spot pilling in the middle of bed sheets where bodies create constant friction.
Most people think pilling damages fabric, but it doesn’t affect the structure or how well it works; it just looks bad. All the same, these stubborn little balls can make expensive clothes look old and worn too soon.
2. How pilling differs from lint
Pilling and lint both involve loose fibers, but they’re different problems. Lint is made of small fabric pieces or loose fibers that come off clothes without sticking to anything. Comparatively, pilling happens when loose fibers form tangled balls stuck to the fabric’s surface.
The most significant difference in their demonstration is that lint falls off and collects loosely on surfaces, but pills stay connected to the fabric through fibers that haven’t broken completely. Lint brushes off easily with your hand, but pills need more specific removal methods, so you need a quality fabric shaver.
There’s another reason these issues are different: lint is temporary and mostly happens during washing or drying, but pilling worsens with wear. Fiber transfer, fibers from other fabrics rubbing off your clothes, looks like pilling, but it’s something else.
3. Why do some fabrics pill more than others
Fabrics have different levels of pilling resistance. Several things determine how likely a textile will develop these annoying fuzzballs:
Fiber length: Fibers with longer lengths pill less than shorter ones. It explains why high-quality cashmere pills are less expensive than cheaper versions.
Fiber type: Natural fibers like linen and silk resist pilling better. Wool, cotton, polyester, acrylic, and other synthetics pill more easily.
Fabric construction: Knitted fabrics pill more than woven ones because knit threads are looser and rub more. Tightly woven fabrics like denim naturally resist pilling better.
Fabric blends: Blended fabrics (like cotton/polyester) usually have one stronger fiber. The weaker fiber breaks first and wraps around the stronger one to form pills. It happens especially when you have synthetic blends with acrylic, which use very short, straight fibers.
Fabric tightness: Tight knits or weaves generally pill less than loose ones because their fibers stay more secure.
New clothes often pill more than older ones because they have extra fibers that haven’t worked loose yet. Synthetic pills also last longer than natural fiber pills; synthetic ones stay attached to the fabric, while natural fiber pills break off eventually.
Understanding which clothes need the most care helps before buying the Conair Fabric Defuzzer, the Gleener Fabric Shaver, or the Philips GC026 Electric Lint Remover. Knowing your acrylic sweater will pill more than your linen shirt gives you a better start in caring for your fabrics.
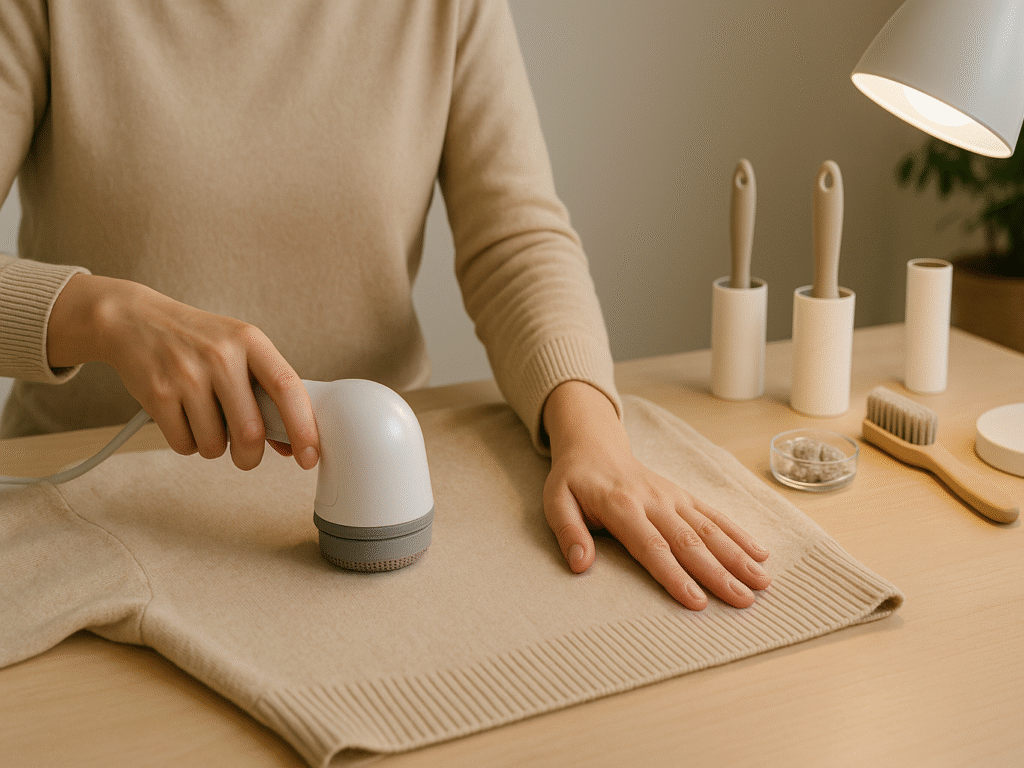
How to Use a Fabric Shaver the Right Way
Becoming skilled at fabric shaving can make all the difference between giving your clothes a new life and ruining your favorite pieces. You need to work with precision after spotting pilling on your garments.
1. Choose a flat surface
You need a stable workspace to safely and effectively shave fabric. Good Housekeeping suggests picking a flat surface that keeps your garments from moving while you work. This stability helps you avoid damaging the fabric.
Pick a bright spot where you can see all the pills. Natural light works best, though a good desk lamp is enough for evening touch-ups. The surface should support your fabric without letting it bunch up or sink, which could lead to uneven results.
A clean dining table or countertop works better than your bed or sofa for bigger items like sweaters or blankets. These solid surfaces support the proper treatment of the fabric.
2. Keep the fabric taut
The best fabric shaver works most effectively when you keep proper tension on your garment. Lay your item on a flat surface and smooth it out. Use your non-dominant hand to hold the fabric tight while you work the shaver with your other hand.
The correct tension creates a smooth surface without overstretching the fabric’s natural shape. Your knitted items, like sweaters, can get permanently distorted if you pull too hard.
You’ll need to turn sleeves or pant legs several times to reach every spot. Keep that gentle tension as you work around the garment, adjusting your grip as needed.
3. Move the shaver in slow circles
Electric models (like the Philips GC026) and manual fabric shavers (like some Gleener varieties) need slightly different approaches:
Rest the shaver lightly against the fabric at first
Work in small, slow circles over piled areas
Press harder only if you must
For manual shavers:
Touch the shaver gently to the clothing
Make controlled strokes from top to bottom
Press slightly harder only on tough pills
Experts from Hayden Hill warn, “Avoid raking at the fabric, as this could damage it.” Try the shaver on a hidden spot first to learn the correct pressure and technique for each fabric type.
Steamery and Good Housekeeping both suggest working in circles instead of straight lines. This circular motion catches pills from every angle and removes them more thoroughly.
4. Clean the shaver regularly
Pills collect in your fabric shaver’s container, which needs frequent emptying, especially with heavily pilled items. Steamery notes, “If you’re working on a heavily pilled garment, you need to check the container and empty it after a while (you normally feel and hear when the machine starts to run a little slower).”
A thorough cleaning involves:
Switching off the device
Emptying all lint from the collection chamber
Cleaning around and under the blades with the included brush
Checking the spinning axis where threads often get stuck
Clean maintenance keeps your shaver working well. A clogged device won’t do its job and might harm your clothes. Steamery stresses that proper cleaning “is essential” and skipping it “might cause the [device] to stop functioning properly.”
Each model, the Conair Fabric Defuzzer, the Gleener Fabric Shaver, and Philips GC026, comes with its cleaning tools and instructions. The Philips model stands out with an easy-to-remove blade assembly that simplifies maintenance.
These four steps help you get more life from your clothes and fabric shaver. It’s a smart way to protect your investment in quality garments and tools.
Tested Fabric Shavers: Budget to Premium
Now that you know how to deal with fabric pilling, let’s get into some tools explicitly made for this job. We tested three popular fabric shavers at different prices to help you pick the right one.
The Conair Fabric Defuzzer is an affordable and effective way to breathe new life into worn garments. This battery-operated device has three depth settings that let you adjust the “shave” based on your fabric type. You can use it on everything from delicate sweaters to sturdy upholstery, making it the Best fabric shaver for couch.
Our tests showed Conair’s large shaving head covers more fabric with each pass. It removed approximately 75% of pills in just one swipe, which is impressive for its price. The comfortable grip design makes it easy to hold for long periods, which helps a lot when working on multiple garments.
The lint catcher pops off easily for cleaning, but you’ll need to empty it often during bigger jobs because of its compact size. Two AA batteries power this portable device, making it easy to pack and store.
The Gleener takes a different approach from electric options by using three swappable edges for different fabric weights. This manual design gives you precise control, which works great with delicate materials like cashmere.
The Gleener comes with specialized edges for:
Fine woolens and delicate fabrics
Medium-weight knits
Heavy-duty fabrics and upholstery
The Gleaner shines with fine woolens; it removes pilling without damaging sensitive fabrics. A built-in lint brush helps collect loose fibers after de-pilling, adding extra value.
At around $19, this tool sits in the middle price range. Natural fibers respond well to treatment, but tougher synthetic blends need more passes to get the job done.
The Philips GC026’s advanced features justify its higher price tag. Its wide blade surface tackles more fabric at once, so you need fewer strokes. The blades spin at 8,800 rounds per minute, making quick work of pills.
This model’s unique mesh design has holes in three sizes to catch pills of all dimensions. An adjustable height cap protects even the most delicate garments.
Two AA batteries and a cleaning brush come in the box. Users say it handles everything from sweaters to sofa cushions well, though the blades might need replacement after six months of regular use.
Which one worked best in our tests?
Each shaver brought something different to the table:
The Conair Fabric Defuzzer combines great price, efficiency, and user-friendliness. It removes 75% of pilling in one pass, which is remarkable for a budget option. This model gives you the best bang for your buck on fabrics of all types.
The Gleener is your best bet for delicate fabrics like cashmere. The manual design gives you more control, which helps avoid fabric damage. The lint brush feature is excellent for final touches.
The Philips GC026 is the best professional fabric shaver with a powerful motor and a large shaving head, perfect for heavy-duty fabrics and significant surface areas. The higher price tag is well worth it for homes filled with upholstery or serious sweater collections.
The Conair model is the best all-around fabric shaver, with outstanding performance and a wallet-friendly price. If you work with luxury fabrics often, the Gleener’s specialized features make it worth the extra money.
Best Practices for Different Fabric Types
Different fabrics need specific methods to remove pills. Here’s a guide to handling various materials the right way.
1. Wool and cotton blends
Pills develop quickly on wool and cotton blends, particularly where friction occurs most. The Conair Fabric Defuzzer ($10-$12) works great with its adjustable settings. The medium setting works best to start, and you can adjust it based on the thickness of the fabric.
Pull wool blends tight across a hard surface and move the shaver in gentle circles. The Philips GC026 ($25-$30) works better for thick wool sweaters because it has a more powerful motor and a bigger blade surface.
Tightly woven fabrics resist pilling better than loose knits. Loose-weave wool garments need more frequent care but should be treated gently to avoid damage.
2. Cashmere and delicate knits
Cashmere’s luxurious yet delicate nature demands special care. Light pressure is essential while de-pilling cashmere to protect its fibers from permanent damage.
Tips for cashmere and other delicate knits:
Clean and dry the garment completely before de-pilling
Use your fabric shaver’s gentlest setting
Move in one direction instead of circles to minimize damage
Take regular breaks to avoid overworking areas
The Gleener Fabric Shaver & Lint Remover ($15–$20) stands out as the best fabric shaver for cashmere thanks to its manual design and interchangeable edges, offering more control than electric models. Recommended by Nori Press experts, it “gently removes the pills without damaging the fabric,” making it a top choice for delicate cashmere care.
A specialized cashmere comb might work better than electric shavers for fabulous cashmere. The New York Times Wirecutter suggests avoiding motorized fabric shavers on delicate cashmere sweaters as “they’re so effective at cutting through the fluff that they can thin out finer fabrics, which leads to holes.”
3. Upholstery and couch fabrics
Upholstery brings its challenges with larger surfaces, multiple fabric types, and hard-to-reach spots. Pilling on upholstery “makes furniture look worn and tired like it needs to be replaced.”
The Philips GC026 handles upholstery well with its large shaving surface and strong motor. Apartment Therapy tests showed, “Before you think about replacing your furniture or dropping hundreds on reupholstering it, try this trick first.”
Start with a flat area on your couch fabric. Pull the fabric tight where you can and work section by section for full coverage. Tests showed the Conair Fabric Defuzzer worked amazingly well. Apartment Therapy reported they were “completely blown away at how easy the tool was to use and how the fabric looked exactly as it had when it was first purchased.”
Watch out for seams, buttons, and decorative elements – catching these can damage your upholstery permanently. The Gleener offers better precision for couches with hard-to-reach areas, though it needs more effort.
Common Mistakes to Avoid When Using a Fabric Shaver
You might have the best fabric shaver, but inevitable common mistakes can ruin your de-pilling efforts or damage your favorite garments beyond repair. Knowing these potential risks will help keep your clothes safe during depilling.
1. Using too much pressure
Most people make the mistake of applying excessive pressure while using fabric shavers. It can stretch the fabric, cause tears, or leave permanent marks on your sweaters. Hayden Hill’s advice makes sense: “Let the tool do the work” instead of forcing it.
The Philips GC026 Electric Lint Remover delivers excellent results with gentle contact; pushing harder won’t make it work better. Good Housekeeping’s warning rings true: “You could end up damaging the item you’re treating – or even cut a hole in it; not ideal when dealing with expensive knitwear.”
To get the best results:
Light pressure works best; increase only if needed
Slow, gentle motions beat, forcing the device
Step away if frustration makes you press harder
2. Not cleaning the blade.
Your fabric shaver’s performance drops quickly without proper care. Steamery says, “You notice that the [device] is working slowly, or if it stops running, even if the indicator lamp is green, the container is full.”
This issue affects all models, including the budget-friendly Conair Fabric Defuzzer. The product manuals stress that regular cleaning is essential to maintain its performance and prolong its lifespan.”
Device maintenance is simple: unscrew the plastic ring, carefully remove the perforated metal mouthpiece (watch out for sharp razors underneath), and clean the razors and lint container with the included brush.
3. Shaving over seams or zippers
Fabric near seams, buttons, and zippers can get damaged easily. Reddit users have noticed that “It can snag and/or cut threads, leaving holes” if used carelessly in these areas.
Innovative ways to avoid damage:
Keep the shaver moving steadily instead of stopping at one spot
Raise the device near seams, buttons, or zippers
Be extra careful with loose-woven materials that snag easily
The depth guard can come off for better control around tricky spots
Many people don’t realize that even the best fabric shaver for cashmere needs proper technique. The New York Times Wirecutter makes a good point: “It’s okay if the pill is not coming out, but if you mishandle the shaver, you may end up causing more pilling instead.”
How to Prevent Fabric Pilling in the Future
You can prevent fabric pilling better than fixing it later. Once you become skilled at using the best fabric shaver, you can change your focus to proactive measures that reduce how often you’ll need to de-pill your favorites.
1. Wash clothes inside out.
Your clothes will last longer if you turn them inside out before washing them. This simple trick protects the visible surface from rubbing against other items in the wash. The friction only affects the inside surfaces when clothes rub together, keeping the outer appearance fresh.
Sweaters and knitted items need this protection, especially when they’re prone to pilling. Inside-out washing creates a barrier that protects the exterior fibers. Jeans also benefit from this method and keep their color longer.
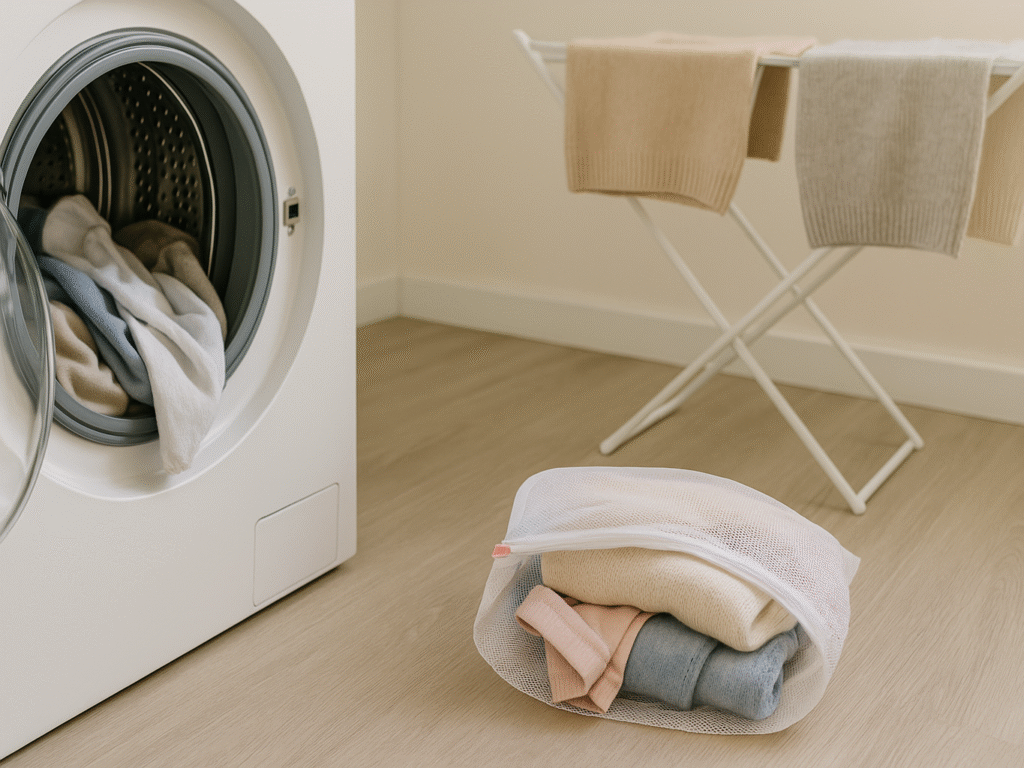
2. Use laundry bags for delicates.
Mesh laundry bags protect your most vulnerable fabrics. These zipped containers let soap and water flow while keeping delicate items away from rougher fabrics.
These bags work great for:
Bras and undergarments (stops stretching and hook damage)
Sweaters and knits (less fiber breakage)
Embellished clothing (keeps decorative elements safe)
Athletic wear (keeps its shape and stretch)
A good mesh bag means you can skip hand-washing, even with cashmere and silk items that usually need gentle care.
3. Avoid high heat in dryers.
Dryer heat at high temperatures makes fabric fibers weak and more likely to break and form pills. Air drying is the gentlest option for items that tend to pill.
If you need a dryer, keep the heat low and take items out while they’re slightly damp. The tumbling creates friction, so shorter drying times mean less damage. Your woven fabrics will last longer on a line, and knitted garments stay in better shape when laid flat to dry.
3. Choose fabrics with tighter weaves.
The fabric you pick is vital to preventing future pilling. Clothes made from longer fibers resist pilling better than those with shorter fibers.
These fabrics resist pills better:
Silk and linen (natural fabrics that stay smooth)
Denim (rigid and tightly woven)
High-quality cotton with longer fibers (Pima or Egyptian)
Watch out for wool, polyester, cotton-poly blends, and other synthetics; they develop pills quickly.
These prevention tips help, but keep your best fabric shaver nearby, whether it’s the budget-friendly Conair Fabric Defuzzer, mid-range Gleener, or premium Philips GC026, for quick touch-ups when needed.
Final Thoughts
Your favorite garments or upholstery don’t need to be discarded just because of fabric pilling. This guide explores how various best fabric shavers can tackle those pesky fuzzballs that make your textiles look worn out. You now know how to make an informed choice based on your needs, whether you prefer the budget-friendly Conair Fabric Defuzzer, the best fabric shaver for cashmere, like the precision-focused Gleener Fabric Shaver, or the best professional fabric shaver,r such as the powerful Philips GC026.
The correct technique matters as much as the tool you choose. You’ll get the best results without damaging delicate materials by using gentle circular motions, cleaning your device regularly, and keeping fabrics taut. You can also reduce the need for a fabric shaver by washing clothes inside out, using laundry bags, and avoiding high dryer heat.
Each textile needs its own approach. A gentle touch works best for delicate cashmere, while sturdy upholstery can handle more pressure. Understanding pilling’s causes helps you choose fabrics more wisely. These explanations will help restore your wardrobe and home textiles to their original beauty.
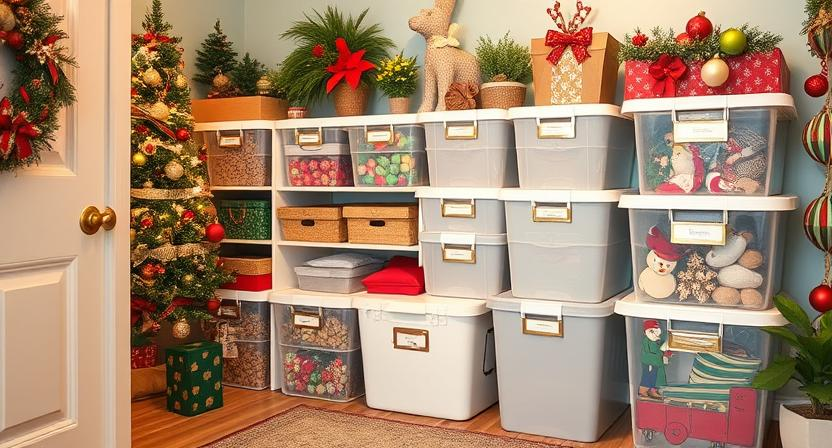
When the holiday season ends, the challenge of storing seasonal decorations begins. Store your holiday décor with care. Good storage is key. It prevents damage to fragile ornaments and big outdoor displays. This way, your items last longer. An organized system helps you keep your decorations safe. Without it, you might lose or damage them. That can make the next holiday season stressful and frustrating.
In this article, we’ll share holiday decoration storage ideas. These tips will help keep your decorations safe and in great shape. We’ll explore the best options for everyone. We have what you need. Whether it’s cheap DIY ornament storage or fancy options for large outdoor items, we’ve got you covered. Find tips and product recommendations to maximize closet space. These will help prevent damage and keep everything organized and easy to access. Using these strategies, you can ditch clutter. Enjoy hassle-free holidays, year after year.
Why Proper Storage Matters for Holiday Decorations
Store your holiday decorations properly to maintain their excellent condition each year. The wrong approach can lead to dust, moisture, and damage. This can harm your treasured items, making them less fun to show off. Here are some holiday decoration storage ideas to help you get organized:
1. Keeps Out Dust and Moisture
Store ornaments, lights, and wreaths in airtight containers or plastic bags. This helps prevent fading, rust, and mildew from environmental damage.
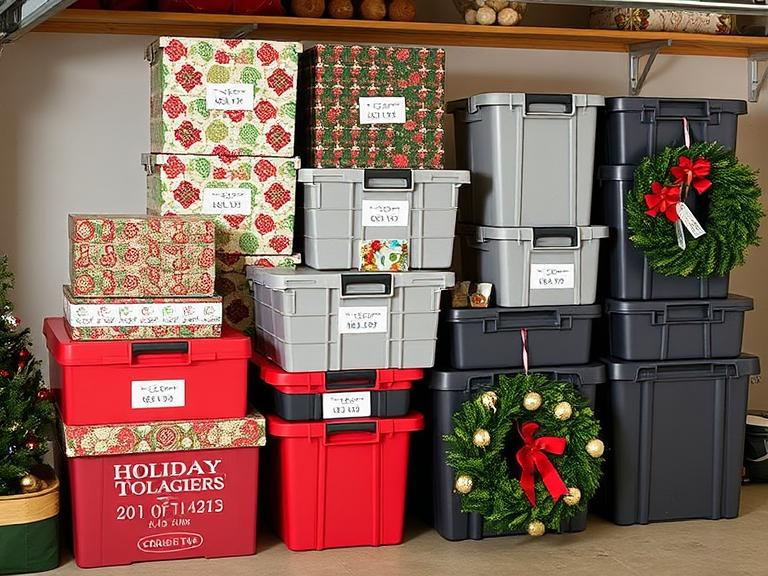
2. Maximize Space
Use stackable bins and clear storage boxes. This way, you can store more decorations and keep everything compact and organized. This helps free up valuable space in your home or garage.
3. Ensures Easy Access
Label your boxes and use dividers. This helps you quickly find decorations. You’ll save time each holiday season and avoid hassle.
Storing your holiday décor properly can make it last longer. This way, your seasonal celebrations stay stress-free!
Holiday Decoration Storage Ideas: Sorting and Categorizing Your Ornaments
Organizing your holiday ornaments is easy and helps them last longer. It also makes setting up for the holidays much simpler. Sort and organize your decorations. This way, fragile items stay safe, and everything is easy to reach when you’re ready to decorate. Here are some helpful tips and tricks to keep your ornaments safe and in great shape.
1. Tips for Grouping Ornaments Based on Size, Type, and Fragility
Size: Start by sorting ornaments by size. Put smaller items in boxes or compartments. Keep larger items in separate bins. This prevents smaller ornaments from getting crushed or tangled.
Type: Group similar ornaments (e.g., glass balls, wooden figurines, or DIY crafts) together. It helps you find a specific type when decorating. This also creates a more uniform look when you display them.
Fragility: Store delicate items, like glass or antiques, in separate boxes. You can also wrap them in tissue paper, bubble wrap, or old socks. Consider using padded dividers or egg cartons to prevent any damage during storage.
2. Why Categorizing Helps with Quicker Setup and Better Protection
Categorizing your ornaments offers the dual benefit of protecting them and saving time. Grouping ornaments logically helps you find what you need without delay. This makes decorating easier and less stressful. It also keeps delicate items cushioned. This way, they won’t break or lose their shape in storage.
3. Easy-to-Implement Organizational Strategies
Use transparent plastic bins complete with lids, allowing visibility of contents. Label each bin with its items. This helps to cut down search time.
Buy storage boxes that include dividers. These boxes keep your ornaments safe and organized. They make it easy to access your holiday decorations, ensuring they stay in great shape.
For DIY, you can reuse egg cartons. You can also make dividers from cardboard. This creates compartments for smaller ornaments.
Taking extra time to sort your ornaments helps protect them from damage. It also makes decorating easier each holiday season.
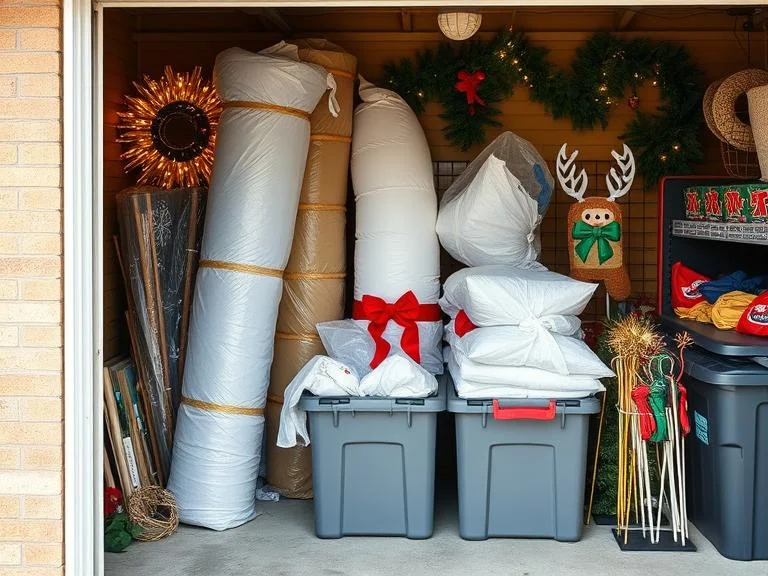
Outdoor Holiday Decor Storage: Keep Your Lawn and Garden Items Safe
Storing outdoor holiday decorations can be tough. Bulky items like wreaths, inflatables, and lights make it even harder. To keep your decorations in great shape and make them last, use smart storage ideas. These will protect your items from damage and help you organize your space better. Here are some practical tips to safeguard your outdoor holiday décor.
1. Practical Storage Tips for Bulky Items Like Wreaths and Inflatables
Wreaths: Keep wreaths in big, strong boxes or containers. This protects them from dust and moisture. Use garment bags for added protection and to keep their shape intact. Hanging wreaths on hooks in a closet or shed stops them from getting crushed.
Inflatables: Deflate inflatable decorations before storing them. Roll them up and place them in large, breathable bags, like canvas or mesh storage bags. This prevents mildew from forming and ensures they’re ready to go next season without damage.
2. Protecting outdoor lighting and garden decorations from the weather.
Outdoor lighting and garden decorations can easily be damaged by bad weather. This includes rain, snow, and changing temperatures. To protect these items:
For storing outdoor holiday lights, use these tips, Wrap the strings around plastic hangers or a spool. This keeps them untangled. Store them in plastic bins with secure lids to keep moisture out. Store fragile garden decorations in weatherproof containers or in your garage when not in use.
For Garden Decorations Use stackable bins with dividers for fragile ornaments. You can also wrap them in bubble wrap. Then, place them in plastic bags to keep them safe from rain and snow. For larger, delicate items like statues, use protective covers. You might also bring them indoors in winter.
3. Suggested Containers and Storage Ideas for Longevity
Get sturdy plastic bins to store bulky items such as wreaths, inflatables, and lights. For smaller items like garden figurines, use cushioned storage boxes to prevent breakage. Plastic storage shelves or racks in your garage or shed help keep things organized. They lift items off the ground, which protects your décor from humidity and pests.
Use these outdoor holiday decor storage ideas to keep your decorations safe. This way, they’ll last longer, and you can enjoy a beautiful, stress-free holiday season each year.
DIY Ornament Storage: Creative Solutions for Budget-Friendly Organizing
Storing your holiday ornaments can be easy and affordable. You can create your own storage solutions using simple materials. A little creativity makes it easy and affordable. Here are some DIY ornament storage ideas. They will keep your decorations safe and add a personal touch.
1. Creating Custom Storage Options Using Simple Materials
Building your own ornament storage is easier than you might think. All you need are a few basic supplies, like cardboard, plastic containers, and fabric. Here are some ideas to get you started:
Reuse Cardboard Boxes: Save money by using boxes from shipments or other products. Cut them into smaller pieces. Use dividers to keep your ornaments safe and separate. You can even cover them with wrapping paper or fabric to make them more festive.
Plastic containers with dividers: Use inexpensive plastic bins and add your own dividers. Foam, cardboard, or even old egg cartons work great for separating ornaments and preventing them from bumping into each other.
2. Advantages of DIY Solutions: Cost-Effectiveness and Personal Touch
The beauty of DIY ornament storage lies in its cost-effectiveness. You don’t need to buy expensive storage containers or boxes. By repurposing materials, you can create custom storage that fits your space and needs, all while saving money. Also, it lets you add your personal touch. You can decorate your boxes with holiday themes or create a unique labeling system that suits you.
3. Methods for Building Your Own Ornament Storage Boxes
(i) Gather Materials
Cardboard boxes (or plastic containers)
Scissors or a box cutter.
Ruler
Tissue paper or bubble wrap.
Fabric or wrapping paper (optional for decoration).
Tape or glue for securing.
(ii) Measure and Cut
First, measure your ornaments. Then, cut the cardboard into strips or squares that fit inside your box. Cut the cardboard into smaller pieces to make dividers. Then, use tape or glue to secure them in the box. This will create compartments for each ornament.
(iii) Wrap for Protection
For fragile ornaments, wrap each in tissue paper or bubble wrap. Then, place them in their compartments. This extra layer of protection ensures they remain safe from dust and damage.
(iv) Decorate and Label
If you want to add a personal touch, cover your storage boxes with festive fabric or wrapping paper. You can also label each box with a permanent marker or label maker for easy identification.
You can make your own DIY ornament storage boxes. Follow these easy steps for boxes that are both useful and stylish. They’ll protect your holiday decorations and add a fun, creative touch to your organization!
Product Recommendations: Best Storage Solutions for Every Budget
Keep Your Décor Safe: The JOLLY ORNAMENTS organizer has 64 adjustable slots. This gives you a secure and tidy place for your ornaments. It’s the perfect way to store holiday decorations. Keep your festive treasures safe year after year.
Save Space in Style: This organizer keeps your decorations neat and stylish. It’s like Santa’s magic bag for storage! Its compact design makes it ideal for tight spaces while still offering ample room.
Durable and Dependable: Constructed with sturdy 600D oxford fabric, this organizer is water-resistant and tear-proof, ensuring your ornaments stay protected for many holidays to come.
Compact and Roomy: At 23 1/2″ x 18 3/8″ x 16 1/8″, this tote is great for storing holiday décor. It saves space and helps you organize your decorations efficiently.
Secure and Neat: The snap-on lid keeps dust out. The indexed design helps you stack and organize easily, so your decorations stay safe and tidy.
Easy Transport: This tote has molded handles, making it simple to move your holiday decorations. Enjoy convenience and durability all in one.
Smart Space Saver: This sturdy storage box holds 24″ wreaths. You can store them upright or flat. It helps maximize space for your outdoor holiday décor.
Protection Perfection: This sturdy plastic case keeps your wreaths safe. It protects against dust, spills, and accidental damage. Your wreaths will stay in great condition for years.
Festive Flair: The bright red design adds holiday cheer. It also helps you find your wreath storage easily when the festive season comes. This way, you stay organized and ready for the holidays.
How to Store Holiday Lights: Keep Them Tangle-Free and Ready to Use
Holiday lights add sparkle and cheer to your home during the festive season. But when it’s time to take them down, the magic can transform into chaos in an instant. A tangled ball of wires, broken bulbs, and mysterious knots that seem to appear out of nowhere? We’ve all been there. No worries! With some smart holiday decoration storage tips, cleanup can be easy. You’ll keep your lights safe and ready for next year.
1. How to Wrap and Store Lights Safely
Unplug and inspect: Before you pack anything away, always check each strand thoroughly. Plug the lights in and inspect for flickering bulbs, exposed wires, or any other signs of damage. Replace bulbs if needed, or discard the entire strand if it looks worn beyond repair.
Wrap Carefully: Choose a base for wrapping; this can be a cardboard sheet, a plastic spool, or even a coat hanger. Anchor the plug end to the base, then wrap the strand around it in a careful and deliberate manner. Don’t overlap the bulbs too tightly, and make sure the wire lies flat to prevent damage.
Secure the Ends: After wrapping, use twist ties, Velcro straps, or zip ties to keep the ends in place. This prevents the lights from coming undone and tangling inside the bin.
2. Recommended Storage Tools for Preventing Tangles and Bulb Damage
Plastic Light Reels: Made for string lights, these reels keep strands neatly wound. They protect against damage and tangling during storage or transport.
Cardboard Sheets: This easy and cheap option lets you cut the sheets to any size. You can customize them for different storage needs and projects.
Clear Plastic Bins: These bins are great for long-term storage. They’re sturdy, dust-proof, and moisture resistant. This keeps your items safe and easy to reach.
3. How to Organize Lights for Easy Retrieval Next Season
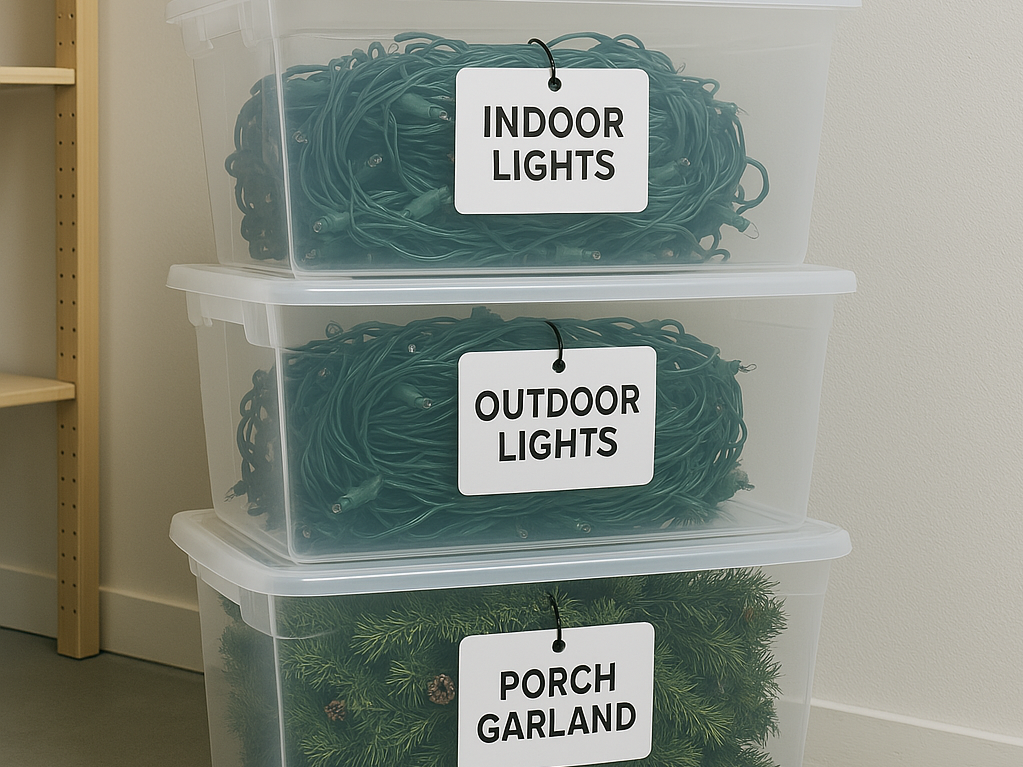
Label Each Strand: Use masking tape or tags to mark each strand’s color, length, or location. This makes it easier to identify them during setup or storage.
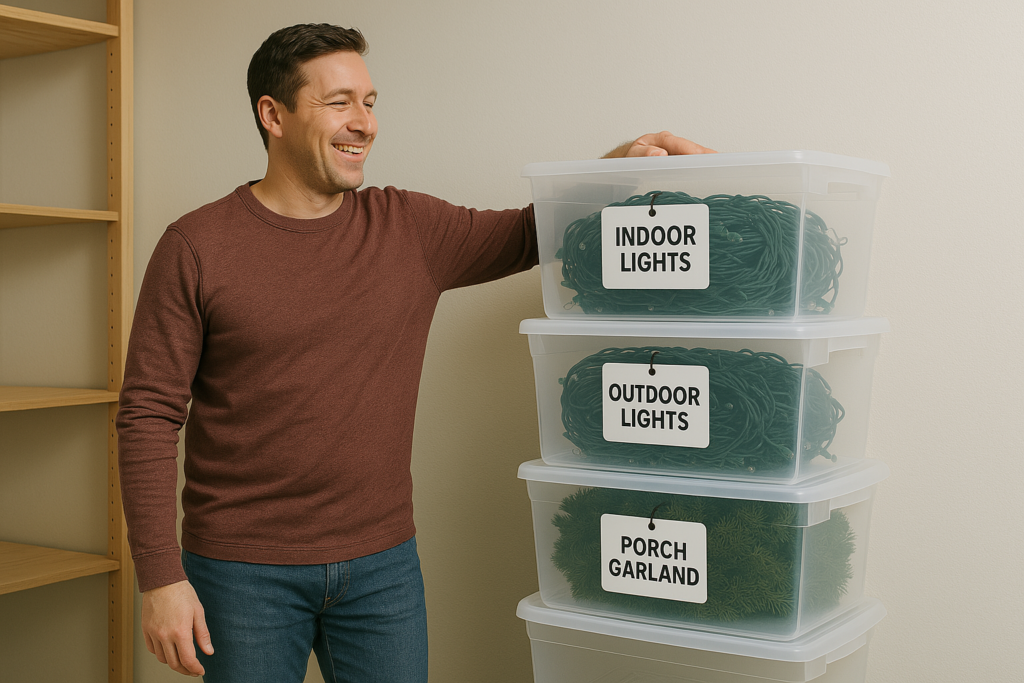
Group by Area: Put your indoor and outdoor lights in different containers. This makes it easier to find and use them for decorating or events.
Store Bins Upright: Place your bins upright in a cool, dry place. This protects them from damage and keeps your lights safe.
Try these holiday decoration storage ideas. You’ll say goodbye to messy lights. Enjoy stress-free decorating next season! ✨
Maximizing Storage Space: Where to Store Your Holiday Décor
After the celebrations end and the holiday sparkle fades, a new challenge starts, where do we put all this décor? No matter how many ornaments you have, finding good storage space will make next year easier. Good news? You don’t need a huge house to stay organized. Good planning and clever storage can help small spaces look great for the holidays.
1. Best Storage Spots Around the Home
Start by scouting your home for underused or overlooked areas. These common zones are perfect for keeping holiday décor out of sight but still within easy reach:
Attic: A great place to store lightweight decorations. Store artificial trees, garlands, and plastic ornaments safely until you need them.
Basement: A good option if it stays dry. Use moisture-proof bins to keep your items safe from dampness. This way, everything stays secure.
Closets and Utility Rooms: Use the top shelves and empty corners for small boxes. This maximizes storage and keeps your space organized and tidy.
Garage: Use sturdy bins for storage. Label each one clearly. This way, you can find your decorations easily next year.
2. Use vertical and hidden storage..
Stackable bins and tall shelves make good use of vertical space in closets and garages. They help keep things organized and easy to reach, all while saving floor space.
Under-bed storage boxes are perfect for storing wrapping paper, bows, and other flat items. They keep everything neat and out of sight when you don’t need them.
Overhead racks in garages or closets are perfect for storing lightweight wreaths and holiday lights. They save floor space and keep decorations organized and easy to reach.
3. Small Space Storage Solutions
Vacuum-sealed bags are great for compressing soft items like stockings and tree skirts. They cut down on size, making storage easier and helping you organize in tight spaces.
Storage ottomans and benches have hidden compartments. They hide décor and keep your space tidy. Plus, they offer extra seating and storage.
Labeled baskets on closet shelves keep things organized. They help you find items easily and stop clutter from taking over your space.
With just a bit of strategy, you can make room for holiday joy without sacrificing your living space.
Maintaining Your Holiday Décor: How to Keep Your Items Looking New
Holiday decorations are more than just festive. They often hold sentimental value, passed down over the years or picked with care. So, when the season ends, preserving their beauty isn’t just about storage, it’s about maintenance. With the right approach, you can keep your décor looking fresh, bright, and ready to dazzle year after year. Here are some holiday decoration storage ideas. They will help you safeguard your investment and keep your valued items in excellent shape.
1. Best Cleaning Practices for Holiday Decorations
Different types of decorations need different kinds of care. Cleaning them before storage helps prevent dust buildup, mold, and wear over time.
Glass and plastic ornaments: Wipe them with a microfiber cloth to get rid of dust. For tough spots, dampen the cloth lightly. Don’t soak the ornaments in water to avoid damage.
Artificial wreaths and garlands: Shake off loose debris. Then, use a handheld vacuum or a soft brush to clean the branches. Be gentle to avoid damaging the delicate fibers or bending the shape.
Lights: Use a dry cloth to dust each strand well before storing them. Check each bulb and wire for any signs of damage or wear. This helps avoid hazards later.
Ceramic or resin décor: Use a soft brush or microfiber cloth to dust off delicate figurines and ceramics. This helps prevent scratches. Avoid harsh cleaners, as they can strip away paint or detailing.
2. Tips to Prevent Fabric and Textile Damage
Fabrics are especially vulnerable to fading, mildew, and pests when not stored properly. Here’s how to keep textiles safe:
Store tree skirts, stockings, and fabric banners in cotton or linen bags. This keeps moisture out and prevents mold. They’ll stay fresh and protected until next season.
Don’t use plastic bags for storage. They trap moisture and cause mildew or mold. This can damage fabrics and create a bad smell.
Place cedar blocks or lavender sachets in storage bins. They naturally repel pests like moths, which ruin fabrics. Plus, they keep your decorations smelling fresh.
3. Pre-Storage Inspection Checklist
Check your décor carefully before packing. This helps you find any damage early and avoid future issues.
Check lights for frayed wires or broken bulbs. These can lead to electrical issues or fire hazards when used again. Make sure everything works safely.
Check each ornament for chips, cracks, or wear. This is important for glass and ceramic pieces. Make sure they are safe for storage and won’t break later.
Ensure tree skirts and stockings are clean and dry before storing. Moisture or stains can cause mildew or permanent damage.
Make sure storage bins are airtight or sealed. Dust and moisture can harm delicate ornaments or fabrics over time.
Inspecting and cleaning your décor now will make it look brand new next holiday season.
Final Thoughts: Make Your Holiday Decoration Storage Hassle-Free
Proper storage is key to keeping your holiday décor looking pristine year after year. With the right holiday decoration storage ideas, such as DIY ornament storage solutions or outdoor holiday decor storage ideas, you can easily protect your decorations from damage and keep your space clutter-free.
Choosing storage solutions based on decoration type and budget is essential. Plan ahead for a stress-free holiday season. Invest in durable bins or try DIY storage. Organizing and storing decorations well helps you enjoy the festivities more. You won’t need to stress about storage!
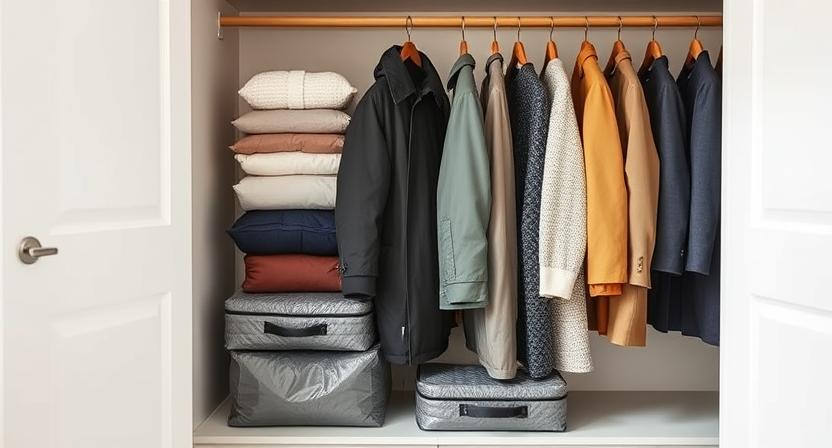
Ever opened your closet and thought, “This thing’s about to explode”? Same. Winter coats stuffed in one corner. Summer dresses crammed in another. And those scarves? The ones you swear you’ll wear someday. Seasonal clutter is real.
But what if you could store all that without turning your home into chaos? Enter the best vacuum storage bags. It’s like a magic trick for your closet—they shrink bulky clothes, save space, and keep things fresh. No more mess. No more digging through piles. Just easy, stress-free storage.
Hitting the road? Best vacuum storage bags for travel make packing easy. No overstuffed suitcases. No wasted space. Just neat, compact packing. Switching out your wardrobe? The best vacuum storage bags for clothes keep everything fresh and organized. No dust. No moisture. No mess. But which ones actually work? Don’t stress, I got you. Let’s break it down.
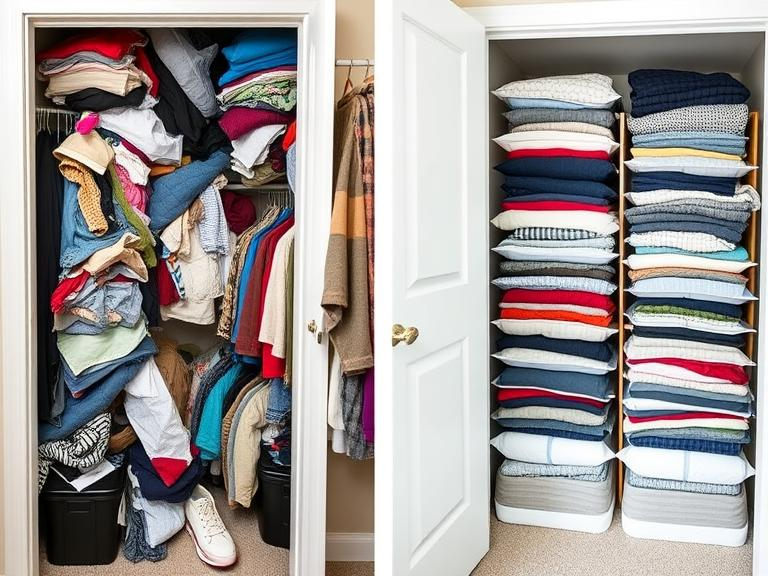
My Closet Disaster (And How I Fixed It)
Last year, I moved into a tiny apartment. Cute, right? That was until I realized my wardrobe didn’t fit. I had boxes of winter sweaters, summer shorts, and random holiday outfits taking up way too much space. I tried folding, stacking, and even shoving things under the bed. Nothing worked. Then, a friend suggested vacuum storage bags. Skeptical but desperate, I gave them a shot. Let me tell you, it was life-changing. My bulky winter clothes shrank down to the size of a pillow. Suddenly, my closet had room to breathe. Now, I swear by these bags for seasonal storage and even packing for trips. Trust me, if I can do it, so can you.
Why Vacuum Storage Bags Are a Must-Have
Let’s be real. We all have too many clothes. Clutter everywhere. Best vacuum storage bags fix that.
They work like magic—suck out the air, clothes shrink, and you save up to 75% of space.
No more messy closets. No more overstuffed drawers. Just neat, organized storage.
Need to store seasonal clothes? Best vacuum storage bags for clothes keep them fresh, clean, and safe.
Packing for a trip? Best vacuum storage bags for travel help fit more in your suitcase. No wrinkles. No stress.
They protect against dust, moisture, and pests. No more musty sweaters. No more moth-eaten scarves.
Winter coats, summer outfits, travel gear, whatever you need to store, these bags are a no-brainer.
Simple. Smart. Stress-free. Get the best vacuum storage bags and say goodbye to clutter.
Clear & Convenient: See-through design lets you identify contents without opening the bin.
Space-Saving & Stackable: Securely locking lids allow for stable, organized stacking in any space.
User-Friendly Design: Pull handle for easy access and secure buckles to keep the lid firmly in place.
Best Vacuum Storage Bags for Clothes: A Space-Saving Solution
Not all vacuum bags are the same. Some leak air, while others tear easily. The best ones? They seal tightly, are durable, and work with any vacuum. Investing in quality saves time and money.
How to use them:
Fold clothes neatly.
Place them inside the bag.
Seal the bag shut.
Use a vacuum or hand pump to remove air.
Store away, flat or stacked.
It’s that easy. Plus, it keeps clothes fresh and wrinkle-free.
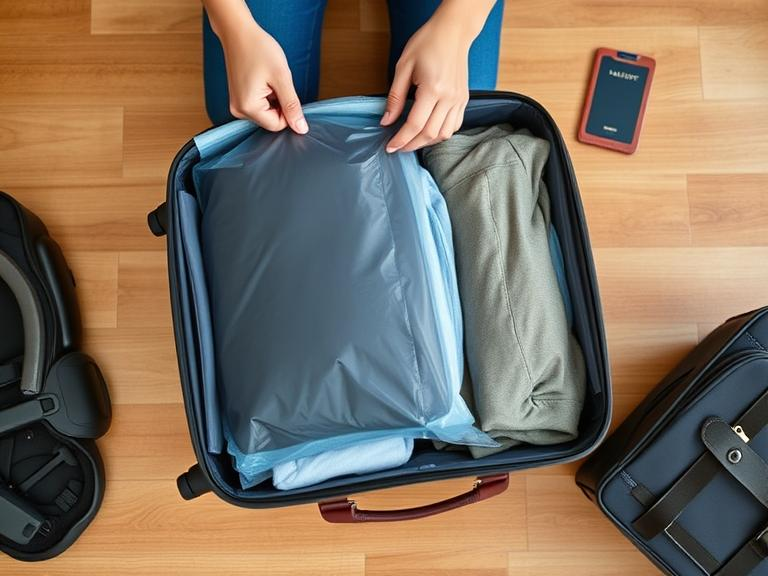
Best Vacuum Storage Bags for Travel: Pack Like a Pro
Ever struggled to fit everything into a suitcase? Travel vacuum bags solve this. Instead of fighting with an overstuffed bag, just vacuum out the air. Clothes shrink. You gain more room.
Perfect for:
Long vacations.
Packing winter gear.
Keeping dirty clothes separate.
Lightweight and portable, travel vacuum bags make packing stress-free.
Common Mistakes to Avoid
Even the best vacuum storage bags won’t work if you use them incorrectly. Avoid these mistakes:
Overstuffing the bag (it won’t compress properly).
Using low-quality bags (they’ll leak air).
Forgetting to clean clothes before storing (dirt can set in).
Conclusion: Declutter Your Life with the Best Vacuum Storage Bag
So, ready to take control of that messy closet? The best vacuum storage bags aren’t just for storage, they’re a total lifesaver. No more clutter. No more wasted space. Just neat, organized storage that actually works.
Need to pack smarter? Best vacuum storage bags for travel make it easy. Storing off-season clothes? Best vacuum storage bags for clothes keep them fresh and compact. Simple. Stress-free.
Trust me, once you use them, you’ll never go back.
About Spoons.wiki
At Spoons.wiki, we tackle everyday problems faced by people, offering practical solutions and product recommendations to make life easier. From household cleaning hacks like removing coffee stains and eliminating pet hair to personal care tips for dry skin and stress relief, each topic is designed to provide actionable advice. Dive in to discover how small changes and the right tools can solve big problems!