
How to Stop Clothes from Bleeding Color: The Laundry Trick You Need to Know

Person shocked by color-bleeding laundry holding a pink-stained white shirt near a washing machine.

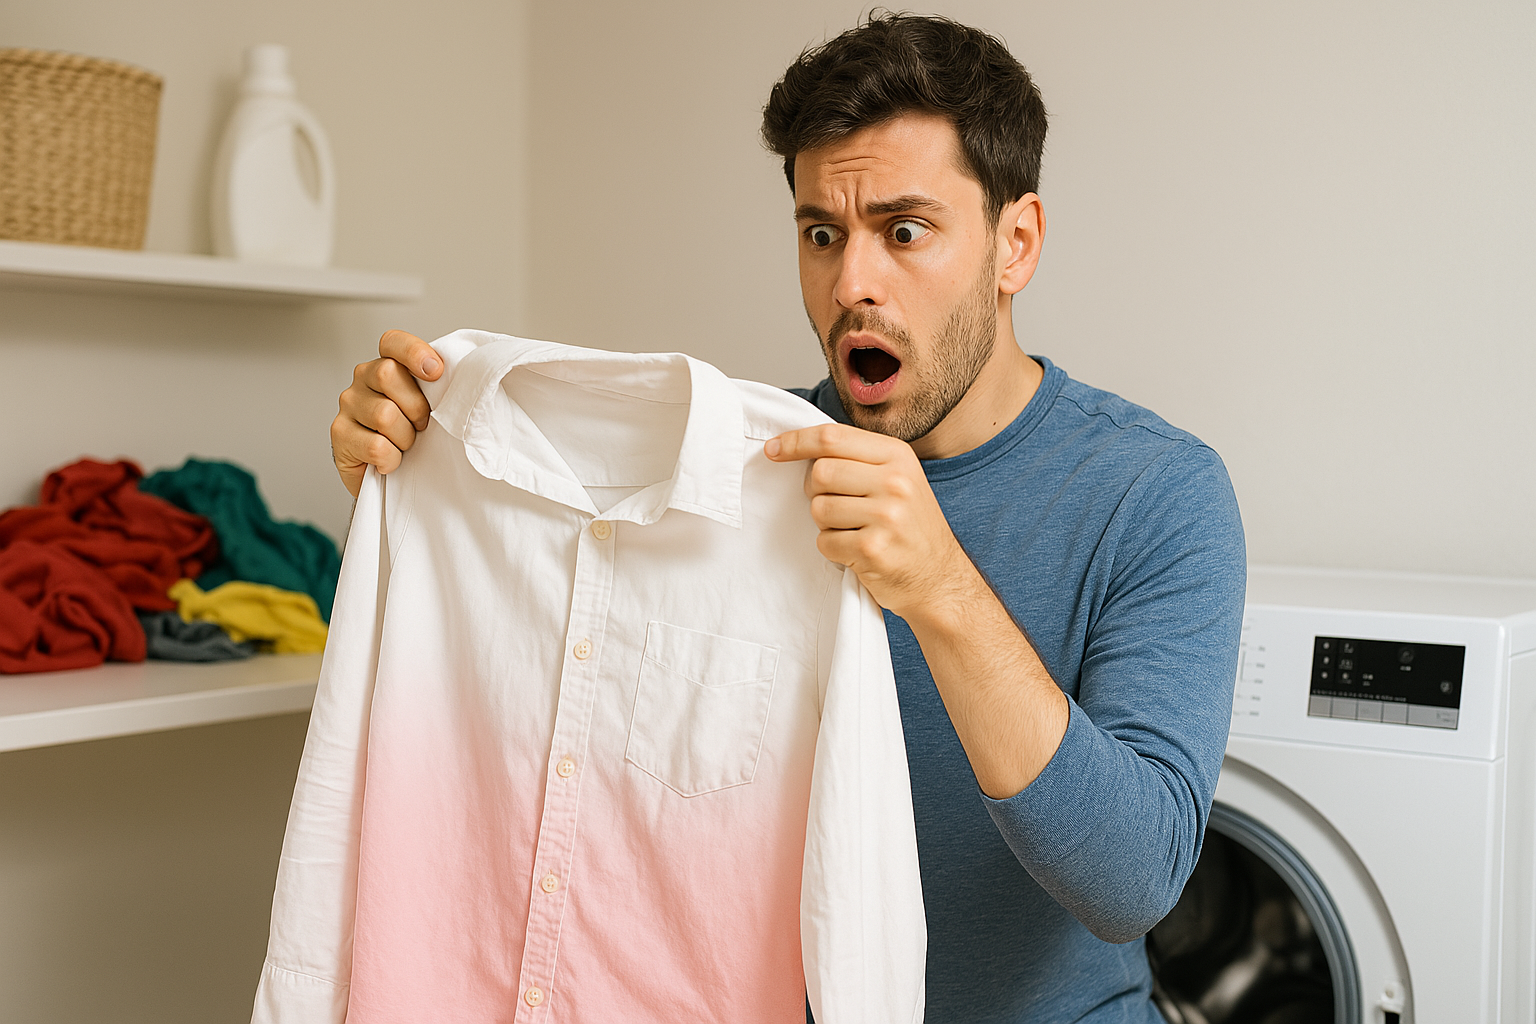
Red and orange clothes tend to bleed color more than any other garments. You might feel frustrated to find an unwanted pink splash on your white shirt, but stopping clothes from bleeding color is simpler than you’d expect.

Poor-quality dye or ineffective dyeing techniques usually cause color bleeding. These dyes can transfer to lighter-colored items during washing and leave unwanted stains. A simple way to protect your clothes is to sort your laundry into lights, whites, and darks. Quick action makes a difference; wet garments with dye transfers need immediate treatment.

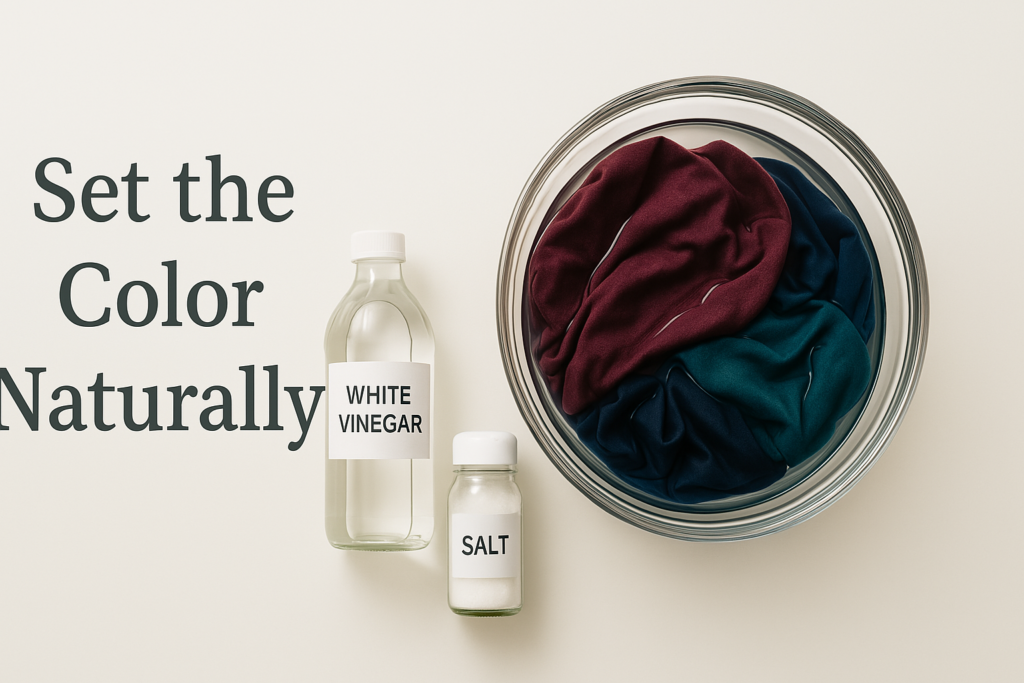
The washing machine offers several ways to keep clothes from bleeding color. Cold water keeps the fabric’s fibers closed and traps the dye inside. Hot water tends to loosen the dye’s grip. Your kitchen supplies can help, too. White vinegar and table salt work well; add half a cup of vinegar to your wash to set dyes and minimize future bleeding.

This blog will guide you through everything from testing if colors will run to smart laundry habits that prevent bleeding. These practical tips will keep your wardrobe’s colors bright and stain-free, whether you have new clothes that might bleed or want to protect your favorite pieces long-term.

How Different Fabrics React to Washing

Dark-colored new clothes being washed separately to prevent color bleeding.

You need to know your fabric’s composition to stop color bleeding. Different materials react uniquely to wash cycles, detergents, and water temperatures. Let’s look at what you should know before you toss everything in the washer.

1. Cotton vs. polyester vs. wool

Natural fibers and synthetic materials behave differently in the wash. Cotton comes from plant fibers and soaks up dye easily, but lets it go just as fast. That’s why your cotton t-shirts fade quicker than expected. Wool’s unique scale-like fiber structure pulls dye deep inside each fiber. This makes it less likely to bleed than cotton, though not as stable as synthetics.

Polyester keeps its color better because it’s not dyed like other fabrics. It’s a petroleum-based product where color gets added during its chemical state before it becomes fiber. This makes polyester hold its bright colors much longer than cotton or wool.

Water temperature plays a significant role in how these fabrics act. Hot water makes natural fibers release more dye as their fibers expand and loosen. You should never wash synthetics above 60 degrees Celsius. A safer bet is 40 degrees to keep colors bright.

2. Why synthetic fabrics bleed less

The manufacturing process gives synthetic fabrics better colorfastness. Unlike natural fibers that need dye after they’re made, synthetic fibers get their color during creation. Makers mix color into the chemical mix before spinning the fiber. This creates more stable colors that last longer.

Synthetic fibers like polyester and nylon are three times thinner than silk but much tougher. Their plastic base breaks down more slowly than natural fibers, which helps them keep their color. High-quality synthetic dyes are also more stable and less likely to run in the wash.

Hard water can make colors bleed more. Research shows bleeding increases substantially at 300 ppm water hardness but stays minimal at 30 ppm. Living in a complex water area might cause color transfer, no matter what fabric you wash.

pH levels affect dye stability, too. Dark colors bleed most in alkaline environments (pH 9-11) but stay stable at near-neutral pH (6-8). That’s why color-safe detergents like Woolite Darks keep a neutral pH balance.

3. How blends behave in the wash

Blended fabrics mix different materials’ properties and create unique washing challenges. High-polyester blends act like pure polyester, with some differences based on the mix ratio. But even mostly synthetic blends can bleed if they use unstable dyes or weak fixing agents.

Blends react differently to temperature. Brown and violet blended fabrics start bleeding at 80°C, while other colors stay stable until 90-100°C. Damp storage is another risk; brown and violet blends keep bleeding when stored at 37°C for 18 hours before drying.

Watch out for nylon in blends. Textile experts call it a “dye scavenger” because it pulls in dye from other fabrics. Light-colored nylon blends will likely pick up color when washed with bleeding items.

You can protect against color bleeding with specific products. Color catcher sheets like Shout Color Catcher (~$5) work great for mixed loads. Woolite Darks Liquid Laundry Detergent (~$10-$12) helps keep dark clothes’ color across fabric types.

Don’t treat all your clothes the same way. Know these fabric differences to create washing strategies that stop color bleeding and make clothes last longer. Sort your laundry based on each fabric’s needs to keep them looking new.

How to Test Clothes for Colorfastness

A quick color test before washing your new bright clothes can save your favorite outfits from getting ruined. Some clothes might look colorfast but release dye when they touch water, detergent, or rub against other fabrics. Simple home tests will tell you if your clothes will bleed color.

1. The white cloth rub test

The rubbing test (the “crocking test”) helps you check if fabric dye transfers during regular wear or washing. This method checks color transfer in dry and damp conditions that match real-life situations like sweating or rain exposure.

To perform the dry rubbing test:

  • Find a white cloth or paper towel
  • Rub it firmly against the colored fabric for 10 cycles in a straight line
  • Check the white cloth for any color transfer
  • Grade the results: visible color transfer shows poor colorfastness

The wet rubbing test follows the same steps as a damp white cloth, but wet rubbing shows more color transfer than dry rubbing. Textile experts say clothes resist dry rubbing better than wet rubbing.

Labs use a “crockmeter” device to rate results on a 5-point scale. A score of 5 means no color transfer, while 1 shows severe bleeding. At home, look at how much dye gets on your white clothes. A noticeable color means you’ll need special care when washing.

2. Soak test for new garments.

The soak test gives you a complete picture, especially when you have new clothes. This test shows how colors behave in the wash.

Step-by-step soak test:

  • Mix a teaspoon of laundry detergent with a cup of warm water (use your normal wash temperature)
  • Submerge a small, hidden part of the garment (like a hem or inside seam) in the solution
  • Let it soak for 30 minutes
  • Remove the fabric without rinsing
  • Press it against a white paper towel or cloth
  • Check for color transfer on the white material

Your garment will likely bleed in the wash if the water changes color or dye gets on the white material. You should repeat this test several times to check if the fabric bleeds after multiple washes.

Clothing labels with warnings like “wash separately,” “wash in cold water,” or “turn inside out to launder” hint that the dyes might not be colorfast. Bright colors like red, blue, violet, and black bleed more than other shades.

Clothes that fail either test should be washed alone at first. Products like Shout Color Catcher sheets (~$5) can catch loose dyes during washing to protect other clothes.

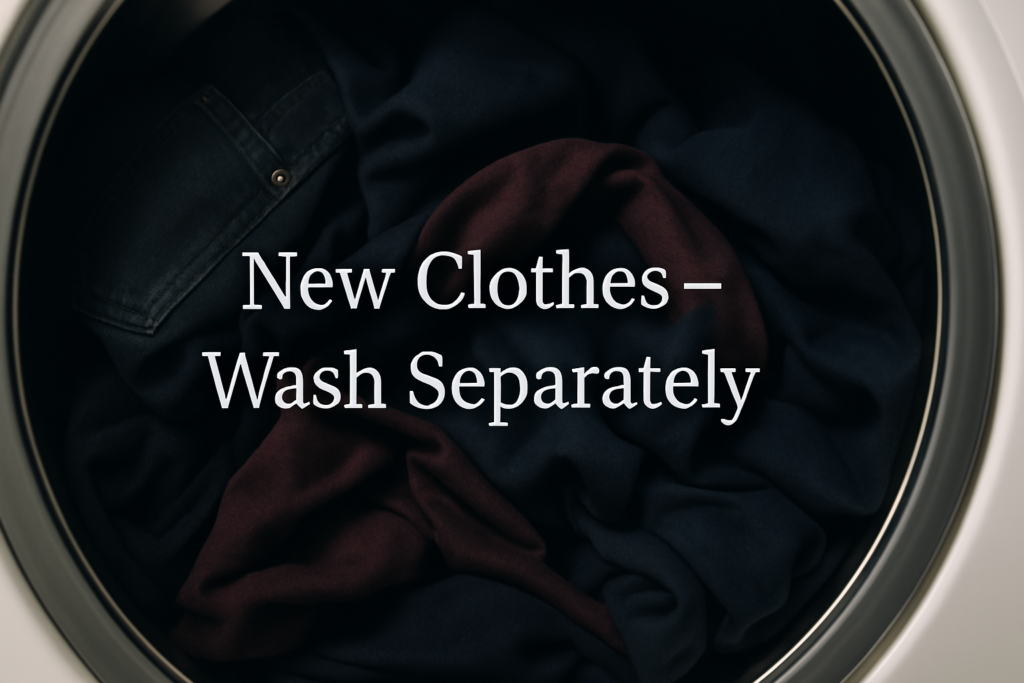
Pre-washing new clothes with bright colors like red and purple helps remove extra dye. These items need separate washing for the first few cycles to confirm colorfastness and remove manufacturing residues. This step protects your other clothes from unexpected stains.

Testing colorfastness is a vital first step to learn how to stop clothes from bleeding color over time. Once you know which clothes might bleed, you can wash them properly to keep your wardrobe looking bright.

Smart Laundry Habits That Prevent Bleeding

Your laundry routine matters as much as the products you use to prevent color bleeding. Simple changes in washing clothes can protect them from dye damage and make them last longer.

1. Read and follow care labels.

Care labels guide you through proper garment care. These small fabric tags tell you exactly how to wash each piece of clothing. Check for warnings like “wash before wearing,” “do not use detergent,” “wash with like colors,” or “use cold water”; these show that the dyes might bleed during washing.

Each care label has specific symbols that tell you the washing requirements. A washtub with one dot means cold water washing, while a crossed-out washtub tells you not to wash the item. These aren’t just suggestions; they’re exact guidelines from manufacturers who know their product’s dye stability.

“If the label doesn’t mention these warnings, your clothing is likely colorfast, meaning the dyes are more resistant to bleeding and fading,” notes Speed Queen, a leading laundry equipment manufacturer. However, clothes without clear warnings might need careful washing, especially in their first few cycles.

2. Don’t overload the washer.

Colors often bleed because people stuff too many clothes into their washing machines. Clothes need space to move during the wash cycle. This reduces friction that can cause dyes to transfer. “Overfilling the washer won’t allow clothes to tumble or clean properly,” explains Whirlpool, a major appliance manufacturer.

Place items loosely around the central column in top-loading machines with agitators. Front-loading washers need clothes spread evenly around the drum for balance. You should fit your hand into the top of a full load; if you can’t, there are too many clothes inside.

Overloading creates several problems that lead to color bleeding:

  • More friction between clothes loosens dye particles
  • Less water circulation keeps dyes concentrated
  • Poor rinsing leaves extra dye on fabrics

These problems create perfect conditions for color transfer. “Don’t overfill your washer or pack clothes into the washer,” advises Speed Queen. “Not only will they come out cleaner, but clothing also will be exposed to less friction.”

3. Use cold water and short cycles.

Cold water works best to stop colors from bleeding. It keeps fabric fibers closed and traps dye molecules inside. Hot or warm water opens these fibers and lets dye escape more easily, which makes colors bleed.

“Cold water washing proves highly effective in preventing color bleeding,” confirms FC Dry Cleaners. “This method keeps fabric fibers closed, trapping dye molecules inside.” Today’s detergents, from budget-friendly Shout Color Catcher Sheets (~$5) to premium Seventh Generation Concentrated Detergent (~$20-$25), work well even in cold water.

Cycle length and intensity affect how well colors stay put. Gentle or delicate cycles use less agitation and less friction to shake loose dye particles. “Wash clothes using the permanent press or gentle setting, which are easier on your laundry than regular cycles,” recommends Speed Queen.

Bright items like dark jeans or red clothes might need the quick wash setting. “The quick wash setting washes clothes quickly, though it’s not quite as thorough. This is a good option for smaller loads of laundry that are only lightly soiled,” notes The Spruce. Quick wash uses less agitation but more spin time, reducing dye transfer while cleaning clothes well.

These three habits, reading care labels, loading your washer right, and using cold water with gentle cycles, protect your whole wardrobe from color bleeding.

How to Stop Clothes from Bleeding Color in the Washing Machine

Woman loading clothes into a front-loading washing machine, carefully placing garments inside.

Some clothes stubbornly bleed color even when you follow best practices. The good news? Specific laundry additives and products can protect against dye transfer. These solutions are a great way to get your clothes to stop bleeding color in the washing machine.

1. Use color-safe detergents

Color-safe detergents pack special ingredients that lock dyes inside fabric fibers and stop them from leaking during wash cycles. Research shows these formulations maintain a neutral to slightly alkaline pH range (6-8), considerably reducing color bleeding compared to more alkaline environments.

These detergents stand out because they include:

  • Enzymes and cleaning agents that tackle stains without hurting color integrity
  • Conditioners that shield fabric fibers from wear that causes fading
  • Special formulas that work well in cold water

You’ll find options at all price points to protect vibrant colors. Tide Plus ColorGuard (~$10-$12) targets color protection while fighting stains. Woolite Darks Liquid Laundry Detergent (~$10-$12) keeps dark-colored garments vibrant. Looking for an eco-friendly choice? Seventh Generation Concentrated Detergent (~$20-$25) provides plant-based color protection without dyes or fragrances.

Avoid detergents with chlorine bleach; they speed up color fading and bleeding. Your best results come from following the manufacturer’s dosage instructions. Too much detergent can leave a residue that makes colors transfer more.

2. Add vinegar or salt to new clothes.

Distilled white vinegar works wonders against color bleeding. Its acidic properties seal dyes inside fabric fibers and soften clothes naturally. Here’s what works best:

  • Pour half a cup of white vinegar into your rinse cycle
  • New garments with lots of pigment need one full cup
  • Cold water helps minimize dye release further

Table salt helps colors stay put in fabrics, too. Just add one tablespoon straight to your wash load for better dye retention. Cotton fabrics respond exceptionally well to this method.

These popular tricks have their limits, though. The Spruce points out, “neither method will work reliably to prevent dye bleeding from clothes or fabrics that have already been commercially dyed.” Vinegar and salt help most during cotton yarn manufacturing or fabric treatment. Commercial dye fixatives work better for store-bought clothes that keep bleeding.

3. Try color catcher sheets for mixed loads.

Color catcher sheets might be the most scientifically proven way to prevent dye transfer. These special laundry sheets work like magnets that grab loose dyes from wash water before they can stick to other clothes.

Lab tests show color catchers successfully absorbed dye from purple solutions and kept white fabrics clean. The test sheets got 41% darker, while white test garments stayed unchanged. This makes them perfect for loads with both dark and light items.

Here’s how to use color catcher sheets:

  • Drop one sheet in the washing machine drum first
  • Add your usual detergent
  • Use two sheets for bigger loads or ones with new/bright items
  • Front-loading machine users should put the sheet in a mesh bag at the back of the drum

Shout Color Catcher Sheets (~$5) lead the market as the most well-known brand. They work safely on all colorfast washables at any water temperature. The sheets cost more than sorting clothes by color, but many people find the time saved makes up for it.

These methods cut down the risk of color bleeding quite a bit. They work even better with good laundry habits, reading care labels, not overloading machines, and using cold water cycles.

How to Set Color in Fabric with Vinegar and Salt

White vinegar and salt placed beside a bowl with colorful new clothes soaking in water, showing a natural method to set fabric dye and prevent color bleeding.

The vinegar and salt method ranks among the most popular home remedies ever used for setting colors in the fabric. You’ll find it in countless online guides and family traditions. The real question is whether this approach works or is another old wives’ tale.

1. What this method can do

Research from the University of Nebraska-Lincoln revealed some disappointing news: vinegar and salt treatments don’t help prevent color loss in commercially dyed fabrics. On top of that, some treatments made the color bleeding worse after washing.

These methods still play specific roles in the dyeing process. When manufacturers dye cotton yarn fibers, salt acts as a mordant (a chemical that fixes dye). Vinegar’s acidity helps wool or nylon take on color during the original dyeing phase. Natural dyes respond differently; vinegar is a mordant for vegetable-based dyes, while salt works better with fruit-based dyes.

2. Step-by-step soaking process

Here’s what to do with newly dyed fabric, or if you want to try this method anyway:

  • Fill a large, clean container with one gallon of fresh water
  • Add one-fourth cup of table salt and one cup of white vinegar
  • Stir well to dissolve salt completely
  • Submerge the garment until it is fully saturated
  • Let it soak for 24 hours
  • Rinse in fresh water afterward
  • Repeat if the color keeps coming out

Natural dyes need a different approach. Pre-soak natural fabrics in either 1 cup vinegar + 4 cups water (vegetable-based dyes) or 1/4 cup salt + 4 cups water (fruit-based dyes).

3. Warnings and limitations

Your washing machine won’t thank you for adding vinegar directly. The acid can damage rubber parts and hoses over time. The vinegar might also stop your detergent from working properly.

Commercial products work better for preventing color bleeding in store-bought clothes. Color catcher sheets like Shout Color Catcher (~$5) or specialty detergents like Woolite Darks (~$10-$12) are a great way to get protection against dye transfer.

Note that vinegar might bleach some fabrics and harm elastic components. If your clothes keep bleeding after several vinegar/salt treatments, they probably have excess dye that will fade with multiple separate washes.

Best Tools and Products for Color Protection

Your wardrobe needs specialized products to lock in color and prevent bleeding. Standard washing techniques might not give enough protection, but targeted solutions can defend your clothes against fading and color transfer.

1. Top 3 detergents for color care

Color-safe detergents help preserve fabric colors through multiple washes with their specialized formulations. Look for detergents labeled “color-safe”; they use milder cleaning agents that remove dirt without stripping away dye molecules.

Here are your best options to protect colors:

(i) Budget Pick: Shout Color Catcher Sheets, ~$5

  • Shout Color Catchers lock in dyes during the wash, preventing bleeding and keeping your clothes vibrant, even when mixing whites and colors in one load.
  • These sheets save time by eliminating the need to sort laundry, so you can wash mixed colors without worrying about color transfer or fading.
  • Safe for all machines and temperatures, they make laundry hassle-free while protecting every fabric’s original hue from bleeding or dulling after each wash.

(ii) Normal Pick: Woolite Darks Liquid Laundry Detergent, ~$10–$12

  • This detergent protects dark clothes from fading, helping them stay vibrant, perfect for keeping black jeans or navy tops looking new.
  • It is designed to prevent fading, fuzz, pilling, and stretching, so it keeps your favorite outfits in top shape, even after multiple washes.
  • Works in cold water and all machine types, gently cleaning while adding a light fresh scent, without harsh ingredients like bleach or phosphates.

(iii) Premium Pick: Seventh Generation Concentrated Detergent (bulk pack), ~$20–$25

  • Ultra-concentrated formula delivers 66 powerful washes in a compact 23 oz bottle, saving space while staying eco-friendly with less waste and smarter storage.
  • One firm squeeze is all you need. Thanks to Easy Dose technology, you’ll never use too much or too little detergent again.
  • With no dyes or fragrances, it’s tough on stains and gentle on clothes, using 60% less plastic and 75% less weight than traditional bottles.

Add detergent to the drum before you put in clothes or use the dispenser. Pouring detergent directly on clothes can leave spots or stains.

2. When to use commercial dye fixatives

Commercial dye fixatives are your last defense against stubborn bleeding. These products make dye molecules swell in the fabric so they stick better.

Dye fixatives work best for:

  • Quilting project fabrics
  • New store-bought clothes that need extra color protection
  • Cotton and cellulose fibers with direct or all-purpose dyes

Retayne, Raycafix, and Rit ColorStay Dye Fixative are great options that reduce bleeding and fading while making colors pop. You’ll get the best results using the stovetop method or washing machine; follow the package instructions.

These products work best right after dyeing or before the first wash. They might not help much with previously washed items.

3. How to store clothes to prevent fading

Storage plays a vital role in keeping colors fresh. Light exposure can fade most dyes, and silk is extra sensitive.

Colorful clothes air-drying on a rack to preserve color and prevent fading.

Here’s how to keep colors bright:

  • Pick cool, dry spots away from light; even closet lights can cause fading
  • Use canvas or cotton garment bags that let air flow while keeping dust away
  • Put delicate items in acid-free tissue paper to stop color transfer and wrinkles
  • Skip plastic covers; they trap moisture and lead to mildew
  • Clean and dry clothes thoroughly before storage to avoid insect damage

Cedar chests with mothballs work well for seasonal storage, but you must air out clothes to remove the smell. Quality detergents, the right fixatives, and smart storage will help your favorite colored clothes stay vibrant much longer.

Conclusion

Preventing color bleeding starts with understanding how fabrics react in the wash. Synthetics like polyester hold dye better than natural fibers like cotton and wool. A quick colorfast test on new clothes can save your laundry from unwanted dye transfers.

Smart laundry habits make all the difference. Always check care labels, wash in cold water, and avoid overloading the machine. For extra protection, budget-friendly products like Shout Color Catcher Sheets and Woolite Darks help lock in colors and prevent fading, especially during those first few washes.

Lastly, storing clothes properly helps preserve their brightness. Keep them out of direct sunlight, store them in breathable bags, and make sure garments are clean before putting them away. These simple steps go a long way in keeping your favorite outfits looking fresh and vibrant.

Wrinkle-Free Wardrobe: Best Handheld Steamer and Best Standing Steamer for Every Need

Modern laundry space with wrinkle-free clothes hanging on a rack, a handheld steamer and a standing steamer placed neatly on the floor.

Wrinkles on clothes are unavoidable, but getting rid of them doesn’t have to be a hassle! Whether you’re rushing to work, traveling, or don’t want to deal with an iron, there are plenty of quick and effective solutions. Everything is covered, from the best handheld steamer to budget-friendly DIY tricks.

In this guide, I’ll share my battle with wrinkles (and how I won), expert-recommended techniques, must-have steamers, and maintenance tips. Let’s make wrinkles a thing of the past!

My Wrinkle-Free Revelation: From Frustration to Fab in Minutes

Person goes from frustrated with a wrinkled shirt to confidently steaming clothes with a handheld steamer in a cozy, modern bedroom.

I attended an important meeting a few years ago, and I looked like a human raisin. My clothes were a wrinkled disaster, and I had no backup plan. The horror! That day, I vowed never to let wrinkles ruin my confidence again.  

After testing countless solutions—from the best handheld steamers to unconventional hacks—I finally found my perfect arsenal. What worked? A high-quality handheld steamer for quick touch-ups, a spritz of wrinkle-release spray for last-minute fixes, and the “shower steam trick” (hanging clothes in the bathroom while I shower). I swear by packing cubes and rolling clothes for travel instead of folding to minimize creases.

I never have to panic over wrinkles again, and neither do you! Try these tricks, and you’ll always step out looking sharp.

Iron-Free Wrinkle Warriors: Quick Fixes for a Smooth Look

Hate ironing? Me too. Luckily, there are plenty of ways to banish wrinkles without one:

1. Use a Steamer: The Best Hassle-Free Solution

  • Quickly removes wrinkles without damaging fabric.
  • No ironing board needed, making it travel-friendly.
  • Works best on delicate fabrics and everyday clothing.

2. Toss It in the Dryer with a Damp Towel

  • Place wrinkled clothes in the dryer on low to medium heat.  
  • Add a damp towel or ice cubes to create steam.  
  • Remove clothes immediately to prevent new wrinkles.  

3. Hang Clothes in a Steamy Bathroom

  • Hang garments near a hot shower to let the steam relax wrinkles.  
  • Works best in a closed bathroom for maximum steam effect.  
  • A great last-minute fix when you don’t have an iron or steamer.  

4. Use a Hair Dryer for Quick Touch-Ups

  • Lightly mist the fabric with water and blow-dry on low heat.  
  • Keep the dryer a few inches away to avoid heat damage.  
  • Smooth out wrinkles with your hand while drying.  

5. Try a Wrinkle-Release Spray

  • Spray directly on wrinkles and gently smooth with your hands.  
  • Works well for quick fixes and freshens up clothes.  
  • Ideal for travel: just spray, shake, and go!

Top Steamer Picks: Handheld and Standing Models for Every Need

Illustrated comparison chart of three steamers with icons for budget, features, and portability.

Steamers are game-changers. Here are the best ones based on budget and efficiency:

1. Budget: Downy Wrinkle Releaser Plus ($5–$7)

  • Wrinkle & Static Fighter: Eliminates wrinkles and reduces static cling in one easy step.
  • No iron is needed: spray, tug, and smooth for a freshly pressed look.
  • Perfect for Busy Lifestyles: Quick and convenient for travel, office, or daily wear.
  • Trusted Quality: Developed by Nehemiah Manufacturing for reliable wrinkle removal.

2. Normal: Conair Turbo ExtremeSteam ($40–$50)

  • Powerful Wrinkle & Germ Fighter: Combines the performance of an iron with the power of steam, removing wrinkles while killing 99.9% of germs, dust mites, and bed bugs.  
  • Fast & Efficient: Heats up in just 40 seconds and provides up to 15 minutes of continuous steam with a 7.3-ounce water tank.  
  • Versatile 3-in-1 Attachment: A silicone band for better results, a delicate fabric spacer for fine fabrics, and a bristle brush for deeper steam penetration.  
  • Multi-Use Fabric Care: Ideal for garments, upholstery, curtains, and more, offering a fresh-pressed look for all your fabrics.  

3. Premium: Rowenta IS6520 ($100–$120)

  • Fast & Powerful Steaming: 1500W of power, 30g/min steam output, and ready to use in just 45 seconds for quick and efficient wrinkle removal.
  • Extra-Large Water Tank: 2.5L (1 gallon) removable tank provides up to 1 hour of continuous steam, perfect for longer steaming sessions.  
  • Multi-Purpose Sanitization: Effectively refreshes clothing, curtains, and even household appliances with powerful steam.  
  • Convenient & Safe Design: Features an adjustable pole, 360° rotating hanger, metal steam head, large wheels for easy movement, and auto shut-off for safety.  

Standing Steamer vs. Handheld Steamer: Which One Should You Choose?

1. Best Standing Steamer

Pros:

  • Powerful steam output for larger and heavier fabrics.  
  • Longer steam time with a large water tank.  
  • Ideal for home use with versatile attachments.  

Cons:

  • Bulky and less portable.  
  • Takes up more storage space.  
  • Higher price point compared to handheld steamers.

2. Best Handheld Steamer

Pros:

  • Lightweight and portable, perfect for travel.  
  • Quick heat-up time for on-the-go steaming.  
  • Easy to store and use in small spaces.  

Cons:

  • A smaller water tank means frequent refills.  
  • Less powerful for thick fabrics and large items.  
  • Limited steam time compared to standing models.

Beyond Clothing: Unexpected Uses for Your Steamer

Steamers aren’t just for clothes!

  • Refresh curtains and upholstery.
  • Sanitize pillows and stuffed animals
  • Remove odors from furniture

DIY Wrinkle Removers: Natural and Budget-Friendly Options

Homemade wrinkle-removing spray ingredients laid out on a table.

1. Vinegar & Water Spray

Mix 1 part white vinegar with 3 parts water in a spray bottle. Lightly mist clothes and smooth out wrinkles by hand.  

2. Fabric Softener Solution

Combine 1 cup of water with 1 teaspoon of liquid fabric softener for a quick, fresh-smelling wrinkle release spray.  

3. Damp Towel Method

Place a damp towel over wrinkled clothes and press down with your hands. Let it sit for a few minutes, then hang it to dry.  

4. Shower Steam Trick

Hang your clothes in the bathroom while taking a hot shower, allowing the steam to relax the fabric and remove wrinkles naturally.

Maintaining Your Steamer: Tips for Long-Lasting Performance

To keep your steamer working at its best:

  • Use distilled water to prevent mineral buildup.
  • Clean regularly by running a vinegar-water solution through it.
  • Store properly to avoid leaks and damage.

Final Thoughts: Wrinkle-Free Confidence Anytime, Anywhere

Achieving wrinkle-free clothes doesn’t have to be time-consuming or stressful. With the right tools, like handheld or standing steamers and quick DIY hacks, you can keep your outfits looking sharp at home or on the go. From budget-friendly sprays to premium steamers, this guide has covered the best solutions to fit every need. With proper maintenance, your steamer will keep your fabrics flawless for years to come.  

Say goodbye to wrinkles and hello to confidence! For more tips, tricks, and product recommendations, explore our complete guide and never let wrinkles ruin your day again.  

Stay smooth, stay stylish!

How to Remove Sweat Stains from Shirts Instantly: DIY Hacks & Pro Tips for Fresh, Stain-Free Clothes

Freshly laundered white shirt in sunlight with natural cleaning ingredients symbolizing DIY sweat stain removal.

Sweat happens, whether you’re crushing it at the gym, surviving a heatwave, or just nervously sweating through a job interview, those pesky sweat stains and odors can turn your favorite shirt into a science experiment gone wrong. But don’t worry, you’re not alone in this sweaty struggle.

In this guide, we’ll tackle the ultimate wardrobe enemy: how to remove sweat stains from clothes instantly. From DIY hacks that’ll make you feel like a laundry wizard, to pro tips that’ll keep your clothes smelling fresher than a spring breeze, we’ve got you covered. Say goodbye to yellow pits and hello to stain-free confidence!

My Armpits Almost Ruined a Perfect Wedding Day

 Man in a white shirt at a wedding reception with visible underarm sweat stains.

I was at a friend’s wedding, wearing my crisp white shirt and feeling like a million bucks. But halfway through the reception, I noticed something horrifying: my underarms had turned into a modern art masterpiece of yellow stains. To make matters worse, my sweat odor could’ve cleared the dance floor.

Panicking, I ran to the bathroom and tried everything: water, hand soap, even a splash of cologne (spoiler: it made things worse). Finally, I remembered my grandma’s “secret weapon”: a mix of baking soda and lemon juice. I rubbed it on the stains, let it sit for 10 minutes, and rinsed it off. Miraculously, the stains faded, and the odor disappeared.  

That quick fix saved my night, but I knew I needed better solutions. If you’ve ever dealt with embarrassing sweat stains, don’t worry, I’ve got you covered. In this guide, I’ll share how to remove sweat stains from clothes instantly using simple household ingredients. Whether you need to How remove sweat stains from clothes instantly diy methods or store-bought solutions, I’ll help you keep your shirts fresh, clean, and stain-free!

5 DIY Solutions for Sweat Stains and Odors

 Flat lay of DIY sweat stain removal ingredients like baking soda, lemon, vinegar, and hydrogen peroxide on a white table.

1. Baking Soda and Vinegar Power Combo

  • Mix 1/4 cup of baking soda with 1/4 cup of white vinegar to form a paste.  
  • Apply the paste to the sweat stains and let it sit for 30 minutes.  
  • Scrub gently with a toothbrush, then wash as usual.  

Why It Works: Baking soda neutralizes odors, while vinegar breaks down sweat stains.  

2. Lemon Juice and Sunlight

  • Squeeze fresh lemon juice onto the stained areas.  
  • Let the shirt sit in direct sunlight for 1–2 hours.  
  • Wash as usual.

Why It Works: Lemon juice acts as a natural bleach, and sunlight helps lift stains.  

3. Hydrogen Peroxide and Dish Soap

  • Mix 1 part hydrogen peroxide with 2 parts dish soap.  
  • Apply the solution to the stains and let it sit for 15 minutes.  
  • Rinse thoroughly and wash.  

Why It Works: Hydrogen peroxide breaks down sweat compounds, while dish soap lifts grease and dirt.  

4. Salt and Warm Water

  • Dissolve 2 tablespoons of salt in a bowl of warm water.  
  • Soak the stained areas for 30 minutes.  
  • Rinse and wash as usual.  

Why It Works: Salt absorbs sweat and helps lift stains.  

5. Aspirin Tablets

  • Crush 2–3 aspirin tablets and mix with warm water to form a paste.  
  • Apply the paste to the stains and let it sit for 1 hour.  
  • Rinse and wash.  

Why It Works: Aspirin contains salicylic acid, which breaks down sweat stains.  

Product Recommendations

1. Budget: Plastic Pop-Up Laundry Hampers ($5–$8)

  • Reinforced Design: Made with strong, denser mesh and reinforced carry handles for durability and tear resistance.
  • Sturdy Construction: Thick fabric material with a collapsible steel frame, allowing airflow to prevent moisture and odors.
  • Space-Saving Foldable Design: Easily folds flat or into a small circle for convenient storage when not in use.
  • Large Storage Capacity: Spacious with an extra side pocket for laundry detergent, socks, towels, and more (22.8 x 14.2 x 14.2 inches).  
  • Versatile Use: Ideal for laundry, home storage, toys, sports equipment, and perfect for dorms, camping, hotels, and travel.

2. Normal: Seville Classics 3-Bag Laundry Sorter ($25–$35)

  • Machine-Washable Removable Bags: Three durable cotton-polyester canvas bags hold up to 2 cu. ft. or 10 lbs. of laundry each.  
  • Sturdy Metal Frame: Tubular steel construction with three crossbars for enhanced stability and support.  
  • Smooth Rolling Design: Tall handles for easy pushing and 2-inch wheels (two with locks) for effortless mobility.  
  • Quick Assembly: Simple screw-together design for easy setup in minutes. 

3. Premium: Whitmor Rolling Utility/Sorting Cart ($50–$60)

  • Spacious Capacity: Measures 19.1\” x 21.25\” x 34.25\”, perfect for hauling groceries, laundry, toys, and sports equipment.  
  • Easy Assembly: Requires pliers for quick and simple assembly.  
  • Smooth Rolling Wheels: Heavy-duty wheels designed for city dwellers, students, and the elderly.  
  • Collapsible Design: Folds easily for convenient storage in small spaces.  
  • Durable Build: Made with a coated steel frame and a foam handle for a sturdy and comfortable grip.

Additional Tips and Tricks to Prevent Sweat Stains and Odors

1. Wear Antiperspirant

  • Use Clinical-Strength Antiperspirant: Reduces sweating by blocking sweat glands.  
  • Apply to Clean, Dry Skin: Best applied at night when sweat glands are less active.  
  • Reapply in the Morning: For all-day sweat protection and freshness.  
  • Look for Aluminum Chloride: A key ingredient known for its strong sweat-blocking properties.  
  • Prevents Sweat Stains: Keeps clothes dry, fresh, and stain-free for longer periods.

2. Choose the Right Fabrics

  • Choose Moisture-Wicking Fabrics: Cotton, bamboo, and linen allow better airflow and keep moisture away from the body.  
  • Avoid Synthetic Materials: Fabrics like polyester and nylon trap heat and sweat, increasing stains and odor.  
  • Lightweight and Breathable: Opt for lightweight fabrics that promote air circulation, keeping you cool and dry.
  • Dark Colors and Patterns: Dark and patterned fabrics can help conceal sweat stains better than light-colored clothing.
  • Invest in Sweat-Proof Clothing: Consider garments designed specifically to resist sweat and odor for extra protection.

3. Wash Clothes Immediately

  • Wash Clothes Immediately: Don’t let sweaty clothes sit in the hamper; wash them as soon as possible to prevent stains from setting in.  
  • Use Cold Water: Cold water helps lift sweat and odors without setting stains.  
  • Pre-Treat Stains: Apply stain remover or a mixture of baking soda and water to sweat spots before washing.
  • Avoid Overloading the Machine: Wash fewer items at a time for a thorough clean and better stain removal.  
  • Dry Properly: Air-dry clothes in direct sunlight when possible, as sunlight acts as a natural stain remover and deodorizer.

4. Use Vinegar in the Wash

  • Add White Vinegar to Laundry: Pour 1/2 cup of white vinegar into the washing machine during the rinse cycle.
  • Neutralizes Odors: Effectively removes sweat and body odor trapped in fabrics.  
  • Softens Fabrics: Acts as a natural fabric softener without harsh chemicals.  
  • Pre-Soak for Tough Stains: Soak sweat-stained clothes in a vinegar-water solution for 30 minutes before washing.  
  • Safe for Most Fabrics: Gentle on clothes while enhancing their freshness and softness.

5. Apply Stain Repellent

  • Use Fabric Protector Spray: Apply a stain repellent to the underarm areas of shirts before wearing them.  
  • Prevents Sweat Stains: Creates a protective barrier that stops sweat from penetrating fabric fibers.  
  • Easy Application: Simply spray a light, even layer on high-sweat areas and let it dry.  
  • Long-Lasting Protection: Helps maintain the appearance of your clothes by preventing yellowing and odor buildup.  
  • Works on All Fabrics: Suitable for cotton, polyester, and other materials without damaging them.

Final Thoughts

Person holding a clean shirt feeling confident after removing sweat stains.

Sweat stains and odors don’t have to ruin your favorite clothes or your confidence. With these DIY solutions, product recommendations, and preventive tips, you can remove sweat stains from shirts instantly and keep your wardrobe fresh and stain-free.  

Remember, the key to beating sweat stains is a combination of quick action, the right tools, and a little laundry know-how. So, the next time sweat tries to sabotage your style, you’ll be ready to fight back like a pro. Here’s to fresh, clean, and stain-free clothes!

Stop the Stink: How to Remove Odor from Gym Clothes (Expert Tips)

A person holding up a gym shirt with a disgusted expression due to a bad smell.

You might be surprised to learn that sweat has no odor by itself. The distinct smell in your gym clothes comes from bacteria on your skin that interact with your sweat.

Removing these stubborn odors needs more than a simple wash cycle. Your activewear’s synthetic fibers excel at wicking moisture away and become perfect hiding spots that trap sweat and bacteria. This combination creates lasting odors that survive regular washing.

Fitness experts stress the importance of washing workout clothes after each session. The challenge lies in using the right amount of detergent. Too much cleaning product can leave behind residue that locks unpleasant odors into your clothes.

Want to eliminate those gym clothes smells? Learn how to naturally remove odor from gym clothes using simple techniques and products. Our guide covers cost-effective tips and premium options that deliver results.

Why Gym Clothes Smell After Washing

A person holding up a gym shirt with a disgusted expression due to a bad smell.

You might have wondered why your gym clothes smell after washing. That annoying “perma-stink” in your workout gear isn’t just frustrating. It’s a scientific process happening in your laundry basket.

1. Sweat mixes with bacteria in the fabric.

Fresh sweat has no odor. That gym smell starts when sweat mixes with skin bacteria. Bacteria love moisture; sweat helps them grow during workouts, producing that sour scent. These bacteria sink into your workout clothes’ fabric. If not washed properly, they linger and stink again next time. Washing alone often isn’t enough.

Cleaning expert Mary Marlowe Leverette says, “Freshly washed workout clothes still smell sweaty because they aren’t thoroughly clean.” Sweat, oils, and bacteria stay trapped in the fabric. That’s why odors return even after washing. Your clothes need deeper cleaning to smell fresh again, truly.

2. Synthetic fabrics trap odor more easily

Modern activewear odor issues depend on fabric type. Synthetic fibers like polyester, nylon, and Lycra smell worse than cotton. Studies show polyester traps more unpleasant scents like sourness and ammonia.

These materials repel moisture and encourage odor-causing Micrococcus bacteria to grow up to 10^6 CFU/cm². Cotton absorbs odors and moisture better, so smells don’t linger as much, though it gets heavy with sweat.

Laundry habits matter, too. Too much detergent leaves a residue that traps bacteria. Fabric softeners coat fibers, blocking moisture-wicking and locking in smells. Choosing the right fabric and cleaning method is key to keeping your gym clothes fresh and odor-free.

You need specific strategies to stop gym clothes from smelling like this, targeting bacteria and the fabric properties that make removing odor from gym clothes tough. Learning to stop gym clothes from smelling involves more than just washing; it means tackling the source. Understanding this science helps explain why your gym clothes smell after washing and what to do about it.

Fixing Detergent and Fabric Softener Mistakes

Close-up of damp, sweaty gym clothes in a pile inside a gym bag.

People often think more detergent means cleaner clothes, which is a common laundry mistake. Surprisingly, this strategy backfires with workout gear, leaving you puzzled about why your gym clothes smell after washing despite your efforts.

1. Use the right amount of detergent.

That extra scoop of detergent makes your workout clothes smell worse. The washing machine can’t rinse away too much detergent, which builds up in fabric fibers. Bacteria thrive in this residue, trapping smells instead of removing them.

“If you suspect that might be your problem, use less detergent and think over running an extra rinse cycle on your washing machine,” notes laundry experts. Your heavily soiled workout clothes don’t need extra detergent; resist that urge.

How much detergent should you use?

 Laundering specialists recommend:

  • Using only 2 tablespoons of detergent for a regular load
  • Using less detergent for workout clothes than for regular clothes
  • Liquid detergent works better for fabric absorption
  • Powdered detergent works best for Nike Dri-FIT items

Your washing machine needs space to work correctly. Stuffing too many clothes prevents water from circulating well. It leaves detergent residue stuck in your clothes.

2. Avoid fabric softeners that trap odor.

Fabric softeners might make towels feel fluffy, but they’re terrible for workout clothes. These products leave a coating that traps odor-causing bacteria and blocks detergent from cleaning fibers properly. Experts say this buildup turns into a glue-like surface for bacteria to stick.

It is key when figuring out how to remove odor from gym clothes. The coating ruins moisture-wicking technology by clogging the fabric’s pores. Harmful softener chemicals, like QACs and phthalates, also break down stretch fibers and irritate skin.

Skipping softeners and using less detergent helps activewear last longer and stay fresh. A softener-free wash makes a noticeable difference after workouts.

Deep Clean Methods That Actually Work

Person sorting workout clothes and turning them inside out before loading them into a washing machine.

Does your athletic wear still smell bad after regular washing? These deep-cleaning methods will help you eliminate those stubborn odors. Regular detergents can’t reach the bacteria and oils deep in fabric fibers, but these techniques target them effectively.

1. Soak in vinegar or oxygen bleach.

White distilled vinegar breaks down bacteria and oils that cause persistent odors in workout clothes. The natural acidity in vinegar helps release dirt, bacteria, and oils trapped in your athletic wear’s fabric.

To soak in vinegar:

  • Mix one part white distilled vinegar with four parts cold water in a container or sink
  • Submerge your workout clothes completely for 20-30 minutes
  • Wash normally after soaking (no need to rinse first)

Soaking overnight works best for really tough odors. Add a cup of vinegar directly to your washing machine’s rinse cycle. The vinegar smell won’t stick around; it disappears completely when washing.

Oxygen bleach (sodium percarbonate) provides another excellent solution for deep cleaning. This natural cleaner removes stains and fights odors while being biodegradable, non-toxic, and safe for colored fabrics, unlike harsh chlorine bleach.

To use oxygen bleach:

  • Fill a basin with cool water
  • Add half to one full scoop of oxygen bleach per gallon of water
  • Soak clothes for 3-6 hours (overnight for severe cases)
  • Wash as normal afterward

2. Spot-treat with hydrogen peroxide

Hydrogen peroxide works great for targeted odor removal on the smelliest parts of your gym clothes. This method works best on underarm areas, collars, and spots where bacteria build up the most.

Steps for spot treatment:

  • Find the smelliest areas of your clothing
  • Spray hydrogen peroxide directly on those spots
  • Let it sit briefly (not too long to avoid fabric damage)
  • Wash immediately in your machine

Test hydrogen peroxide on a hidden area first, since it might bleach or damage some fabrics. This treatment breaks down bacterial compounds right at their source.

3. Use laundry sanitizers for extra protection.

Laundry sanitizers pack a punch against gym clothes odor. These products kill 99.9% of odor-causing bacteria that regular detergents miss. While detergents clean visible dirt, sanitizers target microscopic bacteria, causing those lasting smells.

Products like Lysol Laundry Sanitizer Sport use special odor control technology for athletic wear. They work in cold water and don’t contain bleach, making them safe for most workout fabrics.

Steps to use sanitizers:

(i) Add to the rinse cycle (not with detergent)

(ii) Keep clothes in the sanitizer for at least 16 minutes

(iii) Pre-soak items in sanitizer (2 capfuls per gallon) for 15 minutes to maximize results

Synthetic workout clothes benefit most from sanitizers because bacteria thrive in their moisture-wicking fibers. These products eliminate odor-causing bacteria like Staphylococcus Aureus and Klebsiella pneumoniae that survive regular washing.

Tough odors need a combined approach. Pre-soak in vinegar, wash with the right detergent, and add sanitizer to the rinse cycle. This all-encompassing approach attacks odor-causing bacteria from every angle and ends that gym clothes smell.

Choosing the Right Detergent for Gym Clothes

Display of different gym-specific detergents like Arm & Hammer, Nathan Sport Wash, and WIN on a laundry counter.

Laundry detergents handle workout gear odor differently. The right specialized detergent makes all the difference between fresh-smelling activewear and lingering gym stink. Let’s look at some options that help with removing odor from gym clothes across different price points.

1. Budget Pick: Arm & Hammer Plus OxiClean Odor Blasters (~$5–$6)

  • Arm & Hammer Plus OxiClean delivers great value with its Odor Blasters formula at approximately $5-$6. This budget-friendly choice combines baking soda’s cleaning power with OxiClean stain fighters to eliminate harsh odors. It tackles body odor, sweat, and musty smells that stick to workout clothes.
  • The detergent’s 5-in-1 power stands out by targeting odor elimination, deep cleaning, whitening, brightening, and freshening at once. The formula attacks the grimy layer where bacteria live and multiply, which causes persistent gym clothes odor.
  • The product works best with the right amount; just 2 tablespoons per regular load stops detergent buildup that traps odors. Heavily soiled loads need a bit more without leaving residue behind.

2. Mid-Range: Nathan Sport Wash Detergent (~$15)

  • Moving up to the mid-range at around $15, Nathan Power Wash Performance Detergent specializes in performance fabric care. This biodegradable, non-toxic formula restores technical qualities to performance fabrics, such as water repellency, breathability, and moisture-wicking abilities.
  • Nathan’s pH-neutral formula sets it apart by protecting fabrics from damage and color fading. Unlike regular detergents that mask odors, the detergent removes bacterial grime without leaving residue.
  • The product handles synthetic performance fabrics and natural fibers like wool, merino, silk, and down equally well. One fluid ounce per load means each bottle lasts about 42 washes.

3. Premium: Win Sports Detergent (bulk set) (~$20–$25)

  • WIN Sports Detergent provides premium protection at $20-$25. This top-selling fitness detergent’s 20-year track record comes from its unique engineering for microfiber, synthetic, and technical fabrics. The formula targets oils trapped in synthetic fibers that cause persistent workout odors.
  • WIN’s pH 4 formula uses oxygen ions to clean organic soils thoroughly. It brings back stretch fabric’s elasticity, brightens colors, and eliminates workout odor from technical fabrics.
  • High-performance Lululemon, Athleta, Nike, and Under Armor apparel benefits from WIN’s specialized care. Users say WIN removes odors that stick around after washing with regular detergents, even in clothes that have undergone months of ride/wash cycles.

Upgrade to Anti-Odor Apparel

Anti-odor apparel offers a proactive solution to smelly gym clothes beyond washing techniques and special detergents. These specialized garments use advanced technologies to stop odors before they start and change the way you deal with workout clothes smell.

1. How odor-resistant fabrics work

These fabrics target bacteria that mix with sweat to create unpleasant odors. The technology works in several ways:

  • Silver ion technology has natural antimicrobial properties. As it oxidizes, it releases silver ions that kill bacteria. Brands like Rhone weave silver into fabric threads, so the antimicrobial properties stay even after washing.
  • Antimicrobial treatments: Certain clothes come with treatments that break down bacterial cell membranes. It kills bacteria before they can make odors. These treatments either stop bacteria from growing or neutralize smelly molecules completely.
  • Moisture management: Many anti-odor fabrics quickly pull sweat away from your skin. It creates conditions where odor-causing bacteria find it hard to grow.

Tests show these technologies can eliminate up to 99.9% of odor-causing bacteria. However, the results vary between brands and treatments. You should consider how long anti-odor properties last since some treatments become less effective after several washes.

2. When to replace old workout gear

Your gym clothes will need replacement, no matter how well you care for them. Look out for these signs:

  • Persistent odor despite proper washing: Even after a good wash, clothes that smell bad usually have too much bacterial buildup.
  • Visible wear and tear: Discoloration, holes, or stretched-out elastic that show both look and function are breaking down.
  • Psychological factors: Health experts say replacing clothes you hate wearing is fine. Workout gear that makes you feel bad will affect your motivation to exercise.

Sports bras need replacement every 6 months, while good quality leggings last around 2 years. Anti-odor apparel reduces cleaning hassles and helps your clothes last longer through better odor control.

Final Thoughts

Gym clothes develop stubborn odors because of bacteria, sweat, and fabric properties. You don’t have to live with smelly workout gear anymore. Several proven methods can help you solve this common problem. Knowing how to remove odor from gym clothes naturally improves their freshness and lifespan.

The proper washing techniques make the most crucial difference. Your activewear stays fresh when you use the correct detergent and skip fabric softeners. Deep cleaning methods like vinegar soaks or laundry sanitizers work well, too. Sports detergents are a great way to get rid of tough odors, from budget-friendly Arm & Hammer to premium WIN Sports Detergent.

You can prevent gym clothes from smelling bad in the first place. Wash your gear right after workouts, pick anti-odor fabrics whenever possible, and replace old items that don’t smell fresh anymore. These expert techniques and products will help you eliminate that persistent workout gear smell. Now, you can focus on what matters: your fitness experience.