
Is It a Cold Sore or Just Chapped Lips? Signs, Causes & Fast Relief

Person with half lip showing a cold sore and half showing dry, chapped lips, illustrating the difference.

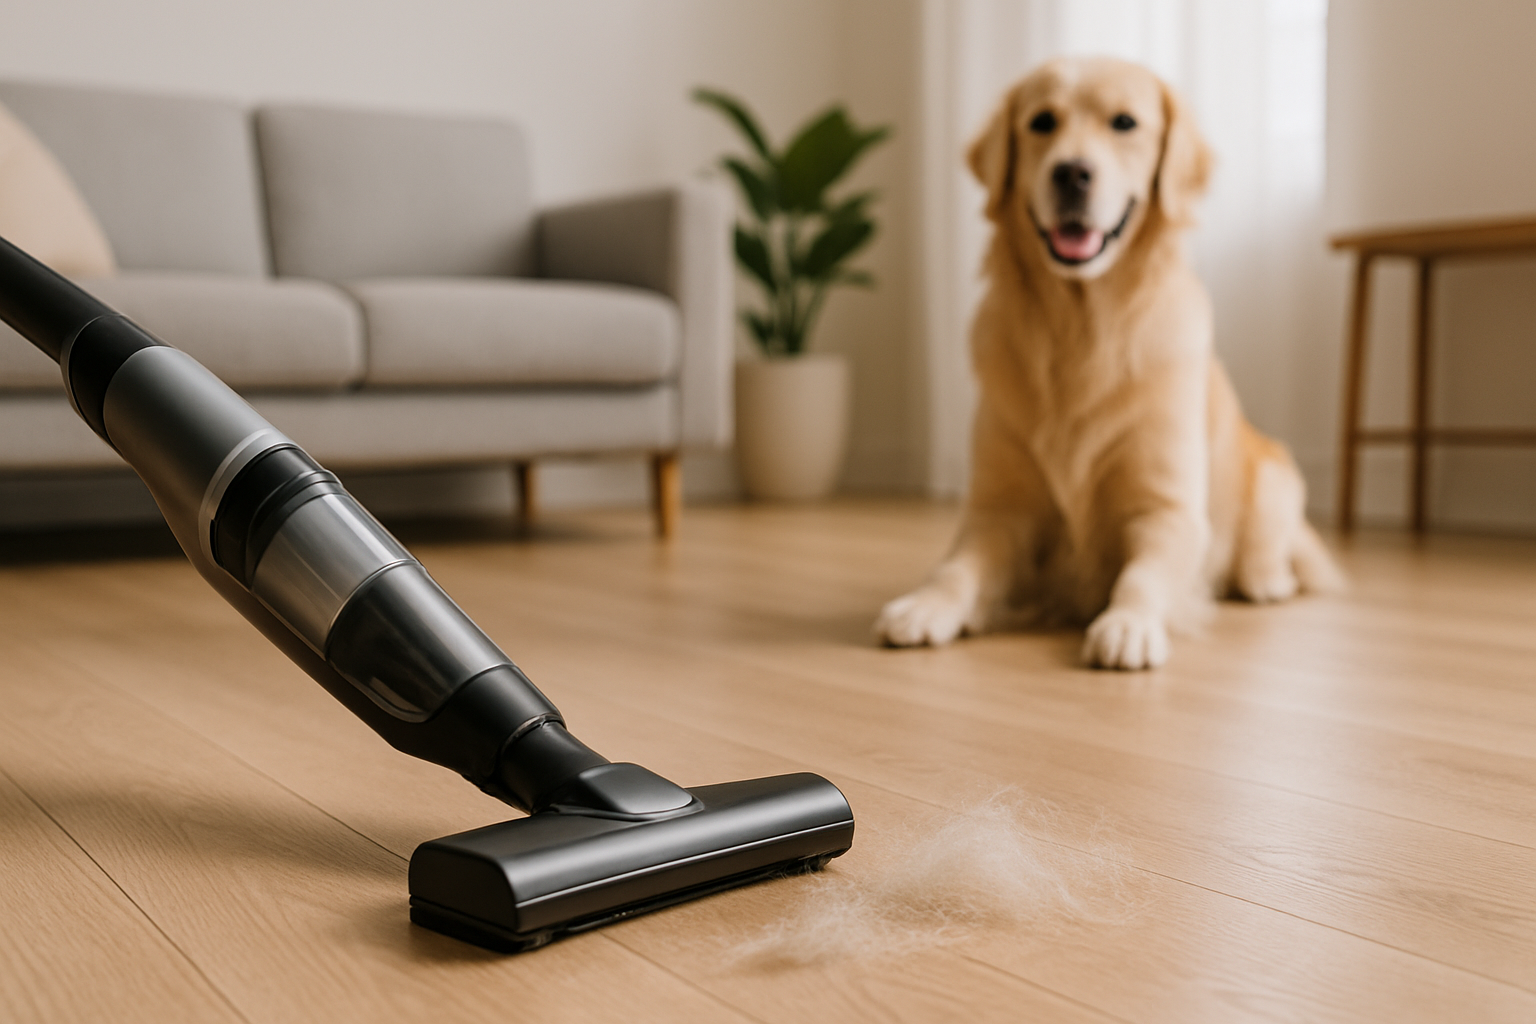
Not Every Lip Issue Is the Same

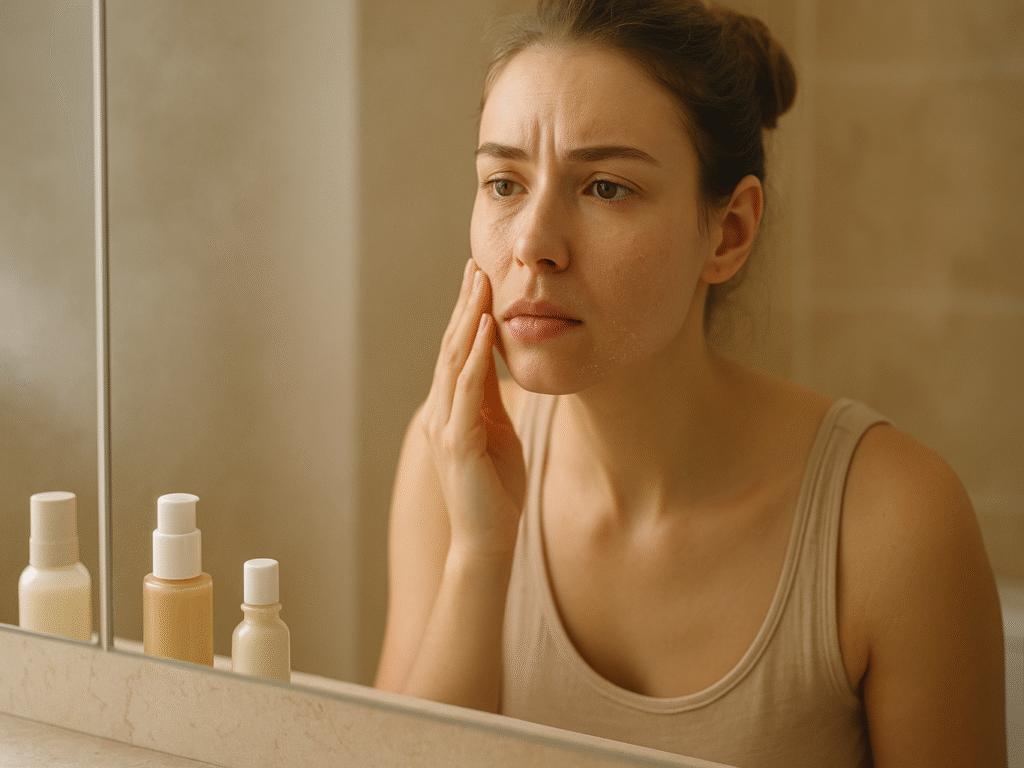
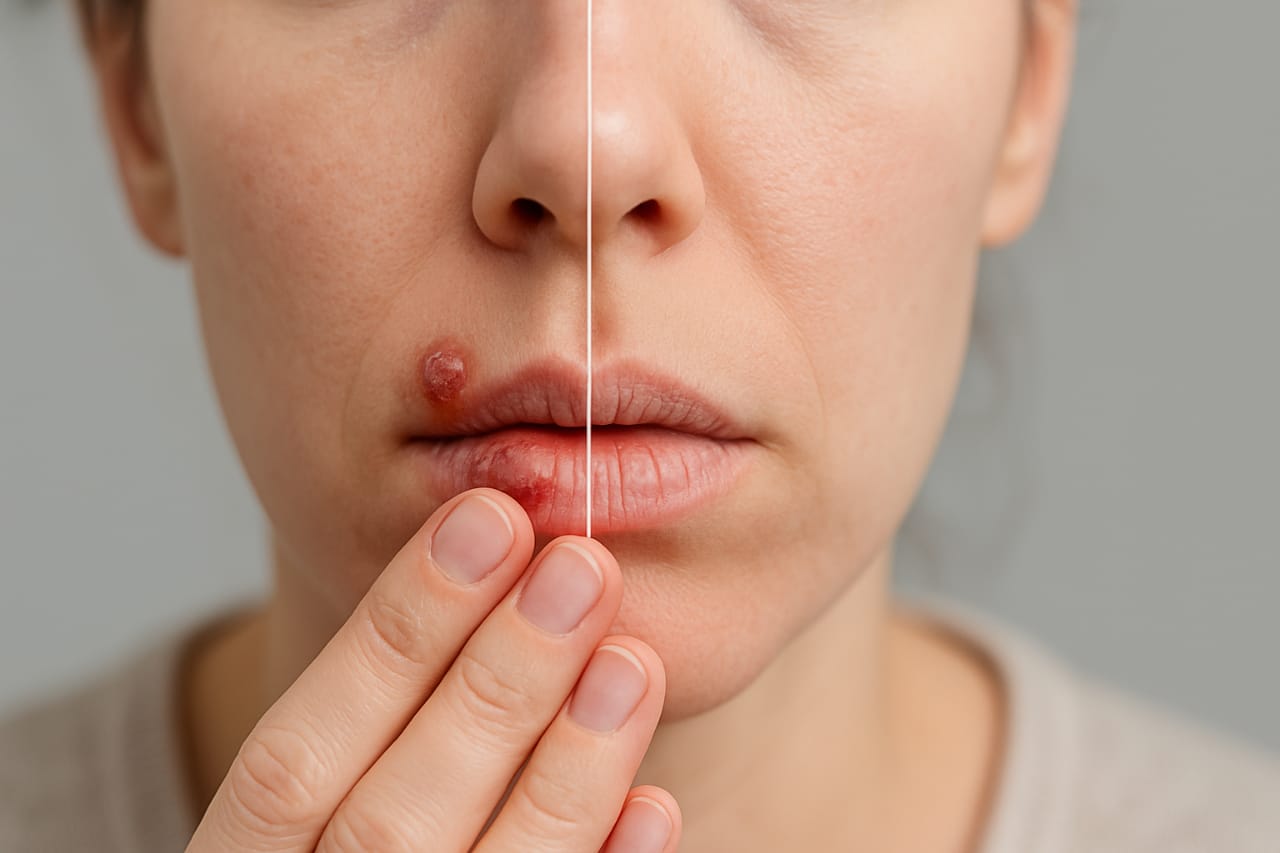
That annoying patch on your lip, is it just dry skin or something more? About 90% of people will get a cold sore at some point in their lives, and many won’t even realize it at first. That’s because chapped lips vs cold sores often feel similar, itchy, painful, and annoying. But treating them the same way? Not a great idea.

Cold sores come from the herpes simplex virus (HSV). They often begin with a tingling feeling. Then, blisters form and crust over. Chapped lips can result from cold weather or dry air. They may crack, peel, and sting, but are not contagious.

The problem? People often confuse one for the other, which delays proper treatment. You might be slathering on lip balm when you need an antiviral cream, or vice versa. Let’s break down the fundamental differences so you can treat your lips the right way the first time.

What Are Chapped Lips?

Close-up of lips with peeling skin and redness from chapping.

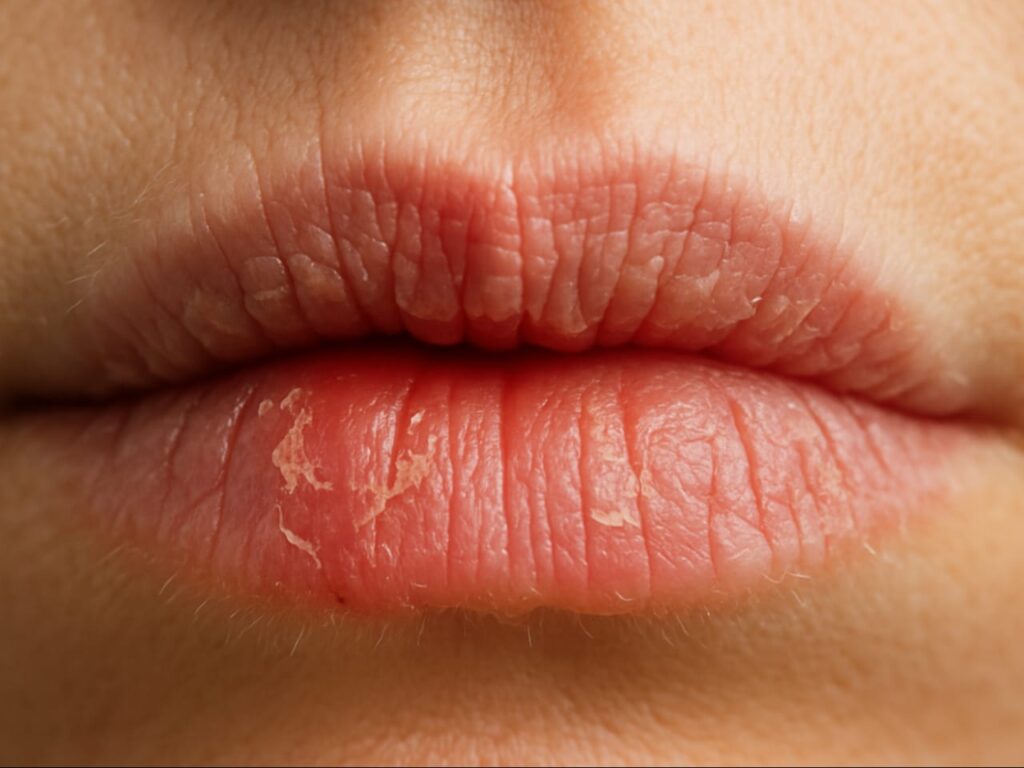
Chapped lips, known as cheilitis, occur when your lips become inflamed. It can happen for a short time or last a long time. Your lips don’t have any oil glands, unlike the rest of your skin, which makes them more likely to dry out and crack. Your lips have thin skin that can quickly lose moisture. It can happen because of different environmental factors, causing discomfort and pain.

You will notice these clear signs if you have chapped lips:

  • Dryness and tightness: Your lips might feel stretched and uncomfortable. It can make it hard to smile or talk without irritation.
  • Flaking and peeling: You may see dry skin layers shedding from your lips. It often leaves rough patches that can sting when touched or exposed to air.
  • Cracks or splits: Small, painful fissures can form, especially at the corners of your mouth. They might bleed when you stretch your lips or eat.
  • Redness and swelling: Irritated lips look red and puffy. They may feel warm or burned, making them more sensitive to products and food.
  • Sores or scaling: Severe dry lips can cause crusty spots, small sores, or scaly textures. These signs mean deeper irritation and need more care.

Moisture loss stands out as the main reason behind chapped lips. Cold winter air, dry summer heat, and wind can all dry out your lips. Licking your lips might seem helpful, but it makes things worse. The saliva dries up and pulls away more moisture, leaving your lips even drier than before.

Certain medications can make chapped lips worse.

Some drugs can dry out your lips as a side effect, even if you’re staying hydrated. Medications known to increase your chances of chapped lips include:

  • Vitamin A supplements: High doses can dry out the skin, including the delicate skin on your lips.
  • Retinoids (like Retin-A or Differin): These are often used for acne or anti-ageing, but they tend to zap moisture from your skin.
  • Lithium: This medication is often used for bipolar disorder. It can cause dryness and irritation, mainly around the mouth.
  • Chemotherapy drugs: Some cancer treatments target fast-growing cells, like skin cells. It can cause dry, cracked lips.

If you’re taking any of these and notice lip dryness, talk to your doctor. They may adjust your dose or suggest a lip-safe moisturizer to help.

Your risk of chapped lips goes up if you’re dehydrated or malnourished. Sun damage to lip tissue can also lead to dryness. Chapped lips usually cover the entire lip area evenly. It makes them easy to tell apart from cold sores, which appear in specific spots. This difference matters a lot when choosing between treatments for chapped lips versus cold sores.

Most cases of chapped lips heal within 2 to 3 weeks with proper care. Something that looks like simple chapped lips might signal a more serious issue. A dry, rough feeling on your lips, especially the lower one, might mean you have actinic cheilitis. You may notice scaly, whitish patches, too. This condition comes from years of sun exposure and might turn into skin cancer.

Chapped lips usually cause temporary discomfort rather than serious health issues. Your lips need extra protection because they lack natural oils that keep moisture in. They dry out faster, especially in harsh weather or if you don’t drink enough water.

Knowing what causes chapped lips helps you distinguish them from other lip problems, like cold sores. Cold sores need different treatments. Quick action to heal your lips works best if you catch the symptoms early.

What Is a Cold Sore on the Lip?

 Diagram of cold sore stages including tingling, blistering, weeping, crusting, and healing.

A cold sore on the lip is quite different from chapped lips. It’s a viral infection that shows up as small, painful blisters. Cold sores affect up to 90% of adults worldwide. These blisters usually appear on or around the lips, but you might find them on your cheeks, nose, or chin.

The herpes simplex virus causes cold sores. HSV-1 is the most common culprit, though HSV-2 can trigger them too. Once this virus gets into your body, it stays there for good. It remains inactive until something triggers it.

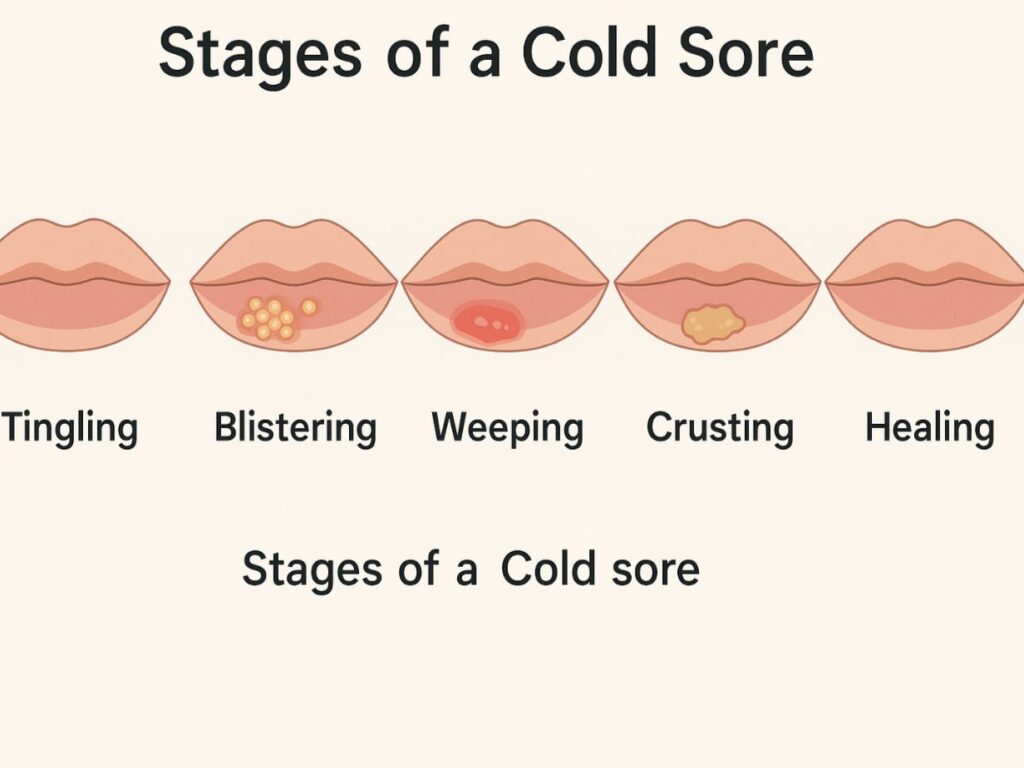
1. Cold sores on the lip develop through specific stages:

  • Tingling stage (Day 1): You may feel itching, burning, or tingling where the cold sore is forming. This sensation signals that the virus has become active again.
  • Blistering stage (Days 1-2): Small fluid-filled blisters emerge in clusters within 24 hours. The spot becomes red, swollen, and painful.
  • Weeping Stage (Days 2-3): The blisters burst and leak clear or yellowish fluid. This stage makes cold sores the most contagious.
  • Crusting stage (Days 3-4): A yellowish or brownish scab develops over the sore area.
  • Healing stage (By day 14): New skin appears as the scab slowly and gradually falls away.

The typical cold sore cycle lasts 8-10 days, though some might need two weeks to heal completely. Cold sores are very contagious. It starts with that first tingling sensation and lasts until they are fully healed.

These factors can trigger cold sore outbreaks:

  • Stress or fatigue
  • Illness or fever
  • Hormonal changes
  • Sun exposure or sunburn.
  • Certain foods
  • Weakened immune system

Chapped lips and cold sores differ mainly in where they appear and how they look. Chapped lips affect the entire lip surface evenly. Cold sores pop up as localized clusters of blisters in specific spots. Cold sores go through clear stages, but chapped lips only show dryness and cracking.

Your first cold sore infection might be especially uncomfortable. You could experience fever, sore throat, swollen lymph nodes, headache, or body aches. The good news? Later outbreaks usually come with milder symptoms. It’s worth mentioning that over-the-counter treatments work best during the early tingling stage. People who have frequent or severe outbreaks may get better relief from prescription antiviral medications.

2. How to Get Rid of a Cold Sore in 24 Hours

To manage a cold sore within 24 hours, initiate treatment immediately upon the first sign of symptoms (tingling or itching). Apply an over-the-counter antiviral cream such as docosanol (Abreva) up to five times daily. Use a cold compress to minimize inflammation, and avoid touching the lesion to prevent viral spread.

Supplementing with L-lysine, an amino acid known to inhibit HSV replication, may support faster recovery. Maintain gentle hydration of the affected area with petroleum-based ointments, avoiding excessive product layering. Early intervention and barrier protection are key to reducing duration and severity of cold sore outbreaks.

Chapped Lips vs Cold Sore: Quick Comparison Table

Chapped lips and cold sores may look similar at first glance. Let’s explore the differences to help you identify what’s affecting your lips.

FeatureChapped LipsCold Sores
AppearanceDry, flaky, cracked skin across the entire lip surfaceSmall fluid-filled blisters in clusters, usually on one side
CauseEnvironmental factors (dryness, wind), dehydration, lip lickingHerpes simplex virus (primarily HSV-1)
Original symptomsGeneral dryness and discomfortTingling, burning, or itching 24 hours before blisters appear
Pain levelMild discomfort to moderate painOften painful, especially when touched
LocationUsually affects the entire lip surface evenlyTypically appears on the edge of the lips or around the mouth in specific spots
ContagiousNot contagiousHighly contagious from the tingling stage until completely healed
DurationHeals with proper care in daysTypically lasts 8-14 days, whatever the treatment
ProgressionRemains consistently dry and flakyProgresses through distinct stages (tingling, blistering, weeping, crusting, healing)

How to distinguish between them:

  • Distribution patterns: Chapped lips affect the entire lip surface. Cold sores appear in specific areas.
  • Blister formation: Cold sores create tight clusters of small blisters with clear fluid. Chapped lips rarely blister unless severe damage occurs.
  • Different sensations: Cold sores start with a distinctive tingling or burning feeling before becoming visible. Chapped lips lack this warning sign.
  • Pain characteristics: Cold sores cause sharp, burning pain in specific areas. Chapped lips create general discomfort and occasional stinging when the lips move or stretch.

These conditions can be connected. Dry and irritated lips might increase your risk of developing a cold sore. Your dormant herpes virus could become active when your lips need protection from becoming chapped. Note that each condition needs different treatment approaches. Antiviral medications work best for cold sores. Chapped lips respond well to moisturizing treatments and protective balms.

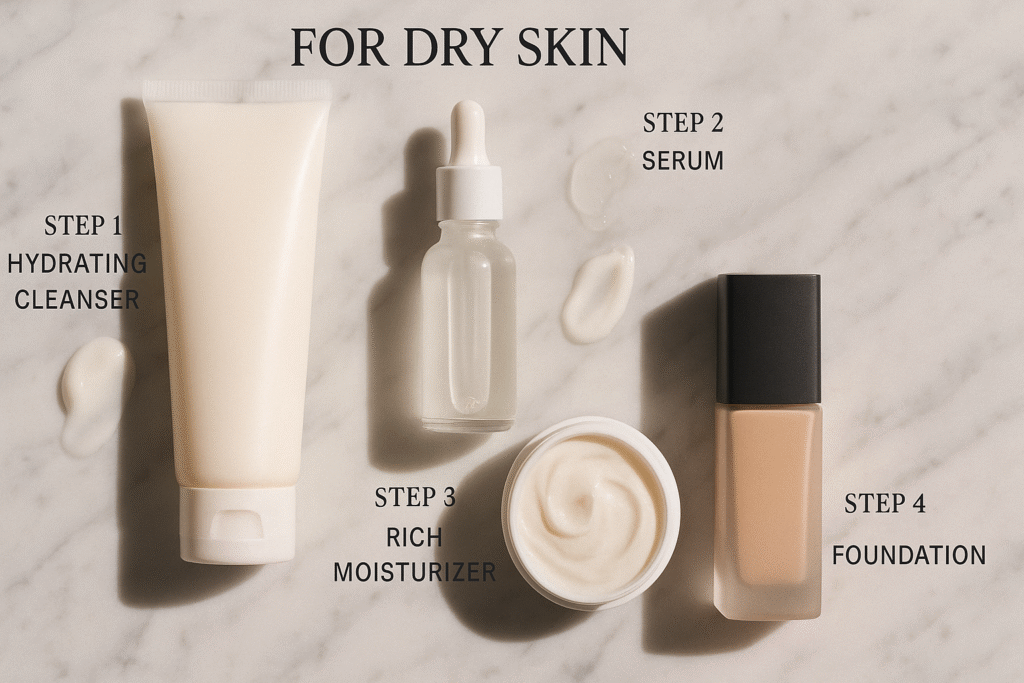
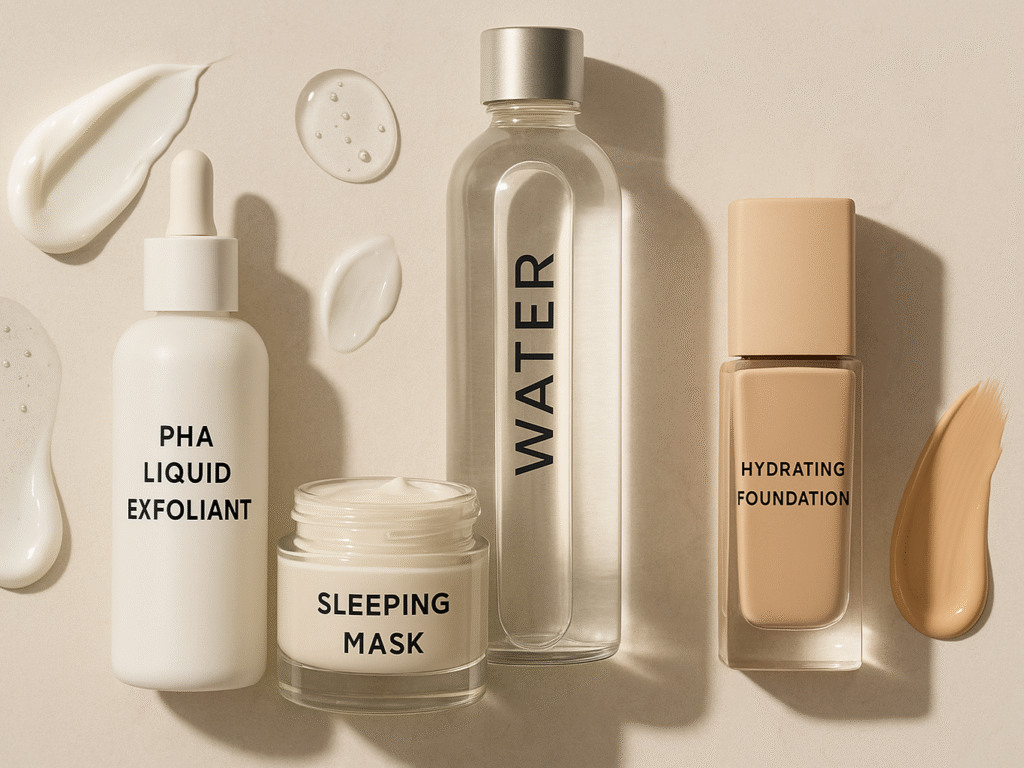
Best Remedies for Chapped Lips

 Flat lay of coconut oil, aloe vera gel, and honey used for natural chapped lip relief.

Your lips feel dry and uncomfortable, and finding relief becomes a priority. Chapped lips don’t need antiviral treatments like cold sores do. Instead, they respond well to moisturizers and easy changes in your daily habits.

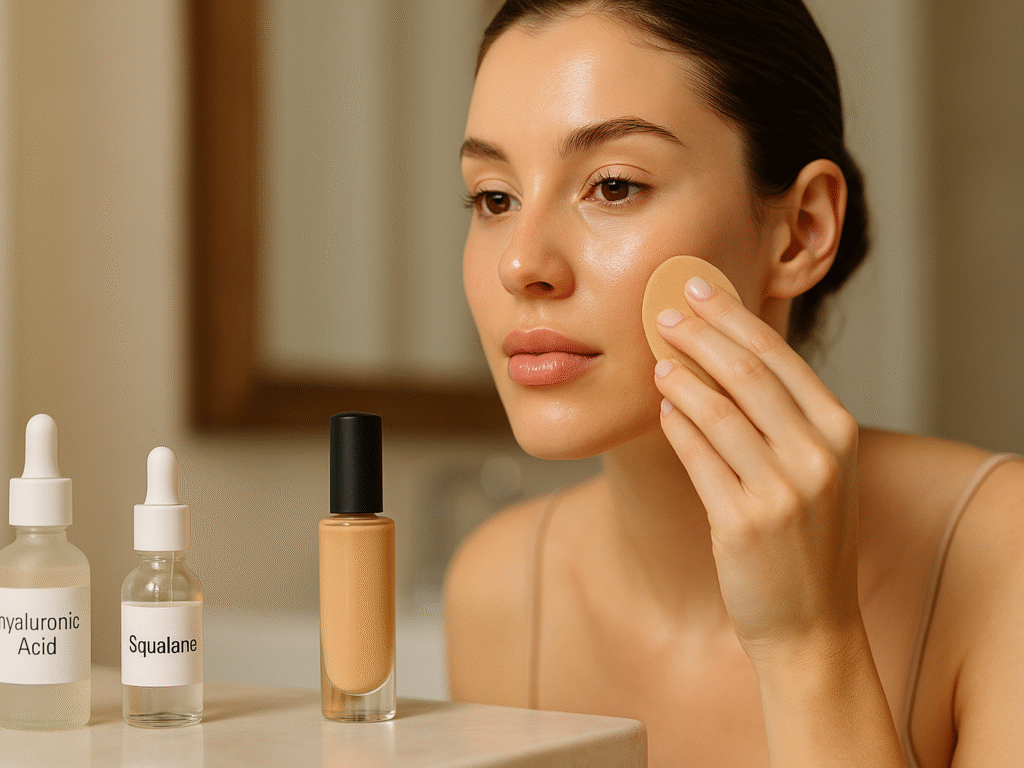
1. Most Effective Ingredients for Chapped Lips

The best lip balms should contain these essential ingredients, according to dermatologists:

  • Petroleum jelly and mineral oil: They create a thick barrier on the lips. They lock in moisture and protect against wind, cold air, and dehydration.
  • Shea butter and beeswax: They are rich in natural emollients. They soften rough patches and lock in hydration. Plus, they form a breathable layer to protect lips from environmental stress.
  • Castor seed oil: It is very moisturizing. It hydrates lips and helps them keep moisture, so you won’t need to reapply as often.
  • Dimethicone and ceramides: help repair skin. They fill tiny cracks and smooth rough areas. Plus, they form a flexible layer that protects against dryness and environmental harm.

Avoid lip care products that contain menthol, camphor, eucalyptus, cinnamon, citrus, mint, or fragrance. These ingredients can irritate sensitive lips even more.

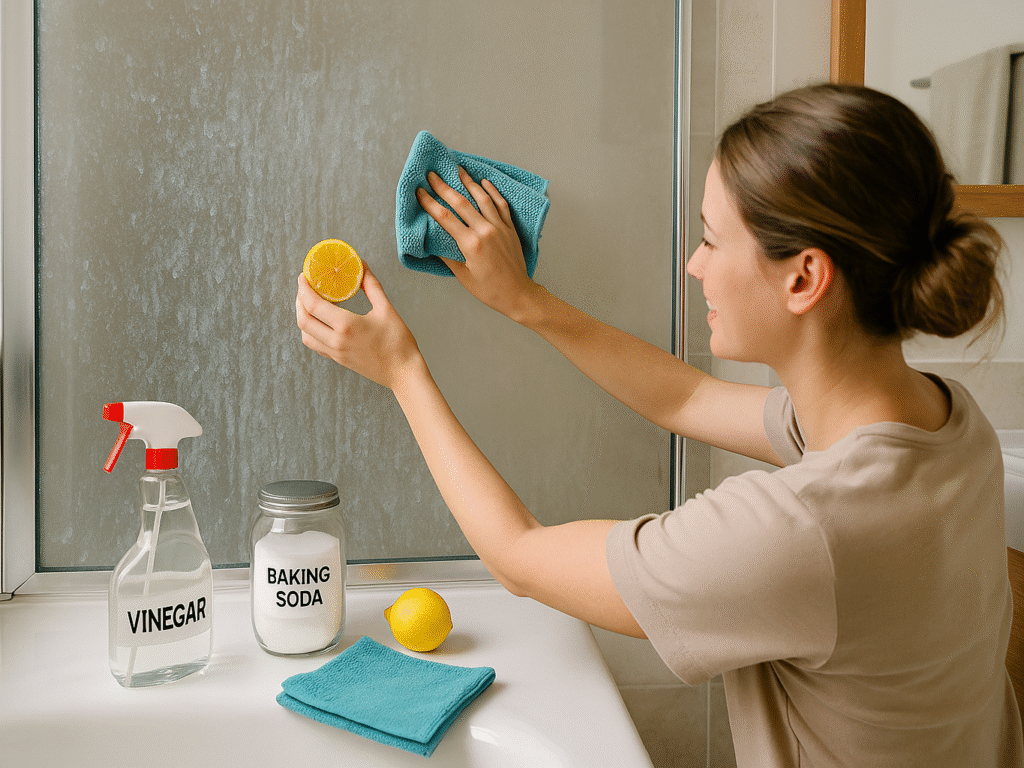
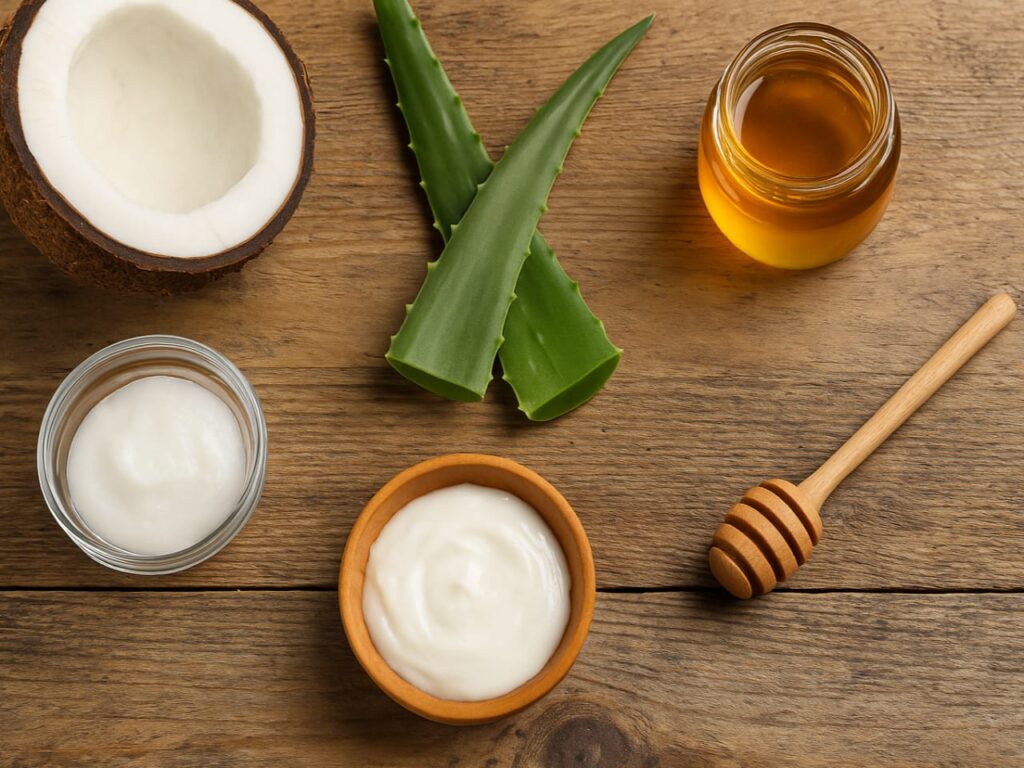
2. Natural Home Remedies

Your kitchen likely contains several ingredients that can soothe chapped lips.

  • Coconut oil: It is rich in anti-inflammatory and antibacterial properties. It soothes irritated lips and deeply moisturizes them. Plus, it helps protect against infections and environmental damage.
  • Honey: It is a natural humectant. It attracts moisture, speeds up healing, and provides antibacterial protection. This helps keep cracked lips from getting infected.
  • Aloe vera gel: Aloe is famous for its soothing and anti-inflammatory effects. It cools chapped lips and reduces redness, swelling, and irritation.
  • Olive oil: It is a natural emollient. It is rich in antioxidants and healthy fats. It nourishes dry lips, seals in moisture, and helps the skin heal.

3. Lifestyle Changes for Preventing Chapped Lips

Healthy lips aren’t just about what you apply; they’re also about what you do daily. A few minor tweaks can keep your lips soft and protected.

  • Stay hydrated: Drinking water daily keeps your skin healthy. It helps your lips stay moist and reduces cracking or peeling.
  • Use a humidifier: Dry air, especially in winter or while you sleep, takes moisture from your lips. A humidifier restores balance and keeps your lips from drying out.
  • Stop licking your lips: It might feel good now, but saliva dries fast. This can leave your lips drier and more irritated than before.
  • Apply lip balm before bed: Nighttime is prime healing time. Thick balms, such as petroleum jelly, trap moisture overnight. This helps with deep repair and protection.
  • Use sun protection: Lips are sensitive to sunburn. Use a balm with SPF 30+ and zinc or titanium oxide to block harmful UV rays and prevent damage.

1% hydrocortisone products, like Dr. Dan’s Cortibalm, can soothe inflammation and pain in severely chapped lips. This low-dose steroid calms irritation, while moisturizing ingredients help with healing. Apply lip treatments often throughout the day, especially after meals and drinks. Most chapped lips show improvement within 2-3 weeks with consistent care. See a healthcare provider if your condition stays the same or gets worse, even with treatment.

Tips to Prevent Both

Your best defence against cold sores and chapped lips is prevention. Good lip care habits can reduce these uncomfortable conditions significantly. Your first defence starts with daily protective measures. Dermatologists recommend using a gentle lip balm several times a day. It helps create a strong moisture barrier. Look for products that contain:

  1. Petrolatum, or white petroleum jelly, keeps moisture in better than wax-based balms. It forms a firm seal that stops lips from drying out all day.
  2. Shea butter is a natural moisturizer. It has fatty acids that nourish lips deeply. It soothes irritation and keeps lips soft. Best of all, it doesn’t feel greasy.
  3. Dimethicone is a skin protectant. It creates a smooth, breathable barrier on the lips. This barrier shields the lips from wind, cold, and other damage.
  4. Castor seed oil and mineral oil help keep moisture in. They seal the skin to keep your lips soft, supple, and hydrated longer.
  5. Ceramides are lipids found in the skin. They help rebuild the protective barrier. This restores cracked lips and boosts moisture retention.

Avoid certain ingredients in lip products. Some popular options can worsen these conditions. Stay away from products with camphor, eucalyptus, flavouring (like cinnamon and mint), fragrance, menthol, phenol, or salicylic acid.

Sunscreen protection is vital outdoors. Pick a lip balm with SPF 30 or higher that has titanium dioxide or zinc oxide. Make sure to reapply every two hours when you’re outside. The sun doesn’t just chap your lips; it might trigger cold sores, too.

The air around you matters a lot. Using a humidifier at home is effective, especially in your bedroom. It is helpful if you breathe through your mouth while you sleep. Drinking enough water helps keep your lips healthy from the inside out.

What you eat affects your lips’ strength. Foods rich in vitamins A (like eggs and carrots), C (citrus fruits), E (nuts and leafy greens), and zinc (oysters and yoghurt) repair damage, strengthen your immune system and retain moisture.

These habits can make both conditions worse, so try to stop:

  • Licking or biting your lips.
  • Touching your mouth when your hands aren’t clean.
  • Holding metal objects with your lips.
  • Smoking (it hurts your skin’s collagen and elastin)

Your lips should look better within 2 to 3 weeks if you follow these prevention tips daily.

Product Picks by Budget (Optional Section)

Need affordable solutions for your lip problems? The right budget-friendly products can help you treat chapped lips or cold sores. These options give you great value without cutting corners on quality.

1. Budget Friendly: Chap Ice Lip Balm 3-pack (~$4–$5)

This Chap Ice lip balm gives you solid protection at a price that won’t break the bank:

  • Made in the USA, this balm features a soothing blend of aloe and Vitamin E, packed into convenient lip chap containers that make application easy anytime, anywhere.
  • SPF 15 protection helps guard your lips from harmful UV rays, which can trigger or worsen a Cold sore on the lip, making prevention part of your daily routine.
  • The fast-acting formula quickly repairs cracked, dry lips by intensely moisturizing and softening the skin, providing comfort and noticeable improvement within just a few uses.
  • Multi-pack options allow you to stash a balm at home, in your car, or at work, ensuring you’re never without protection, no matter where your day takes you.

This budget-friendly option ended up being a great choice because it combines sun protection with moisturizers. You get both healing and prevention benefits, which we talked about earlier.

 2. Mid-Range: Palmer’s Cocoa Butter Lip Balm SPF 15

Palmer’s lip balm costs a bit more, but you’re paying for high-quality natural ingredients that deliver:

  • Rich cocoa butter acts as a deep moisturizer, softening rough, dry lips. It’s beneficial when figuring out chapped lips vs cold sores and needing daily hydration either way.
  • Vitamin E helps repair and protect damaged skin, working as an antioxidant that improves overall lip texture and helps soothe irritation from dryness or a Cold sore on the lip.
  • With SPF 15 sun protection, it shields lips from harmful UV rays, perfect for preventing dryness, sun-triggered flare-ups, or worsening lip issues during outdoor exposure.
  • This formula comforts irritated lips, preventing chapping, windburn, and cracking while encouraging healing. It’s a soothing daily balm that works across all seasons and skin types.
  • Packaged in convenient lip chap containers, it’s travel-friendly, allergen-free (no gluten, coconut, lanolin, or parabens), and ideal for sensitive skin or anyone needing a gentle, effective option

Yes, it is a great choice, especially when you have sensitive lips that need good protection from environmental damage.

3. Premium: Laneige Lip Sleeping Mask (for overnight healing)

This premium option delivers professional results for those who want to invest in overnight treatment:

  • Korean skincare technology offers advanced moisturizing power, providing intense, lasting hydration to help manage both chapped lips vs cold sores and keep lips soft and smooth throughout the night.
  • Berry Fruit Complex combines antioxidants, coconut oil, shea butter, and murumuru seed butter to nourish and repair lips, enhancing moisture and promoting healing for dry, cracked lips or a Cold sore on the lip.
  • Clinical studies showed a 135% increase in hydration immediately after use, making this product an effective option for restoring moisture and preventing lips from drying out or cracking.
  • 93% of users reported their lips were noticeably softer with reduced flaking after just one week of use, highlighting its power to heal and maintain smooth, healthy lips.
  • The overnight treatment formula allows lips to heal without interruption, ensuring you wake up to hydrated, rejuvenated lips, even after a long day of exposure to environmental elements.

The mask works like an intensive treatment. Your lips repair themselves as you sleep, and the antioxidants protect against more damage.

Note that each product works better for specific needs. Daytime protection comes from balms with SPF, while overnight masks help heal severely chapped lips.

Conclusion: Know the Difference, Treat It Right

A side-by-side comparison of healthy, moisturized lips and lips with a cold sore, emphasizing the visible difference. Includes icons like a lip balm with SPF, a water bottle, and a humidifier in the background to suggest prevention tips.

Knowing the difference between chapped lips and cold sores is key to choosing the proper treatment. While they may look similar, they require very different care. Cold sores come from the herpes simplex virus. They often need antiviral treatment and usually heal in 8 to 14 days. Chapped lips improve when you moisturize them regularly. They usually heal in 2 to 3 weeks. About 90% of adults will get cold sores. So, preventing them and taking care of them early is important.

Your daily habits play a big role in lip health. Use lip balm with SPF 30+. Stay hydrated. Avoid irritants like menthol or camphor. Running a humidifier at night also helps prevent dryness. Quick identification of chapped lips vs cold sores leads to faster relief. If symptoms last more than two weeks, see a healthcare provider. It might mean a more serious condition.

Best Foundation for Dry Skin (2025): Affordable to Luxe Options

Close-up of a woman with dry skin applying a hydrating foundation with a sponge

The Struggle of Makeup on Dry Skin

Ever applied foundation only to end up looking flaky instead of flawless? Yep, the struggle is way too real. One minute, you’re applying that creamy formula, hoping for a fresh look. Then, your skin feels tight and cracked, looking even drier than before. Your foundation clings to dry patches. It won’t blend, no matter how much you prep. And if your skin is sensitive, too? That’s a whole new level of frustration.

That’s why finding the best foundation for dry skin isn’t a want; it’s a need. When your skin needs hydration, comfort, and a natural look, this product delivers.

In this guide, we’ll explore the best foundations for dry skin in 2025. We’ll cover both budget-friendly options and high-end splurges. For daily flakiness or long-lasting makeup, we have the right products and expert tips. Your dry skin will love our formulas.

Why is my skin so dry even when I moisturize?

A woman with visibly dry skin examining her face in the mirror, surrounded by skincare products on a vanity counter in a softly lit bathroom.

You apply moisturizer every morning. Sometimes at night, too. And yet… your skin still feels dry, tight, and flaky. You’re not alone. Many people ask the same thing: “Why is my skin so dry even when I moisturize?”

The truth is, dry skin needs more than just any moisturizer. It needs the proper routine and the right ingredients to stay soft and healthy. Here’s what might be going wrong:

1. You might be using the wrong kind of moisturizer.

Not all moisturizers work the same way. Some may feel smooth at first, but fail to treat deeper dryness. For real results, choose products that hydrate beneath the surface, nourish the skin barrier, and lock in moisture. That’s how you get soft, healthy skin that lasts beyond the first hour.

  • Humectants (like hyaluronic acid and glycerin) attract water into your skin. That sounds good! But if the air is dry, it will pull moisture from deeper skin layers, making things worse.
  • Emollients like squalane, fatty acids, and cholesterol fill gaps between skin cells. They also smooth out rough areas. However, they cannot fully prevent water loss by themselves.
  • Occlusives, such as shea butter, petrolatum, and dimethicone, form a seal on your skin. This helps keep water locked in. This step is crucial if you live in a dry or cold climate.

Choose moisturizers that combine all three types: humectants, emollients, and occlusives. Apply to damp skin to lock in moisture, and seal with an occlusive if necessary to prevent water loss, ensuring your skin stays hydrated and nourished throughout the day.

2. Your cleanser could be damaging your skin barrier.

Even with the perfect moisturizer, your face wash could be sabotaging your efforts. Harsh cleansers can strip your skin’s natural oils, leaving it vulnerable to dryness and irritation. Choose gentle, hydrating cleansers to preserve your skin’s barrier and keep moisture locked in for longer-lasting hydration.

  • Cleansers that have a high ph level, particularly foaming types, can remove the skin’s essential natural oils, leading to dryness and potential irritation over time if used regularly.
  • Ingredients like alcohol, artificial fragrances, and sulfates can harm the outer layer of your skin, resulting in increased dryness and irritation that can affect overall skin health and comfort.
  • When the protective barrier of your skin becomes compromised, it loses moisture more rapidly than you can replenish, making it increasingly challenging to maintain proper hydration and balance.

Use a gentle, sulfate-free cleanser that’s enriched with soothing ingredients like oat extract, aloe vera, or ceramides. These help maintain and strengthen your skin’s barrier, preventing moisture loss and ensuring your skin stays hydrated and protected throughout the day.

3. You’re missing the moisture window.

It’s simple but important: If you wait too long to moisturize after washing your face, you lose hydration quickly. Once the water evaporates from your skin, dryness starts to set in. Apply your moisturizer within 30 to 60 seconds to prevent moisture from escaping.

  • As soon as water evaporates from freshly cleansed skin, dryness increases rapidly. This happens because your skin no longer has the moisture it needs to stay hydrated. To avoid this, don’t delay your moisturizer application. Apply it right after cleansing to lock in hydration before it evaporates.
  • Applying moisturizer while your skin is still slightly damp helps trap water and lock in hydration. This is crucial for preventing dryness and ensuring your skin stays soft and smooth. Make it a habit to moisturize immediately after cleansing to get the most out of your skincare routine.

Moisturize within 30 to 60 seconds after cleansing. This is the optimal time window to lock in moisture before it evaporates from your skin. Don’t let your skin dry out in between steps; this simple practice can significantly improve your hydration and help keep your skin soft and supple.

4. Environmental conditions are working against you.

Sometimes, the issue isn’t your skincare products; it’s your environment. Indoor heating or air conditioning dries out the air, drawing moisture from your skin day and night, leaving it dehydrated and prone to irritation.

  • Long, hot showers may feel good, but strip your skin of its natural oils, weakening your barrier. This leaves skin more vulnerable to dryness and irritation. Opt for warm showers instead of hot ones to preserve your skin’s moisture and natural oils.
  • Overusing exfoliants, retinol, or acids can weaken your skin barrier. When your skin barrier is compromised, moisture escapes, leaving your skin dry, irritated, and more susceptible to environmental stress. Limit these products to once or twice a week for balanced skin health.

To combat dry air, use a humidifier, particularly at night. Adding moisture to the air helps prevent your skin from losing hydration while you sleep. This simple step can make a noticeable difference in how hydrated your skin feels throughout the day.

5. The Wrong Foundation Can Ruin Your Hard Work

Even with well-prepped skin, matte or heavy foundations can make you appear patchy or dry. These formulas cling to dry patches, highlighting texture and creating an uneven finish. They may also cause irritation or redness, especially on sensitive skin, leaving you with a less-than-flawless appearance.

  • Many “long-lasting” or “oil-free” foundations tend to cling to dry patches, making them more noticeable and emphasizing skin texture. These formulas can leave your skin looking patchy and uneven, which is especially problematic for dry skin.
  • If your skin is sensitive, these foundations can cause irritation or redness. Their ingredients may disrupt your skin’s barrier, leading to discomfort or inflammation. Choosing gentler formulas is key to avoiding these issues and achieving a smooth finish.

Switch to a hydrating foundation for dry skin. Look for labels with words like “glow,” “moisturizing,” or “dewy.” Foundations with ingredients like hyaluronic acid, niacinamide, or squalane provide deep hydration, improve texture, and offer a smooth, radiant finish without emphasizing dryness or irritation.

Before You Apply Makeup, Prep Properly

A step-by-step flat lay of skincare and foundation products arranged neatly with labels for cleanse, serum, moisturize, and foundation. Soft lighting highlights textures like cream, gel, and serum on a marble vanity top, symbolizing a skin prep routine for dry skin.

Here’s a simple and effective skin prep routine before applying foundation: Start with a mild, hydrating cleanser to remove impurities without stripping moisture. Follow with a hydrating serum, then apply a rich moisturizer to lock in hydration. Let the moisturizer absorb fully, ensuring a smooth, hydrated base for flawless makeup.

1. Cleanse

Use a mild, hydrating cleanser to cleanse your skin without stripping away its natural moisture. This sets a fresh base for the rest of your skincare.

2. Pat Dry

After cleansing, gently pat your skin dry, leaving it slightly damp. This helps subsequent products absorb more effectively, maximizing hydration.

3. Serum

Apply a serum rich in humectants, such as hyaluronic acid. This helps draw moisture into your skin, providing deep hydration and improving the overall look of your complexion.

4. Moisturize

Follow up with a rich moisturizer containing emollients and occlusives. These ingredients help lock in moisture and nourish the skin, leaving it soft and smooth.

5. Absorb

Let your moisturizer absorb fully into your skin, about 5 to 10 minutes, before applying makeup. This ensures a hydrated, smooth base for foundation.

Now your skin is ready. Ready for a foundation that won’t crack, cake, or cling to the flakes. Keep reading for our expert picks for the best foundation for dry skin in 2025, tested, loved, and made for your skin type.

What to Look for in the Best Foundation for Dry Skin

To find the best foundation for dry skin, choose ones with hydrating ingredients. Look for hyaluronic acid, glycerin, and squalane. These ingredients trap moisture. They keep your skin smooth, hydrated, and glowing all day. Plus, they won’t cling to dry patches or flakes.

1. Hydrating Ingredients for Dry Skin

Choose a hydrating foundation for dry skin. Look for ingredients like hyaluronic acid and glycerin. These humectants attract moisture to your skin, helping it stay hydrated for longer. They provide deep nourishment. This keeps your foundation smooth and fresh all day without highlighting dryness.

Squalane is another key ingredient in foundations designed for dry skin. It acts as an emollient, providing moisture and softening the skin’s surface. A hydrating foundation with squalane is perfect for dry skin. It helps restore moisture balance. This leaves a smooth and supple base for applying makeup.

2. Creamy texture for a smooth finish

A creamy texture in foundations works wonders for dry skin. Hydrating foundations have a creamy finish. They blend well and stop dryness from settling into fine lines. This foundation gives a dewy, glowing look. It boosts your skin’s natural shine and keeps it hydrated.

If you’re looking for a flawless finish, opt for a hydrating foundation with a dewy texture. This provides a glowing, fresh look, ideal for dry skin. A hydrating foundation for dry skin gives a dewy finish. It helps your complexion look healthy and youthful. Plus, it won’t highlight patches or rough spots.

3. Avoid matte foundation and powder formulas

Matte foundations can dry out the skin and highlight texture. This often makes dry skin look patchy. These formulas tend to absorb moisture and can worsen dryness. Choose a hydrating foundation for dry skin. It should give you a moisturizing and natural look for the best results.

Powder foundations can exacerbate dryness by clinging to flaky areas and uneven textures. To prevent this, choose foundations designed for dry skin that provide more moisture. Hydrating foundations give you a smooth and even look. They don’t highlight dry areas or irritate. This way, you stay comfortable all day.

4. Buildable Coverage for Dry Skin

Hydrating foundations provide buildable coverage. This helps you achieve a flawless look without drying out your skin. Choose a foundation that offers light to medium coverage and keeps your skin hydrated. This ensures that your foundation remains smooth and natural throughout the day.

A lightweight formula is essential for dry skin. Heavy foundations can settle into dry areas and make your complexion appear cakey. Hydrating foundations are lightweight, so they allow you to build coverage easily. This makes them great for dry or sensitive skin.

Best Foundation for Dry Skin: Top 3 Picks by Budget

To choose the best foundation for dry skin, look for one that hydrates. It should also give a smooth finish and not cling to dry patches. Here are the top three foundations by budget. Each one meets different needs and preferences.

1. Budget Option: Maybelline Fit Me Dewy and Smooth Foundation

  • Price: ~$8
  • Key Ingredients: Glycerin, SPF 18
  • Ideal for: Daily wear, light to medium coverage
  • Amazon Rating: ⭐⭐⭐⭐

Why it’s great for dry skin:

  • Hydrating formula: Glycerin pulls moisture into the skin, providing hydration throughout the day. This makes it a great choice for those dealing with dry skin that feels tight or flaky.
  • SPF 18: Shields the skin from UV damage. It helps to stop dryness from sun exposure.
  • Light-to-medium coverage: This foundation balances skin tone well. It feels light, not heavy. This is important for dry skin.

Use: A damp sponge for the best, most seamless application. This technique keeps the foundation from settling in dry areas. It gives your skin a smooth, dewy finish.

2. Mid-Range Option: L’Oréal Paris True Match Lumi Healthy Luminous Makeup

  • Price: ~$15–$18
  • Key Ingredients: Vitamin C, Antioxidants
  • Ideal for: Hydrating foundation for dry skin and dry-sensitive skin.
  • Amazon Rating: ⭐⭐⭐⭐

Why it’s great for dry skin:

  • Radiant finish: This lightweight formula offers a luminous glow without the grease. It is ideal for dry skin needing moisture and a touch of radiance.
  • Hydrating benefits: Vitamin C and antioxidants protect and nourish the skin. They keep it hydrated, so you need less moisturizer before applying foundation.
  • Great for dry and sensitive skin: This foundation is perfect for those who have skin that easily gets irritated or red. It provides a dewy, healthy-looking finish without aggravating skin issues.

Perfect for: Those with dry, sensitive skin who need both hydration and a glowing finish.

3. Premium Option: NARS Light-Reflecting Foundation

  • Price: ~$50
  • Key Ingredients: Light-reflecting complex, vegan
  • Ideal for: The best foundation for dry sensitive skin.
  • Amazon Rating: ⭐⭐⭐⭐⭐

Why it’s great for dry skin:

  • Skincare-infused formula: This foundation has a light-reflecting complex that blurs flaws and smooths skin. It also hydrates and offers anti-ageing benefits.
  • Lightweight, serum-like feel: This foundation is weightless. It wears like a second skin, unlike heavier options. It helps reduce the appearance of dry patches and keeps your skin looking fresh.
  • Blurry texture: This foundation smooths rough spots and fine lines. It’s ideal for dry skin that tends to be flaky or uneven.

Ideal for: Anyone seeking a luxury foundation that hydrates dry skin. It also provides skincare benefits and gives a flawless, glowing finish.

Tips for Choosing the Best Foundation for Dry Skin

  • Hydrating Foundation for Dry Skin: To find the best foundation for dry skin, look for hydrating ingredients. Good options include hyaluronic acid, glycerin, and squalane. These help lock in moisture and prevent the foundation from accentuating dry patches.
  • Why is my skin so dry even when I moisturize? It could be due to harsh cleansers, heat or AC, or using the wrong moisturizer. It’s essential to hydrate adequately before applying foundation to ensure a smooth, long-lasting finish.
  • For dry, sensitive skin: Choose a foundation without irritating ingredients. Look for options free from alcohol and fragrances. Foundations with added vitamins, antioxidants, or calming agents will help soothe your skin while keeping it moisturized.

These options and tips will guide you in finding the perfect foundation for your dry skin. No matter if you want an affordable, mid-range, or premium choice, each product offers hydration and a smooth, radiant finish.

Application Tips: How to Make Foundation Work on Dry Skin

Flat lay of hydrating foundation tools on a towel: primer, facial oil, sponge, and setting spray in soft lighting.

To apply foundation on dry skin, use the right products and techniques. This helps prevent cakiness, patchiness, and irritation. To get a smooth, even finish, use hydrating primers and damp beauty blenders. Also, avoid powders. Follow these tips to make the best foundation for dry skin work effectively for you.

1. Start with a hydrating primer or facial oil.

To keep your skin moisturized all day, begin with a hydrating primer or facial oil. These products give you a smooth, nourished base. This helps your foundation go on easily. A hydrating foundation for dry skin must have a base that locks in moisture. This way, your skin stays plump and hydrated.

Choose primers that have glycerin or hyaluronic acid. These ingredients help add moisture. Applying a light layer of facial oil can provide an extra dose of moisture, especially for dehydrated skin.

2. Use a damp beauty blender, not brushes.

Brushes can lift dry skin flakes and create patchiness, leaving your best foundation for dry skin looking uneven. Instead, use a damp beauty blender. The sponge adds moisture, which helps press the foundation into your skin. This ensures an even application and keeps it from sticking to dry patches.

Dampen your beauty blender with a hydrating mist or setting spray. This helps blend the product. It also makes your hydrating foundation for dry skin last longer and prevents it from drying out.

3. Avoid powder unless it’s necessary.

Powder can be extremely drying for the skin, making it an enemy of dry and sensitive skin. If you’re using the best foundation for dry sensitive skin, try to avoid powder altogether. If you must set your foundation, use a light touch and focus only on areas that tend to get oily, like the T-zone.

Choose a translucent powder and apply it sparingly with a fluffy brush. Avoid matte powders, as they can make dry skin look even more parched.

4. Set with Hydrating Spray, not Matte Setting Spray.

Matte setting sprays can take moisture from your skin. This isn’t great when you’re using the best foundation for dry skin. Instead, opt for a hydrating setting spray that locks in moisture and gives your skin a fresh, dewy finish. These sprays keep your skin looking hydrated all day. They are great, especially with a hydrating foundation for dry skin.

Choose setting sprays with aloe vera or hyaluronic acid. They add hydration. These sprays make your makeup feel good. They help it last longer and keep your skin from drying out.

These tips will help your foundation for dry, sensitive skin look flawless. It will also make you feel comfortable and stay hydrated all day. The right mix of products and methods can give you a smooth, glowing complexion. It won’t highlight any dry patches.

Real Talk: Should You Fix Your Skin or Buy a Better Foundation?

Flat lay of exfoliator, sleeping mask, water bottle, and hydrating foundation for dry skin care and makeup prep.

Short answer: Do both.

A hydrating foundation for dry skin can work wonders, but it’s only part of the solution. The key to achieving flawless makeup starts with healthy, nourished skin. When your skin is well-prepped and hydrated, the best foundation looks and lasts better.

Here’s how to take care of your skin to make foundation work even harder for you:

1. Gentle exfoliators 

(like PHA or lactic acid) They are a game changer. These acids slough off dead skin cells without irritating your sensitive skin. They smooth rough patches. This way, your favourite foundation for dry skin glides on evenly and won’t settle into dry spots.

2. Sleeping masks 

They are fantastic for an overnight boost of moisture. They deliver deep hydration and lock it in while you sleep, ensuring you wake up with plump, smooth skin. This makes foundation application much more effective by providing a hydrated base.

3. Drinking water 

It won’t cure everything, but it helps keep your skin hydrated. Water supports your skin’s barrier. This helps prevent dryness and irritation.

In short, excellent skin care combined with the best foundation for dry sensitive skin creates a flawless, natural finish. Healthy skin is the secret to making your makeup look even better.

Conclusion: Flawless skin starts with the right foundation (and prep).

Choosing the best foundation for dry skin is essential for achieving a flawless complexion, but prep is just as important. Choosing between budget-friendly foundations like Maybelline Fit Me Dewy + Smooth and premium ones like NARS Light Reflecting Foundation can be key. The proper foundation truly makes a difference.

Remember, there’s no one-size-fits-all solution, but hydration is always key. A hydrating foundation with a good skincare routine will keep your skin radiant and comfortable all day.

Don’t forget: healthy, nourished skin is the secret to making your foundation work even better. With the right combination of skincare and makeup, your dry skin will have the glow it deserves.

Try one of these foundation picks today and give your dry skin the glow it deserves.

Best Portable Vacuum for Pet Hair: Top Picks for Effortless Cleaning | Powerful & Efficient

A modern portable vacuum cleaner removing pet hair from a hardwood floor while a dog lounges nearby.

If you’ve had a pet, you know the struggle. There’s fur on the couch, in the car, and even on your favourite black hoodie. Standard vacuums often fall short. You need something quick, light, and effective. That’s where finding the best portable vacuum for pet hair matters.

A portable vacuum can save you time and sanity. It helps with dog hair on the carpet and cat fur in hardwood floor cracks. But with so many options out there, how do you know which one works?

In this guide, we’ll cover the best features to consider. We’ll also discuss common issues, like weak suction and short battery life. Finally, we’ll share our top vacuum picks for every budget. By the end, you’ll know how to pick the best portable vacuum for pet hair. It will fit your space, needs, and furry chaos.

Why does pet hair require a special vacuum?

Pet hair is much more than just a nuisance; it can embed itself deep into carpets, couches, and car interiors. Standard vacuums aren’t built to handle the job, which is why the Best Portable Vacuum for Pet Hair is a must-have. Here’s why a pet-specific vacuum is essential:

1. Strong Suction Power

Pet hair can be stubborn and cling tightly to surfaces. A powerful vacuum pulls hair from deep carpet fibres and upholstery. This makes your home cleaner and fresher.

2. Tangle-Free Brushes

Regular vacuums can get clogged with pet fur, especially long hair. Specialised vacuums have tangle-free brush rolls. This design keeps them running smoothly. You won’t need to stop often for maintenance.

3. HEPA Filters for Allergens

Pet hair isn’t just messy. It also carries dander that can cause allergies. A vacuum with HEPA filters catches allergens. This helps improve air quality and makes your home healthier.

4. Lightweight & Portable

The Best Portable Vacuum for Pet Hair is designed for convenience. It’s easy to use. You can clean tight spaces, your car, or soft furniture. This makes cleanup quick and effortless.

If you have pets, a standard vacuum won’t do the job. A top portable vacuum for pet hair keeps your home free of stubborn fur. It also helps improve air quality and saves you time. Investing in the right vacuum is a game-changer for any pet owner.

How to Choose the Best Portable Vacuum for Pet Hair

Close-up of a vacuum cleaner with pet hair in the filter and specialized attachments.

Choosing the best portable vacuum for pet hair? Consider these key factors to find the right model for you. Pet hair can be stubborn, and a regular vacuum won’t cut it. Here’s a mini buyer’s guide to help you make the best choice.

1. Suction Power

Suction is key when it comes to removing pet hair from carpets, furniture, and floors. To effectively lift even the most embedded hair from deep fibres, you need a vacuum with strong suction power. Cordless models with a motorised brush or high-powered handheld vacuums are ideal for tackling pet hair. Suppose you’re looking for the best vacuum for pet hair and carpet. In that case, these vacuums are designed to provide powerful suction and specialized tools that can easily handle the toughest pet hair on carpets and upholstery.

2. Filters 

For pet owners, it’s crucial to consider filtration systems. HEPA filters are ideal as they trap both pet hair and allergens such as dander. This is especially important if you or someone in your household has allergies. A good filter will improve air quality and prevent pet-related irritants from circulating.

3. Battery Life 

If you’re opting for a cordless vacuum, battery life is essential. A vacuum with a longer runtime allows you to clean many areas in one go, whether it’s your home, car, or furniture. Choose models that run for 20 to 30 minutes. This ensures efficient, uninterrupted cleaning.

4. Attachments and Accessories 

The right attachments can make a world of difference. Look for vacuums that come with special tools. These can include crevice tools, motorized brush heads, and upholstery brushes. These tools will help you remove pet hair from tricky places, like between couch cushions, on stairs, or in your car.

5. Portability:

The best portable vacuum for pet hair should be light and easy to move. It should be comfortable to hold for extended periods, especially for detailed cleaning tasks, and easy to store when not in use.

The best portable vacuum for pet hair has strong suction, dependable filters, a long battery life, useful attachments, and is easy to carry. Taking the time to choose the right vacuum will save you hours of cleaning and help keep your home hair-free and allergen-free.

Product Recommendations: Top Picks for Every Budget

1.  Budget Pick: Pet Hair Handheld Vacuum Cordless Vacuum ($30–$40)

  • Strong Suction Power: With a powerful 20,000 Pa suction, this handheld vacuum easily picks up pet hair. It works well on carpets, furniture, and floors. This makes it ideal for homes with pets.
  • Large 500ml Dust Cup: This model has a large 500ml dust cup. It can hold a lot of pet hair and debris. It cuts down on how often you need to empty it. This makes it great for cleaning big spaces or several rooms at once.
  • 30 minutes of cordless use: This vacuum runs for 30 minutes on a 4000 mAh lithium battery. You can easily remove pet hair from every corner of your home without recharging.
  • Versatile Attachments for Detailed Cleaning: This product comes with several attachments. You get a crevice nozzle, a brush nozzle, and a long hose. These tools help you clean tight corners, upholstery, and your car interior easily.

2. Mid-Range Pick: Vazone Cordless Vacuum Cleaner ($50–$70)

  • Strong 35 KPa Suction and Smart Monitoring: The new digital motor provides 35 KPa suction power. It easily lifts dirt, dust, and pet hair from various surfaces. The IQ LED display keeps you informed with real-time updates.
  • Battery Life and Quick Charging: This vacuum comes with six 2,200 mAh batteries. You can enjoy up to 40 minutes of use in standard mode. The fast charging feature lets you swap batteries. This way, you can clean continuously without delays.
  • Advanced HEPA Filtration: This 6-stage HEPA system traps 99.99% of fine dust, pet dander, and allergens. It ensures cleaner air, making it ideal for people with allergies or asthma.
  • Anti-Tangle V-Shaped Brush with LED Lights: This V-shaped brush stops tangles. It guides pet hair and debris right into the vacuum path. LED headlights brighten dark spots, making it easier to spot dirt. This helps you clean thoroughly, even in low light.

3. Premium Pick: Rechargeable Cordless Vacuum for Pet Hair ($160–$170)

  • 45,000 Pa Suction Power: This powerful vacuum has a strong 45 kPa suction. It uses a 550 W motor that runs at 180,000 RPM. This means it quickly removes pet hair and debris from any floor type.
  • 65-Minute Runtime: This model has a battery capacity of 8 * 2500 mAh. It provides up to 65 minutes of use on lower suction settings. This gives you plenty of time to clean large areas or several rooms without stopping.
  • Flexible Anti-Tangle Electric Brush: The rotating brush head bends easily. Its V-shaped comb teeth help reduce tangles. Plus, six LED lights brighten dark areas for a complete clean.
  • 8-Stage Filtration & 1.6L Large Dust Cup: This system captures 99.9% of dust and allergens. It releases clean air. The 1.6L dust cup holds a lot of debris. You can empty it with just one button for easy use.

Pet Hair vs. Hardwood Floors: What You Should Know

Vacuum with tangle-free brush rolls deep-cleaning pet hair from a plush carpet.

When it comes to cleaning pet hair on hardwood floors, not just any vacuum will do. Pet hair tends to cling to smooth surfaces, making it trickier to clean compared to carpets. This is where the best portable vacuum for pet hair and hardwood floors truly stands out. Designed to tackle this challenge, it cleans effectively without damaging your floors.

One key feature to look for in the Best vacuum for pet hair and carpet is soft rollers. These rollers are gentle on hardwood surfaces while still providing strong suction to pick up stubborn pet hair. They clean effectively without causing damage, ensuring your floors stay in excellent condition by preventing scratches or scuff marks.

Another vital consideration is no-scuff wheels. Regular vacuum wheels can mark hardwood floors, but no-scuff wheels glide smoothly, preventing damage while cleaning. Additionally, many of the best portable vacuums for pet hair and hardwood floors include a suction-only mode, which reduces noise, prevents debris from moving, and ensures a safer, quieter clean.

Carpet Deep-Cleaning: What Works

When it comes to removing pet hair from carpets, using the best vacuum for pet hair and carpet is essential for a deep, thorough clean. Pet hair can get stuck in carpet fibers. This makes it hard to remove without the right tools. Here’s what works to ensure your carpet gets the clean it deserves:

1. Tangle-Free Brush Rolls

Pet hair can quickly clog up standard vacuum brush rolls. Choose a vacuum with tangle-free brush rolls. These stop hair from wrapping around the bristles. This feature helps keep suction strong and reduces maintenance.

2. Strong Suction Power

Deep suction is critical when cleaning pet hair from carpets. Carpet vacuums have strong suction. They pull out hair and dirt from deep in the fibers. This leaves your carpet clean.

3. Anti-Static Features

Pet hair attracts static. This makes it cling to carpets and vacuum brushes. Anti-static technology cuts down on static cling. This makes it easier to lift and remove stubborn pet hair from your carpet.

4. HEPA Filtration

If you have allergies or pet dander, HEPA filters catch tiny particles. This helps keep the air clean. This is particularly useful for allergy sufferers.

Investing in a vacuum with these features will provide a more efficient and effective cleaning solution for your carpets and keep them free from embedded pet hair.

Corded vs. Cordless: Which is Better for Pet Owners?

When selecting the best portable vacuum for pet hair, you must decide between a corded or cordless model. Each type has its pros and cons. The best choice often depends on your lifestyle and cleaning needs.

1. Corded Vacuums

  • Consistent Power: Corded vacuums provide steady, strong suction. This makes them great for big homes or tough cleaning tasks. If you have a lot of pet hair or thick carpets, a corded vacuum is a great option.
  • No Battery Worries: A corded vacuum means you won’t run out of power mid-clean. This is especially useful for extensive cleaning sessions.
  • More Suction Power: Corded vacuums usually have more potent suction than cordless ones. This can make them more effective at picking up stubborn pet hair embedded in carpets.

2. Cordless Vacuums

  • Portability and Convenience: Cordless vacuums are light and easy to use. They’re great for quick cleanups and homes with tight corners. They’re also easier to store and use in multiple rooms without being tethered to an outlet.
  • Rechargeable Batteries: Cordless vacuums are handy for moving around. So, be sure to recharge them after each use. Battery life can vary, so look for a model with a longer runtime, especially for large spaces.
  • Ideal for Quick Touch-Ups: If you only need to clean a small area or perform regular touch-ups, a cordless vacuum can offer great convenience without the hassle of dealing with cords.

If you want strong suction and longer cleaning times, choose a corded vacuum. If you value convenience and mobility, especially for quick cleanups, choose a cordless vacuum.

Why Filtration Matters More Than You Think

close-up of a vacuum cleaner’s HEPA filter being removed, with pet hair and dust trapped inside, symbolizing clean air and allergy protection.

When choosing a portable vacuum for pet hair, filtration matters. It affects your home’s air quality, especially if you have pets. If you have allergies or want cleaner air, a vacuum with a sound filtration system is essential.

1. HEPA filters

High-efficiency particulate air (HEPA) filters capture tiny pet dander, dust, and allergens. These can worsen breathing problems. These filters catch particles as small as 0.3 microns. This makes them perfect for people with allergies.

2. Sealed Systems

A sealed vacuum keeps dust, dirt, and allergens trapped inside. This stops them from escaping back into the air while you clean. This matters a lot if you have pets with sensitive lungs or if you have allergies.

3. Cleaner Air

A vacuum with advanced filters makes indoor air better. It removes pet hair, dander, and other tiny particles that can stay in your home. It can make a big difference, especially in homes with pets that shed a lot.

4. Less Odor

Pet hair can sometimes contribute to unpleasant smells. A vacuum with a strong filtration system helps get rid of odors. It traps pet hair and cuts down on bacteria.

Pet owners need a vacuum with HEPA filters and a sealed system. This helps keep their homes clean and free of allergens. It makes sure your vacuum picks up pet hair and cleans the air. This gives everyone a healthier place to live.

Tools & Attachments That Make Pet Hair Cleanup Easier

The best portable vacuum for pet hair is often only as good as the tools and attachments it comes with. Pet hair accessories can speed up cleaning. They make the task easier and less of a hassle. Here are a few must-have tools for pet owners:

1. Motorized Brush Head

A motorized brush or turbo tool works well for getting pet hair out of carpets, upholstery, and rugs. The firm rotating bristles shake loose tough hair, so it’s easier to suction up.

2. Crevice Tool

This slim, angled tool fits into tight spaces. Use it between couch cushions or along baseboards. It helps get every last bit of pet hair in hard-to-reach corners.

3. Pet Upholstery Tool

Designed for furniture and fabrics, this tool is excellent for removing pet hair from sofas, chairs, and even car seats. It’s gentle on fabrics but harsh on hair.

4. Extension Wand

This tool helps you clean high areas like ceilings, vents, and curtains. You won’t need a stepladder, making it ideal for multi-level homes.

Attachments and accessories are essential to getting the most out of your vacuum. Motorized brushes and special tools help pet owners clean up hair easily. They are great for tough spots.

How Weight and Size Impact Everyday Cleaning

The best portable vacuum for pet hair needs to be easy to handle, especially when you’re cleaning daily or tackling multiple areas of your home. Weight and size can make all the difference in your cleaning routine.

1. Lightweight Design

If you’re a senior, a busy parent, or someone who needs to clean frequently, a lightweight vacuum can make a huge difference. Vacuums that are under 5 lbs or have ergonomic designs are easier to maneuver and less straining on the body.

2. Portability for Stairs

A vacuum that’s lightweight and easy to carry makes cleaning stairs, furniture, and different levels simple. Look for vacuums with a compact design that won’t require heavy lifting.

3. Storage Space

If you have limited storage, choose a compact vacuum. It should fit easily in closets or under furniture. Smaller vacuums are easy to store. This makes them great for homes with little space.

4. Multi-Surface Versatility 

Lightweight vacuums work on many surfaces, like wood, carpet, and tile. This makes them great for different areas in your home and even in your car.

If you need something easy to move and store, lightweight vacuums are your best choice. Their portability makes them great for daily cleaning. This is especially true for those with multiple levels or small living spaces.

Final Thoughts: Choosing the Right Fit for Your Home

When choosing the best portable vacuum for pet hair, it’s essential to consider your specific needs. If your pets shed a lot, opt for vacuums with strong suction power. Look for models equipped with special tools like motorized brushes, designed to handle tough pet hair. These vacuums feature unique capabilities to tackle thick fur and ensure a deep clean with every pass.

The layout of your home also plays a significant role in your decision. A lightweight, cordless vacuum is ideal for multi-level homes or hard-to-reach areas, making it easy to clean. For larger spaces, a corded vacuum with more potent suction can save you time while delivering a more powerful clean.

Additionally, your budget will determine which features you can invest in. Higher-priced models often come with better filters and longer-lasting batteries. However, many affordable options still perform well for most pet owners. Consider all these factors when selecting the best portable vacuum for pet hair for your home, including whether you need the best portable vacuum for pet hair and hardwood floors or the best vacuum for pet hair and carpet.

The Easiest Way to Remove Hard Water Stains From Shower Glass (Tested Method)

Sparkling clean glass shower door in a modern bathroom with natural light and no visible water stains.

Did you know that hard water stains can turn from white to green buildup when left untreated on your shower glass? These stubborn mineral deposits, called limescale, leave a chalky residue that gets harder to clean as time passes.

Cleaning experts suggest you clean your shower every two weeks,  or weekly if used heavily,  to stop these stains from becoming a cleaning nightmare. Life gets busy, and sticking to this schedule isn’t always possible. We tested several ways to remove hard water stains from shower glass and found what works best, whether dealing with fresh spots or tough buildup.

Natural solutions like distilled vinegar and baking soda work great, and specialized cleaning products can help restore your shower glass’s original sparkle. You’ll also find proven tips on how to remove hard water stains from glass and keep those annoying water spots away longer.

Understand What Causes Hard Water Stains

Close-up of hard water stains on a shower glass door, showing white, chalky residue caused by mineral deposits.

Hard water stains are the stubborn enemies of bathroom cleanliness that affect homes nationwide. Let’s explore how to remove hard water stains from shower glass. You’ll need to understand what causes these lasting marks to treat and prevent them properly.

1. Why does hard water leave marks on glass

Your pipes carry something daily that creates those annoying cloudy spots on shower doors. Hard water has high levels of dissolved minerals, mainly calcium and magnesium. These minerals come from the water’s path through rock layers before reaching your home. Water becomes “hard” when it has more than 1 grain per gallon (GPG) or 17.1 parts per million of these minerals.

These mineral-rich waters create problems on glass surfaces because:

  • Minerals stay behind when hard water dries on glass surfaces.
  • The remaining minerals create white, cloudy deposits that spoil your shower’s look.
  • Each region has different water hardness levels, and some areas have very hard water, measuring 121 to 180+ mg/l
  • These stains appear faster and are harder to remove in areas with tough water (10.5 GPG or higher), such as the Midwest, Southwest, and Florida.

You need to know that hard water stains aren’t just surface dirt. These mineral deposits have chemically bonded with your shower glass.

Your water’s mineral makeup determines how the stains look. Calcium and magnesium usually leave white or off-white deposits. Other minerals in your water supply create different colored stains:

  • Manganese leaves have black or brown tinted stains
  • Iron shows up as reddish marks (sometimes looking like white slime)
  • Green stains often show acidic water’s reaction with brass or copper pipes

The color of these stains helps you choose the right cleaning method to remove water spots from your shower glass door.

2. How mineral buildup forms over time

Hard water stains don’t appear overnight. They build up slowly and get worse with time. This timeline shows why removing hard water stains from glass doors becomes harder the longer you wait.

The buildup follows this pattern:

  • Original exposure: A thin, almost invisible film of minerals starts forming when hard water touches glass during showers
  • Film development: More minerals collect as time passes, making the glass look hazier
  • Crusty buildup: These deposits get thicker and more complex to clean if left untreated
  • Permanent damage: The glass surface can get etched chemically, causing damage that can’t be fixed

Hard water stains on shower glass are tough to remove because of a special chemical reaction. Minerals from complex water mix with fatty acids from soaps and shampoos in your shower. This creates a potent combination that sticks firmly to glass surfaces, what we know as soap scum mixed with mineral deposits.

Several things affect how fast and severe mineral buildup becomes:

  • Your water’s hardness level (more minerals mean faster buildup)
  • How often do people use the shower
  • Whether someone dries the surfaces after use
  • Water temperature (hot water dries faster, leaving more minerals)
  • The types of glass cleaners you use

These factors help you decide how to remove hard water stains from shower enclosures. For example, see how your local water hardness level helps pick the right cleaner, from affordable Rain, X Shower Door X, Xtreme Clean to mid-range Bio Clean Hard Water Stain Remover or premium Drill Brush Shower Door Cleaning Kit.

Old stains are more challenging to remove than fresh ones. New deposits might clean up easily, but older stains need stronger cleaners and more scrubbing. This explains why removing hard water stains from shower glass gets tougher as stains age.

You can clear your shower glass with less work by spotting mineral buildup early and treating it immediately.

Gather the Right Tools and Products

Set of cleaning tools including microfiber cloths, a squeegee, electric scrubber, and non-scratch pads on a bathroom shelf.

The right cleaning tools make all the difference when you tackle mineral deposits on shower glass. Your budget and the severity of stains will determine which products work best to remove hard water stains from shower enclosures. Let’s look at some options that deliver solid results at different price points.

1. Budget: Rain, X Shower Door Xtreme Clean

Looking for a budget-friendly way to remove hard water stains from shower surfaces? Rain, X Shower Door Xtreme Clean ($6, $7) stands out as a top performer. Users who’ve fought stubborn mineral deposits love this product:

  • Takes out soap scum and hard water stains in minutes
  • Needs less scrubbing than other budget options
  • Spread like toothpaste with a damp cloth in circular motions
  • Leaves no streaks when you rinse and dry properly

Users with very hard, well water report excellent results. After cleaning ten years of buildup, one customer said their shower glass looked brand new.

2. Mid, range: Bio Clean Hard Water Stain Remover

Need something with more muscle? Bio Clean Hard Water Stain Remover ($15) steps up the game. This green cleaning solution balances power with environmental care:

  • Natural, biodegradable formula without harsh fumes or scents
  • Safe abrasives remove years of mineral buildup
  • Works on many surfaces besides shower glass
  • Leaves a protective coating to stop future stains

Bio-Clean shines because it’s safe around plants and pets. Many professional cleaners pick this product for its strength and safety, pairing it with 0000 superfine steel wool to tackle deep stains without damaging glass.

3. Premium: Drill Brush Shower Door Cleaning Kit

Serious buildup calls for serious tools. The Drill Brush Shower Door Cleaning Kit ($20, $30) turns your power drill into a cleaning machine:

  • Multiple brush attachments in different sizes and shapes
  • Soft nylon bristles protect glass from scratches
  • Cuts cleaning time substantially
  • Team up with any cleaning solution you choose

This tool makes cleaning shower areas much easier. You won’t spend hours scrubbing by hand, and the drill does the heavy lifting. The kit usually comes with:

  • A 4-inch flat brush for significant areas
  • A 2-inch detail brush for corners
  • A bullet-shaped brush for curves

Remember to wear a mask when using the drill brush with cleaning solutions to avoid splashing back.

4. Safety gear and simple supplies

Whatever product you pick, having the right basic supplies can help you work more safely and effectively by protecting your hands, eyes, and lungs while improving how thoroughly and quickly you can clean tough stains.

  • Rubber gloves to shield your hands
  • Safety glasses to protect your eyes
  • Mask for strong cleaners or drill brushwork
  • Microfiber cloths that won’t scratch
  • Spray bottles for homemade solutions
  • Squeegee to prevent new water spots

You already have some surprisingly effective cleaners in your kitchen cabinets that can handle tough cleaning jobs, helping you deal with stains quickly and easily without needing a special store run.

  • Distilled white vinegar
  • Baking soda
  • Lemon juice
  • Rubbing alcohol
  • Hydrogen peroxide

These everyday kitchen staples are affordable, easy to use, and surprisingly powerful against mild to moderate hard water stains, making them a wise, budget-friendly choice for regular maintenance and glass surface care. The right tools make cleaning faster and easier. Choose between budget, mid, range, or premium options based on your stains’ severity and what you can spend.

Step by Step: How to Remove Hard Water Stains From Shower Glass

Do stubborn mineral deposits form on your shower glass? You can bring back that crystal-clear shine to your cloudy, spotted surfaces. I’ve tested many ways and found the quickest way to remove hard water stains from shower enclosures.

1. Pre-rinse and dry the glass surface

Proper preparation is essential before you begin cleaning your shower glass. Taking a few extra minutes to get the surface ready ensures better results by loosening buildup, clearing away residue, and making it easier to see where the stains are.

  • Let hot water run to create steam that loosens debris and mineral deposits
  • Give the glass surface a good rinse with clean water to remove dirt and soap residue
  • Wipe down with a dry towel to remove extra moisture
  • Let the surface dry completely so you can see all the stained spots clearly

This prep work lets your cleaning solution target those mineral deposits directly instead of getting mixed with leftover moisture. A well-lit, ventilated bathroom will help you spot every affected area as you clean.

2. Apply your chosen cleaner (DIY or product)

The next step in cleaning your shower glass is to generously apply your chosen cleaning solution, whether it’s a store-bought product or a homemade remedy, so it can properly break down stubborn stains and prepare the surface for scrubbing.

  • Commercial products: Follow what’s written on Rain, X Shower Door Xtreme Clean, Bio Clean Hard Water Stain Remover, or your product of choice
  • Vinegar solution: Mix the exact amounts of distilled white vinegar and water in a spray bottle and spray it all over
  • Baking soda paste: Mix 3 parts baking soda with 1 part water to make a paste and put it on the stains
  • Lemon and salt: Light stains? Cut a lemon in half, dip it in salt, and rub it on the glass.

Work your way down in rows to cover everything. For shower doors, soak paper towels in vinegar and stick them on the glass to keep it wet while you clean.

3. Let it sit for the recommended time

Timing is crucial in successfully removing water spots from your shower glass door. Letting the cleaner sit for the right time allows it to break down mineral buildup effectively, making the scrubbing process much easier.

  • Commercial cleaners: Check the label (usually 2, 5 minutes)
  • Vinegar solutions: Give it 5 to 30 minutes, based on how nasty the stains are
  • Baking soda paste: Wait 15 to 20 minutes
  • Lemon and salt: Let it work for 5 to 10 minutes

Keep the solution wet the whole time. Add more if it starts drying out. Check those paper towels on the shower doors to ensure they stay wet. This waiting period breaks down the mineral bonds.

4. Scrub using a microfiber or drill brush

Once your cleaning solution has had time to work, it’s time to start scrubbing. This step helps lift the loosened stains off the glass, revealing a more transparent surface, especially when using the right tools with care and steady pressure.

  • Light stains need just a non-abrasive sponge or microfiber cloth in circles.
  • Moderate stains call for a soft-bristle brush or an old toothbrush
  • Stubborn buildup might need a drill brush attachment
  • Corners and edges are best cleaned with an old toothbrush

Use gentle pressure and clean small sections at a time. The Drill Brush Shower Door Cleaning Kit works excellently, but keep that drill steady and wear eye protection to avoid splashes.

5. Rinse thoroughly and dry with microfiber

The final step in cleaning your shower glass is thorough rinsing and careful drying. Skipping this can leave behind streaks or new mineral spots, so take your time and ensure the entire surface is completely water-free.

  • Clean, warm water removes all the cleaning solution
  • Start at the top and move down to avoid streaks
  • A good squeegee takes care of most water
  • Finish up right away with a lint-free microfiber cloth

This final drying step might be the most essential part of the whole process. Any water that dries alone can leave new mineral deposits and undo your work. The best results come from drying the glass thoroughly with side motions and motions from top to bottom.

For really tough stains, you might need another round or a stronger commercial cleaner made just for glass doors. On top of that, it helps to add a protective coating afterward. This makes future cleaning easier and stops the buildup.

How to Remove Hard Water Stains from Glass with Natural Methods

Person spraying vinegar solution on a glass shower door, with cleaning supplies like baking soda and lemon on a nearby shelf.

Natural ingredients from your kitchen pantry can tackle hard water stains on shower glass. These economical solutions work just as well as commercial products to remove mineral deposits. You should put in a little more elbow grease, though.

1. Using vinegar and baking soda paste

Vinegar is the star in natural remedies that remove hard water stains from shower surfaces. Its acidity helps dissolve mineral deposits. Mix it with baking soda, and you have a powerful cleaning duo.

Here’s how to make an effective cleaning paste:

  • Mix three parts baking soda with one part water until you get a thick, spreadable paste
  • You’ll need equal parts white vinegar and water in a spray bottle for tough stains
  • Put the baking soda paste right on the stained areas of the shower glass
  • Spray vinegar solution over the paste and watch it fizz
  • Let it sit for 15 to 30 minutes, based on how nasty the stains are

The science is pretty simple. The acidic vinegar meets alkaline baking soda and creates carbonic acid that breaks down mineral deposits. This makes cleaning those stubborn stains much easier.

Stubborn spots might need gentle scrubbing with a soft cloth in circles after the solution works. Rinse everything with clean water and dry it with a microfiber cloth so new water spots don’t form.

2. Lemon and salt scrub for light stains

Lemon juice’s natural citric acid mixed with salt’s gentle scrubbing power makes another great natural cleaner for water spots on shower glass doors.

Try this method:

  • Cut a lemon in half
  • Coat the cut side with regular table salt
  • Scrub the glass directly with your salted lemon using medium-pressure
  • Let the juice sit there for 5 to 10 minutes
  • Large areas need a paste. Mix lemon juice and salt in a bowl and apply with a soft cloth.

This lemon salt combo works great on lighter stains and makes a perfect regular maintenance cleaner. Unlike many commercial glass door cleaners, it leaves your bathroom smelling fresh.

Quick weekly sprays with diluted vinegar or lemon juice help stop new buildup. This makes your next cleaning job easier. Remember to dry everything with a squeegee or microfiber cloth after cleaning.

These natural methods take more work than products like Rain, X Shower Door Xtreme Clean, or the Drill Brush Shower Door Cleaning Kit. But they are non-toxic and friendly, and you probably have everything in your kitchen.

These gentle yet powerful natural solutions will keep your shower glass spotless without harsh chemicals. They’re safe for your family and good for the environment, too.

How to Remove Water Spots from Shower Glass Door Without Scratching

Cleaning shower glass requires special attention to both tools and techniques. When you tackle mineral buildup, using the wrong approach can leave permanent scratches that no cleaning will fix.

1. Use non-abrasive tools only.

The proper cleaning implements protect your shower glass. Abrasive materials can quickly damage glass surfaces and create microscopic scratches that collect more mineral deposits over time.

To clean hard water stains from your shower safely yet effectively, stick to:

  • Microfiber cloths trap particles rather than dragging them across the glass
  • Soft sponges provide a gentle scrubbing action
  • Silicone squeegees remove water without scratching
  • White nylon Scotch Brite pads, safe for glass surfaces
  • Soft-bristled brushes reach corners without damage

Rough materials like steel wool, stiff brushes, and abrasive scouring pads can permanently damage glass. The seemingly gentle Magic Eraser needs careful handling since it might contain abrasive particles that scratch glass surfaces.

A Drill Brush Shower Door Cleaning Kit can help remove water spots from shower glass doors. Select attachments with nylon bristles designed for glass to prevent scratching during power cleaning.

2. Avoid harsh chemicals on coated glass.

Modern shower enclosures often have protective coatings that repel water and resist staining. These special coatings need particular care to remove hard water stains from glass.

Note that with coated glass:

Harsh cleaners containing bleach, chlorine, or acetone can strip the glass’s protective coatings. In fact, manufacturers of coated shower glass recommend using only white vinegar and a soft sponge for cleaning.

Diluted vinegar solutions work effectively on glass doors with protective coatings without causing damage. Stubborn spots might require undiluted vinegar.

A squeegee used daily after showering remains the quickest way to prevent hard water stains. Wiping down the glass after each use significantly reduces cleaning frequency and eliminates the need for harsher methods.

Rain, X Shower Door X, Treme Clean works effectively while gentle enough for most glass surfaces. Bio Clean offers eco-friendly cleaning power without harsh abrasives, making both products excellent choices for maintaining spotless shower glass.

How to Keep Shower Glass Clean After Removing Stains

Your shower glass looks spotless after removing those stubborn hard water stains. The next challenge is keeping it that way. A regular cleaning routine takes nowhere near the effort of dealing with built-up mineral deposits.

1. Daily squeegee routine

The most effective way to maintain spotless shower glass daily is by using a squeegee right after each shower. This simple habit prevents mineral buildup and makes long-term cleaning easier by keeping water droplets from drying on the surface.

  • Take 60 seconds to wipe down glass surfaces with a squeegee after showering.
  • Pull downward from the top in overlapping strokes to avoid streaks
  • Clean the squeegee blade with a cloth between strokes to stop residue from spreading
  • This habit stops water droplets from drying and leaving mineral deposits

This quick daily practice reduces the need for deep cleaning. A quality squeegee in your shower reminds you to stick to this routine.

2. Weekly vinegar spray maintenance

To prevent mineral buildup from ever becoming a problem, we added weekly vinegar spray treatments to our daily routine. This easy step keeps the shower glass clear, reduces deep cleaning needs, and helps maintain a polished, streak-free finish longer.

  • Mix equal parts white vinegar and water in a spray bottle
  • Spray glass surfaces after your last shower of the week
  • Let it sit briefly, then wipe it with a microfiber cloth
  • Regular upkeep means less intensive cleaning later

Rain, X Shower Door Xtreme Clean (~$6, $7) is a preventive treatment. This product cleans and protects against future buildup.

3. Leave doors open to reduce moisture.

Proper ventilation is key in preventing new stains on your shower glass doors. Allowing airflow after each use helps reduce moisture buildup, which in turn minimizes the chances of water spots and soap scum forming.

  • Leave shower doors open after use for better airflow
  • Run bathroom fans during showers and 30 minutes after
  • A dehumidifier helps bathrooms with poor ventilation
  • Lower humidity means fewer water spots and less soap scum

Protective coatings like Diamon and Fusion can cut cleaning time by up to 90%. These treatments create a water-repellent barrier that stops minerals from sticking to glass.

These three simple habits,  daily squeegee use, weekly vinegar spray, and proper ventilation,  keep your shower glass crystal clear with minimal effort. Bio Clean (~$15) is a great eco-friendly option to add to your weekly routine that protects against stubborn buildup.

Final Thoughts

Your shower doesn’t have to suffer from hard water stains. You can easily remove hard water stains from shower surfaces with the right tools, products, and techniques. Natural solutions and specialized cleaners can restore your glass to its sparkling state.

Regular maintenance is key. Daily habits like squeezing and ensuring proper ventilation will reduce mineral buildup. Budget-friendly options like Rain X Shower Door Xtreme Clean ($6) or Bio Clean ($15) work wonders for tougher stains.

Consistency is essential. Daily wiping, weekly treatments, and good ventilation significantly reduce deep cleaning sessions. The right cleaning approach keeps your shower glass looking great between thorough cleanings.

Quick action is crucial. Start using these methods today, and you’ll soon know how to remove hard water stains from glass and keep your shower crystal clear!