
Best Keyboard Vacuum Cleaners for 2025: A Buyer’s Guide

A compact, USB-powered keyboard vacuum cleaner resting on a workspace next to a laptop, ready for cleaning small debris between keys. The image highlights the sleek design and practicality of this essential office tool, ideal for maintaining cleanliness without damaging sensitive electronics.
Close-up of a vacuum cleaner with a brush attachment cleaning debris from a mechanical keyboard on a desk, with a computer monitor and mouse in the background.

Regular vacuum cleaners can damage your keyboard because they generate static electricity. A keyboard vacuum might look like a simple cleaning tool, but picking the right one matters between safe maintenance and getting pricey repairs.

Our research of hundreds of hand vacuums over the last several years shows that specially designed keyboard vacuum cleaners work best to keep your computer peripherals safe. The market offers various options, from USB-powered mini vacuum cleaners for keyboards to cordless models like the Ryobi 18V One+ Performance Hand Vacuum. You’ll find budget-friendly cleaners starting at $39 and premium models that come with specialized attachments. This detailed guide will help you pick the perfect Computer keyboard vacuum cleaner that fits your needs and budget.

Understanding Why You Need a Keyboard Vacuum

Close-up of a dirty mechanical keyboard with several keycaps removed, revealing blue switches and accumulated dust and debris, as a hand uses a cotton swab to clean between the keys.

Image Source: Alamy

Your keyboard hides more than just stuck keys. Every keystroke creates an invisible exchange of finger oils, dead skin cells, and tiny particles that move from your hands to the keys. The space between your keys collects more than you might think, and that’s why a keyboard vacuum isn’t just another cleaning gadget. It’s something you need.

Common causes of keyboard dust buildup

The dust in an average home adds up to an eye-opening 40 pounds each year, and keyboards collect more than their fair share. It isn’t your regular household dust; it’s a mix of some pretty unsettling things:

  • Dead skin cells (we shed millions every day)
  • Hair and animal dander
  • Fabric fibers from clothing
  • Food particles and crumbs
  • Pollen and mold spores
  • Insect waste and body parts
  • Microorganisms, including bacteria and viruses

The air drops plenty of particles naturally, but keyboards face extra contamination from direct contact. Your fingertips leave oils that create sticky surfaces and trap particles. One study even called keyboards “a germy house.” And let’s face it: if you snack while working (most of us do), those food crumbs will find their way into every tiny gap between the keys.

The situation gets trickier for gamers and people who use mechanical keyboards. These keyboards have separate switches under each keycap, which means more spaces where dust can hide. These precise parts don’t work well when they get dirty.

Why regular cleaning matters for performance

A dirty keyboard doesn’t just look bad; it stops working correctly and wears out faster. Experts say dust buildup is “one of the most documented causes of PC failure.” A keyboard vacuum becomes crucial because:

1. Performance suffers

Dust interferes with the key function, making typing less accurate and slower. Debris under and around keys leads to inconsistent keypresses, unresponsive keys, or keys that get completely stuck.

2. Electrical problems arise

The scariest part? Dust often contains materials that conduct electricity. These particles can create unwanted electrical connections on exposed circuits, which might cause short circuits or electrical problems.

3. Components get damaged

Built-up dust acts like a blanket, trapping heat from electronic parts. It reduces cooling and can cause overheating. Extended exposure to high temperatures can permanently harm sensitive components.

4. Keyboards die early

The right tools, like a keyboard vacuum, help your keyboard last longer by preventing harmful buildup. Without proper care, dust and grime will force you to replace your keyboard sooner than needed.

5. Health risks increase

Your keyboard typically carries more germs than a toilet seat. Regular cleaning reduces germ spread and illness. You breathe about 50 million dust particles every hour, and many come from things right in front of you, including your keyboard.

Experts suggest cleaning your keyboard monthly for the best results. If you use it heavily or eat nearby, quick weekly cleanings make sense. That’s where specialized keyboard vacuum cleaners shine.

Regular vacuum cleaners might harm keyboards through static electricity or too much suction. But keyboard vacuums are built specifically for this delicate job. They provide just enough suction to remove debris safely.

Compressed air just moves dust around instead of obliterating it. A keyboard vacuum pulls particles out rather than redistributing them. A quality keyboard vacuum isn’t just another cleaning tool; it protects both your hardware investment and your health.

Types of Keyboard Vacuum Cleaners Explained

Black USB mini keyboard vacuum cleaner with a brush nozzle attachment, shown plugged in and resting on a white surface—designed for small debris removal from tight keyboard spaces.

Image Source: The Verze

The right cleaning tool makes all the difference in keeping your keyboard spotless. Different keyboard vacuum cleaners serve unique purposes based on your cleaning needs and priorities.

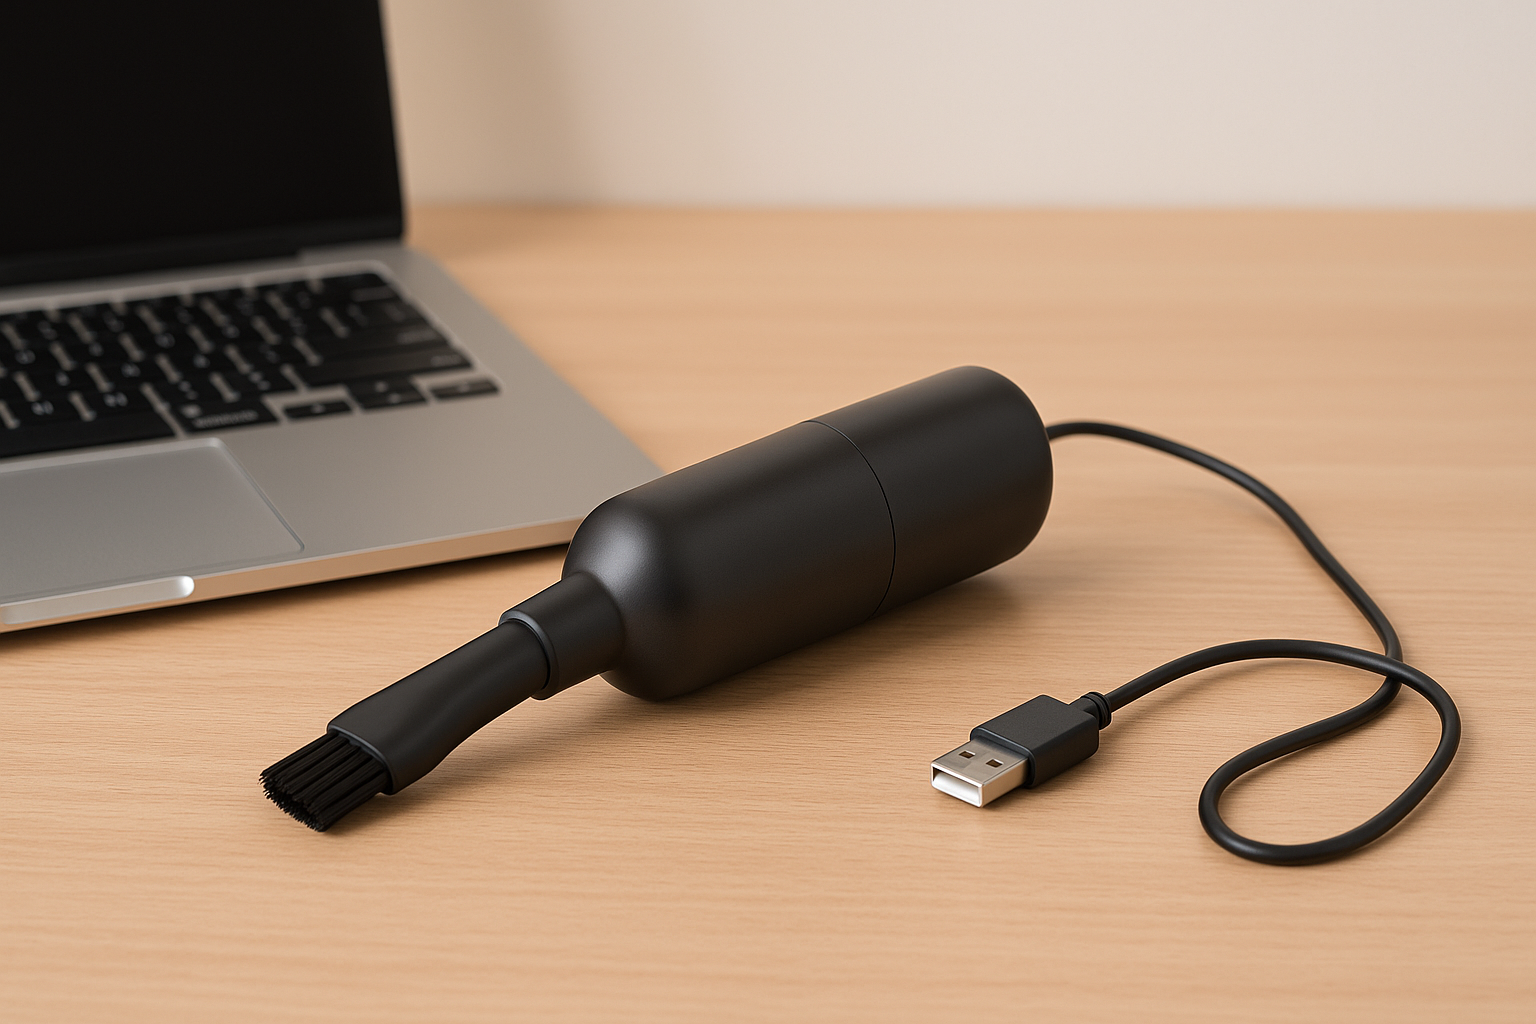
1. USB Mini Vacuum Cleaner for Keyboard

These mighty USB small keyboard vacuum cleaners pack convenience into a compact desk-cleaning package. You can plug them directly into any computer or laptop USB port without needing separate power sources.

A typical USB keyboard vacuum measures around 2 inches wide and 6 inches long, so you can easily store it in a desk drawer. These vacuums deliver focused suction that removes dust and crumbs between keys without damaging sensitive electronics despite their small size.

USB-powered models give you a constant power supply, and you’ll never need to replace or recharge batteries. The slim nozzle designs let you clean precisely in tight spaces, so every part of your keyboard stays dust-free. Many models include brush attachments that sweep away stubborn particles while gently loosening them.

These ultra-portable cleaners fit perfectly in a laptop bag or desk organizer, making them great for people who work from different locations. You can quickly clean during work breaks since they only need an available USB port.

2. Cordless keyboard vacuum

Cordless keyboard vacuums let you move freely without cable or USB connection restrictions. You can clean not just keyboards but also car interiors, small spaces, and other electronics with these handheld devices.

The versatility stands out as the most significant advantage of cordless models. Many work as both vacuums and blowers, which gives you flexibility for different cleaning needs. This dual-purpose design works better than canned air for cleaning electronic components and helps the environment, too.

Most cordless keyboard vacuums come with specialized attachments:

  • Brush attachments for keyboards and car interiors
  • Flat nozzles for capturing paper scraps and larger debris
  • Crevice tools for reaching tight spaces between keys

These vacuums feature detachable dust collectors with washable filter systems. The filter cleaning process is simple: just open the dust collector, take out the filter net, and rinse it with fresh water. It beats having to replace disposable systems.

3. Rechargeable vs. battery-powered models

Your choice of power source shapes both performance and convenience in a keyboard vacuum. You’ll find two main options: rechargeable and battery-powered models.

Rechargeable keyboard vacuums use built-in lithium-ion batteries that charge through USB or special charging ports. These models typically run for about 12 minutes at maximum power and up to 35 minutes on lower settings. A full recharge usually takes around 200 minutes (3.3 hours).

Battery-powered models work with replaceable AA or AAA batteries instead. You won’t wait for charging since you can pop in fresh batteries, but the power output drops as batteries drain.

Rechargeable vacuums often give you multiple power settings to balance cleaning strength with battery life. The PeroBuno model runs for nearly 12 minutes at maximum power, 20 minutes at medium, and up to 35 minutes on low power settings. It helps a lot during long cleaning sessions or when cleaning multiple devices.

Rechargeable models save money over time and deliver steady performance. Battery-powered options work better if you can’t easily charge, like during travel or in places without power outlets.

Your cleaning habits should guide your choice between these types. Think about whether quick availability (battery-powered) or long-term convenience (rechargeable) matches your cleaning routine better.

Key Features to Look for in 2025 Models

Four types of handheld keyboard vacuum cleaners displayed on a blue background, including models with brush heads and crevice tools—ideal for cleaning crumbs and dust from keyboards.

Image Source: Reviewed

Finding the right computer keyboard vacuum for 2025 means looking at technical features that separate premium models from simple cleaners. The newest keyboard vacuums have made amazing strides in how well they clean and how easy they are to use.

1. Suction power and airflow

Suction power makes the most significant difference in how well a keyboard vacuum works. Premium models in 2025 can reach 15,000 Pa of maximum suction. This huge jump from older models lets you remove even the most stubborn dirt stuck between keys.

Your vacuum needs good airflow speed and volume to move debris from the keyboard to the dust collector. The best models push 500L/min airflow at 22m/s. It means you get a thorough clean without leaving any particles behind. Better airflow also stops the vacuum from getting clogged and keeps suction steady while you clean.

Budget models under 4,000 Pa don’t deal very well with anything more than surface dust. Mid-range options (5,000-8,000 Pa) can handle daily cleaning needs. The best models above 10,000 Pa pull out everything, even pet hair stuck in mechanical keyboards.

Some smart keyboard vacuums now adjust their power based on how much debris they detect. This clever feature saves battery life but still gives you a deep clean.

2. Noise level and comfort

The noise levels between different models vary a lot. The quietest ones run at about 75 dB, while stronger models can go past 85 dB. Regular household vacuums can be loud enough to hurt your ears if you use them too long.

Models with more potent suction usually make more noise. Manufacturers know this is a problem, and their 2025 models use better motors and sound-dampening to fix it.

These vacuums come with several comfort features:

  • Grips that fit your hand naturally
  • Light build (the best ones weigh under 1 pound)
  • Handles that reduce shaking
  • LED lights to see dark spots under keys

The Black+Decker Dustbuster AdvancedClean+ stands out because it runs quietly but still cleans really well.

3. Attachments and brush types

The right attachments turn a simple keyboard vacuum into a complete cleaning tool. Here are the most useful ones for keyboard cleaning:

Crevice tools help you clean between keys and tight spots. These slim attachments focus the suction exactly where you need it without spreading dust around. Look for ones under 5mm wide to clean keyboards.

Soft dusting brushes with special bristles remove dust without scratching your keys or electronics. These work great on mechanical keyboards, where you can take the keys off.

Computer cleaning kits usually come with a 36-inch-long micro-hose, mini extension wand, and special brush tools made just for keyboards. These tools use materials that won’t create static electricity that could damage your devices.

The best keyboard vacuums now use special plastics that don’t generate static. It protects your keyboard while giving you a thorough clean.

4. Battery life and charging time

Battery life ranges from 9 to 23 minutes at full power across different models. You should look for ones that run at least 15 minutes so you can clean multiple devices in one go.

Most wireless models let you choose different power settings to make the battery last longer. Running at medium power might give you 20 minutes of cleaning time, while low power can last up to 35 minutes.

Charging has gotten much faster. The best 2025 models fully charge in about 2.5 hours. Some use fast-charging technology with 13W charging speeds through USB-C so that you won’t wait long between cleanings.

Batteries range from 1900 mAh to 2500 mAh in current models. Bigger batteries usually mean longer runtime, but might make the vacuum heavier and take longer to charge.

The perfect keyboard vacuum combines strong suction with reasonable noise levels, includes useful attachments for electronics, and runs long enough to clean thoroughly without constant recharging. Looking at these features will help you find a 2025 model that keeps your keyboard clean and working great.

Best Keyboard Vacuums by Use Case

Mini handheld keyboard vacuum cleaner on a white background, designed for cleaning electronics and tight spaces.

Image Source: Amazon.com

Different tasks need specific tools, particularly when you want to keep your workspace and gadgets dust-free. Keyboard vacuum cleaners come in many designs. Each design works best for specific scenarios based on what users need.

1. For office and remote workers

Remote work has made clean keyboards more critical than ever. A dusty keyboard can “disrupt your work” and affect how much you get done during important tasks. Office workers love compact USB-powered keyboard vacuums that merge well with their workspace setup.

The BISSELL AeroSlim shines as a top pick for office spaces. This cordless model is specifically “designed to quickly pick up unexpected messes” in homes, cars, and offices. Its sleek design fits any workspace and packs enough power to keep things clean.

You should look for computer keyboard vacuums with multiple attachments. Models with “six different attachments” give you a detailed clean beyond just keyboards. They work on various surfaces and parts in your workspace. You can use them to clean multiple devices throughout your day.

2. For gamers and mechanical keyboards

Mechanical keyboards need extra care because “nasties can and will fall into the larger spaces between the keys.” These keyboards need “a little more TLC than other keyboards” by design.

Experts suggest you remove keycaps with a wire keycap puller before you start cleaning. It helps you clean “under the keycaps, around the switches, and the stabilizers.” Let the keycaps dry completely before putting them back.

The best vacuums for gaming setups have anti-static features. Static electricity can damage sensitive mechanical switches and gaming gear. The Shark HAND VAC fits this need perfectly. It combines “lightweight portability with the incredible suction power of a high-speed brushless motor” at just 1.4 pounds.

3. For Lego and minor debris cleanup

Keyboard vacuums work great for organizing small items like Lego bricks. Special models are “designed to reach into narrow spaces and deep clean ANY narrow gaps” without damaging the pieces.

The CleanMyBricks Mini Vacuum Cleaner for Keyboard stands out for this job. It comes with “unique dual cleaning nozzles- flat and brush nozzles” that reach tight spaces between small pieces. Users say it “instantly makes the cleaning job a breeze” with tiny components.

These special vacuums include “an effective filtration system.” You can open the dust collector and clean the filter net easily. This feature helps collect many small pieces that would be hard to pick up otherwise. A Keyboard vacuum for Lego is also perfect for collecting tiny bricks during cleanup.

These small-debris vacuums excel at cleaning “camera lenses, circuit boards and other electronic components, car interiors, restoration, and hobbyist purposes.” Anyone who works with small components or precision tools will find them worth the investment.

Top-Rated Keyboard Vacuum Cleaners of 2025

Our rigorous testing revealed several standout models in the keyboard vacuum cleaner market for 2025. These top picks combine powerful suction with innovative design elements that make keyboard cleaning easy and efficient.

1. Best budget: Dustbuster Blast HNVD220J00 ($39)

The Dustbuster Blast HNVD220J00 delivers great value without cutting corners on key features. The 8V MAX lithium-ion powered handheld vacuum provides enough suction to clean keyboards effectively.

The innovative trigger design helps save power; you use it only when needed by releasing it between cleaning areas. This feature helps the battery last longer during regular cleaning sessions.

A built-in crevice tool and flip-up brush come standard for dusting and cleaning upholstery. These attachments work great for keyboards as the brush loosens stuck particles while the crevice tool pulls them out.

The 290mL translucent bagless dirt bowl lets you see when it needs emptying. Budget-conscious users will find that the Dustbuster Blast offers solid performance at a reasonable price point.

2. Mid Range: Ryobi 18V One+ Performance Hand Vacuum ($72)

The Ryobi 18V One+ Performance Hand Vacuum excels at keyboard cleaning tasks. This cordless vacuum delivers strong suction power that quickly removes dust, crumbs, and debris from keyboards. The device works great for both home office setups and car interiors.

The Ryobi’s EVER CHARGE Internal Charging System keeps the battery ready to use whenever you need it. The kit version comes with a 1.3 Ah Compact Battery and Wall Adaptor/Charger. You can use it with over 300 ONE+ products in the Ryobi ecosystem.

The universal nozzle accepts 1-1/4″ accessories, which adapt well to different cleaning scenarios. It’s lightweight and lets you clean without tiring your hands during longer sessions.

3. Premium: Black+Decker Dustbuster AdvancedClean+ ($90)

The Black+Decker Dustbuster AdvancedClean+ packs a 20V MAX lithium-ion battery that delivers up to 35 AW of suction power. The model has two speeds and a POWERBOOST mode you can activate with one button press to tackle tough debris.

The extra-long built-in crevice tool, “our longest ever,” reaches deep between keyboard keys. The XL 750mL dustbin reduces the frequency of emptying compared to other keyboard vacuums.

The ONE-TOUCH easy empty system keeps your hands clean while disposing of collected debris. A battery indicator shows the remaining charge, so you won’t run out of power mid-cleaning.

How to Use and Maintain Your Keyboard Vacuum

Handheld keyboard vacuum cleaner being used on a black keyboard, with airflow effects shown; includes attachments and USB charging cable on a white background.

Image Source: Amazon.com

Your keyboard vacuum needs regular care to work at its best and last longer. These specialized devices require the same attention as the tools they clean.

1. Safe cleaning practices

Electronic components can be at risk if you don’t use keyboard vacuums correctly. The first step is to turn off and unplug your vacuum before any maintenance. The nozzle needs special attention with mechanical keyboards that have removable keycaps. To name just one example, see how stretching a nylon stocking over the vacuum nozzle and securing it with a rubber band prevents keys from getting sucked up while dust still gets removed.

Static electricity is the biggest problem when cleaning electronic components. Of course, standard household vacuums can generate static charges that might damage sensitive keyboard circuits. The solution is to use specialized keyboard vacuums with anti-static components that reduce this risk.

Moisture can damage internal components, so avoid using too much liquid when cleaning your vacuum or keyboard. A cotton swab with isopropyl alcohol works better than water-based cleaners for stubborn debris on your keyboard.

2. How often do you clean your keyboard?

A regular cleaning schedule will keep debris from building up and make your keyboard last longer. Your keyboard needs cleaning at least once a month for basic maintenance. People who use their keyboards often or eat nearby should clean them weekly.

Quick cleans take about five minutes each week. Deep cleaning needs at least 30 minutes plus time to dry. Mechanical keyboards need deep cleaning every 1-2 months.

A simple weekly maintenance routine involves:

  1. Unplugging your keyboard and turning it upside down to shake out loose debris
  2. Use your keyboard vacuum to remove the remaining particles
  3. Wiping down keycaps with a microfiber cloth to remove oils

3. Cleaning and replacing filters

Your keyboard vacuum’s suction power depends on filter maintenance. Light users should clean HEPA filters every 1-3 months and foam/paper filters every 1-2 months. Heavy users need to clean all filters monthly.

The filter cleaning process starts with turning off the vacuum and removing the nozzle attachment. Next, remove the filter gently and tap it to dislodge loose particles. Foam filters can be rinsed under running water, but detergents should never be used because they make foam stiff and less effective.

Replace your filter if you notice the following:

  • Decreased suction power
  • Visible damage or wear
  • Unusual overheating
  • Persistent odors despite cleaning

Let filters dry completely before putting them back in your vacuum. This step prevents moisture damage and keeps airflow optimal for effective cleaning.

Conclusion

A keyboard vacuum cleaner plays a vital role in your device’s performance and workspace hygiene. The latest models have improved suction power, reaching up to 15,000 Pa. These devices come with specialized attachments built for electronics.

Your specific needs should guide your choice of keyboard vacuum. USB-powered models excel in office environments. Cordless options give you more flexibility. The Ryobi 18V One+ and Black+Decker Dustbuster AdvancedClean+ offer professional-grade cleaning power. These premium models include HEPA filtration and long-lasting batteries.

Note that consistent maintenance makes all the difference. Quick weekly cleanings paired with deeper monthly sessions keep your keyboard at peak performance. Your vacuum cleaner and keyboard will last for years with proper care and regular filter changes.

Your keyboard is crucial to daily productivity and comfort. The right cleaning tools and regular maintenance will protect your investment and ensure consistent, reliable performance.

Why Your Car Still Smells Bad: Expert Guide to Car Odor Removers That Actually Work

Person grimacing and pinching nose inside a car that appears smelly and cluttered.

Car owners often battle foul odors that seem impossible to eliminate. Forgotten gym clothes, food spills, cigarette smoke, and pet accidents create unwanted smells that stick around despite regular cleaning attempts.

The battle against stubborn car odors can be frustrating when regular air fresheners only mask the problem temporarily. But there’s good news: several solutions work well to eliminate these smells. Natural remedies like charcoal (nature’s toxin absorber) and baking soda can help. Professional treatments that use specialized tools and ozone machines offer another option. This blog will show you proven methods to get rid of those persistent smells and make your car’s interior fresh again.

Why Your Car Smells Bad: Common Culprits Behind Persistent Odors

Car interior showing various common odor sources like food waste, wet carpets, and pet hair.

Bad smells that won’t go away in your car aren’t just annoying; they usually point to bigger problems you need to fix. Quick-fading odors are one thing, but those that stick around come from specific sources that keep making your car smell bad until you deal with them appropriately. Let me get into the most common things causing those nasty car smells and how a trusted car odor remover can help eliminate them at the source.

1. Food and beverage spills

Spilling your morning coffee or your kid’s juice box might not seem like a big deal at first. But these spills become serious stink sources when you leave them untreated. Food bits and liquids soak deep into your car’s upholstery and carpeting. It creates the perfect environment for bacteria to grow.

Here’s why food spills are such a headache:

  • Decomposition process: Food starts to rot quickly, especially in hot cars, and the smell gets worse over time
  • Deep penetration: Liquids soak way past the surface into padding and materials underneath
  • Difficulty in complete removal: Regular cleaning tools won’t get all the leftover bits stuck in the fibers

You need to clean up even tiny spills right away. Just wiping the top of your car’s fabric won’t cut it once liquids have soaked through to deeper layers. Spilt drinks, especially milk or sweet ones, start to stink even more in the heat.

A smell that keeps coming back after you clean usually means some residue is hiding somewhere. The trunk often causes trouble, especially after you’ve carried takeout food that might have leaked sauce or oil.

2. Pet odors and accidents

Dogs make great travel buddies, but they leave behind distinct smells that aren’t easy to get rid of. Beyond the usual “dog smell” that spreads through fabric surfaces, accidents happen, especially on longer trips.

Pet smells become a real problem in tight car spaces where scents are much stronger than in open areas. Dogs fresh from swimming or playing outside bring special kinds of smells that stick to your car’s interior.

The worst pet smells usually come from accidents. Dog pee has chemicals that stick to fabric fibers. These create lasting smells that get worse if you don’t treat them properly. Your pet’s shedding hair also traps smells and spreads them all over your car.

You’ll need to find and fix the source to get rid of the smell instead of just covering it up. UV stain detectors work great to find pee spots you might miss during regular cleaning.

3. Mold and mildew from moisture

That old-sock smell coming from your vents or seats usually means you’ve got a moisture problem, causing mold and mildew. Water gets in and creates the perfect setup for these fungi to grow.

Moisture usually comes from:

  • Inadequate drainage in the AC evaporator system
  • Water is getting through the door seals or the sunroof channels
  • Wet stuff left in the car (umbrellas, towels, floor mats)
  • Spills that didn’t dry completely

Bacteria and mold grow when water collects in your AC system’s evaporator. It creates that distinct musty smell that fills up the whole car. The smell hits you hardest right after turning on your climate control.

The smell isn’t just unpleasant; mold and mildew release spores into the air that can harm your health if you breathe them for too long. Some car models tend to have more moisture problems because of how their drainage systems are built.

Poor airflow makes everything worse by trapping humidity inside. You can help prevent moisture buildup in your vents by running your AC on maximum heat for about a minute before turning off your car, especially in humid weather.

4. Cigarette smoke residue

Cigarette smoke might be the toughest car smell to get rid of. Smoke gets deep into every soft surface in your car, creating a problem that goes beyond simple cleaning. If you’re wondering how to remove cigarette odor from the car, it requires more than just a clean surface. Proper techniques and specialized treatments are necessary to tackle the deeply embedded smoke particles.

Smoke hits these spots the hardest:

  • Headliner (often turns yellow from tar and nicotine)
  • Upholstery and carpet fibers
  • Air vents and filtration system
  • Door panels and dash surfaces

The smell is so hard to get rid of because tar and nicotine build up over time. They leave a sticky coating that keeps releasing the smell. Cars with a long smoking history can smell so strong that you notice it the second you open the door.

Heat and enclosed spaces make the smoke smell even stronger, letting particles get deeper into materials even if you’ve never smoked in your car. buying a used car from a smoker means dealing with this stubborn problem.

Regular cleaning often fails to remove the cigarette smell because smoke particles get too deep for normal cleaning products to reach. The smell sticks to soft surfaces and grabs onto car upholstery fibers like nothing else.

Finding out exactly what’s causing your car’s smell is a vital first step to picking the right solution. Once you’ve identified the source, you can take targeted action to address it. If cigarette smoke is the culprit, learning how to remove cigarette odor from cars can be the key to eliminating that stubborn smell and restoring a fresh atmosphere in your vehicle.

How to Identify the Source of Car Odors

Person inspecting their car interior for odor sources, with highlighted zones like seats, vents, floor mats, and trunk showing common causes of bad smells.

Finding the exact source of bad car smells should be your first step before using any car odor remover. You’ll waste time and money on fixes that miss the real issue without proper detection. Let me show you how to become skilled at tracking down car odors using proven methods.

1. The sniff test: Locating odor zones

The quickest way to spot car odors might surprise you: use your nose. This step-by-step method helps you zero in on where that nasty smell comes from.

Break your vehicle into zones and sniff each area systematically:

  • Front cabin area: Look under seats, floor mats, dashboard, and vents
  • Rear seating: Look through cushions, floor areas, and door pockets
  • Cargo area: Check trunk carpet, spare tire well, and hidden compartments

“The process of elimination helps find where the smell is coming from,” notes automotive experts who recommend this approach. Watch how odors change strength as you move through different parts of the vehicle.

Timing plays a significant role here. Some smells get stronger under specific conditions, and musty odors often peak when you first start the AC, while food smells usually get worse on hot days with your car sitting in direct sunlight.

Your nose works best as your primary tool, but for challenging cases, a UV light can help spot biological stains like urine or spilt milk that you can’t see but keep making odors.

2. Common hiding spots for odor-causing materials

Stubborn odors often hide in spots we miss, even after a good cleaning. These hidden areas usually harbor smells that just won’t quit.

Here’s where smells love to hide:

  • Under seats, food crumbs and spills are collected, and this creates problems since we rarely clean these spots. Floor mats catch dirt, moisture, and debris, making them major sources.
  • Glove compartments might hide forgotten food that’s now decomposing. Many cars have secret storage spots that owners forget to clean.
  • Sunroof drains and door seals collect moisture, creating perfect spots for mold. The evaporator in your heating and cooling system traps condensation, which leads to that classic “high school locker room” smell.

So, the cabin air filter becomes another usual suspect, especially in humid areas where mold and bacteria thrive. Make filter replacement part of your regular maintenance to prevent odors.

3.  When the smell might indicate a mechanical problem

Car odors don’t always come from interior messes, and they might signal mechanical problems that need quick attention. Learning these warning scents can help you avoid getting pricey repairs later.

  • A sweet, syrupy smell usually means you have a coolant leak in your vehicle’s cooling system. This smell needs immediate attention since driving could overheat your engine and cause it to fail.
  • Burning rubber might point to slipping drive belts, misplaced hoses touching pulleys or brake issues. The smell of gasoline points to fuel system problems, possibly in your fuel injectors or fuel tank.
  • That rotten egg smell usually means your catalytic converter isn’t converting hydrogen sulfide properly. Acrid smoke or burning oil suggests problems with your engine’s piston rings, which can hurt fuel efficiency and engine power.
  • The smell of burning plastic should make you pull over right away; it might mean overheating parts or electrical problems that could start fires. Exhaust fumes in the cabin need immediate attention because of the dangers of carbon monoxide.

It’s worth mentioning that these mechanical smells aren’t just unpleasant; they’re your car’s way of sending warning signals. “Those things are your car trying to talk to you and saying, ‘Hey, I’m not healthy,'” explains an automotive expert. Quick action on these smells improves your driving experience and might save you thousands in repairs.

DIY Solutions: How to Remove Odor from Car Interiors

DIY car odor removal supplies including baking soda, charcoal, essential oils, and vacuum.

You can tackle car odors with simple household items instead of waiting for professional help. These DIY approaches save money and work just as well as commercial products. Here are three robust household solutions that will refresh your car’s interior.

1. Baking soda treatments for fabric surfaces

Baking soda (sodium bicarbonate) works like magic on fabric surfaces by neutralizing odors rather than just masking them. It happens because most bad smells are acidic, and baking soda’s alkaline properties help neutralize these acidic compounds.

Here’s how to remove odors with baking soda:

  • Vacuum first to remove surface debris
  • Check for moisture – baking soda won’t work well if you apply it to wet areas
  • Sprinkle generously over dry fabric surfaces, including seats, carpets, and floor mats
  • Allow to sit overnight for maximum absorption
  • Vacuum the next day

“Sprinkling and hoovering up baking soda in rear- or front-facing car seats can be a quick refresh between washes to keep odors down,” according to cleaning experts. You can repeat this process several times for stubborn odors.

A helpful tip: put some baking soda under seats or in hidden areas where it will keep absorbing odors over time. You can also add a few drops of essential oil to the baking soda before application for a pleasant scent.

2. Vinegar solutions for hard surfaces

White vinegar serves as a natural odor eliminator that works great on hard surfaces throughout your vehicle. The acetic acid in vinegar kills odor-causing bacteria and neutralizes smells at their source.

Here’s a simple yet powerful vinegar-cleaning solution:

Mix equal parts distilled white vinegar and warm water in a spray bottle. This mixture works well for dashboards, plastic components, and other hard surfaces. You can increase the vinegar ratio slightly for more pungent odors.

A small bowl with about a cup of white vinegar in your car overnight, close to the smell’s source if you know it, will absorb airborne odors. The vinegar smell goes away quickly after removing the bowl and airing out the vehicle.

When you know precisely where an odor comes from (like a spill on a seat), direct application works better. Mix vinegar, water, and a couple of drops of dish soap, then clean the affected area with a damp cloth.

3. Activated charcoal for absorbing airborne odors

Activated charcoal is nature’s toxin absorber and eliminates car odors amazingly well. Unlike baking soda and vinegar, which work through chemical neutralization, charcoal physically traps odor molecules in its millions of tiny pores.

Charcoal is widely known as nature’s toxin absorber. This is the compound that you’ll find in filters of all kinds,” note cleaning experts. Its very porous structure helps it absorb floating odors.

Here’s how to use activated charcoal:

  • Put an open bag of charcoal in a central location in your vehicle
  • Leave it overnight or longer for stubborn odors
  • Place multiple smaller bags throughout the car for best results
  • Put used charcoal in sunlight for 1-2 hours every month to rejuvenate it

Charcoal odor absorbers can stay effective for up to two years with proper care. They work great because they have no fragrance or chemicals, making them safe for use around children and pets.

These three household solutions give you budget-friendly alternatives to commercial car odor removers and tackle the most common car smell problems without harsh chemicals.

Best Car Odor Eliminator Products That Actually Work

Car interior with various odor remover products like sprays, gels, and air purifiers displayed.

Car odors that don’t respond to DIY treatments need specialized commercial products. The right product choice depends on your specific odor issue and can help you avoid wasting time and money. Professional detailers recommend several proven solutions.

1. Sprays vs. bombs: Which works better?

The choice between spray treatments and Car odor remover bombs depends on the intensity and how you apply them. Car odor remover sprays target specific areas directly, while odor bombs use foggers to deodorize the entire cabin.

Odor bombs reach hidden spaces that other products can’t touch:

  • They get into vents, under seats, and deep into upholstery fibers
  • The results last longer than sprays
  • Your vehicle needs to stay sealed for several hours

“Dead Scent Auto Odor Eliminator uses Chlorine Dioxide (CLO2) to eliminate odors at the molecular level rather than just masking them,” notes detailing professionals. The treatment needs at least 6 hours (overnight works best) plus an hour to air out afterward.

Car odor remover sprays offer quick treatments and handle localized odors well. You might need multiple applications for tough problems. These products help maintain freshness between deeper cleanings.

2. Enzyme-based cleaners for organic odors

Food spills, pet accidents, or biological odors need enzyme-based cleaners. These cleaners use bacteria that break down organic materials, causing bad smells.

Bio-enzymatic products like Malco’s Enzyme Cleaner contain special bacterial enzymes. “Bio-Zyme Enzyme Automotive Interior Cleaner is a specially formulated blend of bacterial enzymes that breaks down heavy organic stains, grease, and oils and removes foul odors from automotive carpets and upholstery.”

Enzyme cleaners destroy odor sources instead of covering them up. Professional detailers have a helpful tip: “Fill a syringe with Bio-Zyme Enzyme Cleaner and inject it into your cushion for maximum odor and bacteria removal.”

These products need 10-30 minutes of contact time to work. The bacteria need time to eliminate odor-causing compounds before cleaning.

3. Odor absorbers vs. air fresheners

Odor absorbers and air fresheners work differently. Absorbers remove smell molecules from the air. Air fresheners cover up smells with stronger scents.

Air fresheners add pleasant smells but don’t fix the mechanisms causing the odor. The original smell comes back once the fragrance fades.

Odor eliminators tackle the problem through different methods:

  • Some change the chemical makeup of odors
  • Others pull bad-smelling molecules from the air
  • The best products combine both approaches

“Car odor remover bombs, also known as car odor removers, are specifically designed to neutralize and eliminate odors rather than just masking them,” explain industry experts. Many detailers use both types: an eliminator first to neutralize odors, followed by an air freshener to keep things fresh between treatments.

Your specific odor problem determines which product works best. Choose the right solution based on your situation.

How to Get Rid of Specific Car Smells

Some car odors need specialized treatment beyond basic cleaning. You’ll need targeted strategies that work for each specific type of odor. Let’s get into three of the most challenging car smells and how to tackle them effectively.

1. Removing cigarette smoke odor from car upholstery

Cigarette smoke creates one of the toughest vehicle odors. Nicotine and tar sink deep into the upholstery. Here’s what you can do:

  • Use a powerful cleaner like Optimum Power Clean to break down nicotine and tar deposits on surfaces.
  • Pay extra attention to the headliner since smoke residue often turns yellow.
  • Clean with vapor steam treatment on fabric surfaces to release trapped smoke particles.

Cars with severe smoke damage might need extraction cleaning. A heated carpet extractor after steam treatment works wonders, even on badly stained headliners. This method shows a 90% improvement most of the time and is one of the most effective ways to remove smoke odor from car interiors that have absorbed years of residue.

2. Eliminating the musty smell in the car’s air conditioning

That sock-like smell from your vents usually means bacteria are growing in your AC system. Here’s the fix:

Condensation forms in the evaporator inside your heating and cooling system. Bacteria and mold grow when water sits there, creating that distinct musty odor.

The solution is simple. Turn your fan to low and open the windows. Spray a disinfectant like Lysol directly into the climate system’s air intake near your windshield wipers. Run the engine with the interior fan on, and the disinfectant will kill the bacteria as it moves through the system.

Take out your cabin filter before spraying so the disinfectant flows freely. It gives you a perfect chance to put in a new filter since dirty ones block airflow.

3. To Remove Gasoline Odor from the Car Carpet

Gasoline spills need quick action as the smell lingers and can be potentially hazardous. Here’s how to get rid of the gas smell:

First, find where it’s coming from: a refueling spill, leaking tank, or gas container transport. Then open all doors and windows to air out your car.

Clean the carpet by blotting excess gasoline with paper towels, then use mild soap and water with a soft brush. Baking soda works great for stubborn smells. Sprinkle it generously, let it sit overnight to absorb the odor, then hoover it up.

Natural absorbers like charcoal or coffee grounds in secured containers also do a great job neutralizing gas odors when left in the car for a few days.

Professional Odor Removal: When to Call the Experts

Professional car odor removal services provide robust solutions that tackle stubborn smells your DIY efforts can’t handle. These expert treatments use advanced equipment and techniques you won’t find at your local auto store. Here’s what you need to know about getting professional help.

1. Ozone treatment: How it works

Ozone generators create O3 molecules that break down odor-causing compounds at the molecular level. This method stands apart from regular air fresheners that mask smells. The ozone neutralizes odors by destroying their chemical makeup.

The process works because:

  • Ozone reaches everywhere air flows, including vents, under seats, and deep into upholstery
  • It reacts with contaminants in fabrics, surfaces, and air
  • Your car gets rid of viruses, bacteria, and allergens at the same time

Professional ozone treatments take 30 minutes to 2 hours, based on how bad the smell is. Your car needs good ventilation afterward, since ozone can harm you if you breathe it in.

2. Steam cleaning for deep-seated odors

Steam cleaning uses superheated water vapor (with only 5% moisture) that gets into surfaces without damaging them. This method:

  • Cleans every part of your vehicle safely, even hard-to-reach spots.
  • Gets rid of deeply embedded dirt from carpets, seats, and vents.
  • Eliminates bacteria, allergens, and mold spores that cause bad smells.
  • Gives you chemical-free cleaning that lasts longer.

Steam cleaning works great on headliners and leather seats, especially with tough smoke odors.

3. Cost Comparison: DIY vs. professional services

Professional odor removal services vary in price:

  • Basic treatments start at $100 for simple pet odors.
  • Complex cases can cost up to $1,000, especially if your HVAC system needs work.
  • Specific treatments like ozone ($50-60 per room) and steam cleaning ($100-800) depend on your vehicle’s size and smell intensity.

All the same, professional services are affordable in the long run because they fix the root problem instead of covering it up. DIY methods might save money upfront but could cost more if they don’t work.

Conclusion

Fresh and clean car interior with an air freshener and tidy seats.

Foul car odors can ruin even the shortest drive, but the proper car odor remover makes a big difference. Quick action is key; cleaning up spills or accidents immediately stops smells from settling deep into the fabric or vents. Everyday items like baking soda, vinegar, and activated charcoal are surprisingly effective and affordable. These natural options often work well as a car odor remover for mild to moderate smells.

However, some odors, like smoke or pet accidents, can be stubborn. That’s where professional cleaning services come in, using advanced tools and treatments to remove odors from hard-to-reach areas. Good habits also matter. Keeping your car clean, dry, and ventilated prevents most odor issues before they start. A fresh-smelling car isn’t just more enjoyable; it helps preserve your vehicle’s value in the long run.

Best Concealer for Dry Skin: Flawless Coverage Without Flaking

Flat lay of concealers on a white towel with dried flowers, representing best concealers for dry skin

Our team tested over 600 concealers in our NYC lab, and we found that there was more to picking the best concealer for dry skin than just coverage. Many products can make dry skin look worse by settling into fine lines or causing flakes as the day goes on.

The right formula can make a huge difference when you need a hydrating concealer to brighten dark circles or a cream that won’t highlight dry patches. Take the Kosas Revealer concealer – it has hyaluronic acid and peptides that give you great coverage without drying out your skin. This piece will show you the best concealers that work with your dry skin and help you get that flawless, hydrated look you want.

In this guide, you will find tips on choosing concealers made for dry skin. We also recommend the best options at different prices. You will find expert tips on applying concealer to prevent flaking and creasing. Plus, there’s a breakdown of key ingredients that offer good coverage and hydration.

Why Dry Skin Needs Special Concealers

Woman with dry under-eye skin holding a concealer, highlighting the need for hydrating formulas

Dry skin produces less oil than other skin types. It makes it more sensitive to makeup’s drying effects. Most concealers have ingredients that can take away much-needed moisture. Your skin might look worse after you put them on.

1. How regular concealers damage dry skin

Most basic concealers contain oil-control agents. Your dry skin doesn’t need these at all. These products stick to dry patches and make them stand out instead of hiding them. Under the eyes or over spots, basic concealers often sink into fine lines. It creates a cakey, flaky look that ages your face.

Using the wrong concealer starts a destructive cycle. Research shows thick formulas meant to cover blemishes can block your pores. It leads to more breakouts. Traditional matte concealers pull moisture from your already dry skin. Your skin looks even drier and rougher as the day goes on.

Dry under-eye areas need special attention. The skin under your eyes is thinner and has fewer oil glands than the rest of your face. Drying concealers in this area will make fine lines stand out and create a crepe-paper effect.

2. Key hydrating ingredients to look for

The right hydrating concealer for dry skin adds moisture while covering imperfections. Look for these powerful hydrating ingredients:

These ingredients make your concealer work more like skincare than makeup. Makeup artists say, “For starters, those with drier skin will want to look for formulas that provide long-lasting hydration so no pesky cracks, creases, or the dreaded flakes rear their ugly heads”.

3. Texture matters: creams vs. liquids

Cream and liquid concealers can both work well for dry skin. Each type serves different purposes and areas of your face.

Liquid concealers flow easily and let you build coverage. They contain water-based complexes that help sensitive or ageing skin. Their high water content gives the most hydration. It makes them perfect for the under-eye areas where dryness shows fine lines more.

Liquid concealers blend naturally and don’t sink into creases. Many people call good liquid concealers a type of “dry skin foundation” because they hydrate well and blend easily.

Cream concealers feel thicker and provide more coverage in a single layer. While they’re often associated with oily skin, new formulas, like a cream concealer for dry skin, effectively cover dark spots, age marks, and blemishes without exacerbating dry patches.

Choose cream concealers with a “dewy finish” instead of matte ones. These products give you full coverage and keep your skin hydrated. Cream concealers with skincare ingredients also help with mature, dry skin issues like wrinkles and dark circles.

Your specific needs should guide your choice between cream and liquid. Liquid formulas work better for daily hydration and under-eye coverage. However, a hydrating cream concealer for dry skin might be best for covering specific spots or dark areas.

Good Under-Eye Concealers for Dry Skin

Your under-eye area needs special care, especially when you have dry skin. The right concealer can change your makeup game completely. Let me share some amazing products at different price points that won’t make your under-eyes look dry or creased.

1. Budget-friendly: Maybelline Instant Age Rewind Eraser ($9-11)

You can find a great concealer that works well with dry skin without spending too much. Here is an affordable option that gives you both moisture and coverage:

  • America’s #1 concealer is loved for its ability to erase dark circles, brighten dull skin, and reduce redness. Its creamy formula makes it a good under-eye concealer for dry skin, offering both hydration and coverage.
  • Infused with Haloxyl, this anti-ageing concealer targets fine lines and puffiness, leaving your under-eyes looking refreshed, radiant, and well-rested.
  • Available in multiple shades, it’s perfect for contouring and highlighting, allowing you to shape and define with ease while keeping your skin moisturized.

A staple in the Maybelline lineup, it pairs effortlessly with their foundations, primers, and setting powders, making it a versatile, good under-eye concealer for dry skin that fits seamlessly into any beauty routine.

2. Mid-range pick: NARS Radiant Creamy Concealer ($20-25)

A bit more money gets you extra perks if you’re dealing with both dryness and stubborn dark circles:

  • NARS Radiant Creamy Concealer Custard is a cult-favorite with a creamy, hydrating formula that blends seamlessly into dry under-eye areas.
  • The Custard shade has a yellow tone, ideal for brightening light to medium complexions and neutralizing dark circles.
  • Packed with skincare benefits, it hydrates while delivering buildable coverage that never looks cakey, making it one of the best concealers for dry skin and dark circles.
  • Loved for its smooth texture and long-lasting wear, this concealer is a top pick for those needing moisture and coverage in one swipe.

3. Luxury concealer: Kosas Revealer Concealer ($30-35)

These high-end options mix makeup with serious skin care if you’re ready to splurge:

  • A medium coverage makeup essential that conceals dark circles and blemishes without masking your natural glow. It strikes the perfect balance, making it the best concealer for dry skin and dark circles.
  • Hyaluronic acid infused, this formula keeps your skin hydrated while preventing creasing or settling into fine lines, perfect for dry under-eyes.
  • Enriched with Caffeine and Pink Algae Extract, it brightens spots and revitalizes tired-looking eyes, giving you a luminous, refreshed look.
  • This concealer doubles as a multi-purpose vegan eye cream, making it more than makeup; it’s skincare, too. With Kosas’ clean beauty commitment, it’s a top choice for anyone looking for the best concealer for dry skin and dark circles.

The perfect concealer for dry under-eyes should give you both coverage and hydration. These options at different price points mean you’ll find one that works for you without sacrificing moisture or coverage.

Top Concealers for Covering Blemishes on Dry Skin

Model applying concealer to blemishes, showcasing a hydrated and natural skin look.

Hiding blemishes on dry skin is challenging because many full-coverage products can make flaky spots look worse. A good concealer needs enough pigment to cover imperfections without drying out your skin.

1. Full coverage options that won’t flake

These options give you maximum coverage and keep your blemish-prone areas hydrated, unlike regular concealers:

  • Kosas Revealer Concealer ($30) combines smoothly with its serum-like texture. This option has hyaluronic acid and peptides that keep blemishes hydrated while covering them. The creamy formula hides discolouration and acne-prone skin without settling into dry patches.
  • Dior Forever Skin Correct Concealer ($40) uses iris and wild pansy extracts to cover acne-prone skin. It keeps blemishes hidden for up to 24 hours until you wash it off. The product works well even in high heat and humidity without drying.
  • L’Oréal Paris Infallible Full Wear Concealer ($12) covers redness and acne scars well. You won’t need colour correction with this waterproof formula that lasts 24 hours.
  • Nars Radiant Creamy Concealer ($9) gives solid, creamy coverage that hides blemishes and dark spots without caking. You can build up the formula that has a slight dewy finish and blends well with bare skin.

2. Color-correcting concealers for redness

Colour-correcting concealers help with stubborn redness from acne, rosacea, or irritation:

  • Green concealer works well because it’s opposite to red on the colour wheel. These colours cancel each other out and create an even base before you apply foundation.
  • Ulta Beauty Collection Color Correcting Face Primer’s green tint reduces redness from acne or irritation. It creates a smooth base before you add regular concealer.
  • Smashbox Photo Finish Correct Anti-Redness Primer ($42) contains hyaluronic acid, algae, rose, and mushroom extract to calm irritated skin. It hydrates and cancels out redness, making it perfect for dry, sensitive skin.

Start with a thin layer of green colour corrector on dry, blemish-prone areas that need it. Then, add your regular concealer on top. Makeup artist Aliana Lopez suggests “less is more” with colour correctors to start light and add more layers if needed for a natural look. A green-tinted moisturizer might work better if you have lots of redness instead of spot-correcting different areas.

3. Hydrating Concealers for Mature Dry Skin

Your skin needs different care as it ages. Finding a concealer that works for ageing concerns and dryness becomes crucial. The skin produces less oil with age, so hydration should be your priority when choosing makeup that won’t draw attention to fine lines or texture.

Anti-aging formulas that don’t settle into lines

The right concealers for mature, dry skin should give you coverage and skincare benefits. Here are some outstanding options:

  • Haus Labs Triclone Skin Tech Concealer uses flexible pigments that match your skin tone. It contains niacinamide, arnica, and hyaluronic acid to reduce puffiness and hydrate under your eyes.
  • Danessa Myricks Youthflex contains sodium hyaluronate that moves naturally with your facial expressions, which helps prevent creasing in fine lines.
  • Lady Jaded Consumer ($4) points out that regular concealers create “pale spidery lines” around the eyes, calling most products “the very quintessence of balls”.

4. Brightening options for age spots

Age spots and hyperpigmentation need special attention. These concealers provide targeted solutions:

  • Ilia True Skin Serum Concealer blends vitamin C with White Water Lily extract. This combination brightens your complexion and smooths skin texture naturally. The light formula covers age spots and improves your skin quality.
  • IT Cosmetics Bye Bye Dark Spots Concealer + Serum treats discolouration with 2% niacinamide and brightens dark circles with caffeine. Makeup artist Elaina Badro suggests picking formulas with vitamin C to handle dark spots on mature skin.
  • Sisley Paris Phyto-Cernes Éclat uses red vine extract, caffeine, and carrot. These ingredients reduce puffiness and smooth fine lines. Celebrity makeup artist Sofia Tilbury recommends products with “brightening niacinamide and vitamin C” for mature skin.

5. Lightweight coverage for everyday wear

Daily makeup should feel light on mature, dry skin while providing good coverage:

  • Iris & Romeo Best Skin Days Concealer feels like a serum and doesn’t emphasize fine lines or enlarged pores. You get both hyaluronic acid and niacinamide in this hydrating formula.
  • Tower 28 Swipe Serum Concealer smoothly covers blemishes and redness. The Centella Asiatica leaf extract and hyaluronic acid make it gentle on sensitive, mature skin.
  • Laura Mercier Weightless Concealer keeps your skin hydrated all day and minimizes pores. The formula contains less than 1% synthetic fragrance, making it perfect for sensitive, mature skin.
  • Your ideal concealer should be “creamy and hydrating” but “lightweight to be buildable without creasing”. Start with a light moisturizer to create the perfect base for your makeup.

Tips to Apply Concealer on Dry Skin (That Actually Work)

 Middle-aged woman applying under-eye concealer for mature, dry skin

The perfect concealer application on dry skin depends on your technique and the product you choose. Even the most moisturizing formula can look cakey if you don’t apply it right.

1. Always moisturize and let it absorb

Good skin prep is the foundation of smooth concealer application. Clean your face well and apply a rich moisturizer that works for your skin type. Many people skip a crucial step, waiting 10 minutes for the moisturizer to sink in before makeup. This patience stops your concealer from moving around or pilling up.

2. Use a hydrating primer (if needed)

A hydrating primer works as an extra moisture barrier for dehydrated skin. Pick primers with hyaluronic acid, glycerin, or plant oils to seal in hydration. Put a thin layer only where you need it, usually under the eyes, around the nose, and on dry patches. Let it settle for 30-60 seconds before moving on.

3. Warm the product on the back of your hand before applying.

Don’t put concealer straight from the tube to your face. Instead, warm it on the back of your hand first. This easy trick melts the product a bit, so it blends into your skin instead of sitting on top. Your ring finger works best because it applies the gentlest pressure.

4. Blend with a damp sponge for a natural finish.

Brushes have their place, but a slightly damp makeup sponge works best for dry skin. The moisture helps your concealer blend smoothly without sticking to dry patches. Gentle dabbing motions keep the coverage intact better than wiping.

5. Avoid too much powder or opt for a hydrating one.

Setting powder can be your skin’s worst enemy if you use too much. Don’t use much of either, just where you need it most, like your T-zone or under your eyes. Better yet, try hydrating powders with hyaluronic acid or squalane that set makeup without drying out your skin.

Final Thoughts: Best concealer for dry skin

Finding the best concealer for dry skin means focusing on hydration and gentle coverage. Look for ingredients like hyaluronic acid, squalane, and peptides that nourish while concealing. Liquid formulas work well under the eyes, while creamy textures are better for spot coverage. Always prep with a good moisturizer and apply using gentle patting motions with a damp sponge or brush.

There are great options for every budget. For an affordable choice, Maybelline Instant Age Rewind is a top-rated hydrating concealer for dry skin. If you prefer luxury, try Kosas Revealer or Armani Luminous Silk; both offer skincare benefits and a radiant finish.

Your skin’s needs can change with the seasons. What works in summer may feel too dry in winter, so adjust your products and application techniques accordingly.

The Ultimate Car Detailing Kit: What Every Car Owner Needs in 2025

A person detailing their car with a foam cannon in a driveway, surrounded by car cleaning tools like towels, sprays, and brushes, representing a DIY car detailing setup at home.

Drowning in options when it comes to car detailing kits? You’re not alone. It’s tough to know where to begin with shelves full of fancy sprays, strange brushes, and kits. They all promise to make your dusty ride shine like a showroom star. Here’s the good news: You don’t need a garage full of tools or a lot of cash to achieve professional results at home.

Whether you’re a weekend warrior or a first-time DIYer, the right car detailing kit can save you hundreds in car detailing prices over time. The trick? Understand what to look for. Know what each tool does. Learn how to use them without scratching your paint or staining your seats.

This guide covers all you need to know. We’ll discuss essential tools and compare DIY kit costs with professional services. You’ll receive step-by-step guides for interior and exterior detailing. Plus, you’ll find tips to customize your kit for your car’s needs. Let’s turn that messy car into a mirror on wheels without burning a hole in your wallet.

How I Saved $500/Year with a DIY Car Detailing Kit

A couple of years ago, I used to take my car to a local detailer every few months. Each visit cost around $140–$160, and honestly, the results were hit or miss. Sometimes great, sometimes rushed. I finally decided to invest in a car detailing kit after realizing I could do a better job myself with a bit of learning.

I started small: a decent microfiber towel set, a foam cannon, a few brushes, and a cleaner for the interior. Over time, I added clay bars, polishers, and sealants. All in all, I spent about $220 upfront, and I haven’t paid for a detailing service since.

The surprising part? My car looks cleaner now than it did after pro-jobs. I’ve saved over $500 in just one year and gained a new weekend hobby I weirdly enjoy.

What is a Car Detailing Kit?

A full car detailing kit displayed neatly on the ground with towels, brushes, cleaners, and waxes, showing the tools used to restore and protect a vehicle inside and out.

A car detail kit is much more than a simple collection of cleaning products. It’s a complete system that brings new life to your vehicle and protects every surface. Unlike simple car wash supplies, a proper detailing kit has specialized tools and products made specifically for automotive surfaces. These products ensure thorough cleaning and long-lasting protection.

Professional detailers know that careful detailing removes both visible and invisible contaminants from your vehicle’s interior. They also restore the exterior to achieve a flawless finish. This methodical process helps your car last longer by protecting it from environmental damage, such as dirt, sun exposure, and harsh weather conditions.

Components of a Professional Car Detailing Kit

A full car detailing kit displayed neatly on the ground with towels, brushes, cleaners, and waxes, showing the tools used to restore and protect a vehicle inside and out.

A professional car detail kit isn’t just a random mix of sprays and rags. It’s a curated set of tools built to tackle every nook, cranny, and curve of your car. Whether you’re working on the inside or outside, here are the essentials you’ll typically find:

1. Car Detailing Brushes

The car detailing brushes set includes soft-bristled brushes for vents, dashboards, and trim, and firmer bristles for scrubbing tyres, carpets, and floor mats, perfect for reaching tight spots without damaging delicate surfaces.

2. Microfiber Cloths

Ultra-absorbent and lint-free, microfiber cloths safely remove dust, polish wax, and dry surfaces without leaving streaks or scratches, ideal for both interior detailing and exterior paintwork.

3. Polishers & Applicator Pads

Polishers and applicator pads are used for smoothly applying wax, polish, and sealants to various surfaces. These tools ensure even coverage, reduce hand fatigue, and deliver a consistent finish with professional-level shine and protection.

4. Interior Cleaners

Specialized formulas are designed for use on leather, vinyl, plastic, and fabric surfaces. These cleaners lift stains, eliminate odours, and restore original texture, which is far more effective than generic household products.

5. Wax or Sealants

Create a protective layer that shields paint from sun damage, water spots, dirt, and road grime. Adds depth and shine while extending the life of your vehicle’s exterior finish.

A Professional Car Interior Detailing Kit typically includes high-quality brushes, microfiber cloths, and surface-specific cleaners to deep-clean seats, dashboards, and carpets. In contrast, exterior kits focus on paint protection, tyre care, and achieving that glossy finish. For the ultimate result, the best choice is a complete detailing kit that combines both, giving your car a professional-level clean inside and out, all in one go.

Modern vehicles utilize a wide range of materials, including synthetic fibre carpeting, carbon fibre composites, natural fibres, vinyl, and various plastics. Each surface type needs its specialized cleaner. That’s why complete professional car detail kits have such a wide range of products.

DIY vs. Professional Kits: Which is Better?

Side-by-side comparison of a DIY car detailing setup at home and a professional detailing service with advanced tools, showing differences in approach, tools, and environment.

Your choice between DIY and professional detailing kits depends on factors such as cost, quality, convenience, and your skill level.

1. Cost Considerations

DIY car detailing costs substantially less than professional services. Professional detailing ranges from $100 to $300 or more based on the package and vehicle condition. A DIY kit requires an upfront investment that pays off with each subsequent use.

You can budget a quality DIY clean and polish kit for under $200. Professional detailing for comprehensive service may cost between $200 and $1,000, depending on your location, vehicle size, and the selected services.

2. Quality and Results

Professional detailing kits contain higher-grade products that aren’t available to most consumers. These professional-grade products offer longer-lasting protection and better cleaning power.

Professional detailers utilize industrial-grade tools and premium products that outperform regular store-bought supplies. Their experience enables them to handle various cars and paint finishes with the appropriate techniques.

3. Time Investment vs. Convenience

DIY detailing can take several hours to a full day, depending on the level of thoroughness. Professional detailing saves you this time investment.

Some people find DIY detailing rewarding and affordable, while others prefer expert service and convenience. Joseph Silveira, who runs a media fleet in New England, says, “Detailing is a skill-based activity, and it takes time to build proficiency.”

4. Expertise Level

Professional detailers bring knowledge and experience that’s hard to match with DIY efforts. They possess advanced techniques, such as paint correction and ceramic coating applications, that require precision.

Car Talk suggests starting small for DIY detailing: “Get a good vacuum. Buy a kit that focuses on washing and waxing. Purchase an interior crevice cleaner. Go slow; be careful not to break anything.” This step-by-step approach helps build skills over time.

5. Specialized Services

Professional kits enable services beyond standard DIY capabilities. Professionals can fix minor scratches or chips to restore your vehicle’s paintwork. Services like ceramic coating and paint protection film (PPF) shield your car’s paint from environmental damage, UV rays, and minor scratches.

Your budget, time, and interest in learning detailing techniques will guide your decision. Many car owners employ both approaches, handling routine maintenance with a quality DIY kit and seeking professional help for more comprehensive treatments and specialized work.

Building your car detailing toolkit requires understanding that detailers earn their fees through skill and hard work. The products are just part of what creates excellent results. Good technique matters as much as quality supplies.

Must-Have Tools for Your Car Detailing Kit

A set of essential car detailing tools, including brushes, cleaners, and conditioners for both interior and exterior car care, laid out neatly for easy use.

Whether you’re a beginner or a weekend detailing warrior, the right tools can make or break your results. From spotless seats to a paint job that turns heads, here are the essentials every car detailing kit should include. Here is a 56 pc ultimate car detailing kit that includes everything you need.

1. Interior Detailing Essentials

Your car’s interior is where you spend the most time, so keeping it clean matters. Here are the must-haves for tackling everything inside:

  • Brushes for vents, seats, and carpets: Soft bristles are ideal for delicate areas like vents, while stiffer brushes effectively handle carpets and fabrics without damaging surfaces or leaving behind debris.
  • Leather cleaners and conditioners: Specially formulated to clean, soften, and protect leather surfaces from cracking, fading, and stains, they are essential for both luxury interiors and everyday wear and tear.
  • Plastic and vinyl cleaners: Restore dashboard, console, and trim shine without leaving a greasy residue, perfect for maintaining that clean, matte factory finish inside your car.
  • Glass cleaner: Safe for tinted windows, these cleaners remove smudges, fingerprints, and haze, leaving behind crystal-clear, streak-free results for maximum visibility.

2. Exterior Detailing Must-Haves

The outside of your car battles sun, grime, and road salt. Arm yourself with these essentials to bring back the shine:

  • Clay bars: Removes embedded contaminants from paint that regular washing can’t, leaving surfaces ultra-smooth and ready for polishing or waxing.
  • Polishing pads and compounds: Apply polish evenly and remove imperfections such as swirls and light scratches, helping to restore your car’s shine and surface clarity.
  • Wheel brushes: Built with tough, flexible bristles to clean tight spaces in rims and remove brake dust without scratching or damaging the wheel’s finish.

Want it all in one? Check out a Car Detailing Kit Interior and Exterior combo, which is designed for convenience, value, and total car care.

3. Top 5 Car Detailing Brushes for Every Task

Not all brushes are created equal. Here’s your go-to list:

  • Soft Bristle Brush: Ideal for painted surfaces and emblems. Gently lifts dirt without scratching delicate finishes, perfect for use on clear coats, badges, and trim.
  • Medium Bristle Brush: Best for door jams, plastic trims, and engine bays. Balances strength and softness to clean stubborn grime without damaging softer materials.
  • Stiff Bristle Tire Brush: Designed to scrub rubber tires and remove heavy brake dust. Durable bristles break down road grime without harming rubber or wheel surfaces.
  • Detailing Crevice Brush: Thin, narrow, and flexible, this brush is perfect for tight spots like air vents, seams, and around buttons. Reaches where other tools simply can’t.

Interior Upholstery Brush: Cleans fabric seats, carpets, and floor mats. Strong enough to lift dirt and stains, yet gentle enough to avoid damaging upholstery fibres.

How to Choose the Best Car Detailing Kit

Selecting the right car detailing kit can be challenging due to the numerous options and varying prices available. An innovative approach helps you avoid overspending on items you won’t use.

Start by checking what you already have at home. Scan your garage shelves or storage bins; this quick step helps prevent buying duplicates and keeps your spending in check.

Also, be cautious of flashy marketing. Some kits claim to offer “20 pieces” but include extras, such as air fresheners or bucket lids, to inflate the total number. Instead of falling for the hype, focus on high-quality essentials that deliver real, professional-level results.

Understanding car detailing prices also helps you decide if you’re better off building a kit piece by piece or going for an all-in-one package. The correct choice balances value with actual usefulness because bright detailing is all about quality over quantity.

1. Budget-Friendly vs. Premium Kits

Car detailing kits are available at various price points, ranging from simple options under $30 to complete, professional-grade kits exceeding $200. Let’s break down what you get at each price level.

Entry-Level Kits ($30-$75) These economical options usually come with:

  • Basic car wash soap: A gentle, pH-balanced formula designed to lift dirt without stripping wax or damaging your car’s paint finish.
  • A few microfiber towels: Soft, absorbent towels perfect for drying, buffing, and wiping without scratching paint or leaving lint behind on surfaces.
  • Simple tyre shine product: Adds a deep, glossy finish to tyres while protecting rubber from cracking, fading, and harmful UV exposure.
  • All-purpose interior cleaner: This versatile spray works on plastic, vinyl, and fabric and is great for dashboards, door panels, and light upholstery stains.

These starter kits work great for light cleaning and suit budget-conscious owners who are just beginning their detailing experience. They offer good value for occasional use but might not last as long as pricier options.

2. Mid-Range Kits ($75-$150) 

These kits balance quality and cost with: 

  • Higher-quality microfiber towels: Thicker, more durable towels that absorb better, last longer, and won’t scratch even the most delicate paint or trim.
  • More specialized cleaners for different surfaces: Formulated for leather, glass, plastic, or carpets—each cleaner targets a specific surface for safer, more effective results.
  • Better applicators and basic brushes: Includes ergonomic applicator pads and sturdy detailing brushes designed for precise application and deeper cleaning of tight areas.
  • Longer-lasting protection products: Premium waxes or sealants that provide a glossier finish and shield your paint from UV rays, water, and contaminants for months.

Most everyday users get excellent results with these kits. Car enthusiasts often find mid-range kits give them the best value, offering clear improvements over basic options without the cost of professional-grade products.

3. Premium Kits ($150-$300+) 

Top-tier car detailing kits feature professional-grade products, including:

  • Concentrated formulas: Powerful, concentrated cleaners and shampoos that require less product per use, offering cost-efficiency and high-performance cleaning results.
  • Specialized tools for different surfaces: These include precision brushes, scrubbers, and applicators designed for specific materials like leather, fabric, trim, and glass for detailed care.
  • Advanced protection products: High-end sealants or ceramic-infused formulas that provide long-lasting protection, enhance shine, and guard against harsh elements and contaminants.
  • Higher-quality applicators and premium microfiber: Soft, durable microfiber towels and ergonomic applicators ensure even product distribution while minimizing the risk of scratches.

Premium kits might cost more upfront, but they often save money over time since their concentrated formulas last longer [9]. The higher-quality products also give better results and protect your car longer.

It’s worth mentioning that cheaper products often contain fillers and extra water, which makes them less effective and might damage your car’s surfaces. Quality products without fillers work better per ounce, making them more economical despite higher initial costs.

Many professional brands sell “combo” packages that group matching products at better prices than buying them separately [3]. These smart combinations ensure product compatibility and save you money.

Customizing Your Kit for Specific Needs

Custom car detailing kit tailored for different climates, car types, and usage patterns, featuring UV protectants, mold-resistant sprays, fabric top cleaners, and a well-organized storage caddy.

Every car has unique needs, and no single detailing kit works perfectly for all situations. Your ideal kit depends on several personal factors.

1. Climate Matters

Your local weather plays a significant role in choosing products:

  • Hot, sunny places need products with UV protection
  • Humid areas work better with mould and mildew prevention products
  • Snowy regions require protection against road salt and chemicals
  • Rainy areas benefit from water-repellent sealants and coatings

Think about your specific needs based on climate, car age, and how often you drive. These factors help determine which products will work best for you.

2. Vehicle Type Considerations 

Different cars need different care:

  • Older cars might need stronger cleaning products and restoration tools
  • Modern cars with complex electronics require gentle, compatible cleaners
  • Dark-coloured cars show swirls easily, needing special polishing products
  • Convertibles require specific fabric top cleaners and protectants
  • Luxury vehicles often have special materials that need extra care

3. Usage Patterns

How often you detail your car affects your kit choice:

  • Weekend warriors might like all-in-one kits for ease
  • Regular detailers benefit from buying concentrated products in bulk
  • Multiple car owners need more complete kits

Ready-made kits from trusted brands like Chemical Guys or Adam’s Polishes include products designed to work together. These collections take away the hassle of matching products.

Building your kit sometimes makes more sense. Many enthusiasts start with a simple kit and add specialized products as needed. This lets you invest gradually while learning what works best for your car.

Good storage matters, too. Kits with dedicated bags, buckets, or organizers keep everything organized. Some premium options include bottle organizers or detailing caddies that make the work easier.

Learning to use different products takes time. Some premium kits include guides or video tutorials that help improve your results. This extra education often justifies the higher price, especially for beginners.

A careful look at your needs and available options will help you find the perfect car detailing kit that gives professional results without wasting money.

Car Detailing Cost Breakdown

The financial aspects of car detailing deserve a close look before you decide to buy a detailing kit or hire professionals. Your choice can make a big difference in costs, which makes this decision vital for anyone who wants to keep their car looking great and maintain its value.

1. How Much Does Car Detailing Cost? (DIY vs. Professional)

Professional car detailing prices vary a lot across the country. The national average for car detailing stands at $160.16. Most services cost between $114.59 and $213.67. Location also plays a huge role in these prices.

Your vehicle’s size plays a major role in professional detailing costs:

Vehicle SizeAverage Professional Cost
Small$50-$175
Medium$175-$250
Large$225-$400
Extra Large$500-$650

These prices show big regional differences. Several other factors affect professional detailing costs:

  • Vehicle condition: A heavily soiled car with dirty interiors or stains will increase the cost, as deep cleaning takes more time and effort.
  • Service depth: Basic cleaning is cheaper than full restoration, which may involve paint correction, upholstery repair, or engine bay detailing.
  • Facility type: Independent shops may charge more for specialized services, while car wash chains usually offer simpler, faster options at lower prices.
  • Interior materials: Leather, suede, or delicate fabrics require extra care and specialized products, making interior cleaning more costly compared to standard fabrics.
  • Environmental regulations: Areas with strict water usage limits may result in higher costs, as shops must implement water-saving practices or additional treatment processes.

Professional services come in different packages. Simple full-service interior and exterior detailing runs $120-$350. Premium “showroom finish” work with paint correction and high-end protection can cost $500 to over $900.

DIY car detailing saves you money. A quality car detailing kit costs $30-$50 per session after the original investment of $50-$150. You’ll save money after just a few uses.

Complete detailing kits with Citrus Wash and Gloss, Butter Wet Wax, and various brushes start around $99.99. Premium packages cost $150-$300, but their concentrated formulas last longer.

 2. Why Interior Detailing Costs More

Interior detailing costs more because of:

  • Time needed to clean every surface: Cleaning time varies based on the surface type; delicate areas, like upholstery or engine bays, require extra time and care.
  • Special tools like steam cleaners and extractors: Professional detailing often involves steam cleaners and extractors to remove deep-set dirt and stains, ensuring thorough cleaning and sanitation.
  • Expert knowledge for different materials: Professionals have the expertise to treat various materials like leather, suede, and carpets, ensuring safe, effective cleaning without damage.
  • Detailed work in small spaces: Experts excel at cleaning tight, hard-to-reach spaces such as vents, between seats, and door jambs, providing a complete detailing service.
  • Health benefits from a clean environment: Clean vehicles can help reduce allergens, bacteria, and odours, improving air quality and promoting overall health and comfort.

Professional interior detailing costs $150-$350 based on vehicle size and condition. DIY enthusiasts need special equipment like upholstery steamers ($100+).

3. Are Professional Kits Worth the Price?

Professional car detailing kits offer both short and long-term value. These kits have concentrated formulas that outlast regular consumer products. A single professional session costs $175-$350, while a $100 detailing kit saves money over multiple uses.

Your priorities determine the real value. Professional kits give you the following:

  • Long-term protection for your car’s surfaces
  • Better resale value (well-kept cars sell for more)
  • Fewer repair costs (regular care prevents damage)
  • Better ingredients without fillers or excess water

Industry experts say, “You get what you pay for”. Cheap products often contain fillers that work poorly and might damage surfaces. Professional formulas clean better per ounce, making them economical despite higher upfront costs.

Good maintenance prevents future damage and saves money. Professional detailing shields your car from the elements and adds years to its life.

Results depend heavily on expertise. Professional products used correctly give better outcomes. Many owners find success with a mixed approach – doing routine care with quality DIY products while getting professional help for deeper cleaning.

Regular detailing proves to be a smart investment. A clean, well-maintained car brings a higher resale value because buyers pay more for cars that show proper care. If you plan to sell, professional detailing or using a quality kit makes good financial sense.

Step-by-Step Guide to Detailing Your Car

Your vehicle can look showroom-perfect with proper detailing. A good car detailing kit and professional techniques will help you achieve amazing results. Let’s look at the step-by-step process that works for both interior and exterior detailing.

1. Interior Detailing Process

Deep cleaning seats, dashboard, and carpets.

  • Clear, Vacuum, and Prep: Start by removing all personal items. Vacuum thoroughly from top to bottom, headliner, seats, carpets, and trunk. Use crevice tools for tight spaces and under seats.
  • Detail Surfaces and Materials: Clean the headliner with a damp sponge. Use microfiber towels and brushes for the dashboard, vents, and door panels. Choose the right cleaner for each surface: plastic, vinyl, or leather.
  • Tackle Upholstery and Leather: Use a vapour steamer or extractor on tough stains. For leather, apply dedicated cleaner and conditioner with soft brushes to maintain texture and longevity.
  • Finish with Dressings and Glass: Apply interior dressings to protect surfaces from UV and cracking. Save glass cleaning to keep windows streak-free and spotless.

2. Exterior Detailing Process

Washing, claying, polishing, waxing.

  • Start with Wheels & Pre-Wash: Clean tyres and wheels first using wheel-safe brushes and cleaners. Pre-rinse the car to remove loose dirt. Then, spray a pre-wash solution or snow foam to soften the grime.
  • Gentle Hand Wash & Decon: Use the two-bucket method, one for soap and one for rinsing. Clean from top to bottom. Then, decontaminate with iron remover, tar remover, and a clay bar for a smooth finish.
  • Drying & Polishing: Dry the vehicle immediately with microfiber drying towels to avoid spots. If paint correction is needed, use polish with the proper pads. Wipe with IPA to remove polish oils.
  • Seal & Protect: Apply a wax, paint sealant, or ceramic coating depending on the desired durability. Each adds a glossy layer of defence against the elements.
  • Final Touches: Dress exterior plastic, rubber trims, and tyres. Finish with glass cleaner on all windows and mirrors for that sparkling look.

Conclusion

Happy man using a professional car detailing kit with microfiber cloths, brushes, and cleaners, standing proudly next to his clean, shiny car—showcasing the satisfaction of DIY detailing.

Investing in a quality car detailing kit is one of the most innovative ways to boost your vehicle’s appearance, value, and longevity. Whether you’re just starting with a basic $50 kit or going all-in with a $300 professional-grade option, the savings are real, especially when professional detailing averages $160 per session. A good car detail kit includes essential tools like microfiber cloths, brushes, and specialized cleaners that let you tackle both interior and exterior like a pro. DIY detailing might seem tricky at first, but with the right tools and a solid routine, it gets easier (and more satisfying) over time. Just be sure to match your kit to your car’s specific needs, local weather, and how often you plan to clean. Even beginners can achieve showroom-level results with a bit of patience and practice. Want to stay organized and make sure you’re using the best tools every time? Download our free car detailing checklist!