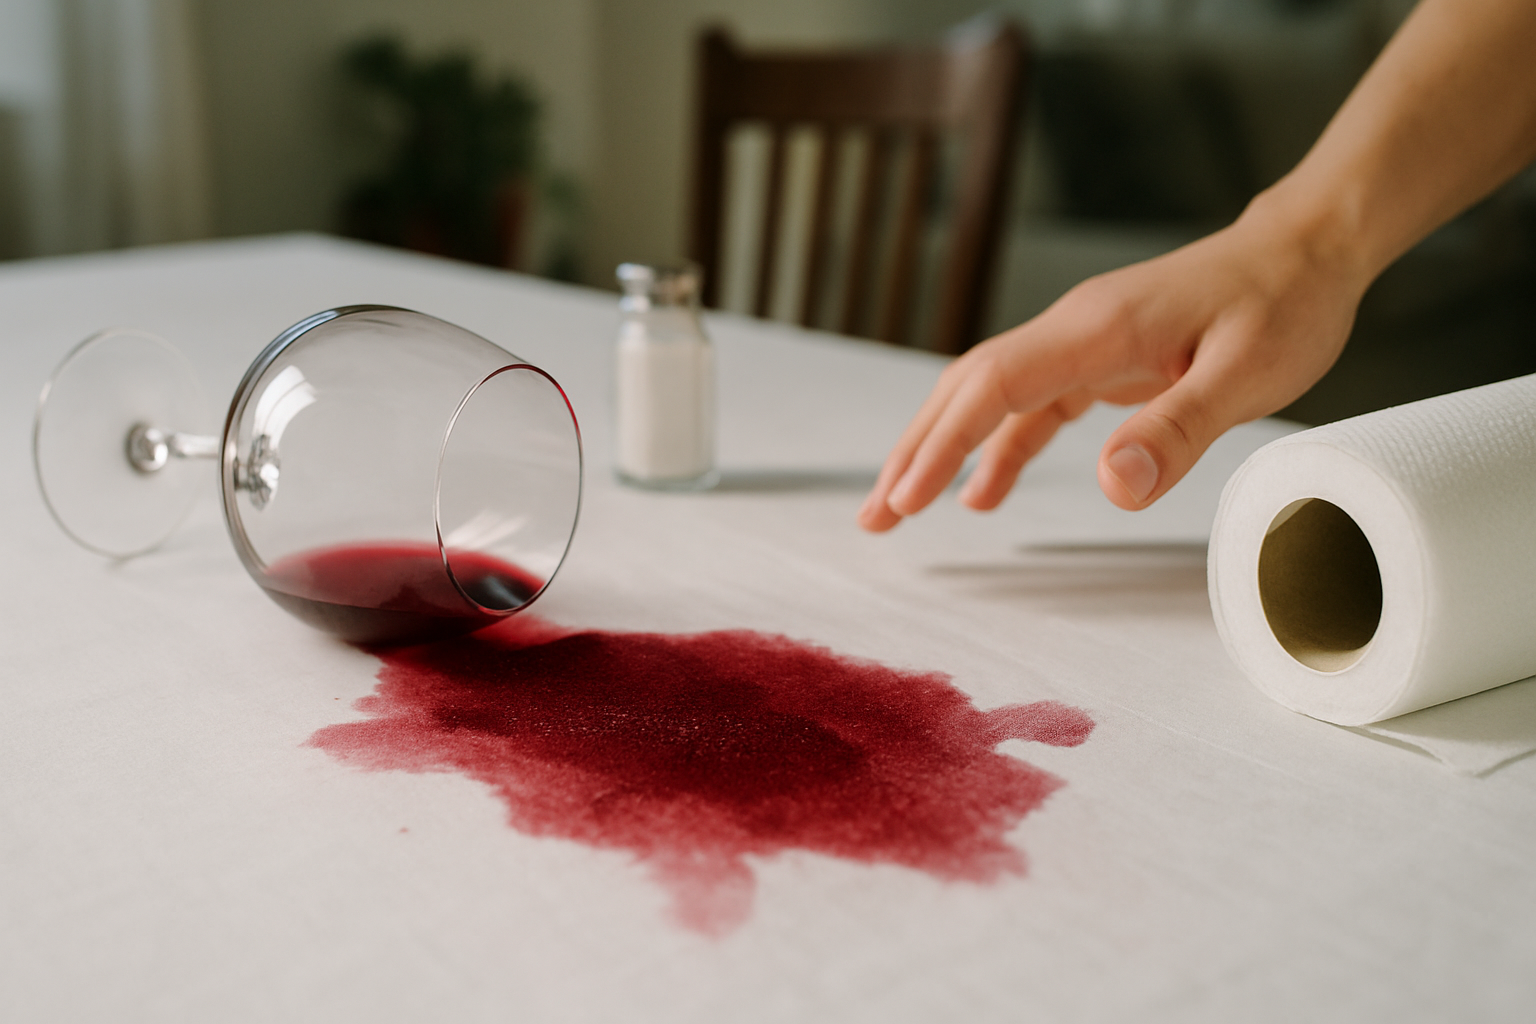
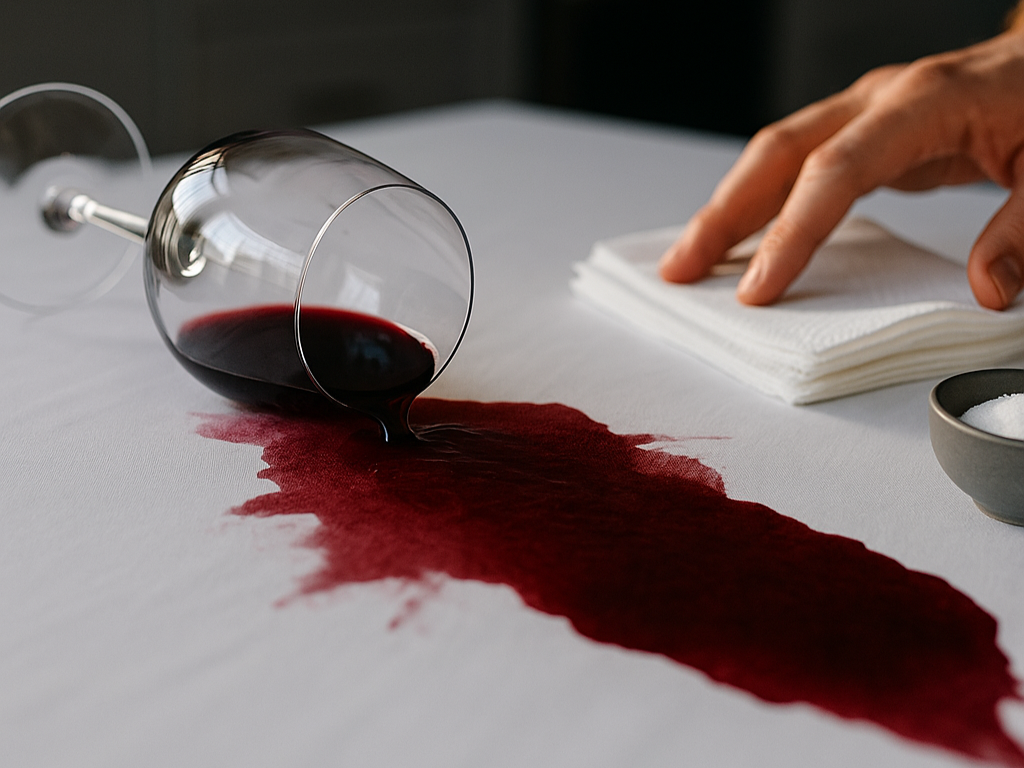
Have you ever accidentally spilled red wine and watched in frustration as your favorite shirt became stained and seemed beyond saving? Red wine contains powerful pigments and tannins that quickly soak into fabric. The longer it sits, the more difficult it becomes to remove. When it comes to wine stains, acting fast is key.
Fortunately, there are several effective methods for treating these stains. Everyday household items like salt, baking soda, and club soda can be helpful when used correctly. With quick action and the proper method, you can often prevent lasting damage to your clothes, tablecloths, or carpets.
In this article, you’ll learn how to clean red wine stains using quick fixes with everyday items, common mistakes to avoid, and our top-tested red wine stain removal products, from affordable options to high-end solutions.
Act Fast: What to Do in the First 60 Seconds
A red wine spill can leave you with either a permanent reminder or a forgotten mishap, depending on your immediate reaction. You have just minutes before a red wine stain starts to set. Let’s look at what you should do in these first critical moments.
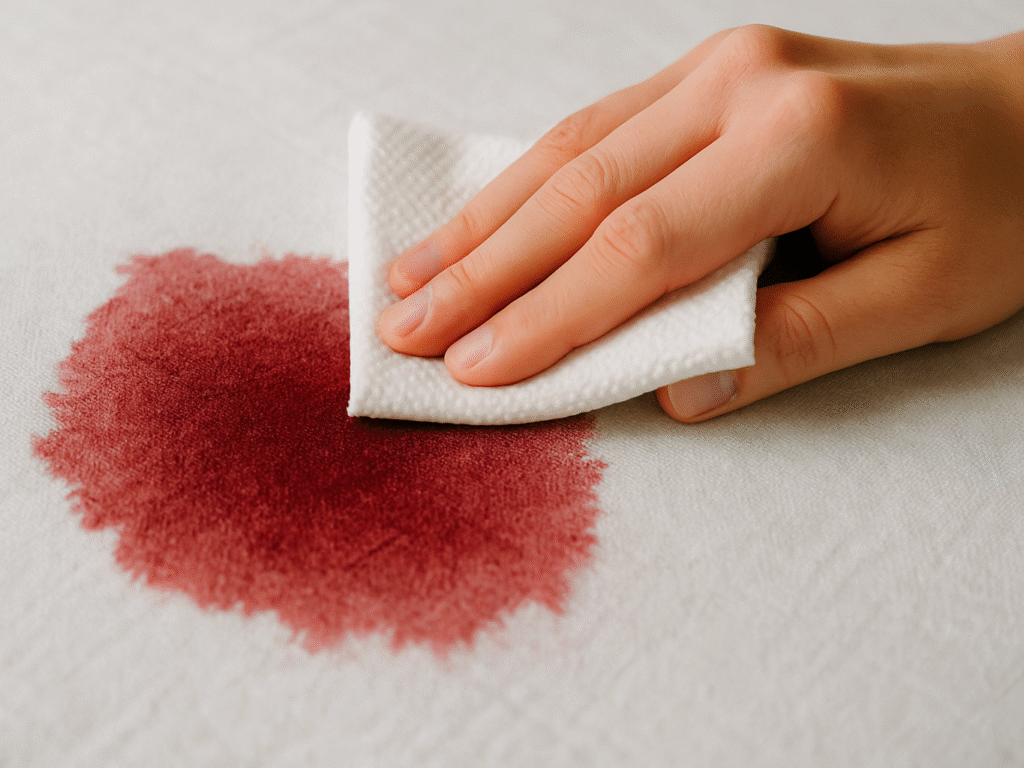
1. Blot, don’t rub the stain.
You should grab a cloth and start scrubbing right away. This is precisely what you should not do. Scrubbing pushes the red wine deeper into the fabric fibers. It makes the stain harder to remove and causes it to spread outward.
Instead:
- Grab clean paper towels or a white cloth
- Gently press down on the stain, applying light pressure
- Lift the towel, move to a clean section, and repeat
- Continue blotting until you’ve absorbed as much liquid as possible
This dabbing motion pulls the wine away from the fabric instead of pushing it deeper. Work from the outside edges toward the center to prevent the stain from spreading.
2. Why cold water matters
Cold water should be your next step after blotting. It helps lift wine molecules from the fabric and stops them from setting permanently.
Water temperature is a vital factor. Never use warm or hot water on a red wine stain; heat will set the stain by making the wine’s pigments bond with the fabric fibers. Run cold water through the stain’s back if possible. It pushes wine out through the fabric rather than allowing it to seep deeper into it.
For upholstery or carpets where running water is not practical, use a clean cloth dampened with cold water and continue blotting. Some experts suggest using sparkling water because its carbonation may break down wine molecules more effectively.
3. Does salt remove red wine stains?
If you’ve ever searched for how to clean red wine stains, you’ll be surprised how well table salt works. It absorbs the wine like a sponge, lifting moisture straight from the fabric.
To use salt effectively:
- First, blot excess wine from the fabric
- Lightly moisten the stain with cold water (don’t soak it)
- Pour a generous amount of salt over the entire stain
- Let the salt sit undisturbed for at least 3-5 minutes
The salt changes color as it absorbs the pigments from the wine. Kosher salt might work better than regular table salt because its larger grains absorb more effectively.
Brush away the salt gently after it has worked, and check the stain. You should repeat this process. Vacuum up the salt after it dries if you’re treating a carpet.
Salt works best on fresh stains. The longer you wait, the less effective it becomes. White wine on red wine stains doesn’t help much and could worsen the situation by spreading the stain.
Quick action makes a huge difference with red wine stains. Acting within the first minute versus waiting ten minutes can significantly impact your chances of removing the stain. Keep clean clothes, cold water, and salt ready if you plan to serve wine at your gathering.
Quick Fixes Using Common Household Items
Red wine spills don’t have to be permanent disasters. Your kitchen cupboards hold powerful stain-fighting allies that can save your fabrics. These simple household remedies can make all the difference between ruined fabric and a complete recovery.
1. How to use baking soda or salt
Baking soda and salt are great stain fighters because they pull moisture and wine out of fabric fibers. Baking soda also alters the pH balance of red wine, which causes the red stains to turn bluish.
To use salt:
- Gently blot any excess red wine with a clean, dry cloth to quickly absorb surface moisture.
- Lightly dampen the stained area with cold water to prevent the wine from setting into the fabric.
- Generously cover the stain with kosher salt; if table salt is available, use that instead.
- Allow the salt to sit for 3–5 minutes, or overnight for more stubborn, deeper stains.
- Carefully brush away the salt, which should now appear pink from absorbing the red wine.
- Rinse the area thoroughly with cold water, and repeat the process if the stain remains visible.
Baking soda gives you two good options:
A. Direct application: Sprinkle baking soda on the stain and let it sit overnight for 30 minutes. The powder absorbs the wine and turns a grayish-blue color. Brush off the residue and rinse with cold water.
B. Paste method: Mix baking soda and water to form a paste. Apply the stain, let it dry, then vacuum or brush it away. Mix ¼ cup of baking soda with 1 tablespoon of white vinegar to create a more potent cleaning paste.
2. Club soda and vinegar combo
This bubbly combination forms a powerful stain-fighting duo. Club soda’s carbonation helps lift and break apart the wine molecules. At the same time, white vinegar targets and weakens the deep red pigments, making it easier to remove the stain without damaging the fabric.
Here’s what to do:
- Blot up as much of the spilled wine as possible using a clean, absorbent cloth.
- Pour a generous amount of club soda directly over the stain to start breaking it down.
- Allow the soda to bubble and soak into the fabric for about 10 minutes.
- Gently blot the area again using a fresh cloth to lift loosened pigment from the fabric.
- Add a small amount of white vinegar directly onto the stain to enhance cleaning power.
- Let the vinegar sit and work on the stain for 10 to 15 minutes uninterrupted.
- Rinse the treated area thoroughly with cold water to remove all residue and loosened stain.
Tough stains might need both ingredients together. Cover the stain with baking soda and add vinegar. The mixture will bubble up; that’s precisely what you want! Rinse with a damp cloth after a few minutes.
3. Boiling water trick for tablecloths
This method is highly effective on tablecloths and durable, colorfast fabrics. However, it’s best avoided for delicate materials such as silk, suede, or wool, as these fabrics can be easily damaged by the acidity or agitation involved in the process.
The right way to do it:
- Boil several cups of water, ensuring it’s at a rolling boil before using it on the stain.
- Stretch the stained fabric tightly over a bowl or sink, securing with a rubber band if necessary.
- Keep the fabric 8-12 inches below the spot where you’ll pour the boiling water.
- Slowly pour the boiling water through the stain from a height of about 8 inches.
- The hot water helps break down and release the wine molecules from the fabric fibers.
- Watch as the stain fades and gradually washes away with the force of the hot water.
This trick works great when saving a tablecloth during dinner parties. Check your fabric type first; boiling water can ruin some materials.
Science helps you fight stains through absorption, pH changes, or breaking molecular bonds. Your success depends on quick action and the type of fabric. Some stains might need multiple treatments or professional cleaning.
How to Clean Red Wine Stains: Advanced Fixes for Spills
Red wine stains can be stubborn and refuse to budge even after your best efforts. You found an old stain days later, or your quick home remedies didn’t work. Science has some robust solutions for these challenging situations.
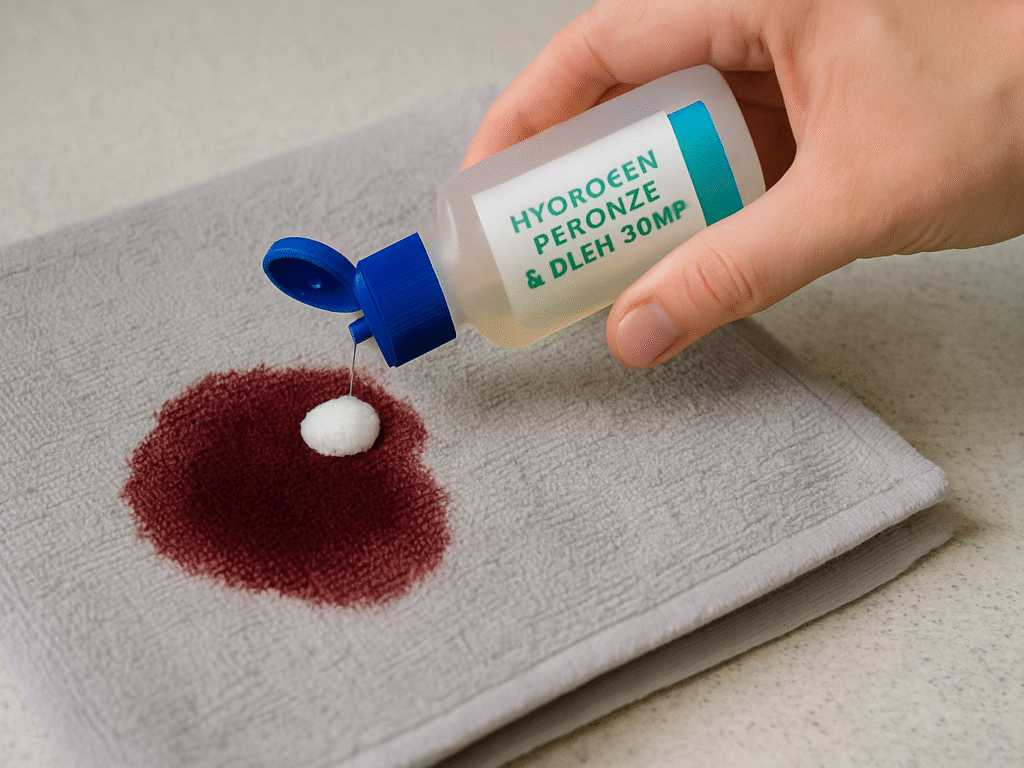
1. Dish soap and hydrogen peroxide mix
This powerful combo works great on fresh and dried red wine stains. You should test it first on colored fabrics, as hydrogen peroxide may bleach them.
To get the best results, mix:
- Mix three parts hydrogen peroxide with one part dish soap, preferably Dawn, for best results.
- Apply the mixture directly to the stained area, ensuring it’s fully saturated with the solution.
- Allow the solution to sit for 30 to 60 minutes, or longer for stubborn, dried stains.
- Rinse the fabric thoroughly with cold water to remove the solution before laundering as usual.
This method works best on machine-washable fabrics. The hydrogen peroxide breaks down the wine’s chromogens, and the dish soap helps lift the dissolved particles from the fabric. White fabrics show immediate results as the stain starts to fade right away.
2. Using enzyme-based detergents
Enzyme-based detergents contain biological compounds that break down protein-based stains, such as those from red wine. These special cleaning agents break down proteins into smaller molecules that can be easily washed away.
Here’s how to use enzyme detergents:
Look for lipases and proteases on the label; these enzymes target the protein compounds in wine. Apply detergent to the stain and gently rub it into the fabric. Let it sit for about 20 minutes before washing with cold water.
Remember not to use enzyme detergents on silk, wool, or leather, as they can damage these natural fibers. They yield the best results when added to your regular laundry routine for stubborn stains that won’t budge.
3. When to try oxygen-based cleaners
Oxygen-based cleaners like OxiClean use sodium percarbonate, which releases hydrogen peroxide when mixed with water. It creates a powerful yet safer option than chlorine bleach for white and colorfast fabrics.
These cleaners are great at removing stubborn dried wine spots. Mix the oxygen cleaner with water according to the package instructions, and soak the stained garment for at least 6 hours or overnight. The long soak time allows the cleaner to penetrate deeply into the fabric and break down the stain molecules.
Oxygen cleaners might be your last chance against those stubborn red wine spots. They’re easier on fabrics than chlorine bleach but still pack a punch against stains. Additionally, many brands offer color-safe ingredients that are compatible with various types of fabrics.
What Not to Do When Removing Red Wine Stains
A red wine spill can trigger panic, and knowing what to avoid is as important as understanding the proper cleanup methods. Even your best intentions can backfire if you make these common mistakes.
1. Avoiding heat and scrubbing
Your instinct might tell you to scrub a red wine stain hard, but this worsens things. The scrubbing pushes wine deeper into the fabric and spreads the stain outward. The pressure forces more wine downward, a real problem for couches and carpets.
Heat becomes red wine’s ally and your enemy. Hot air changes the chemical process as the stain dries. A temporary accident can become a permanent mark. You should avoid:
- Using hair dryers on the spot
- Putting stained clothes in the dryer before treatment
- Washing with hot water (which sets the stain)
2. Why does white wine not help
In contrast to this popular belief, white wine does not help remove red wine stains. This myth has wasted many good bottles at parties. White wine can’t counteract red wine’s dyeing agents or remove the stain. The truth is, white wine:
- This method only slightly dilutes the red stain, often leaving behind a faint but visible mark.
- It can cause the original stain to spread, making the affected area even larger.
- The solution adds its staining agents, potentially introducing new colors to the fabric.
- Instead of removing the stain, it creates two distinct stains, complicating the cleaning process.
A cleaning expert says, “Stop chucking wine at people!” Red and white wines often come from the same grapes; the main difference lies in the amount of grape skin contact time.
3. Common myths that make stains worse
Beyond the typical myth about white wine, there are several other misconceptions about stain removal. These myths can exacerbate stains or damage fabrics, resulting in increased frustration and ineffective results.
- Salt misuse: Salt can help remove fresh stains correctly, but incorrect application can permanently set the stain.
- Delayed action: Stains that sit too long settle deep into fibers. Red wine becomes a fabric dye with time.
- Untested store cleaners: These potent formulas may damage delicate fabrics while attempting to remove the stain.
Note that red wine’s tannins quickly bind to fabric fibers. Each wrong approach reduces your chances of successful stain removal.
Choosing the Best Red Wine Stain Remover Products
Red wine disasters sometimes need more than just household remedies. The market offers practical solutions for removing red wine stains at all price points, each providing unique benefits to tackle those challenging red spots.
1. Budget Friendly: Bundle of OxiClean Max Force Laundry Stain Remover Spray ($5-$10)
This budget-friendly powerhouse removes fresh and set-in red wine stains. The spray soaks deep into stains and quickly loosens wine molecules from fabric fibers. OxiClean Max Force removes red wine stains from khakis and dish towels in one wash cycle.
The quickest way to use it:
- Spray the solution directly onto the wine stain, ensuring the fabric is fully saturated with the product for maximum effectiveness in breaking down the stain without damaging the fibers.
- Gently rub the solution into the fabric, working it into the stain with your fingers or a soft cloth to ensure even distribution and to help lift the wine molecules from the fabric.
- Allow the mixture to stand for up to 10 minutes, giving the solution sufficient time to penetrate and break down the wine stain, making it easier to remove during washing.
- Wash the treated fabric with your regular laundry detergent, following the care instructions for the fabric type to ensure thorough cleaning and the removal of any remaining residue from the stain.
OxiClean works effectively on washable fabrics but should be avoided on wool, silk, leather, or dry-clean-only materials. Tough stains need soaking for up to 6 hours.
2. Mid Range: Party Foul Wine Stain Out Spray ($17-$20)
This specialized solution stands out with its 100% plant-based formula. A two-pack of 8oz bottles costs around $17.99. Party Foul uses an eco-friendly approach without compromising on results.
The formula has no harmful “forever chemicals” (PFAS-free), making it a safe choice for homes with kids and pets. Beyond wine, it effectively removes red wine stains from carpet and helps to remove red wine stains from clothes, as well as coffee, tea, and sports drink stains from various surfaces.
Party Foul can remove weeks-old stains that other products couldn’t touch. One customer said, “I was skeptical, but it worked”.
3. Premium: Clorox Stain Remover and Color Booster Powder
Clorox Stain Remover and Color Booster are the go-to choices for tricky situations. We tested it on old, set-in wine stains that other products only lightened, making it the best red wine stain remover for tough stains.
Lab tests showed this product obliterated old blood stains. It proves it works well on protein-based stains like red wine. It also brightens colored fabrics while removing stains.
The best way to tackle stubborn red wine marks:
- Pretreat the wine stain directly with the product, ensuring it’s evenly applied and fully saturates the affected area to effectively break down the stain before washing.
- Allow the product to sit on the stain for exactly 10 minutes, giving it sufficient time to penetrate and break down the wine molecules for easier removal.
- Wash the fabric in the hottest water recommended on the fabric care label, as the high temperature helps lift and remove the stain while preserving the fabric’s integrity.
The right product on hand can save your favorite items from permanent damage.
Final Thoughts
Red wine stains don’t have to ruin your favorite fabrics. Quick action with the proper treatment method greatly improves your chances of removing the stain. You can use simple household items, such as salt and baking soda, or specialized cleaners. The proper application techniques will make all the difference.
Acting fast helps you avoid common mistakes. Blot the stain instead of scrubbing it. Avoid using hot water or believing in the myth of white wine. Keeping a reliable stain remover product nearby can save valuable time in the event of an accident.
If you’ve ever wondered how to clean red wine stains effectively, your success depends on choosing the right solution for each situation. Simple salt treatment works well for fresh spills. Set-in stains might need stronger oxygen-based cleaners. These proven methods and products will help you confidently tackle any red wine accident.