Mystery stain identification becomes critical when you discover an unfamiliar spot on your favorite shirt. Unfortunately, the longer a stain has set, the harder it may be to remove. Whether you’re dealing with brown protein-based stains, gray oil-rich marks, or yellowish sweat stains, tackling the unknown requires the right tools and techniques.
When faced with unknown set-in stains on your clothes, time is truly of the essence. The less time a stain has to soak in, the easier it will be to remove. However, even persistent stains can be conquered with the proper approach, such as soaking the fabric in cold water for at least 30 minutes before applying appropriate treatments.
In this guide, you’ll discover five essential tools that will transform your mystery stain identification process and help you remove stubborn spots from your garments. From UV lights to fabric stain testers, these solutions will help you determine precisely what you’re dealing with, and specifically how to make those stubborn spots disappear for good.
The Challenge of Mystery Stains
Almost everyone faces the perplexing situation of pulling laundry from the hamper only to discover an unidentifiable mark on their clothing, making mystery stain identification a crucial household skill. These unknown blemishes often appear mysteriously, sometimes becoming visible only after washing or dry cleaning. Understanding the nature of these elusive stains is the first step toward effectively removing them.
1. Why mystery stains are so common
Mystery stains are incredibly prevalent for several surprising reasons. First and foremost, many spills happen without your knowledge. You might dribble clear soda or vinaigrette on your shirt without noticing it. These invisible spills dry clear, leaving no immediate evidence of their presence.
Furthermore, numerous household products can create stains that initially remain undetected:
- Toothpaste, facial soap, and deodorants often cause hidden stains.
- Makeup, perfumes containing alcohol, and even rainwater can leave spotty marks.
- Common beverages, such as soft drinks, fruit juices, and those containing corn syrup or honey, can frequently create invisible stains.
For natural approaches to mystery stain identification and removal, consider exploring home remedies that utilize ingredients you likely already have at home.
What makes these particularly tricky is their development timeline. Many clear substances remain invisible until they oxidize, a process that occurs through exposure to air or heat. During this period, the spill absorbs oxygen and gradually transforms into a visible stain. It explains why you might drop off seemingly clean clothes at the dry cleaner only to pick them up with new stains that weren’t visible before.
Additionally, modern cleaning challenges contribute to the frequency of mystery stains. Excessive detergent residue can trap dirt particles and lint on your clothes, causing them to appear dirty. This residue contains additives that might react with moisture, creating discoloration where no stain previously existed.
Hard water presents another common culprit. Water containing high levels of calcium and magnesium reacts with detergents to form insoluble compounds that cling to fabric fibers. These mineral-laden residues not only reduce detergent effectiveness but also create stubborn marks on freshly washed garments.
2. How do they differ from regular stains?
Mystery stains differ fundamentally from regular stains in several ways. While ordinary stains are usually visible right away, mystery stains often remain hidden until triggered by specific conditions. The International Fabricare Institute investigates thousands of such puzzling cases annually, highlighting just how complex and elusive these stains can be.
Unlike typical stains that retain a consistent look, mystery stains can evolve. A seemingly invisible spill may darken or turn yellow after exposure to heat or air. This delayed appearance complicates the cleaning process, as you’re treating a transformed chemical rather than the original substance that caused the mark.
These stains also lack standard identifiers, such as location, smell, and color. Without these clues, identifying the cause becomes a matter of guesswork. You’re left solving a mystery with incomplete information, which makes effective stain removal much more challenging and often frustrating for the average person doing laundry. For comprehensive guidance on tackling these puzzling marks, our complete mystery stain removal guide provides detailed washing machine techniques for various unknown stains.
What makes them trickier is their composition; many result from chemical reactions. Dye transfers, detergent build-up, or hard water minerals can combine to form new stains. Standard cleaning methods often fail, and using the wrong one can permanently set the stain in place. Treating mystery stains requires patience, careful observation, and the right tools.
3. The importance of a methodical approach
Given the cryptic nature of mystery stains, adopting a systematic approach to mystery stain identification becomes essential for successful removal. First and foremost, timing matters significantly; the golden rule of stain removal is that the sooner you tackle it, the easier it will be to remove. This principle applies doubly to mystery stains, as they tend to become increasingly stubborn with age.
Instead of panicking and immediately applying random cleaning products, begin with careful examination. As an armchair detective, your first task is to gather evidence. Inspect the stain’s color, shape, texture, and odor as these characteristics provide valuable clues about its origin. For instance:
- Reddish-brown stains might indicate dried blood
- Shiny marks often point to oil or grease
- Strong odors typically suggest food-related stains
Stain location offers valuable clues; food and drinks usually land on the front. At the same time, mud or dirt collects near the bottom. This context helps narrow down possible sources. Before washing, thoroughly pre-treat the affected area and allow the treatment time to work for optimal results.
Handle mystery stains methodically to avoid cross-contamination. Hand-wash heavily soiled garments separately and always inspect them before drying. Heat can permanently set any remaining stain. Though time-consuming, this detective-like process significantly improves your chances of removing stubborn marks without damaging your clothes. Patience and persistence are key to success.
Mystery Stain on Clothes? Here’s What It Might Be and How to Remove It: Discover the most common types of mystery stains and their telltale signs. This comprehensive guide reveals expert identification techniques and proven removal methods for every mysterious mark you encounter. Click to solve your stain mystery today.
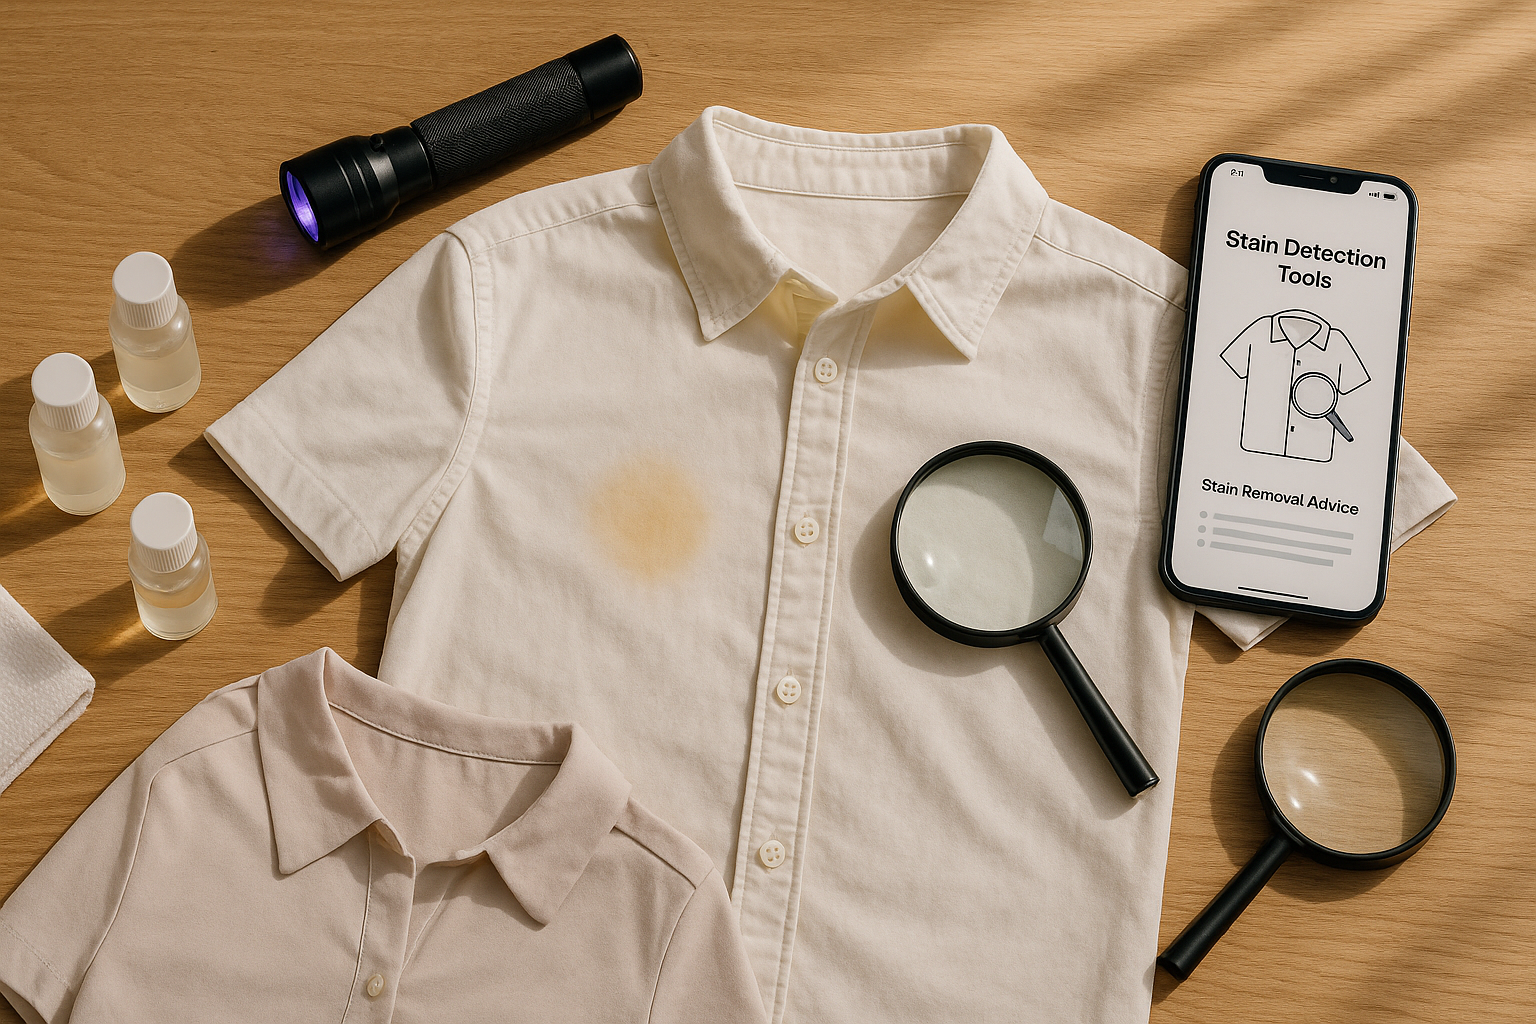
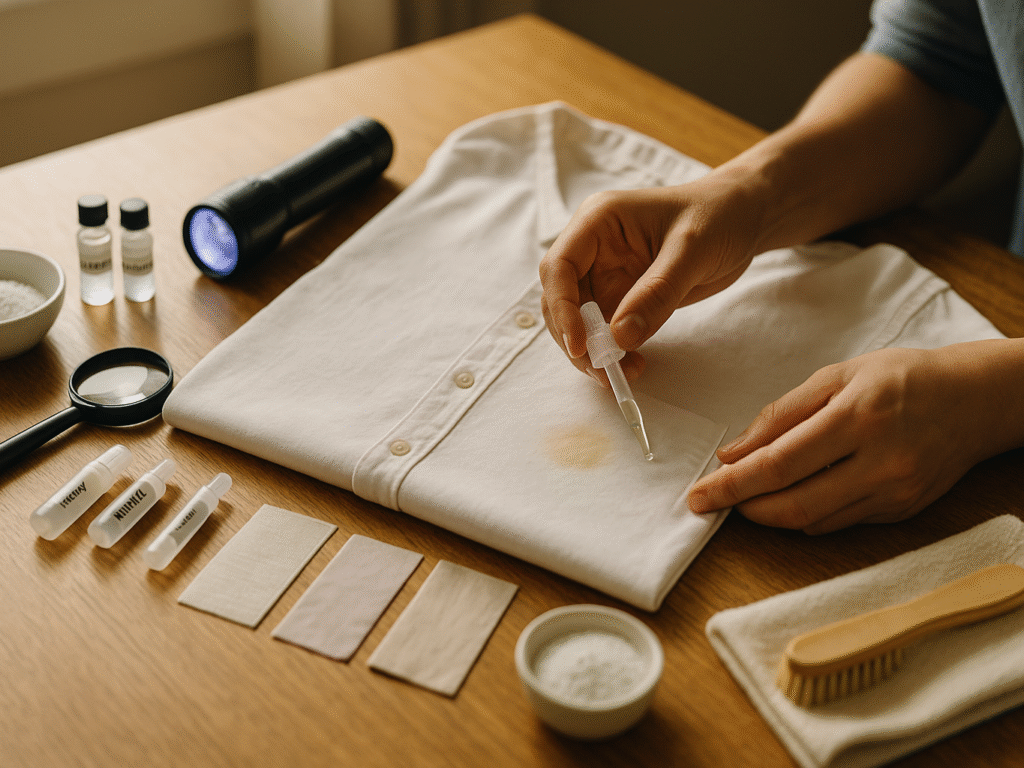
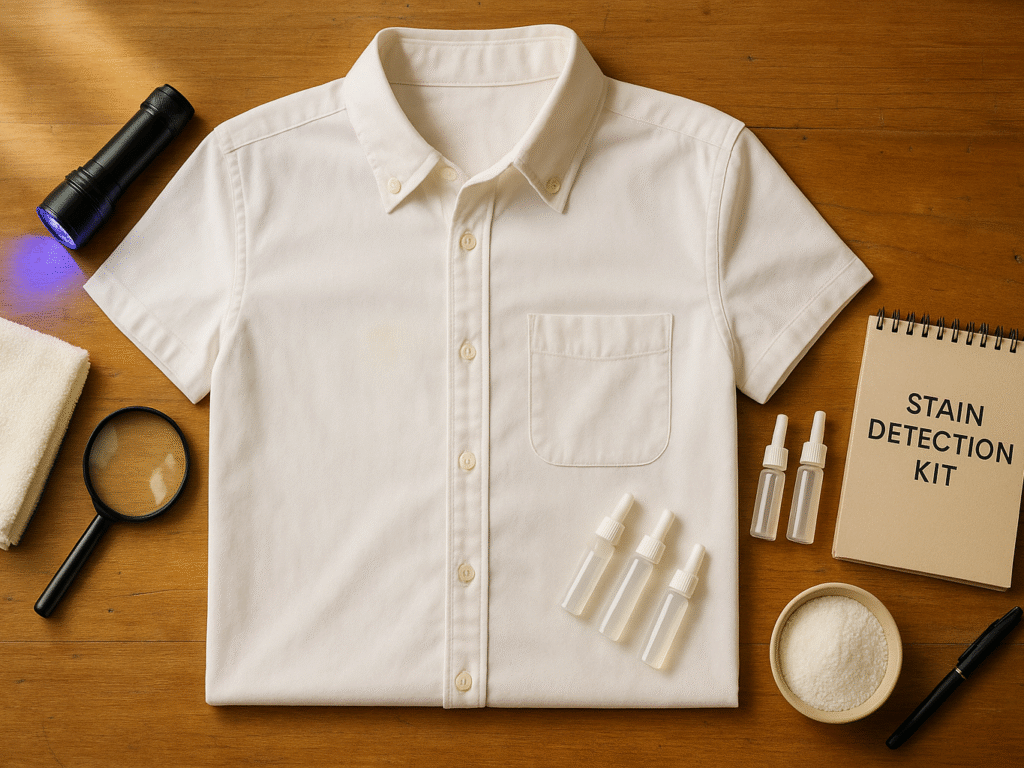
Meet the 5 Best Tools for Stain Detection
Tackling tough-to-identify marks on your favorite clothing requires proper detective equipment. Fortunately, several specialized tools are available that can enhance your mystery stain identification skills and help you tackle even the most stubborn stains before they become permanent. Let’s explore the most effective stain detection tools that will transform your stain removal success rate.
| Tool Name | Key Features | Best For | Rating | Price | Amazon Link |
| UV Light for Stains | 365nm wavelength for optimal detection, Reveals protein-based stains, USB rechargeable, Portable & lightweight, Works in complete darkness | Pet urine, bodily fluids, invisible organic stains | 4.3/5 | $15 – $45 | View on Amazon |
| Fabric Stain Tester Kit | Multiple chemical reagents, Color-coded applicators, Reference identification chart, Scientific stain analysis, Prevents cross-contamination | Unknown stain identification, chemical analysis | 4.1/5 | $25 – $65 | View on Amazon |
| Enzyme-Based Detectors | Protease for protein stains, Amylase for starch compounds, Lipase for oil/fat stains, Dual identification & treatment, Temperature sensitive (86-104°F) | Protein, starch, and oil-based mystery stains | 4.2/5 | $12 – $35 | View on Amazon |
| Digital Magnifier | Up to 300x magnification, Continuous zoom functionality, LED illumination, High-resolution imaging (1600×1200), Aluminum construction | Detailed fabric analysis, stain penetration depth | 4.0/5 | $45 – $120 | View on Amazon |
| DIY Testing Kit | Magnifying glass (10x), pH test strips, Cotton swabs & applicators, Reference guide booklet, Storage case included | Basic stain identification, budget-friendly option | 3.8/5 | $8 – $25 | View on Amazon |
| 💡 Pro Tip: For best results, use these tools in combination. Start with visual inspection using a magnifier, then use UV light for hidden stains, and finally confirm with enzyme or chemical testing before treatment. |
1. UV Light for Stains
UV light for stains has become an indispensable tool for discovering hidden marks that remain invisible to the naked eye. These handy devices emit ultraviolet light, typically in the 365-395nm range, causing certain organic materials to fluoresce or glow.
What makes UV light for stains particularly valuable is its ability to reveal protein-based stains. When you shine a UV light on dried bodily fluids, such as urine, semen, or saliva, they’ll glow distinctly, often appearing as yellowish-green marks in the dark. It makes UV light for stains especially useful for:
- Finding pet accident areas on carpets and furniture
- Identifying bodily fluid stains on clothing or bedding
- Locating invisible food residue containing proteins
For optimal results, use a UV light with a 365nm wavelength, as research has shown that this wavelength penetrates surfaces more deeply than other UV frequencies. Moreover, scientific studies confirm that even tiny amounts of dried blood serum (as little as five microliters) can be effectively detected using UV light at 365 nm.
One important point to remember: for the most effective detection, ensure you’re operating in complete darkness. Even faint ambient light can mask the subtle fluorescence of older or fainter stains.
2. Fabric Stain Tester
Fabric stain testers are specialized kits designed specifically for identifying mystery stains. These portable fabric stain tester systems typically contain multiple chemical reagents that react differently with various stain compounds.
Professional-grade fabric stain testers allow you to take a scientific approach to mystery stain identification and analysis by:
- First, apply a small amount of the testing solution to an inconspicuous area
- Next, observe the chemical reaction (color change, fizzing, etc.)
- Then, matching the reaction pattern to a reference chart
These kits can differentiate between protein stains (such as blood or milk), tannin stains (like coffee or wine), oil-based stains, and dye-transfer stains, knowledge that’s crucial for selecting the appropriate removal method.
Although commercial fabric stain tester kits vary in complexity, many include color-coded applicators to prevent cross-contamination between testing agents. This systematic approach removes guesswork from the stain identification process, helping you avoid damaging treatments that might permanently set unknown stains.
3. Enzyme-Based Detectors
Enzyme-based stain detectors represent a more sophisticated approach to identifying mystery stains. These specialized solutions contain specific enzymes that target particular types of stains:
- Protease enzymes react with protein-based stains
- Amylase enzymes break down starch compounds
- Lipase enzymes identify and begin breaking down fatty/oily stains
What makes enzyme detectors particularly useful is their dual function; they simultaneously identify and begin treating the stain. When applied to an unknown mark, visible reactions such as bubbling, color changes, or dissolution indicate both the stain type and that the treatment is working.
Importantly, enzyme-based products often require specific temperature ranges to work effectively. Most enzyme detectors perform optimally between 86°F and 104°F (30-40°C), so testing in very cold or hot environments may yield inaccurate results.
4. Digital Magnifiers
Digital magnifiers represent the modern evolution of traditional lens testers, providing detailed visual analysis of fabric and stains. These handheld devices, such as the Supereyes C003 Digital Automatic Textile Analysis Device, offer magnification capabilities up to 300 times with continuous zoom functionality.
The primary advantage of digital magnifiers in mystery stain identification is their ability to reveal crucial characteristics about mystery stains that remain invisible to the naked eye:
- Stain penetration depth into fabric fibers
- Distribution pattern across threads (which helps distinguish oil from water-based stains)
- Crystalline structures that form as stains dry
Modern digital magnifiers come equipped with additional features that enhance stain analysis capabilities. Many include adjustable LED illumination, measurement tools, and even the ability to capture high-resolution images (up to 1600 x 1200 pixels). This documentation capability proves invaluable when consulting stain removal professionals or researching treatment options online.
Initially designed for fabric quality control and forensic investigation, these devices have become increasingly accessible for use at home. Their aluminum construction makes them lightweight and portable while maintaining durability.
5. DIY Smell and Texture Tests
Sometimes, the most effective mystery stain identification tools are those you already possess, your senses. Professional cleaners rely on five key sensory clues when identifying mystery stains:
- Location: The area where the stain appears offers valuable context. Armpit stains likely indicate perspiration, while collar stains often suggest the use of makeup or body oils.
- Color: The stain’s hue provides crucial identification hints. Pale brown stains frequently result from caramelized sugar in beverages, whereas reddish-brown typically suggests blood.
- Feel: Texture reveals composition. Stains that remain slightly moist even after exposure to air typically indicate the presence of oil-based substances. At the same time, stiff or crusty textures suggest protein-based stains.
- Appearance: Examine how the stain interacts with the fabric. Does it sit on top of fibers or penetrate through them? Oil stains typically follow thread patterns, whereas dye-based stains create more defined edges.
- Odor: Certain stains retain distinctive smells even after drying. Perfumes, food (especially mustard), and biological stains often maintain identifiable odors.
After identifying the stain through these sensory tests, professionals classify it into one of three categories for treatment: dry-side stains (requiring non-water solutions), wet-side stains (requiring water or steam), or combination stains that need multiple treatment approaches.
The truly effective stain detective employs multiple tools from this arsenal, depending on the specific mystery stain they’re facing. By combining technological solutions, such as UV lights and digital magnifiers, with sensory analysis, you can significantly enhance your ability to identify and subsequently remove even the most persistent unknown stains.
Best Home Remedies to Remove Mystery Stains from Fabric: Skip expensive commercial products and use household items you already own. Learn time-tested natural remedies that professional cleaners swear by for removing stubborn mystery stains. Safe, effective, and budget-friendly solutions await. Start cleaning naturally now.
How to Choose the Right Tool for the Job
Selecting the appropriate tool for mystery stain identification requires understanding both the mystery stain and the fabric you’re working with. After all, using the wrong detection method could potentially damage your clothing or fail to identify the culprit behind that mysterious mark.
1. Matching tools to fabric types
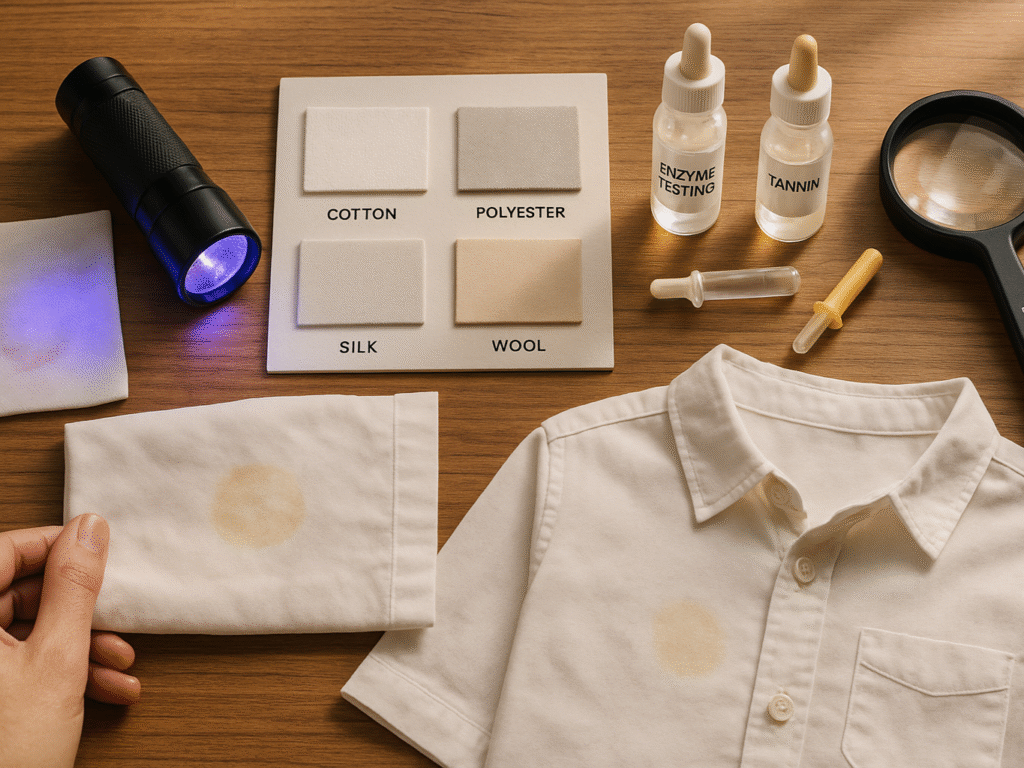
The fabric composition plays a crucial role in determining which stain detection tool yields the most accurate results. The three primary characteristics that help identify stains on different fabrics are edge type, feel, and color.
(i) Natural fibers like cotton and linen
- UV lights and fabric stain tester kits work exceptionally well, as these fabrics generally have low background fluorescence
- Digital magnifiers reveal how deeply the stain has penetrated the more absorbent natural fibers
- Enzyme detectors are typically safe, though reaction times may vary based on fiber density
(ii) Synthetic fabrics
such as polyester and nylon respond differently:
- These materials often have higher background fluorescence under UV light, making a fabric stain tester more reliable for subtle stains
- Fabric stain testers yield more reliable results as they rely on chemical reactions rather than visual properties
- Digital magnifiers help identify whether the stain sits on top of these less-absorbent fibers or has penetrated them
(iii) Delicate fabrics
including silk and wool, require special consideration:
- Silk can develop water spots easily when using liquid-based detection methods
- Wool fibers may felt or shrink when exposed to moisture or heat during testing
- DIY smell and texture tests often provide a safer initial assessment for these sensitive materials
Beyond fiber type, fabric color impacts your tool selection. Darker fabrics make visual detection challenging, regardless of the tool used. In these cases, texture analysis or enzyme-based detectors offer better alternatives to light-based detection methods.
The edge appearance of stains also provides valuable clues. Stains with sharp, clearly defined edges (like blood, varnish, or glue) can be easier to identify visually. In contrast, stains with diffuse edges may require chemical testing for proper identification.
2. When to use UV vs enzyme kits
Deciding between UV lights and enzyme-based detection kits depends mainly on the suspected stain type and your testing environment.
UV light for stains excels at detecting:
- Protein-based stains that contain phosphorus, which causes them to fluoresce under ultraviolet light
- Bodily fluids, including urine, which glows distinctly even in tiny amounts
- Poorly cleaned stains that were previously treated with enzyme cleaners
For optimal UV detection results, use lights with wavelengths between 365-370 nm, as research shows that these penetrate surfaces more effectively than other UV frequencies. Furthermore, complete darkness significantly enhances the visibility of fluorescent reactions.
Enzyme kits prove more effective for:
- Identifying the specific composition of unknown stains (protein, oil, tannin)
- Testing stains on fabrics with high natural fluorescence that might confuse UV readings
- Situations where you need simultaneous identification and pre-treatment
One significant advantage of UV light for stains is its non-invasive nature; they require no physical contact with the fabric. Consequently, they offer a safer option for the initial assessment of delicate or valuable textiles before applying any chemical tests.
Nonetheless, certain materials present challenges for UV detection. Research has demonstrated that serum detection using UV light is relatively complex on materials like jean fabric and white cotton T-shirts due to their background fluorescence properties. In these cases, enzyme-based detection provides more reliable results.
Temperature also affects your tool choice. Most enzyme detectors function optimally between 86°F and 104°F (30-40°C), while UV lights perform consistently across a wider temperature range.
3. Safety tips for delicate materials
Protecting valuable or sensitive fabrics requires extra caution during stain detection. Following these guidelines minimizes the risk of damage:
- Always test in an inconspicuous area first. This fundamental rule applies to all stain detection methods, particularly those based on chemicals. Apply a small amount of any testing solution to a hidden section of the fabric, such as an inner seam, before proceeding to the stained area.
- Prioritize non-invasive methods initially. Begin with visual inspection under different light sources before progressing to processes that require direct contact with the fabric.
- Use proper ventilation when employing chemical tests. Work in well-ventilated areas by opening doors and windows to allow fresh air circulation when using enzyme kits or other chemical detection methods.
- Apply minimal pressure during inspection. When examining delicate fabrics with digital magnifiers, maintain gentle contact to avoid damaging sensitive fibers.
- Handle steam with extreme caution. If using steam to activate specific detection reagents, maintain a distance of 3-4 inches between the steam source and the fabric surface to prevent damage. Remember that high steam pressure can irreversibly damage fabrics, alter surface properties, affect dyes, and permanently alter thermoplastic fibers.
- Limit chemical exposure time. Apply only small amounts of detection chemicals, keeping the tested area as confined as possible. After testing, thoroughly rinse the area several times to remove all chemical residues, which could otherwise reappear during pressing or ironing.
- Prevent spotting rings. When applying liquid-based detection solutions, work from the outer edge toward the center of the stained area. During drying, use compressed air by beginning at the outer zone and gradually shifting inward to prevent ring formation.
For particularly valuable textiles, such as antique linens or designer garments, consider consulting professional textile conservators before attempting any detection methods on your own. Professionals possess specialized equipment and expertise that minimize risks to irreplaceable items.
By matching the right detection tool to both the fabric type and the suspected stain composition, you dramatically increase your chances of successful mystery stain identification without compromising the integrity of your textiles. Proper identification forms the essential first step toward effective treatment and complete stain removal.
Step-by-Step: Using Tools to Identify and Treat Stains
Successful mystery stain identification and removal begins with a methodical approach that combines careful examination with targeted treatment. Understanding that a stain is fundamentally a chemical reaction between the staining agent and fabric fibers, you can systematically work through identification and removal. The following process will guide you through tackling even the most puzzling marks on your garments.
Step 1: Examine with light or a magnifier
First and foremost, begin by examining the mystery stain closely under good lighting conditions. Intense illumination is crucial for discerning subtle details that may reveal the origin of the stain. Position the garment so that light strikes the fabric from different angles; this technique, known as raking light examination, reveals surface textures and topographical features that might otherwise remain hidden.
For enhanced visibility, use a digital magnifier to inspect:
- The depth of stain penetration into fabric fibers
- Whether the stain follows thread patterns (indicating oil) or has defined edges (suggesting dye)
- Any crystalline structures that have formed as the stain dried
If you suspect the stain might be organic, examine it using UV light for stains in complete darkness. Many protein-based stains will fluoresce distinctly; bodily fluids often glow a yellowish-green, while specific food residues may show different fluorescent patterns. Remember that blood absorbs rather than reflects UV light, appearing quite black under ultraviolet examination.
Take note of the stain’s location, color, texture, and smell, as these characteristics provide valuable clues. Armpit stains likely indicate perspiration, whereas front-of-garment stains typically suggest food or beverage spills.
Step 2: Test with an enzyme or fabric kit
Once you’ve completed the visual examination, conduct chemical tests to confirm the stain’s composition. If using a professional fabric stain tester kit, apply a small amount of the testing solution to an inconspicuous area first to ensure it won’t damage the fabric.
For enzyme-based detection, select the appropriate enzyme type:
- Protease enzymes react with protein soils (blood, sweat, egg)
- Lipase enzymes target natural oil soils
- Amylase enzymes break down starches
Apply the enzyme solution to a small portion of the stain and observe the reaction that occurs. Bubbling, color change, or stain lightening indicates that both the stain type and treatment are beginning to work. Most enzyme detectors function optimally between 86°F and 104°F (30-40°C), so testing in icy environments may yield inaccurate results.
For combination stains (such as chocolate or lipstick), always test and treat the oily component first, as this allows better access to any underlying protein or tannin components.
Step 3: Identify stain type (oil, protein, dye)
Based on your examination and testing, classify the mystery stain into one of the four major categories:
- Oil-based stains: Butter, cooking oil, deodorant, makeup, and grease create deep-seated stains that feel slightly slick and often follow the thread pattern of fabric. These stains typically leave a translucent mark and may darken when water is applied to them.
- Protein-based stains: Blood, dairy, baby food, bodily excrement, and mud fall into this category. These stains often have a stiff or crusty texture when dry and may have a distinctive odor.
- Tannin stains: Wine, coffee, tea, fruit juice, and soft drinks contain plant-based tannins. These stains are water-soluble but can become permanent if treated incorrectly.
- Dye stains: Ink, grass, mustard, blueberries, and permanent markers contain colorants that spread quickly and prove most challenging to remove.
Certain stains fall into multiple categories. For instance, chocolate contains both fats and proteins. At the same time, makeup may combine oils with dyes. Lipstick stains are particularly challenging as they blend waxy oils with intense dyes, requiring specialized removal techniques. Accordingly, treatment must address each component in the correct sequence.
Step 4: Apply appropriate treatment
With the stain correctly identified, apply the appropriate treatment method:
For oil-based stains, pre-treat with a solvent-based product containing surfactants that can break down and emulsify the oils. Apply the product directly to the stain, gently work it in, and allow it to sit for 5-10 minutes. For stubborn oil stains, soak the garment in the hottest water the fabric can tolerate.
For protein-based stains, use cold water initially, never hot, as heat will “cook” the protein and make the stain permanent. Gently scrape off any solid residue with a spoon, then apply an enzyme-based pre-treatment designed explicitly for protein stains. Since sweat stains are protein-based, they respond particularly well to this cold-water enzyme treatment approach. Let it soak for at least 30 minutes.
For tannin stains, rinse with cold water first, then wash in hot water with detergent. Avoid using regular soap on tannin stains as it can set them more permanently into the fabric. For older tannin stains, oxygen bleach may be necessary.
For dye stains, act quickly as these spread rapidly. Treat fresh stains immediately with cold water. Use a pre-treatment product specifically designed for dye removal. Rinse thoroughly and repeat as needed.
Step 5: Rinse and recheck before drying
After treatment, thoroughly rinse the garment and inspect the stain in natural light. Heat from dryers can permanently set any remaining stain residue, making it essential to verify the stain thoroughly before drying. If traces of the stain remain, repeat the appropriate treatment process. Patience is key, as some stains respond slowly and may require multiple applications to remove.
For particularly stubborn stains, consider using an oxygen-based bleach solution as a final treatment. Mix according to product directions and soak the garment before washing again. This technique is generally safe for all washable fabrics except silk, wool, and leather-trimmed items.
Throughout this process, remember that fresh stains are much easier to remove than old ones. Nevertheless, even set-in stains that have been through a hot dryer can often be salvaged with persistence and the right approach. By methodically working through these mystery stain identification steps with your detection tools, you’ll dramatically improve your success rate with even the most mysterious fabric stains.
Mystery Stain Removal Guide: How to Remove Unknown Stains from Clothes: Get step-by-step instructions for removing specific mystery stains using your washing machine. This detailed guide covers pre-treatment, wash settings, and post-wash care for maximum stain removal success. Transform your laundry routine today.
Pro Tips for Mystery Stain Removal Success
Even the most stubborn mystery marks can be conquered with persistence and proper techniques. The golden rule remains clear: the sooner you tackle a stain, the easier it will be to remove. Yet even old, set-in stains aren’t necessarily permanent with these professional-level strategies.
1. How to remove unknown set-in stains
When facing a stubborn mystery stain that has already dried or been through the dryer, your approach must be methodical yet aggressive. For washable fabrics with unidentified stains, start by soaking in cold water for at least 30 minutes to loosen the stain.
After soaking, apply a strong pre-treatment solution directly to the mark. For particularly stubborn stains:
- Mix oxygen bleach with hot water (safe for colored garments)
- Soak the item for 1-6 hours, depending on stain severity
- Wash normally with regular detergent
- Air-dry to verify complete removal before machine drying
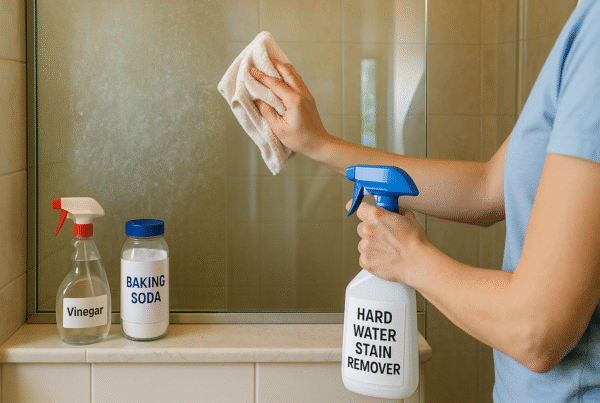
For extremely persistent marks, consider this layered approach: first, saturate with white vinegar, then create a paste from vinegar and baking soda, rubbing it vigorously into the stain. Let it soak overnight in either pure vinegar or a mixture of white vinegar and laundry detergent.
2. How to spot treat stains without damaging fabric
Proper spot treatment confines cleaning agents to the affected area, preventing damage to the fabric and loss of color. First, always test any cleaning agent on an inconspicuous area before applying it to the visible stain.
When applying products, work from the outside of the stain inward to prevent the stain from spreading. Never rub fabrics together when treating stains, as this pushes the stain deeper into the fibers. Instead, gently work solutions in with your fingertips or a soft brush.
For delicate fabrics, blot rather than rub. Start from the stain’s edges and work toward the center. Use white cloths or paper towels as blotting materials to avoid transferring any dyes.
3. When to repeat vs when to stop
Patience often separates successful stain removal from permanent damage. For stubborn stains, multiple treatments may be necessary. Some products, such as OxiClean MaxForce, can safely remain on fabrics for up to a week before being washed.
Yet recognize when to admit defeat. Some stains are impossible to remove completely. If you’ve attempted multiple treatments with different methods and see no improvement, continued efforts might damage the fabric structure.
Key indicators it’s time to stop:
- The fabric begins showing signs of wear or color loss.
- The stained area feels weaker or thinner than the surrounding fabric.
- Multiple treatments show no improvement.
4. Preventing future mystery stains
Prevention remains your best defense against mystery stains. Organize a dedicated stain-fighting kit with essential supplies so you’re ready when stains occur. Check clothing before washing and pre-treat any minor marks you discover.
For storing seasonal clothes, ensure they’re spotless and stain-free before packing away. Store garments in cool, dry, well-ventilated areas, preferably with silica gel packets, to maintain optimal humidity levels. It prevents brown oxidation stains that commonly develop on stored clothing. Regular maintenance and quick action on fresh stains, as detailed in our mystery stain identification guide, significantly reduces the chances of dealing with set-in mystery marks later.
Ultimately, regular inspection is crucial. Examine wet laundry before drying; heat from dryers can permanently set stains that are not removed. For mysterious post-wash stains, check whether you’re using too much detergent, which can leave residue that traps dirt. As a guideline, use only 1-2 tablespoons of HE (high-efficiency) detergent placed directly in the washing machine tub.
How to Remove Lipstick Stains: Expert-Tested Methods That Work: Lipstick stains combine oils and dyes, making them particularly challenging to remove. Learn the exact techniques professionals use to remove lipstick from any fabric type completely. Don’t let makeup mishaps ruin your clothes.
Mystery stain identification: Key Takeaways
Mystery stains no longer need to ruin your laundry routine. This guide has shown how the proper detection tools can change your approach. UV lights reveal invisible protein-based spots, while digital magnifiers uncover crucial details in stain patterns. Enzyme-based detectors and fabric-specific testers bring scientific accuracy to stain identification, eliminating guesswork and making your cleaning efforts far more effective.
Proper identification is the first step toward successful stain removal. Each type of stain, such as oil, protein, tannin, or dye, requires a unique treatment. With the right tools, you can now determine the exact stain type before choosing the most effective method. This strategic approach prevents damage and increases your chances of complete stain removal from the start.
Mystery stains may seem overwhelming, but they’re manageable with the proper process. Act quickly, use targeted tools, and avoid applying random products without consideration. With a bit of patience and preparation, including a basic stain detection kit, you’ll feel empowered to handle even set-in stains. Turn mystery into mastery and restore your garments with confidence.
How to Remove Sweat Stains from Shirts Instantly: Yellow sweat stains are among the most common mystery marks on clothing. Discover the fastest, most effective methods to eliminate perspiration stains and prevent them fromreturning. Keep your shirts looking fresh and clean.
FAQs on Mystery stain identification
Q1. What is the most effective stain remover for unknown stains?
OxiClean Max Force is widely recommended for tackling mystery stains. It can be applied directly to the stain and left on for up to a week before washing. For particularly stubborn stains, you may need to repeat the treatment process.
Q2. How can I identify an unknown stain on my clothing?
Examine the stain’s location, color, texture, and smell. Use a digital magnifier to inspect the stain’s depth of penetration and pattern. For organic stains, try examining under UV light in complete darkness. These characteristics can provide valuable clues about the stain’s origin.
Q3. What’s the best approach for removing set-in stains?
For set-in stains, start by soaking the garment in cold water for at least 30 minutes. Then apply a strong pre-treatment solution directly to the stain. For extremely persistent marks, consider using a mixture of white vinegar and baking soda, letting it soak overnight before washing.
Q4. How can I prevent damaging fabric while treating stains?
Always test any cleaning agent on an inconspicuous area first. When applying products, work from the outside of the stain inward to prevent the stain from spreading. For delicate fabrics, blot rather than rub. Use white cloths or paper towels as blotting materials to avoid transferring any dyes.