Does your garbage disposal smells like mold and emit a moldy odor? You’re not alone. When food particles and waste don’t drain properly, foul odors soon follow. Suppose your disposal smells like mold or mildew. In that case, chances are both have started growing in hidden, moist areas of the system, feeding off leftover scraps and grease.
Thankfully, this issue isn’t permanent. Mold in garbage disposal units tends to develop over time, particularly with frequent use and inadequate cleaning practices. As food buildup increases, so does the risk of unpleasant smells. The musty odors emanating from your sink are a sign that it’s time for a deep clean.
The good news? A regular cleaning routine can eliminate musty smells in garbage disposal systems. In this guide, you’ll learn seven easy steps to remove moldy odors and prevent them from coming back, using simple household items you likely already have in your kitchen.
Step 1: Identify the source of the moldy smell
Before attempting to clean when your garbage disposal smells like mold, you need to pinpoint exactly where that moldy smell is coming from. Taking time to identify the source correctly will make your cleaning efforts much more effective and prevent the smell from quickly returning.
(i) Check for food buildup under the splash guard.
The most common culprit when your garbage disposal smells like mold is the rubber splash guard (also called a gasket or baffle). This black rubber panel, sitting at the top of your drain hole, is designed to prevent food from splattering during grinding. Still, it’s also a prime location for food buildup. If you’re dealing with persistent odors, our comprehensive guide on how to eliminate a garbage disposal smell covers additional troubleshooting methods beyond mold-specific issues.
“Most odors that come out of the garbage disposal are coming from food buildup on the splash guard,” according to product experts. The problem lies in the guard’s many grooves and crevices, which easily trap small food particles and grease underneath. Over time, these particles decay, creating that unmistakable moldy smell.
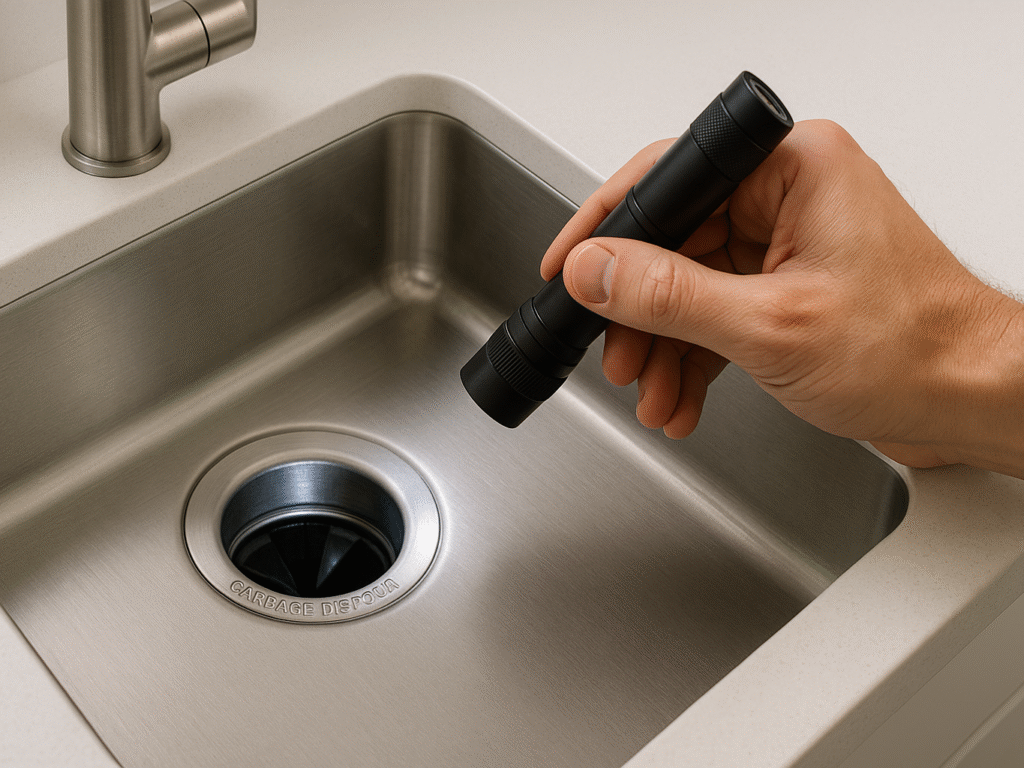
To examine the splash guard properly:
- Make sure the disposal is turned off completely
- Use a flashlight to illuminate the area
- Lift the edges of the rubber flaps to look underneath
- Note any slime, gunk, or food residue clinging to the underside
The underside of the splash guard is particularly problematic because it remains hidden from view during regular cleaning. Food particles and grease can accumulate there for months, creating what cleaning experts describe as “a major source of odors and a breeding place for germs”. This area requires special attention during the cleaning process.
(ii) Inspect the drain for mold or mildew.
After checking the splash guard, it’s time to examine the disposal system itself more closely. When your garbage disposal smells like mold, it’s often because actual mold or mildew has colonized the moist environment inside.
Mold thrives in your kitchen sink area because it offers ideal growing conditions, consistent moisture, organic food matter, and warm temperatures. As you peer down your sink drain with a flashlight, you may notice black or white mold patches on the walls of the disposal or the drain lines.
Additionally, biofilms involving mold commonly develop on the underside of the splash guard and along the inner walls of the sink drain. It often results from either:
- Not running the disposal when food is dropped down
- Running the disposal without enough water to flush the system properly
Look for these warning signs of mold presence in your disposal:
- Black or white patches inside the disposal chamber
- Persistent foul, musty odors that worsen over time
- Slimy textures or sticky residue on visible parts
- Allergic reactions that occur specifically when using the kitchen
The grinding chamber itself can harbor decaying food particles, especially if your disposal isn’t powerful enough or has become coated with residue. Smaller disposals (particularly those with 1/3 horsepower) are more prone to jamming and incomplete grinding, which leaves more food waste behind to rot.
(iii) Look for trapped items, such as sponges or rags.
Surprisingly often, when your garbage disposal smells like mold persistently, it comes from something that shouldn’t be in your disposal at all. Foreign objects can slip down the drain unnoticed and become trapped, creating perfect conditions for mold growth.
“If your disposal smells like mold or mildew, those two have likely made a home down there. It is not uncommon for a dish rag or sponge to slip down your drain. Mold and mildew can quickly build up on items gone unnoticed in your system,” according to plumbing experts.
To check for trapped items:
- Please turn off the disposal completely and unplug it for safety
- Shine a flashlight down into the disposal chamber
- Use tongs or pliers (never your fingers) to remove any visible objects
- Look specifically for fragments of sponges, dishcloths, or other items
Certain foods, such as banana peels, onion skins, and celery, are difficult to grind and often leave residue behind. This leftover waste encourages the growth of mold and bacteria, making your disposal smell worse over time. Mechanical issues can also cause food to get trapped and rot. Smaller or older units may struggle to grind properly, leading to more buildup. Identifying the odor source is key to cleaning it effectively.
The Quick Fix: How to Get Rid of the Garbage Disposal Smell Today: Need immediate relief from disposal odors? This comprehensive guide reveals professional techniques and household remedies that eliminate smells within hours. Don’t let unpleasant odors take over your kitchen. Get the quick-fix solution now!
Step 2: Clean the visible parts of the disposal
Now that you’ve identified the source of the unpleasant smell, it’s time to address the visible parts of your disposal. These areas often harbor the most buildup, and fortunately, they are the easiest to clean.
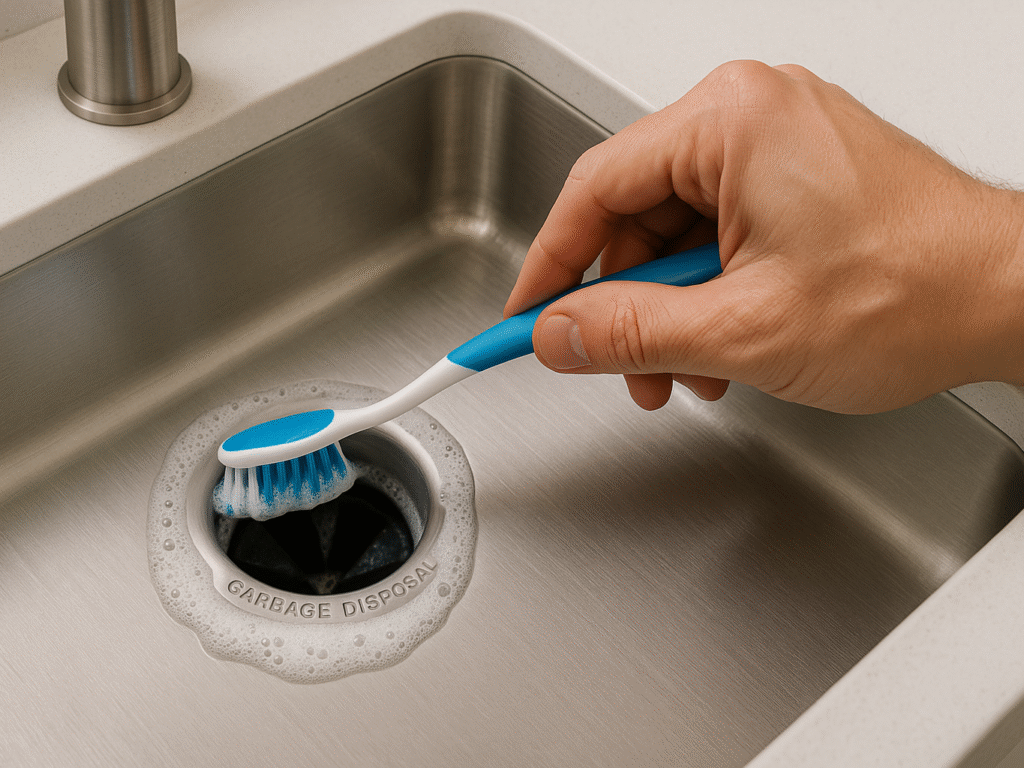
(i) Use dish soap and a brush to scrub the rim.
When your garbage disposal smells like mold, the rim is a prime location for food particles and grime to accumulate over time. Moreover, this area is often overlooked during regular kitchen cleaning.
To properly clean this area:
- First and foremost, ensure your disposal is completely switched off. Safety experts consistently warn against cleaning a dishwasher that’s still connected to power.
- Grab a good quality dish soap; grease-fighting formulas work exceptionally well for this purpose. Dish soap is particularly effective because it cuts through the greasy residue that often binds food particles together in your disposal.
- Select an appropriate cleaning tool. An old toothbrush works perfectly for this job. However, a bottle brush or dedicated scrubbing brush provides more scrubbing power for stubborn grime. The ideal brush should have a handle that is 2-3 inches long to reach under the rubber flaps.
- Apply a generous amount of dish soap directly to your brush. As one cleaning expert notes, “Use a little dishwashing liquid and a bottle brush to scrub out your disposal”.
- Thoroughly scrub around the visible opening of the disposal, paying careful attention to the metal rim where it meets the sink basin. This junction often collects significant amounts of debris.
Remember that oily residue tends to build up over time, consequently making the disposal smell like mold or mildew. The combination of dish soap and thorough scrubbing helps break down this residue effectively.
(ii) Wipe down the rubber flaps and sink area.
The rubber splash guard (also called a gasket or baffle) is usually the primary culprit when your garbage disposal smells like mold. This component requires special attention:
“Use an old toothbrush or scrubbing brush to clean it thoroughly using dish soap. Pay extra attention to the underside and remove any debris or slime,” advises cleaning expert Tretyakova.
For thorough cleaning of the rubber flaps:
- Initially, determine if your splash guard is removable. Some models allow you to pull the entire piece straight up and out for easier cleaning. If yours is removable, gently pull it upward to detach it.
- For non-removable splash guards, you’ll need to clean them in place. Lift the edges of the rubber flaps and clean underneath with your brush and dish soap.
- Be methodical and clean all sections of the splash guard, focusing on the underside where most grime accumulates. As noted by home maintenance experts, “Because mold and mildew can accumulate beneath the rubber flaps of the disposal, this is an area that needs to be cleaned regularly”.
- For particularly stubborn buildup, you might need to use a stiff bottle brush, “mashed in and out vigorously” to dislodge trapped grime. Keep your mouth closed during this process, as sometimes gunk can fly out!
If your splash guard is removable and you’ve taken it out:
- Thoroughly scrub both sides with dish soap and your brush
- Rinse thoroughly under warm water
- Please return it to the drain by pushing straight down until it seats properly
In addition to the splash guard, don’t neglect the sink area immediately surrounding your disposal. Food particles often splatter and stick to this area:
“And scrub the area on the sink where the guard connects. Rinse thoroughly,” suggest cleaning professionals.
Throughout this process, follow these important safety guidelines:
- Never put your hands inside a garbage disposal, even when it is turned off. “Use your flashlight and inspect the disposal for any visible debris. Should you find some, dispose of it using tongs or pliers. Never use your hands to prevent injury,” instructs cleaning expert Alicia Sokolowski.
- Always keep the disposal unplugged or the circuit breaker off while cleaning.
- Use adequate lighting (like a flashlight) to see what you’re doing.
If you’re working with an InSinkErator unit specifically, check out our detailed guide on how to stop InSinkErator smelling for brand-specific maintenance tips that complement these general cleaning methods. After completing these steps, your disposal’s visible areas should be noticeably cleaner. This thorough cleaning of the visible parts addresses a significant source of moldy smells in your garbage disposal.
The next step will involve flushing the system with hot soapy water to remove deeper grime that’s not visible but still contributing to the problem.
(iii) Recommended Products
| Product Name | Key Features | Best For | Price | Rating | Amazon Link |
| Bottle Brush Cleaner Set | Long handle, flexible bristles, multiple sizes | Deep cleaning the splash guards and the drain | $12-18 | 4.5/5 | View on Amazon |
| Flexible Drain Snake | 25-foot length, barbed design, plastic construction | Removing trapped debris and clogs | $8-15 | 4.3/5 | View on Amazon |
| Garbage Disposal Brush | Designed for disposals, angled head, sturdy grip | Regular maintenance cleaning | $10-16 | 4.4/5 | View on Amazon |
| Kitchen Tongs Set | Stainless steel, non-slip grip, dishwasher safe | Safely removing foreign objects | $15-25 | 4.6/5 | View on Amazon |
Step 3: Flush the disposal with hot, soapy water
After scrubbing the visible parts when your garbage disposal smells like mold, a thorough flush is the next crucial step in eliminating that persistent moldy smell. This deep-cleaning method reaches areas that simple scrubbing cannot, making it particularly effective for addressing odors that seem to linger despite surface cleaning.
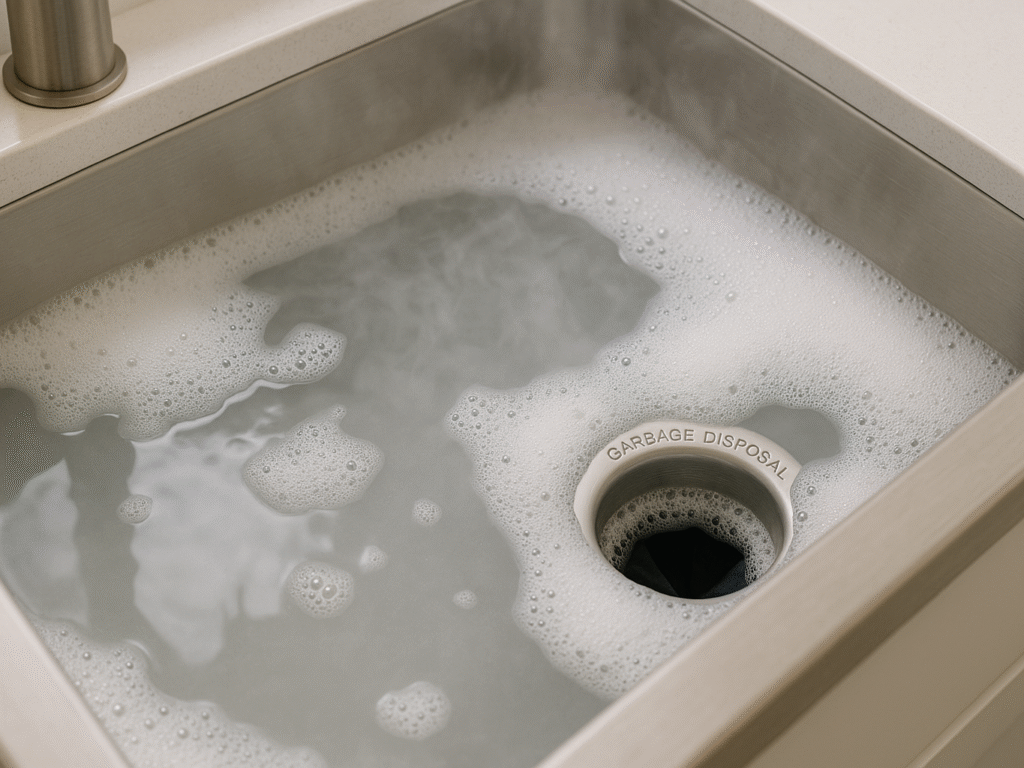
(i) Fill the sink halfway with hot water and soap.
The power of hot, soapy water when your garbage disposal smells like mold should not be underestimated. This simple combination creates a potent cleaning solution that helps break down accumulated grime throughout your disposal system.
To prepare for this cleansing flush:
- First, ensure your disposal is correctly connected to power but turned off
- Insert the sink stopper or plug to seal the drain completely
- Please turn on the hot water tap and let it run until it’s truly hot
- Add a generous squirt of grease-cutting dish detergent directly into the sink basin
- Allow the sink to fill to approximately halfway full
The combination of hot water and dish soap works effectively because heat loosens sticky residue. In contrast, soap’s surfactants break down greasy buildup. Experts note, “A sink full of hot water and dishwashing soap is fine for cleaning the disposal,” making it ideal for flushing out the entire system.
Unlike targeted methods that clean only certain parts, this approach creates a full-system rinse. The combination of heat and soap offers better cleaning power than either one alone. It’s a simple yet powerful technique that ensures debris and grime throughout your disposal system are properly loosened and rinsed away with minimal effort.
(ii) Unplug the drain and run the disposal.
Once your sink is appropriately filled with hot, soapy water, you’re ready for the actual flushing process. This step is where the magic happens in eliminating those unpleasant, moldy odors:
- Position yourself away from the sink (to avoid splashing)
- Simultaneously, remove the drain plug and turn on the garbage disposal
- Allow all water to drain completely through the system while the disposal runs
- Continue running the disposal for 10-15 seconds after all water has drained
This cleaning method is highly effective because “it helps fill the disposal with soapy water to reach the upper portions of the unit, which often don’t get cleaned by other methods.” It also cleans the drain line, removing hidden food residue and odors.
The turbulence from rushing water dislodges debris from hard-to-reach spots. Combined with the disposal’s grinding action and the soap’s degreasing properties, it creates a powerful, all-around cleaning effect. It helps eliminate grime that often causes persistent moldy or mildew smells.
- For strong mold odors, run the cleaning cycle twice or extend the time to three minutes.
- Always run the disposal with hot water after flushing to rinse away remaining debris.
- This method is ideal for eliminating odors originating from deep within the drain system, rather than just surface buildup.
If your garbage disposal smells like mold after cleaning with this technique, deeper or long-neglected buildup will require additional cleaning steps. Follow the rest of this guide to eliminate mold smells from your garbage disposal.
How to Stop Your InSinkErator from Smelling: Quick & Easy Fixes: InSinkErator disposal acting up? Discover brand-specific troubleshooting methods and maintenance tips to keep your premium disposal running smoothly and efficiently. Get expert solutions tailored to your InSinkErator model today!
Step 4: Use ice and salt to dislodge grime
Even with regular flushing, stubborn grime can build up inside your disposal over time. The ice and salt method offers a powerful yet natural way to dislodge this buildup that causes your garbage disposal to smell like mold or mildew. For a deeper dive into this specific technique, our guide on cleaning a garbage disposal with ice provides additional tips and variations for maximum effectiveness.
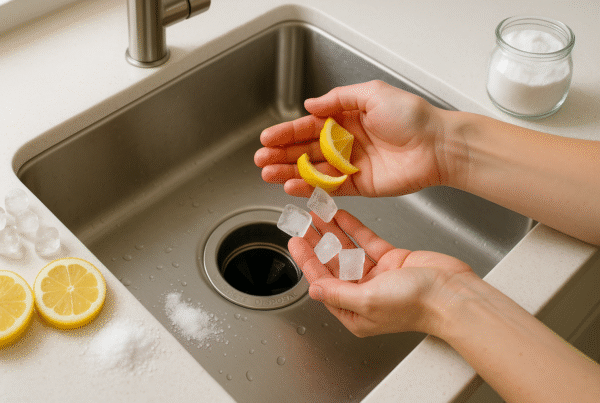
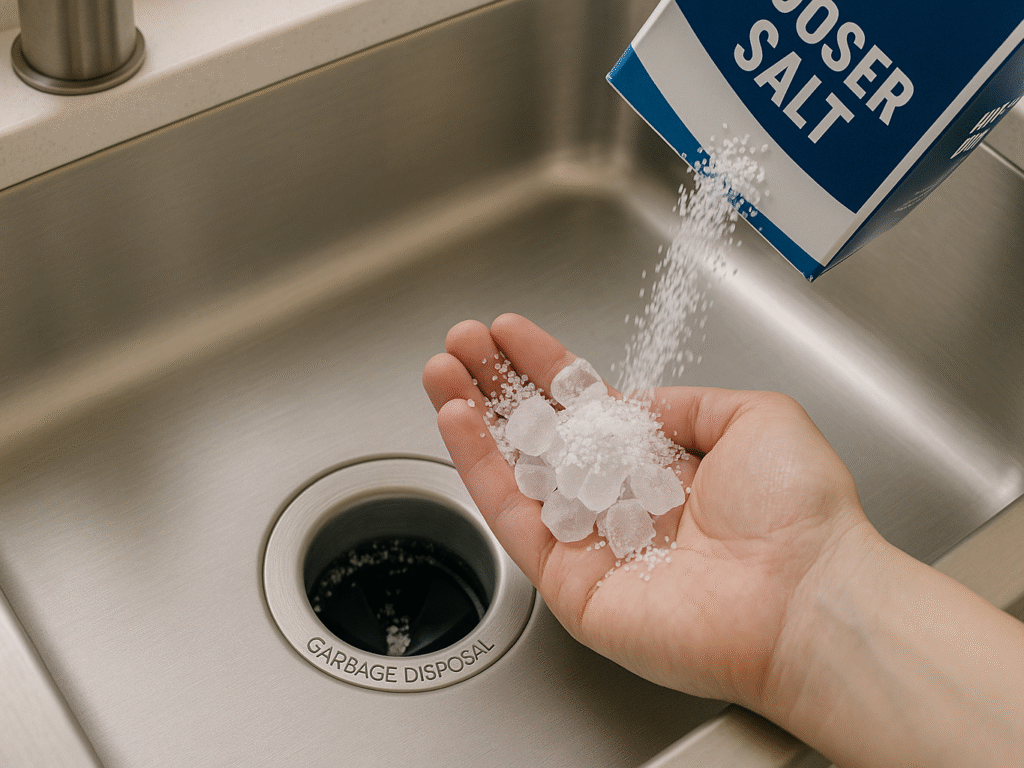
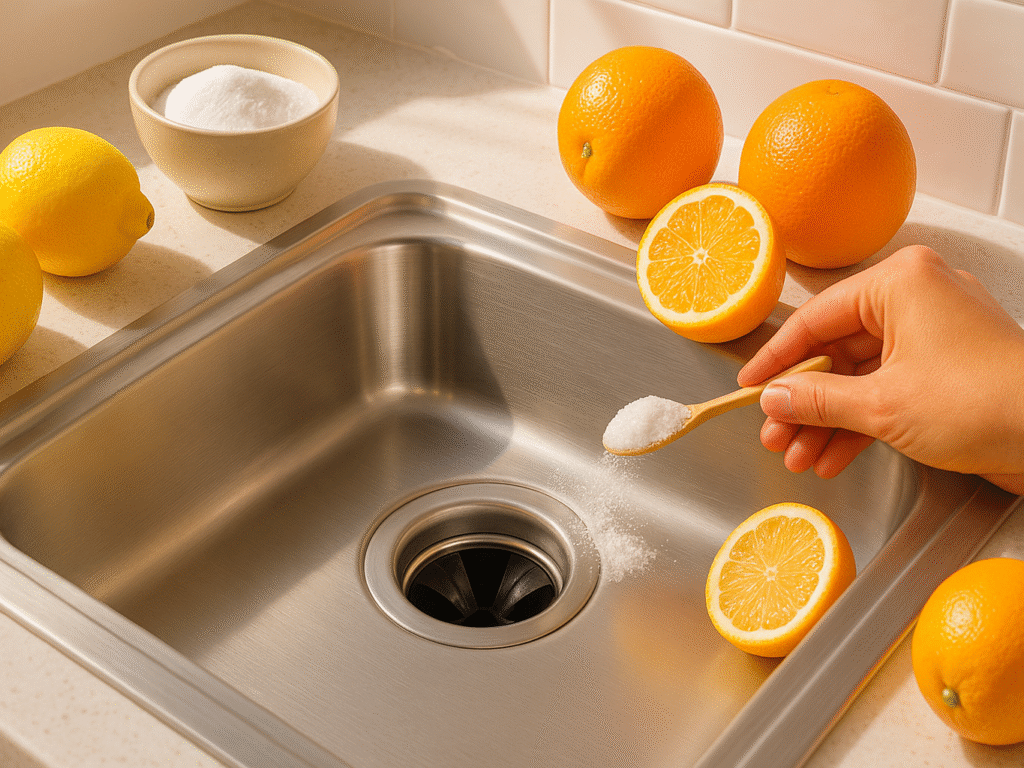
(i) Add 1 cup of ice cubes and ½ cup kosher salt.
When your garbage disposal smells like mold, this simple but effective combination creates a natural scrubbing action that reaches places your brush simply cannot. Unlike chemical cleaners, these kitchen staples work together to clean the interior components of your disposal mechanically.
For optimal cleaning results:
- First, ensure your disposal is empty of standing water following your previous cleaning steps.
- Gather approximately one cup of ice cubes from your freezer. Regular ice cubes work perfectly, though crushed ice can also be effective.
- Measure out ½ cup of kosher salt or rock salt. The coarse texture is crucial for maximum cleaning power.
“Simply pour two cups of ice cubes into the garbage disposal followed by one cup of rock salt,” suggests one home maintenance expert. Most professionals recommend this 2:1 ice-to-salt ratio, as it delivers the most effective abrasive cleaning for stubborn buildup and odors.
Coarse salt is key, offering a gritty texture that scrubs the grinding components. Rock salt is ideal, although kosher or table salt can also be used as an alternative. Pour the ice in first, then the salt, to prevent premature dissolving. This method relies on mechanical scrubbing, not chemicals, to break down moldy residue and restore freshness.
(ii) Run the disposal to scrub the blades.
Once your ice and salt mixture is in place, it’s time to put it to work:
- Turn on the cold water tap (cold is essential for this step).
- Switch on your garbage disposal.
- Let the disposal run continuously until you no longer hear ice being crushed.
- Continue running water for 5-10 seconds afterward to flush away dislodged debris.
Throughout this process, the ice and salt work together as a powerful cleaning team. As the disposal crushes the ice, the frozen chunks scrub the blades and internal surfaces. At the same time, coarse salt boosts this scrubbing effect, helping remove sticky grime and lingering moldy residue.
“While being crushed, the ice will clean the blades of any slimy residue that has stuck to the blades, while the salt will help deodorize it,” explains a home maintenance expert. Ice also solidifies grease, making it easier to break apart and flush. It creates a highly effective, chemical-free deep clean.
- Let the disposal run until the grinding sound becomes a smooth hum.
- Always use cold water during this process to keep the grease solid for removal.
- Avoid hot water; it melts grease, which can re-coat interior parts.
- This method targets areas unreachable by brushes or soapy rinses.
After completing this step, your disposal should already smell much fresher. However, if your garbage disposal smells like mold after cleaning with ice and salt, the next steps in this guide will help tackle any remaining buildup. For tough cases, double the ice and salt to boost the scrubbing power.
Step 5: Deodorize with baking soda and vinegar
When your garbage disposal smells like mold, the natural chemical reaction between baking soda and vinegar creates a powerful cleaning force that eliminates mold and bacteria, causing those unpleasant odors in your disposal. This method requires no harsh chemicals yet delivers impressive results in neutralizing that persistent moldy smell.
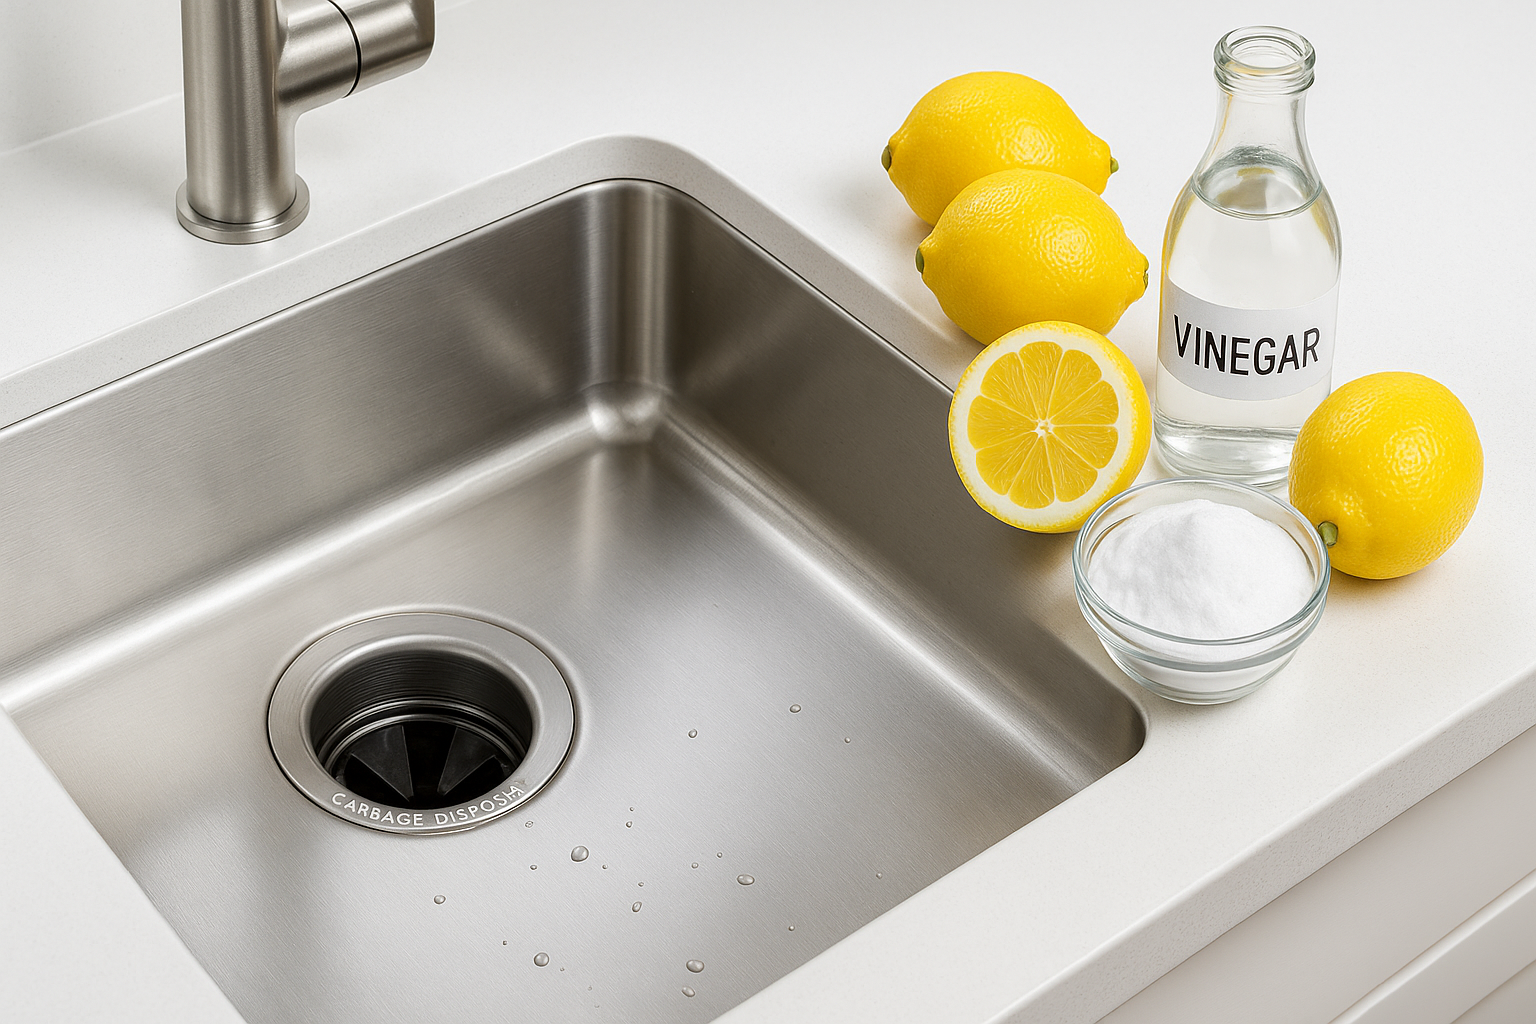
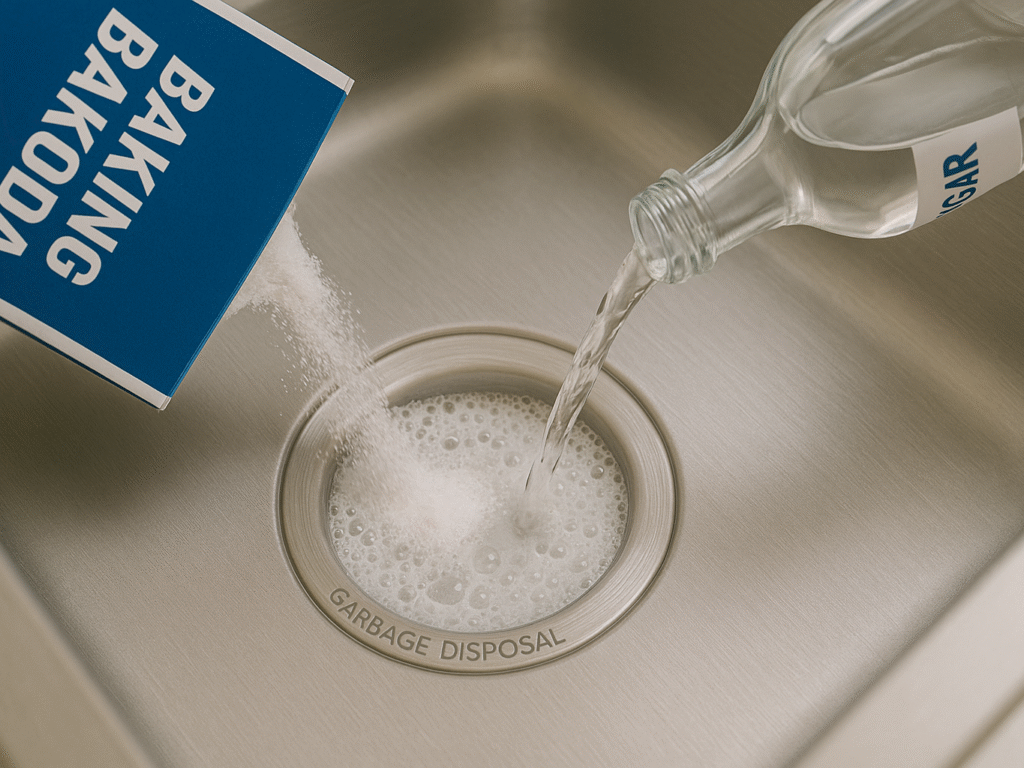
(i) Pour ½ cup of baking soda, followed by 1 cup of vinegar.
First and foremost, gather your supplies for this natural deodorizing method:
- ½ cup baking soda: this alkaline powder neutralizes acidic odors
- 1 cup vinegar: either white vinegar or apple cider vinegar works effectively
The exact measurements matter for maximum effectiveness. While some cleaning methods allow for approximation, experts consistently recommend a specific ratio for garbage disposal cleaning: half a cup of baking soda followed by one cup of vinegar. It creates the optimal fizzing action needed to break down residue.
To begin the deodorizing process:
- Ensure your disposal is entirely free of standing water
- Measure ½ cup of baking soda and pour it directly into the garbage disposal opening
- Next, slowly pour 1 cup of vinegar down the drain
Immediately after adding vinegar to baking soda, you’ll witness a fizzing, bubbling reaction. It’s not just fun, it’s functional. This reaction helps kill odor-causing germs and bacteria. Experts call it “nature’s disinfectant,” using only kitchen staples to combat bad smells.
Baking soda is a base. Vinegar is an acid. When they meet, they produce carbon dioxide bubbles that scrub the interior of the garbage disposal. This fizzy combo not only loosens grime but also naturally and effectively neutralizes stubborn, pH-based odors, with no harsh chemicals required.
Many homeowners appreciate this method for its simplicity and safety. White vinegar is a standard choice. Still, apple cider vinegar is also an effective alternative. For deep cleaning, cover the drain with a stopper. That traps the bubbling mix inside, letting it thoroughly clean all hidden, moldy surfaces.
(ii) Let it sit for 10–15 minutes before rinsing.
To maximize the deodorizing power of this natural solution, timing is crucial. The baking soda and vinegar mixture requires sufficient contact time to break down odor-causing residues effectively.
Most cleaning professionals recommend letting the solution work for 10-15 minutes. During this waiting period, the chemical reaction continues to bubble away, loosening grime and killing odor-causing bacteria throughout your garbage disposal system.
In reality, the minimum adequate time varies slightly according to different experts:
- Some professionals suggest 5-10 minutes
- 10 minutes is the most commonly recommended duration
- Up to 30 minutes may be beneficial for severely neglected disposals
For typical mold smells in garbage disposals, 10 minutes strikes the right balance between effectiveness and efficiency.
After the waiting period concludes, proper rinsing is essential:
- Turn on the cold water tap
- Switch on the garbage disposal
- Let both run for about 15-30 seconds
This final step ensures all the loosened debris and the baking soda/vinegar mixture flush completely through your system. “Turn on the garbage disposal and run cold water to distribute the mixture and flush it through the unit”.
The baking soda and vinegar method is particularly effective against mineral deposits that harbor odor-causing bacteria. As one expert points out, “This method also cleans away mineral deposits that can harbor smelly germs”.
If your garbage disposal smells like mold after cleaning with the previous methods, this step should provide significant improvement. The combination of mechanical cleaning from the bubbling action and chemical deodorizing from the ingredients themselves addresses most causes of musty smells in garbage disposals.
Garbage Disposal Burning Smell: Top Causes and Quick Fixes – Notice a Burning Odor from Your Disposal? It could indicate serious mechanical issues requiring immediate attention. Learn to identify warning signs and implement quick fixes before costly repairs become necessary. Act fast!
(iii) Recommended Products
| Product Name | Key Features | Best For | Price | Rating | Amazon Link |
| Glisten Disposal Care | Foaming action, removes buildup, fresh scent | Deep cleaning and deodorizing | $8-12 | 4.2/5 | View on Amazon |
| Plink Garbage Disposal Cleaner | Fizzing tablets, easy to use, citrus scented | Regular maintenance and odor control | $6-10 | 4.1/5 | View on Amazon |
| Dawn Dish Soap | Grease-cutting formula, concentrated, gentle | Basic cleaning and degreasing | $3-8 | 4.7/5 | View on Amazon |
| Arm & Hammer Baking Soda | Pure sodium bicarbonate, odor neutralizer, bulk size | Natural deodorizing and cleaning | $4-8 | 4.8/5 | View on Amazon |
Step 6: Add citrus peels for a fresh scent
For the finishing touch to your freshly cleaned disposal, nothing works quite like natural citrus peels. This step adds a pleasant scent while providing additional cleaning benefits that help keep mold at bay long after your deep clean.
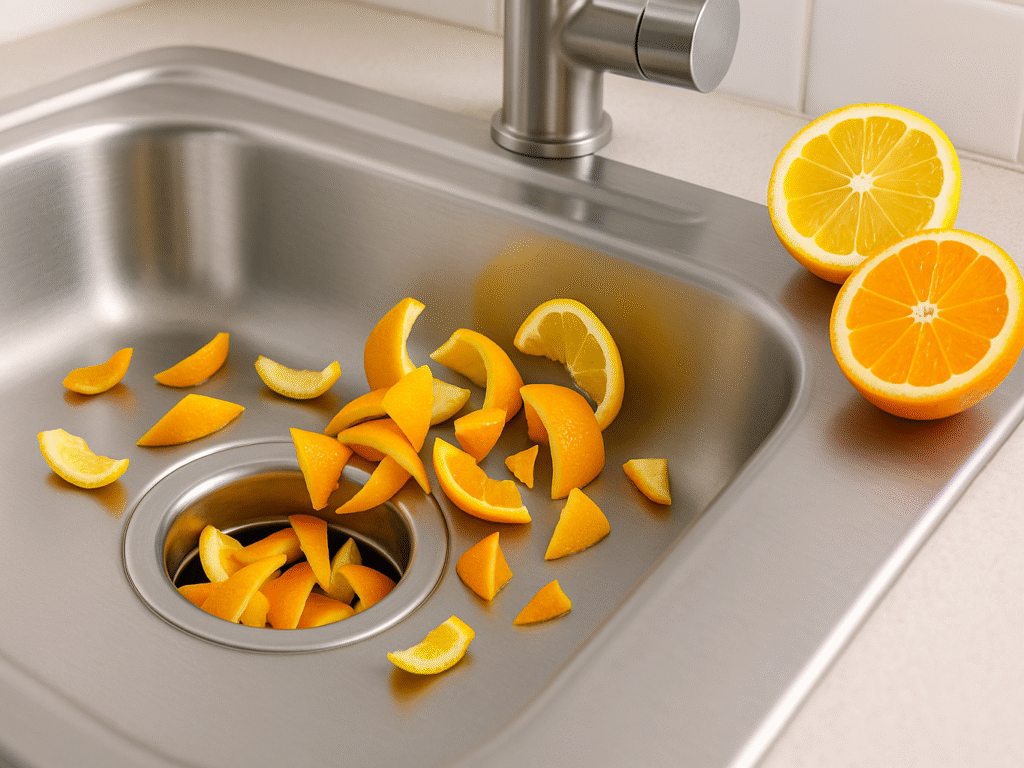
(i) Grind lemon or orange peels in the disposal.
Citrus peels serve as natural air fresheners while actively helping to eliminate any lingering musty odors in your garbage disposal. The secret lies in the peels’ natural oils, primarily a compound called limonene, which possesses potent antibacterial and antifungal properties. Upon grinding, these oils are released, creating a fresh, clean scent throughout your kitchen.
Almost any citrus fruit works effectively:
- Lemons and limes (most commonly recommended)
- Oranges and tangerines
- Grapefruit
Proper preparation matters for optimal results. Cut the peels into manageable pieces, such as quarters or smaller segments, to prevent overloading your disposal. Feed these pieces gradually into the running disposal, allowing each piece to be fully ground before adding the next.
Many homeowners find this method particularly appealing as it’s cost-effective and uses items you likely already have. As noted by experts, citrus rinds are “even better than other cleaning alternatives like essential oils and citrus smell sprays because they are more cost-effective and readily available”.
Finally, be mindful of frequency. While most sources recommend using citrus peels regularly for maintenance, one manufacturer cautions that “with repeated use, the acidity of the fruit can eventually damage the metal inside of your machine”. Consider using this method on a weekly or bi-weekly basis, rather than daily.
(ii) Run cold water while grinding.
Proper technique maximizes both cleaning effectiveness and safety when using citrus peels. Always run cold water, never hot, while grinding citrus peels. Cold water serves two essential functions: it helps solidify any residual grease, making it easier for the disposal to break it down completely, plus it assists in flushing away the tiny citrus particles after grinding.
Begin running cold water before adding the peels, subsequently continuing for 10-15 seconds after the grinding sounds stop. This extended rinsing helps “flush out any remaining debris” that might otherwise accumulate and become a future source of odors.
The entire process should take approximately 30 seconds of grinding time, followed by the additional flushing period. As a bonus, many users report that the combination of ice cubes and lemon peels provides an even more thorough cleaning effect.
If your garbage disposal smells like mold after cleaning with citrus peels, revisiting earlier cleaning steps, or increasing the frequency of this maintenance routine typically resolves persistent odors.
How to Get Rid of Garbage Disposal Smell with Ice: A Simple Trick That Works: Master the ice cleaning technique that professional plumbers swear by! This detailed guide shows exactly how to use ice for maximum cleaning power and odor elimination. Transform your disposal maintenance routine with this game-changing method!
Step 7: Prevent future mold smells
Preventing your garbage disposal from smelling like mold requires consistent attention to a few key practices. According to the Centers for Disease Control, mold can begin growing in as little as 24 hours, making regular maintenance crucial for preventing those unpleasant odors from returning.
(i) Avoid putting grease, eggshells, or coffee grounds.
Certain food items create perfect conditions for mold growth in your disposal. First of all, never pour oils, fats, or grease down your drain. These substances congeal as they cool, causing significant blockages. The sticky residue becomes a breeding ground for bacteria and mold, creating those persistent musty odors.
Likewise, eggshells should not be put in your disposal. Despite the common myth that they sharpen blades, eggshells cause problems. The membrane lining can wrap around the grinding components, plus the shells themselves can stick to oils in the drain pipes, leading to clogs and that distinctive rotten egg smell.
Coffee grounds remain another major culprit. When coffee grounds enter your drain, they form a thick, dense paste that easily accumulates and decays, allowing bacteria to flourish. Over time, this creates blockages and contributes significantly to disposal odors.
Other items to keep out of your disposal include:
- Fibrous vegetables (celery, onion skins)
- Starchy foods (pasta, rice)
- Potato peels and banana peels
(ii) Run water before and after using the disposal.
Proper water usage significantly reduces the risk of mold. Primarily, you should run cold water, never hot, both before and after using your disposal. Cold water helps solidify any grease, preventing it from coating your pipes. In contrast, hot water would liquefy fats, allowing them to adhere to the blades more easily.
Continue running water for 10-20 seconds after grinding stops. This extended flush helps carry away food particles that might otherwise remain in the system and decompose. Without sufficient water, food waste can stick to disposal components, creating ideal conditions for mold growth.
(iii) Clean weekly to prevent buildup
Consistency is key in preventing mold odors. Ideally, clean your garbage disposal at least once a week, especially if you use it frequently. Monthly cleaning may be sufficient for less frequent users, but remember that even small food particles can support mold growth within a day.
A simple maintenance routine of ice and salt can keep your disposal fresh between deep cleanings. Additionally, a monthly baking soda and vinegar treatment helps eliminate bacteria that cause odors.
By following these preventative measures, you’ll prevent situations where your garbage disposal smells like mold after cleaning and avoid unpleasant surprises. However, if you notice any unusual burning odors during operation, this could indicate mechanical problems rather than just mold buildup. Our guide on garbage disposal burning smell causes and fixes helps identify when professional repair might be necessary.
(iv) Recommended Products
| Product Name | Key Features | Best For | Price | Rating | Amazon Link |
|---|---|---|---|---|---|
| InSinkErator Evolution Compact | 3/4 HP, SoundSeal technology, anti-jam system | Quiet operation and powerful grinding | $180-220 | 4.4/5 | View on Amazon |
| Waste King L-8000 | 1 HP, high-speed motor, easy installation | Heavy-duty grinding and durability | $120-160 | 4.3/5 | View on Amazon |
| Moen GX50C | 1/2 HP, pre-installed cord, compact design | Budget-friendly reliable performance | $80-120 | 4.2/5 | View on Amazon |
| KitchenAid KCDB250G | 1/2 HP, continuous feed, overload protection | Reliable everyday use and easy maintenance | $90-130 | 4.1/5 | View on Amazon |
Conclusion
Dealing with a moldy-smelling garbage disposal is one of the less pleasant kitchen chores. However, with the proper techniques, you can quickly eliminate those odors and keep your unit functioning properly for years to come. Regular maintenance and a few household items are all it takes to keep smells at bay.
Preventing mold starts with smart usage habits. Always run cold water before and after using the disposal, avoid grinding grease, starchy foods, or coffee grounds, and clean it weekly. These simple practices can significantly reduce the chances of mold buildup and stop that unpleasant smell from returning.
The seven-step method prevents your garbage disposal from smelling like mold after cleaning because it addresses every aspect of the problem. From identifying the odor source and scrubbing visible surfaces to flushing with soapy water, ice, and salt, each step plays a role. Finishing with baking soda, vinegar, and citrus peels gives you a clean, deodorized disposal that smells fresh and works like new.
FAQs
Q1. What causes moldy smells in garbage disposals?
Moldy smells usually come from old food particles that have become stuck in the disposal. When not cleaned regularly, moisture and leftovers create the perfect environment for mold and bacteria, resulting in a musty, unpleasant odor.
Q2. How can I identify the source of the moldy smell?
Check under the rubber splash guard, inside the grinding chamber, and around the drain. Moldy smells often come from hidden food buildup or moist areas where bacteria thrive. A flashlight can help you spot any debris or grime.
Q3. What steps should I follow to clean the visible parts of the disposal?
Turn off the power. Use warm soapy water and a brush to scrub the sink flange, rubber guard, and grinding chamber. Clean thoroughly under the splash guard, where food residue often hides and causes lingering smells.
Q4. How can I naturally deodorize my garbage disposal?
Pour ½ cup of baking soda and 1 cup of vinegar into the disposal. Let it fizz for 10 minutes. Rinse with cold water while the disposal is running. This works well if your garbage disposal occasionally smells like mold.