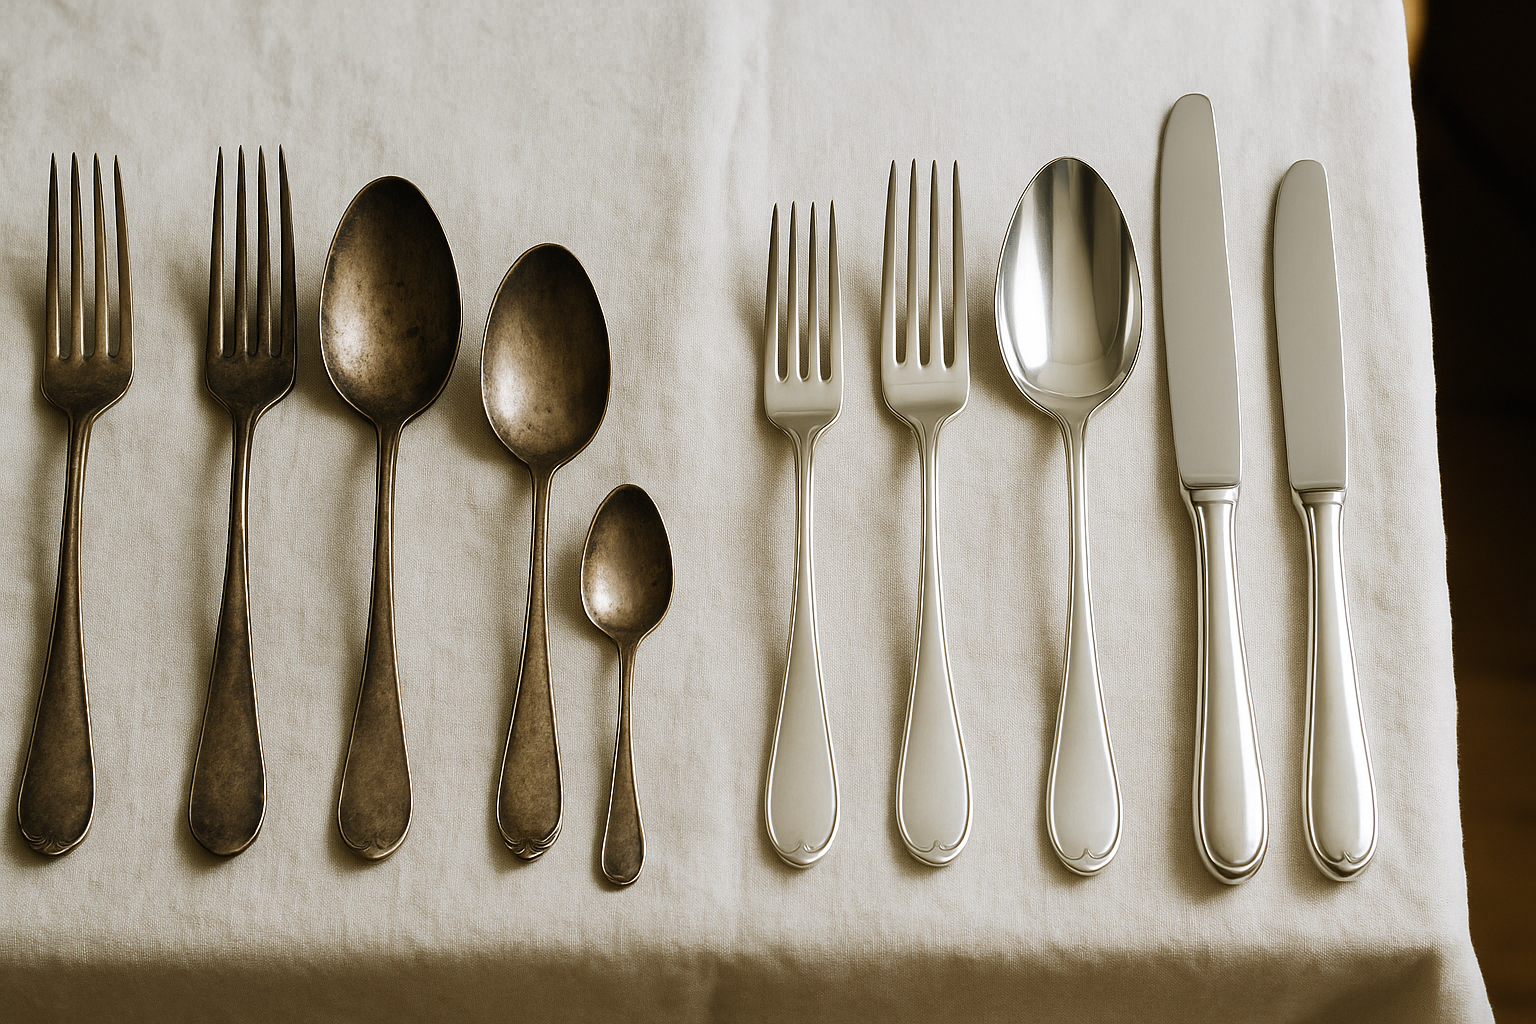
There’s nothing quite like the sinking feeling of pulling out your good silverware for a special dinner, only to find it dull, spotted, and tarnished. I’ve been there, staring at family heirlooms or wedding gifts that have lost their luster, wondering if they’ll ever shine again. After years of trial and error (and more than a few cleaning disasters), I’ve finally mastered how to clean tarnished silverware without damaging these precious items.
Whether preparing for holiday entertaining or simply wanting to restore your everyday flatware, this guide covers everything from gentle DIY solutions to professional-grade products. I’ll walk you through the science behind tarnish, share step-by-step cleaning methods that work, and reveal expert secrets to keep your silver gleaming for years.
What Is Silver Tarnish?
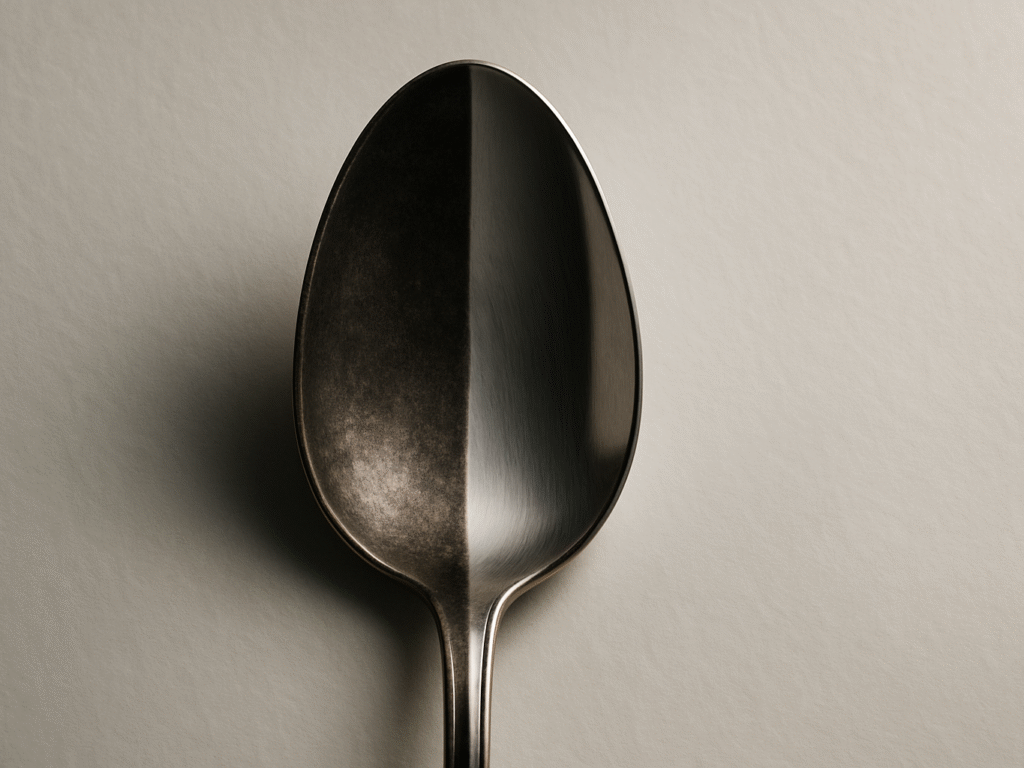
That dull, blackish coating on your silverware isn’t dirt; it’s a chemical reaction. Tarnish forms when silver reacts with sulfur compounds in the air, creating silver sulfide. According to Dr. Sarah Jenkins, a metallurgist at Cornell, even cooking eggs or using rubber bands can cause this.
The good news? Tarnish is usually just a surface issue. The bad news? It can wear down silver-plated items if left unchecked, thinning the top layer. High humidity speeds up tarnishing, so storing silver in bathrooms or basements can be a big mistake.
Sterling silver (92.5% pure silver) tarnishes more slowly and evenly than silver plates, which may develop blotchy patches or reveal the base metal underneath. Knowing how to keep silverware from tarnishing through smart storage and gentle handling saves effort and preserves your pieces longer.
Pre-Cleaning Preparation
Before diving into any cleaning method, proper preparation is crucial. Gathering the right materials and taking safety precautions will make the process easier and protect you and your silverware.
You’ll need:
- Aluminum foil
- Baking soda
- White vinegar
- Soft microfiber cloths
- Rubber gloves
- A shallow pan or dish (glass or plastic, not metal)
- Cotton swabs for detailed areas
- Soft-bristled toothbrush
Safety first: Always work in a well-ventilated area, especially when using commercial cleaners containing ammonia or other chemicals. Wearing rubber gloves protects your hands and, importantly, prevents oils from your skin from transferring to freshly cleaned silver.
“Before attempting any cleaning method on precious or antique silverware, always test on a small, inconspicuous area first,” advises Julia Koenigsberg, silver restoration specialist at the Metropolitan Museum of Art’s conservation department. “What works beautifully on one piece might damage another, depending on its age, composition, and manufacturing techniques.”
How to clean tarnished silverware properly starts with this crucial step: sorting your pieces by type and tarnish level. Heavily tarnished items might need a different approach than slightly affected ones, and silver plates should generally receive gentler treatment than solid sterling silver.
Method 1: Aluminum Foil and Baking Soda
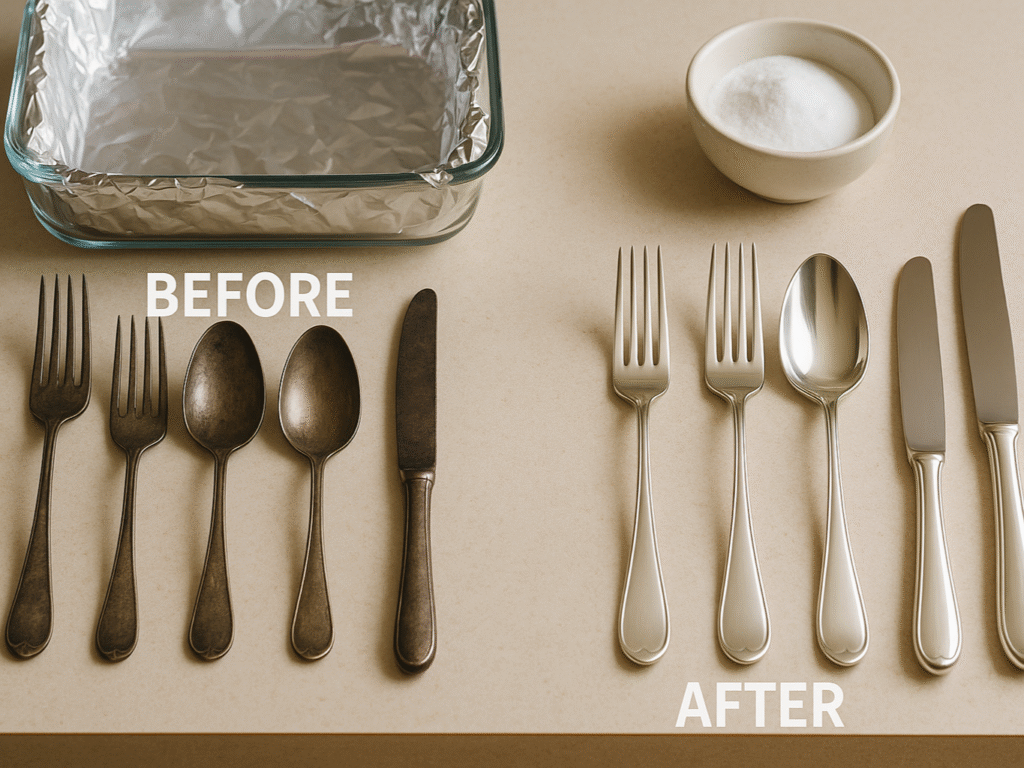
This method is miraculous for removing tarnish quickly with minimal effort, and it’s based on fascinating chemistry. Rather than scrubbing away tarnish, this technique reverses the chemical reaction that caused it. To clean tarnished silverware with foil, follow this process:
(i) Prep the Cleaning Station
Line a glass or plastic container with aluminum foil, shiny side up. It isn’t just for looks; direct contact with the foil is essential for the reaction. Place your tarnished silverware inside, ensuring each piece touches the foil to activate the chemical process.
(ii) Boil the Cleaning Solution
Bring 2–3 cups of water to a boil. Once boiling, carefully add 1/4 cup of baking soda. It’ll fizz and bubble like a science experiment, and that’s your cue; it’s reacting. It creates the perfect electrochemical bath for your silver.
(iii) Pour & Submerge
Slowly pour the hot baking soda solution over the silverware, fully submerging each piece. The moment the solution hits the foil and silver, the tarnish begins to disappear, transferring from the silver to the foil. Let the pieces sit for 5–10 minutes.
(iv) Rotate for Full Coverage
Using wooden tongs, gently turn each piece halfway through soaking. It ensures all sides are equally exposed to the reaction. You’ll notice some stubborn tarnish melting away before your eyes. For heavier buildup, you should repeat this step or process.
(v) Rinse & Dry Thoroughly
Once the tarnish is gone, remove the silverware, rinse thoroughly under cool water, and dry immediately with a soft, lint-free cloth. Don’t air-dry; moisture can cause new tarnish. Repeat the process, especially for older or deeply tarnished silver.
For those wondering how to clean tarnished silverware with foil, this method stands out for its speed, safety, and scientific elegance. The aluminum (more reactive than silver) essentially “takes” the sulfur from the silver sulfide, leaving your silverware clean.
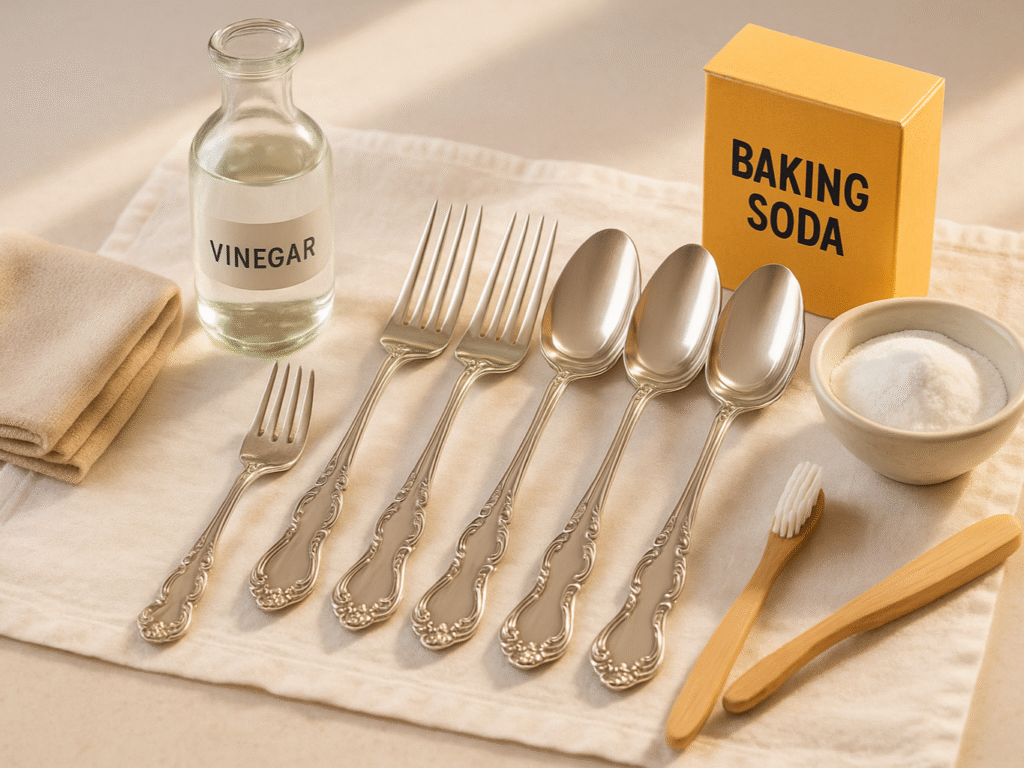
Method 2: Vinegar and Baking Soda Soak

A vinegar and baking soda soak offers excellent results for moderately tarnished pieces, especially those with intricate designs where the foil method might miss spots. This method is particularly effective on flatware with detailed patterns where tarnish can hide in crevices. For those wondering how to clean tarnished silverware with vinegar, this is a highly effective approach:
(i) Prepare the Cleaning Mixture
Mix 1 cup of white vinegar with 2 tablespoons of baking soda in a glass or plastic container. Add the baking soda slowly; it will fizz intensely. To increase effectiveness, stir in 1 tablespoon of salt. This solution is gentle yet powerful for tarnished silver.
(ii) Add Warm Water and Silverware
Once the bubbling calms down, add warm water until it completely covers your silverware. Submerge the pieces, making sure they’re fully soaked. The solution will begin loosening tarnish, which is especially useful for flatware with ornate or engraved designs where buildup hides in fine crevices.
(iii) Soak for 2–3 Hours
Let your silverware sit in the solution for 2–3 hours. During this passive soak time, the vinegar’s acidity dissolves tarnish while baking soda provides a gentle lift. It’s a low-effort method ideal for when you don’t want to scrub manually but want visible results.
(iv) Gently Scrub Detailed Areas
After soaking, gently scrub any remaining tarnish from hard-to-reach areas using a soft-bristled toothbrush. This is particularly useful for detailed patterns, grooves, or engraving. Don’t use a hard brush; silver is delicate, and scratching the surface can permanently dull the finish.
(v) Rinse & Buff to Shine
Thoroughly rinse each piece under clean water to remove any vinegar or baking soda residue. Immediately dry and buff with a soft, clean cloth to prevent water spots and re-tarnishing. Buffing also restores the natural shine without needing polish.
Chef Marcus Williams, culinary director at the prestigious Culinary Institute of America, explains: “Restaurant professionals know that vinegar’s mild acidity works wonders on tarnished silver without damaging it. We use this method weekly in high-end restaurants to maintain the silverware used for service. The key is the proper dilution; too strong and you risk damage; too weak and it won’t be effective.”
For anyone curious about how to clean tarnished silverware with vinegar, this method offers a perfect balance of effectiveness and gentleness, ideal for restoring shine without abrasive polishing.
Method 3: Baking Soda Paste
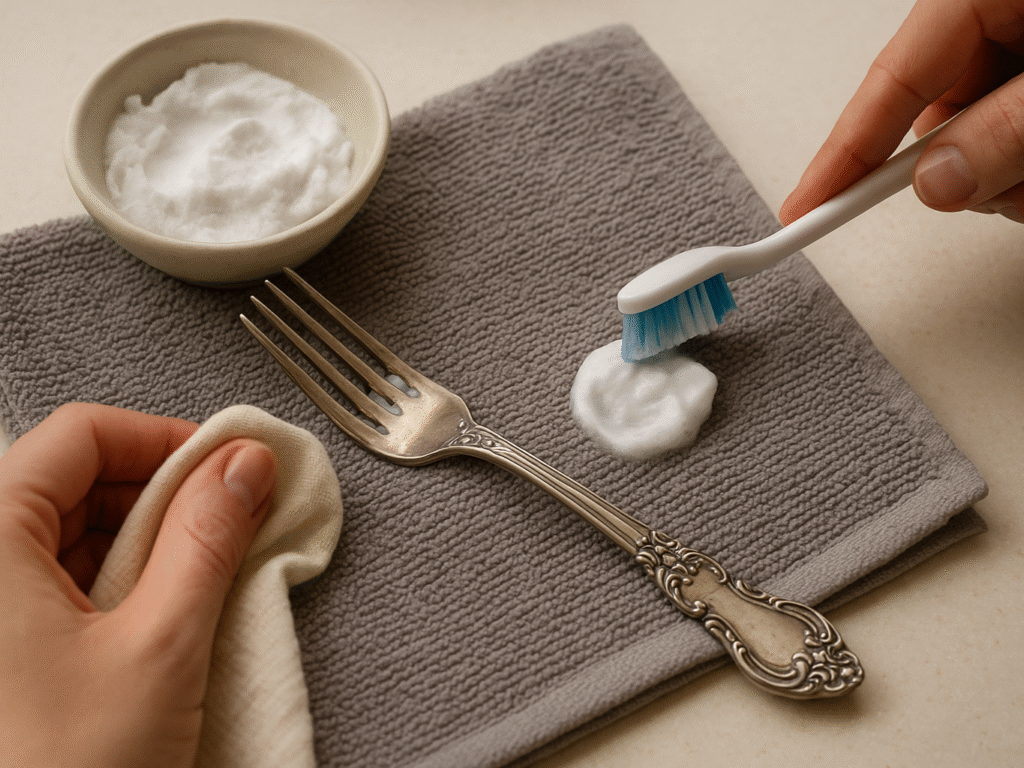
A baking soda paste offers precision and control for the targeted cleaning of delicate pieces with moderate tarnish. This method allows you to focus on specific areas without submerging entire pieces. To clean tarnished silverware with baking soda paste:
(i) Mix the Paste
In a small bowl, combine 3 parts baking soda with 1 part water to form a thick, spreadable paste. It should resemble toothpaste in texture. This mild abrasive mix is safe for silver and ideal for precise, hands-on cleaning without submerging the entire item.
(ii) Apply the Paste Gently
Apply the paste directly to tarnished areas using a soft cloth or your fingers (wear gloves). Gently rub in circular motions, following the silver’s natural grain if visible. This targeted method helps clean problem spots without affecting already-polished surfaces or mixed materials.
(iii) Detail Hard-to-Reach Areas
Dip a soft-bristled toothbrush or cotton swab into the paste for corners, engraved lines, or intricate designs. Gently scrub those crevices to lift tarnish that’s settled in detailed patterns, especially useful for vintage silver or jewelry with delicate filigree.
(iv) Let It Sit (Optional)
For areas with stubborn tarnish, allow the paste to sit on the silver for about 10 minutes before rinsing. It gives the baking soda time to break down tarnish chemically without damaging the surface. Avoid letting it dry completely, especially on sensitive items.
(v) Rinse, Dry & Buff
Rinse each item under warm running water to remove all residue. Immediately dry with a soft microfiber cloth and buff lightly to enhance the shine. Don’t skip drying; lingering moisture encourages tarnish to return. Patience and consistency will protect your silver’s long-term beauty.
This method gives you precise control, making it perfect for pieces with a combination of tarnished and clean areas or for silver with mixed metal components where submersion methods might cause damage.
If you’re tackling detailed or mixed-material silverware, mastering how to clean tarnished silverware with baking soda in paste form gives you control without risk of overexposure to liquid cleaners.
Tackling Badly Tarnished Silver-Plated Pieces
When facing a severely blackened silver plate, you should bring in the big guns. Silver plate requires special care because aggressive cleaning can wear through the silver layer to the base metal below.
So, how do you clean badly tarnished silver plate without damaging it? The key is to start with commercial products specifically formulated for the job:
1. Choose the Right Polish
Select a high-quality silver polish labeled safe for silver plate. Apply it to a soft cloth, not directly to the item, and work in straight lines using light pressure.
2. Tackle Stubborn Tarnish
For heavy tarnish, let the polish sit for 5 minutes before wiping. Avoid scrubbing; allow the product to do the work.
3. Double-clean if Needed
Use aluminum foil to eliminate any lingering tarnish after polishing. Rinse thoroughly and dry completely.
4. Final Protection
Buff with an anti-tarnish cloth to restore shine and slow down future tarnishing.
For pieces with significant tarnish buildup in detailed areas, dampening a soft toothbrush with water and dipping it in baking soda can help reach crevices. Always brush gently and keep it aligned with the design, not across it.
Professional restorers often recommend alternating between chemical and mechanical cleaning methods for the best results on badly tarnished pieces. The commercial polish provides targeted cleaning power, while the gentler foil method handles the finishing work.
Preventing Future Tarnish
The best way to deal with tarnish is to prevent it from forming in the first place. With simple habits and storage solutions, you can dramatically reduce how often you need to clean your silver.
Here’s how to prevent silverware from tarnishing
1. Store properly
Keep silver in anti-tarnish cloth bags or chests lined with anti-tarnish fabric. These materials contain materials that absorb sulfur compounds before they can react with your silver.
2. Control humidity
Silver tarnishes faster in humid environments. Use silica gel packets in your storage containers in a humid climate.
3. Avoid damaging materials
Never store silver with rubber bands, wool, felt, or newspaper, all of which contain sulfur compounds that accelerate tarnishing.
4. Use it regularly
Believe it or not, silver used and washed regularly tarnishes more slowly than pieces stored for long periods. The friction from gentle use and washing helps remove tarnish-causing compounds before they can react.
5. Wash properly
Hand wash with mild dish soap and dry immediately and thoroughly. Never put sterling or silver plates in the dishwasher, as detergents can cause spotting and damage.
Antiques appraiser Michael Flanigan from PBS’s Antiques Roadshow notes, “The biggest mistake I see collectors make is improper storage. Silver wrapped in plastic or regular cloth will tarnish much faster than pieces stored properly in anti-tarnish materials. It’s a small investment that saves countless hours of cleaning.”
Product Recommendations
While DIY methods work wonderfully for regular maintenance, sometimes you need the power of commercial products for thorough cleaning or preservation. Here are three excellent options at different price points:
1. Budget: Wright’s Silver Cleaner and Polish Cream 8 oz ($11.64)
Best Overall Silver Polish for Everyday Use
Key Features
- Ammonia-Free Formula: Safe for use on silver, chrome, pewter, porcelain, and stainless steel.
- Restores Shine: Effectively removes tarnish, bringing silver back to its original luster.
- Protective Coating: Leaves behind a barrier that helps prevent future tarnishing.
- Included Accessories: Comes with a polishing cloth for easy application.
- Trusted Brand: Wright’s has been a leader in silver care since 1873.
Pros
- Gentle on delicate items; does not scratch surfaces.
- Easy to use with quick results.
- Suitable for a variety of metals and items.
- Highly rated by users for effectiveness.
Cons
- It may require some manual effort for heavily tarnished pieces.
- The included sponge may not be durable for long-term use.
Ideal For
- Individuals seeking a reliable, everyday silver polish.
- Those with a variety of silver items, from jewelry to flatware.
- Users prefer a gentle, ammonia-free cleaning solution.
Customer Feedback
With over 18,000 ratings on Amazon and an average of 4.7 out of 5 stars, users praise Wright’s Silver Cream for its effectiveness and ease of use. Many highlight its ability to restore shine to tarnished items without harsh chemicals. Some users note that while the product works well, the included sponge may not be the most durable.
2. Mid-Range: Weiman Jewelry Polish and Tarnish Remover ($17.98)
Top Pick for Convenient Jewelry Cleaning
Key Features
- Ammonia-Free Formula: Safe for silver, gold, brass, copper, aluminum, and jewelry with diamonds or gemstones.
- Restores Shine: Effectively removes tarnish, rejuvenating dull jewelry to a brilliant shine.
- Protective Coating: Leaves behind a barrier that helps prevent future tarnishing.
- Convenient Wipes: Pre-moistened wipes allow easy, mess-free application without additional tools.
- Trusted Brand: Weiman has been a leader in surface care since 1941.
Pros
- Quick and easy to use, ideal for on-the-go cleaning.
- Suitable for a variety of metals and jewelry types.
- Leaves a protective layer to delay tarnish formation.
- Highly rated by users for effectiveness and convenience.
Cons
- It may not be as effective on heavily tarnished items.
- The scent may not appeal to all users
Ideal For
- Individuals seeking a quick and convenient solution for light to moderate tarnish.
- Those with a variety of jewelry pieces, including items with gemstones.
- Users prefer a mess-free, wipe-based application.
Customer Feedback
With over 400 ratings on Amazon and an average of 4.6 out of 5 stars, users praise Weiman Jewelry Wipes for their convenience and effectiveness. Many highlight the ease of use and the immediate improvement in their jewelry’s appearance. Some users note that while the wipes are excellent for regular maintenance, they may require additional effort for heavily tarnished pieces.
3. Goddard’s Silver Care Liquid Dip 10 oz ($60)
Best for Quick and Effective Silver Tarnish Removal
Key Features
- Instant Tarnish Removal: Quickly eliminates tarnish from silverware, jewelry, and small silver items without scrubbing.
- Ready-to-Use Formula: No mixing is required; dip the item, rinse, and dry it for immediate results.
- Safe for Silver: Designed specifically for sterling silver and silver-plated items; not recommended for stainless steel.
- Professional Strength: Trusted by professionals for its powerful cleaning capabilities.
Pros
- Effortless Application: Dip, rinse, and dry; no polishing is required.
- Effective on Intricate Designs: Reaches into crevices and detailed patterns where clothes can’t.
- Restores Shine: Leaves silver items looking bright and renewed.
Cons
- Not Suitable for Stainless Steel: Contact with stainless steel can cause damage.
- Strong Odor: Some users report a noticeable chemical smell during use.
Ideal For
- Individuals seeking a fast and efficient solution for tarnished silver items.
- Those with silverware, jewelry, or decorative pieces require regular maintenance.
- Users prefer a dip method over manual polishing.
Customer Feedback
Goddard’s Silver Care Liquid Dip has garnered positive reviews for its effectiveness and ease of use. Customers appreciate the quick results and the ability to clean intricate silver items without damage. Some users note the importance of following instructions carefully to avoid potential issues.
Conclusion
Mastering how to clean tarnished silverware isn’t just about aesthetics; it’s about preserving pieces that often carry significant monetary and sentimental value. From the chemistry-driven aluminum foil method to the precision of baking soda paste, you now have multiple proven techniques to restore your silver’s natural beauty.
Remember that consistent care is far easier than occasional deep cleaning. Proper storage solutions and handling practices will dramatically reduce tarnish formation, saving time and protecting your silver in the long run.
Whether you inherited your grandmother’s sterling flatware, invested in silver for entertaining, or want to maintain the stainless look of your everyday table setting, regular maintenance using these methods will keep your pieces looking their best for generations to come.
Ready to give your tarnished treasures new life? Start with the aluminum foil method for quick results, invest in proper anti-tarnish storage, and consider trying one of the recommended polishes for your most precious pieces. Your silverware and anyone who dines at your table will thank you for the extra effort.