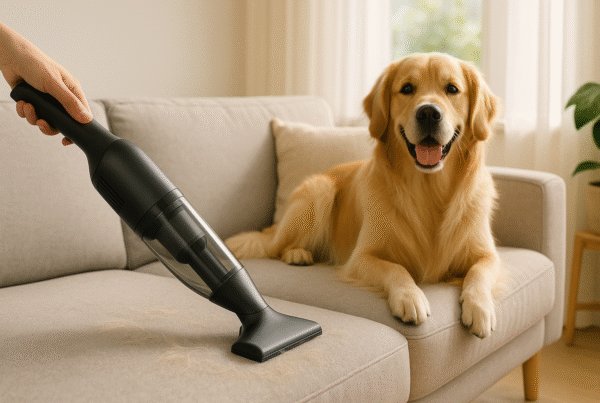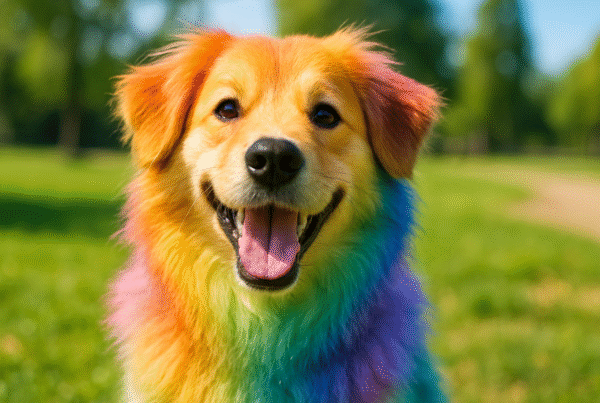
Dyeing your dog’s hair for a special occasion or just for fun can be a joyful way to give them extra attention. It’s perfect for birthdays, holidays, or themed events. However, before anything else, always ensure that your pet’s safety, comfort, and skin health remain your top priority.
Understanding how to dye a dog’s hair safely begins with knowing which products are safe for your dog. Edible food-based dyes usually last a few days, while Kool-Aid may hold for several weeks. For a complete breakdown of safe color options and creative ideas, explore our dog hair dye ideas guide for inspiration and tips.
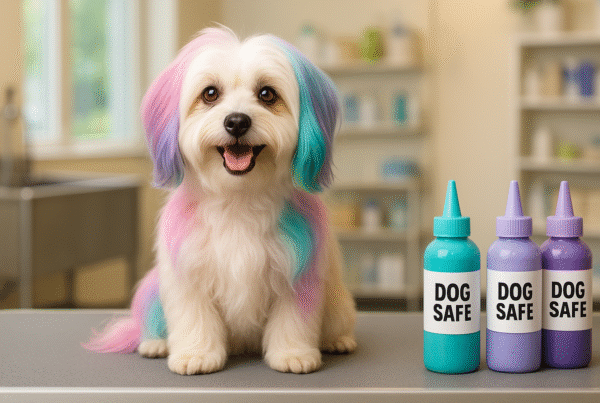
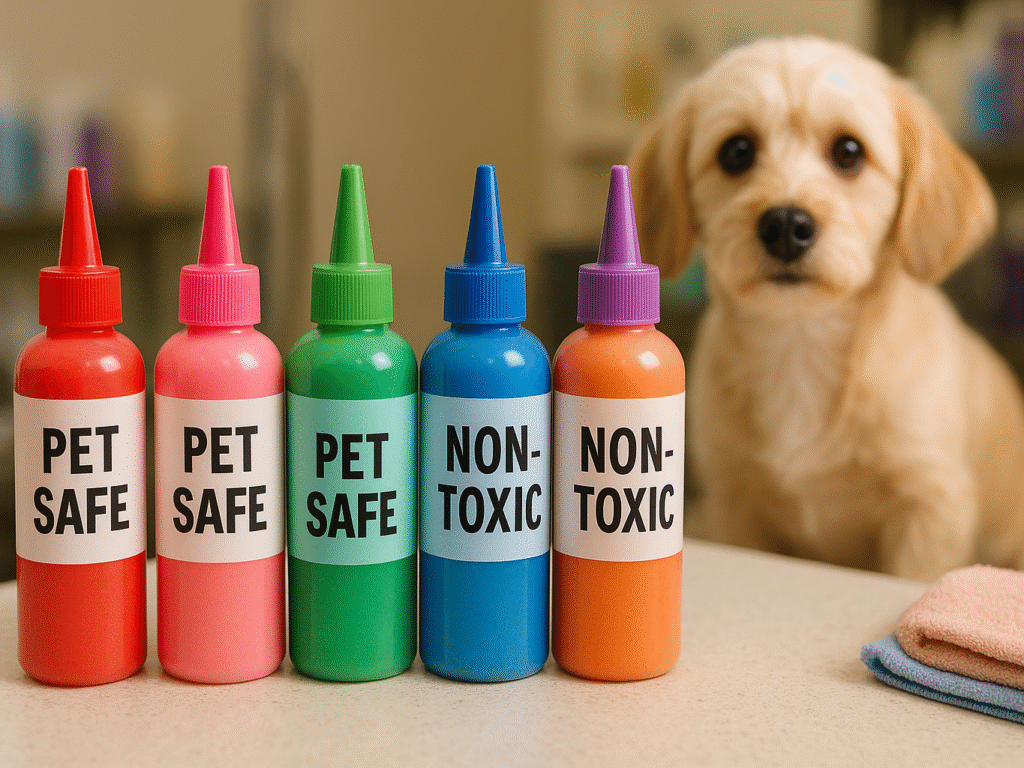
Always choose pet-safe products. Avoid human hair dye at all costs. Instead, opt for unsweetened Kool-Aid or natural colorants, such as beet juice, turmeric, or spinach extract. This guide walks you through everything, from selecting the right dye to applying it and maintaining the color, so your pup stays happy and vibrant.
Step 1: Choose a Safe Dog Hair Dye
When learning how to dye a dog’s hair, selecting the right dye for your canine companion is the most critical decision in the entire dyeing process. Since your dog’s safety matters more than their appearance, taking time to research and choose appropriate products is essential. Let’s explore the safest options for adding some flair to your furry friend’s coat.
(i) Avoid human hair dyes
Human hair dyes are off-limits for your dog. It isn’t just a recommendation, it’s a critical safety rule that could prevent serious harm to your pet. Human hair dyes contain chemicals that are toxic to dogs, including ammonia, peroxide, and para-phenylenediamine (a known carcinogen). These chemicals can cause severe reactions ranging from mild irritation to life-threatening situations.
First, the pH level of your dog’s skin differs significantly from human skin. This difference makes dogs much more susceptible to chemical burns and irritation from products formulated for humans. Furthermore, dogs instinctively lick anything foreign they come in contact with, which means they might ingest these toxic substances.
One alarming case involved a Maltese who nearly died from severe burns after being dyed purple with human hair dye. This tragic incident clearly illustrates the dangers of using the wrong products on your pet. Even if your dog doesn’t experience immediate visible reactions, these chemicals can potentially cause long-term health issues.
When considering how to dye a dog’s hair, remember that, unlike humans, dogs don’t understand the concept of beauty treatments and cannot tell if they’re experiencing discomfort. The risks associated with human hair dyes include:
- Chemical burns on the skin
- Respiratory issues from fumes
- Eye irritation or damage
- Allergic reactions
- Poisoning from ingestion during self-grooming
If you notice any signs of distress in your dog after dyeing, such as excessive scratching, redness, swelling, or changes in behavior, rinse the dye off immediately and contact your veterinarian.
Dog Hair Dye Ideas: Creative Looks for White, Black, Brown & Vibrant Colors (Pink, Blue, Green!): Discover stunning color combinations and creative patterns that work perfectly for different coat types. From subtle highlights to bold rainbow designs, explore professional techniques that make your dog stand out safely and beautifully.
(ii) Use pet-safe or natural food coloring.
When wondering how to dye a dog’s hair safely, instead of putting your pet’s health at risk with human products, opt for specially formulated pet-safe dyes. These products are designed with your dog’s safety in mind and contain gentler ingredients that won’t harm their skin or cause toxicity if accidentally ingested.
Several reputable brands offer pet-safe hair dyes:
- OPAWZ Semi-Permanent Dyes are made with food-grade pigments and contain no ammonia or peroxide. These dyes gradually wash away after about 6-12 washes.
- Warren London Critter Color offers a plant-based alternative, crafted with organic vegetable dyes and botanical extracts that color your dog’s coat while nourishing it.
For those seeking shorter-lasting options, our detailed review of temporary hair dye for dogs covers the safest wash-out alternatives available. Nevertheless, not all products labeled “pet-safe” undergo rigorous testing or are subject to regulation. Before using any commercial pet dye, consider these safety measures:
- Check the ingredients list carefully and research any unfamiliar components
- Look specifically for a product“ that states “no ammonia ”or peroxide.”
- Test a small patch of fur before full application
- Show the product to your veterinarian for approval
- Never use dyes on dogs under 6 months old
- Avoid dyeing dogs with sensitive skin, medical conditions, or any skin issues
For those asking how to dye a dog’s hair naturally, natural food coloring offers a safe alternative for dyeing your dog’s fur. These plant-based options are generally gentle on the skin and non-harmful if accidentally ingested. Some excellent natural coloring options include:
- Beet juice: Creates red or pink tones
- Turmeric: Produces yellow or orange shades
- Carrot juice: Gives an orange tint
- Spinach extract: Makes green hues
- Blueberry or blackberry juice: Creates purple tones
Since natural food coloring is exactly what it sounds like, coloring derived from food, it’s typically safe for your dog. However, individual dogs may have food sensitivities, so it’s always best to test a small area first and monitor for any adverse reactions.
Temporary Hair Dye for Dogs: Safest Non-Toxic & Wash-Out Color Kits: Find the perfect temporary coloring solution for special events and holidays. Our comprehensive guide reviews the safest wash-out options that provide vibrant results without long-term commitment to your pet’s appearance.
(ii) Try Kool-Aid or vegetable-based dyes.
Many pet owners asking how to dye a dog’s hair affordably find that unsweetened Kool-Aid powder has become a popular, inexpensive, and readily available option for dyeing dog fur. This method works particularly well for dogs with white or light-colored coats. The bright, vibrant colors can last several weeks and generally fade gracefully.
Different Kool-Aid colors fade differently. Dark blue maintains its appearance well, while purple fades to a pleasant lavender; green, on the other hand, tends to fade to a yellowish tone that may be less appealing. For comprehensive information about all dog hair dye options, including Kool-Aid techniques, consult our detailed comparison guide.
To use Kool-Aid as a dog hair dye:
- Purchase small, sugar-free packets of Kool-Aid
- Mix the powder with water or pet conditioner until it forms a paste-like consistency
- Apply the mix to your dog’s clean, dry fur
- Allow it to sit for the appropriate time (usually 5-20 minutes)
- Rinse thoroughly with lukewarm water
The citric acid in Kool-Aid acts as a natural fixative, so you don’t need to add any additional chemicals. Different Kool-Aid colors fade differently. Dark blue maintains its appearance well, while purple fades to a pleasant lavender; green, on the other hand, tends to fade to a yellowish tone that may be less appealing.
One advantage of using Kool-Its is that it’s typically more affordable than commercial pet dyes. Additionally, if your dog has a darker coat, Kool-Aid may still work, although the results will be more subtle than on white fur.
For those still questioning how dogs dye a dog’s hair with completely natural ingredients, purely vegetable-based dyes offer another excellent alternative. These dyes derive their coloring power directly from vegetables, fruits, and other plants. For instance, you can create:
- Red/pink dye from pureed strawberries or raspberries
- Orange dye from carrot juice or pumpkin puree
- Yellow dye from turmeric mixed with water
- Green dye from wheatgrass or kale juice
- Purple dye from blueberry juice
When using vegetable-based dyes, keep in mind that the color intensity will generally be milder than that of commercial options. Moreover, these natural alternatives don’t last as long, often washing out after a few baths. Nonetheless, they provide the safest possible option for adding temporary cdogs to your diet.
If you’re wondering how to dye a dog’s hair with minimal risk, starting with natural options is always the safest approach. For special occasions where you want the color to last longer, pet-specific dyes can be appropriate if used correctly.
Remember that regardless of which dye is chosen, it’s essential to consider your dog’s comfort throughout the process. Not all dogs enjoy being dyed or appreciate the extra attention that comes with a colorful coat. Please pay close attention to your pet’s reactions and respect their boundaries during the dyeing process.
Ultimately, how to dye dog hair safely comes down to choosing products specifically formulated for pets, avoiding toxic ingredients, and monitoring your dog for any signs of discomfort or adverse reactions throughout the process.
Step 2: Prepare Your Dog and Tools
When learning how to dye a dog’s hair successfully, proper preparation forms the foundation of a successful dog dyeing process. Once you’ve selected the appropriate dye, taking time to prepare both your pet and your workspace ensures better color results and a more comfortable experience for your friend. Let’s explore the essential preparation steps before you begin applying color.
(i) Wash your dog’s fur.
Understanding how to dye a dog’s hair for lasting results starts with knowing that the cleanliness of your dog’s coat directly impacts how well the dye adheres and how long it lasts. You’ll need to thoroughly wash your dog with an appropriate shampoo to create the ideal canvas for coloring.
For optimal results, use a clarifying shampoo that removes all dirt, oil, and product buildup from your dog’s coat. This step is crucial because oil buildup near the skin will prevent the dye from covering evenly or setting properly. A clean coat ensures the dye sets correctly and produces vibrant, lasting results.
After washing, drying your dog’s fur entirely is equally essential:
- If planning to use semi-permanent dyes, ensure the coat is thoroughly dried
- For food coloring methods, leaving the fur slightly damp may help with absorption
- You can use a pet-safe dryer on low or no-heat setting to speed up the process
Remember that damp fur generally holds dye more effectively than completely dry fur. However, following the specific instructions for your chosen dye type is essential, as some products work better on fur that is fully dry.
(ii) Brush out tangles for even application
Once your dog’s coat is clean and appropriately dried, thorough brushing is the next critical step. This preparation ensures the dye distributes evenly and produces consistent coloration on your dog’s fur.
First, use a suitable brush or comb to remove any loose fur, mats, or tangles. Matted or tangled fur creates barriers that prevent dye from reaching all hair strands, resulting in patchy coloration. The better and more thoroughly their hair is brushed, the easier it will be to apply the hair dye evenly.
For long-haired breeds, consider these additional brushing tips:
- Start from the tips of the fur and work your way up to prevent painful pulling
- Use a detangling spray if your dog has particularly stubborn knots
- Consider a light trim if necessary to create an even surface for dye application
Properly brushed fur not only accepts dye more evenly but also requires less powder, as you won’t waste dye on areas that can’t absorb it due to tangles.
(iii) Apply eye ointment if dyeing near the face.
Prodding your dog’s sensitive areas, particularly around the face, is a non-negotiable safety measure when dyeing. Correspondingly, if you plan to color your dog’s face, proper eye protection becomes essential.
Apply sterile ophthalmic ointment to your dog’s eyes, especially when dyeing fur around the eyes or on the face. This protective barrier helps prevent dye from irritating the eyes and reduces the risk of infection if dye accidentally comes into contact with the eyes. The ointment creates a barrier that repels water-based dyes and protects delicate eye tissues.
Beyond eye ointment, consider these additional protection methods:
- Apply petroleum jelly around the eyes and ears as an additional barrier
- Use blocking cream or conditioner to shield, so you don’t want dyed hair.
- Consider placing cotton in your dog’s ears to prevent dye intrusion
- In some cases, using a cone temporarily during the dyeing process may help prevent your dog from touching their face
Remember that even pet-safe dyes can irritate the eyes if they come into contact with them. Always prioritize your dog’s safety and comfort over aesthetic considerations.
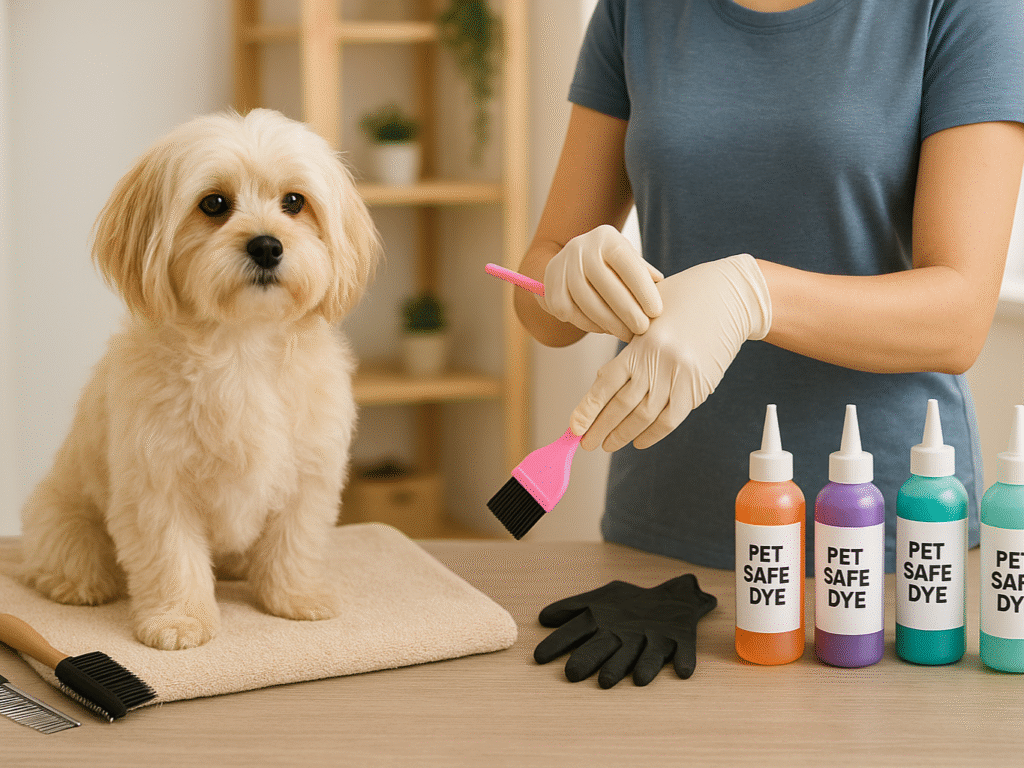
(iv) Gather gloves, brushes, and towels.
When considering how to dye a dog’s hair efficiently, setting up your workspace with all the necessary tools before starting ensures a smoother and more efficient dyeing process. Having everything prepared allows you to focus on the application without scrambling for supplies. Here’s rough.
Here’s a comprehensive list of tools you’ll need:
- Application tools
- Soft brushes, sponges, or cotton balls for applying dye
- An old toothbrush or a thick paintbrush for precise application
- Applicator bottles for liquid dyes
- Color dye applicator for professional results
- Protection supplies
- Gloves to prevent staining your hands
- Old towels or cloths to manage drips and spills
- Newspapers or plastic sheets to protect your workspace
- A cape or cover to shield won’t be dyed
- Accessories
- Hair clips to section off areas (especially for complex designs)
- Graduated mixing bowl for preparing dyes
- Pintail comb for separating fur sections
First-time dyers should consider a complete dog hair dye tool kit. These kits typically include essential grooming tools, such as gloves, brushes, sectioning clips, and applicators. Many come as 14-piece sets designed to be lightweight, reusable, and tailored for pet-safe dye applications.
Prepare your workspace before beginning. Choose an easy-to-clean area, such as a bathroom, and ensure it’s well-lit. Use old towels or protective covers on the floor and nearby surfaces to prevent stains from forming. Preparation reduces mess and makes the process more controlled and stress-free for both you and your dog.
Keep wet wipes or paper towels nearby for quick cleanups after accidental spills if your dog is prone to excessive movement or becomes anxious. Having a second person available to help can be invaluable. Dogs o’fur with clips before dyeing to ensure precision and avoid unintended color bleeding between areas.
Do a patch test first, even with pet-safe dye, to avoid allergic reactions. Apply a small amount behind the ear and wait 24 hours. Pridog’sze your dog’s comfort at every stage. Proper tools, prep, and sensitivity to their needs will ensure a safe and successful dyeing experience.
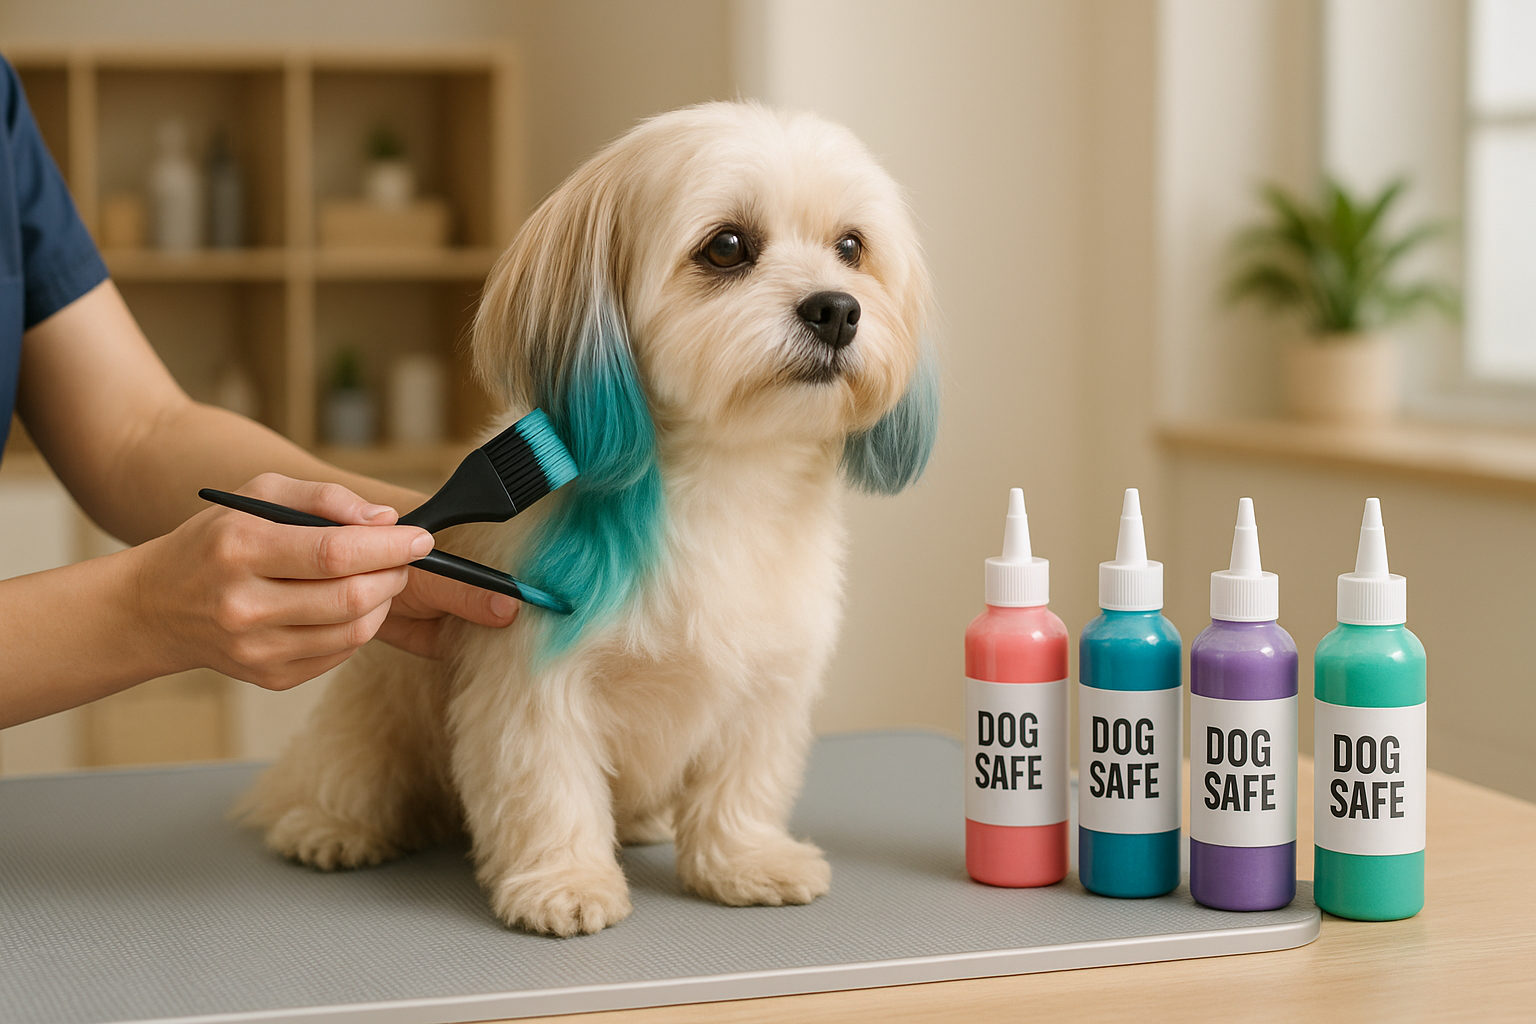
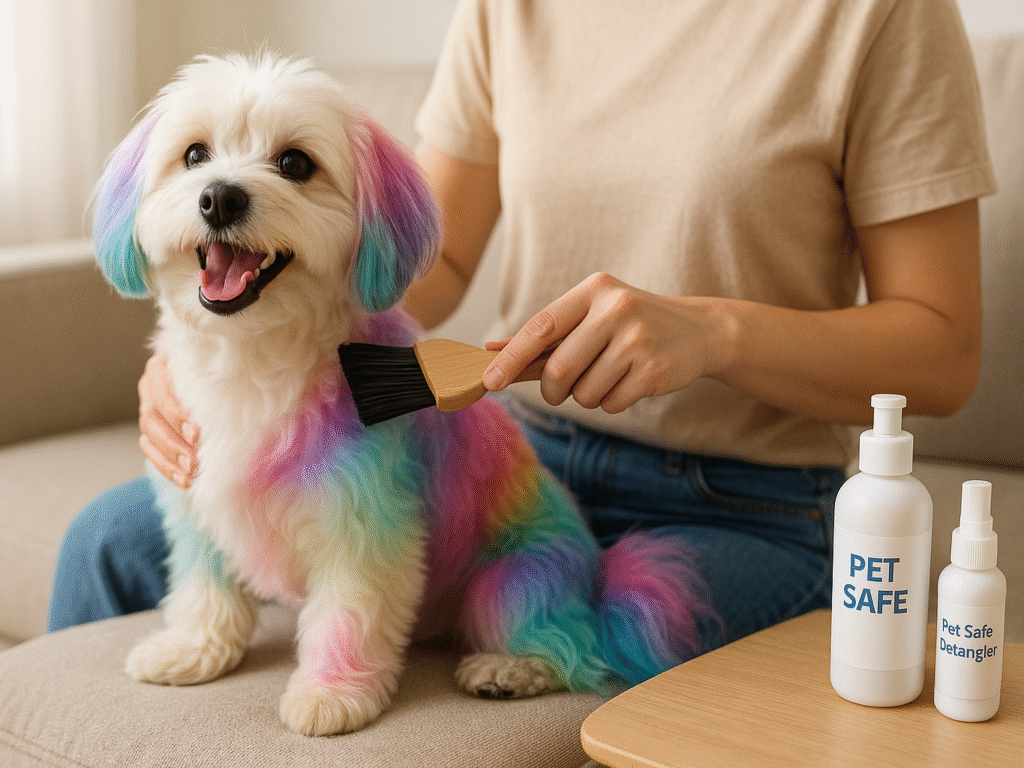
Step 3: Apply the Dye Evenly
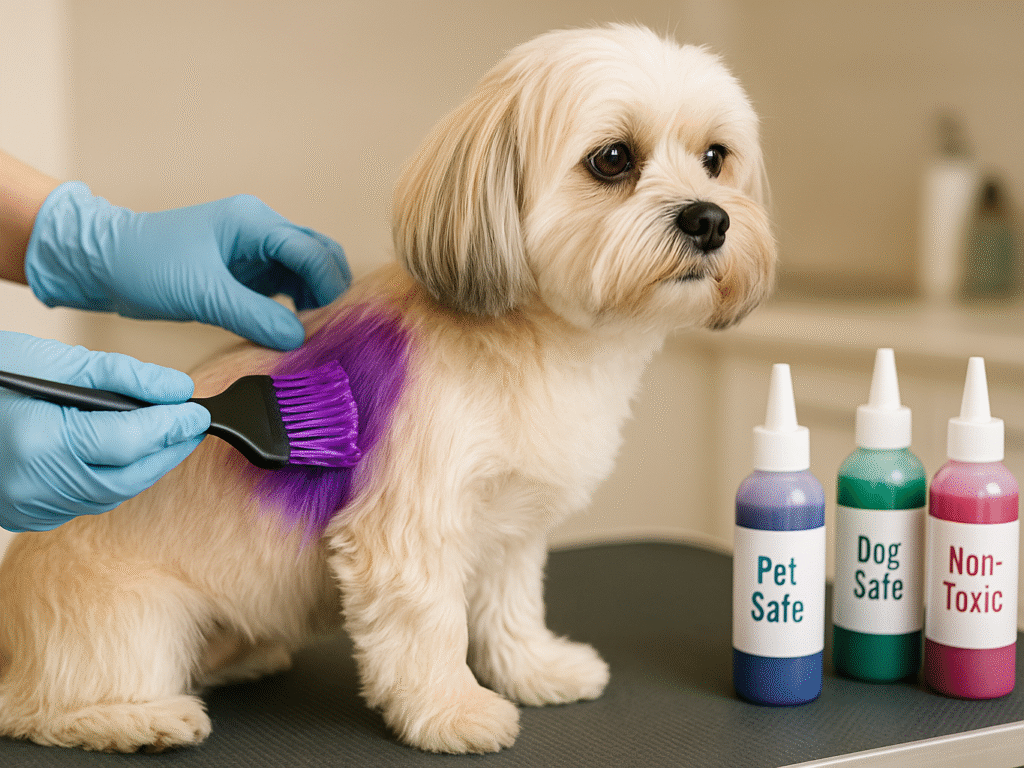
After careful preparation and understanding how to dye a dog’s hair properly, it’s time for the exciting part: applying the dye to your dog’s coat. The application process itself requires patience and precision to achieve even, beautiful results. With your dye mixed according to instructions and your dog comfortably positioned, you’re ready to begin transforming their appearance.
(i) Use a brush or your fingers to apply the product.
The dye application method you choose directly affects the outcome. For broader coverage, use tools like sponges, cotton balls, or soft brushes. These distribute color evenly across large areas and help manage product usage while minimizing mess or uneven patches.
When precision is required, especially for small sections or designs, old toothbrushes or thick paint brushes work best. Many groomers also use gloved hands to massage dye into the fur, providing better control and ensuring the color penetrates evenly from root to tip.
For intricate patterns or focused coloring, applicator bottles provide excellent accuracy. Apply to dry fur for small areas, such as ears or tails. However, for full-body dyeing, slightly damp fur allows smoother color absorption and more consistent overall results. Shake all products well before use.
(ii) Start from the neck and move back.
A systematic approach ensures complete coverage, leaving no gaps. Bdog’s your dog’s neck area, gradually working your way toward the tail. This orderly progression helps track areas you’ve already covered while maintaining consistent color application.
Massage the dye thoroughly into the coat to achieve uniform saturation; patchy coloring usually results from uneven application pressure or insufficient product. Pay careful attention to your desired design and color placement throughout the process.
For dogs with double coats or particularly thick fur, section the hair using clips or vet tape to create clean lines between different colors or between dyed and undyed areas. This technique proves invaluable when creating specific patterns or designs rather than solid colors.
Alternatively, if you’re applying food coloring or diluted dyes, using a spray bottle can provide more even distribution over large areas. For thicker dye formulations, applying with a brush often works better as it allows you to control precisely how much product contacts the fur.
(iii) Avoid the eyes, ears, and mouth.
Safety is critical when dyeing your dog’s fur. Avoid sensitive areas, such as the eyes, ears, nose, and mouth. Use protective gear, such as caps or cones, and ensure that any pre-applied eye ointment remains effective throughout the grooming session.
If your dog shows signs of stress or tries licking the dye, pause immediately. Keep clean water and towels on hand for emergencies. When working near the face, move slowly and have a helper nearby to prevent sudden movements that could cause accidents.
(iv) Let the dye sit for 5–20 minutes.
Timing plays a crucial role in achieving optimal color results. Always follow the instructions on your chosen dye. Most pet-safe products require 5–20 minutes, but some shades, like brown, may take up to 40 minutes to develop fully.
- Use a lick mat with peanut butter to keep your dog still.
- Monitor closely for irritation during processing.
- Never exceed recommended timing to avoid skin reactions.
For temporary dyes, such as chalk or spray-on formulas, set times are often shorter, typically just a few minutes. If using homemade dyes, such as beet or turmeric paste, begin with a 5-minute test and gradually build the time while monitoring the color and comfort.
Throughout the entire process, be alert for signs of itching, redness, or unusual behavior. Even safe dyes can trigger reactions in dogs with sensitive skin. If anything seems off, rinse immediately with lukewarm water and do not reapply.
Ultimately, your dog’s well-being comes first. Don’t push for deeper color at the expense of their comfort. It’s okay if the hue isn’t perfect; the goal is fun and bonding, not flawless beauty at your pet’s expense.
Step 4: Rinse and Dry
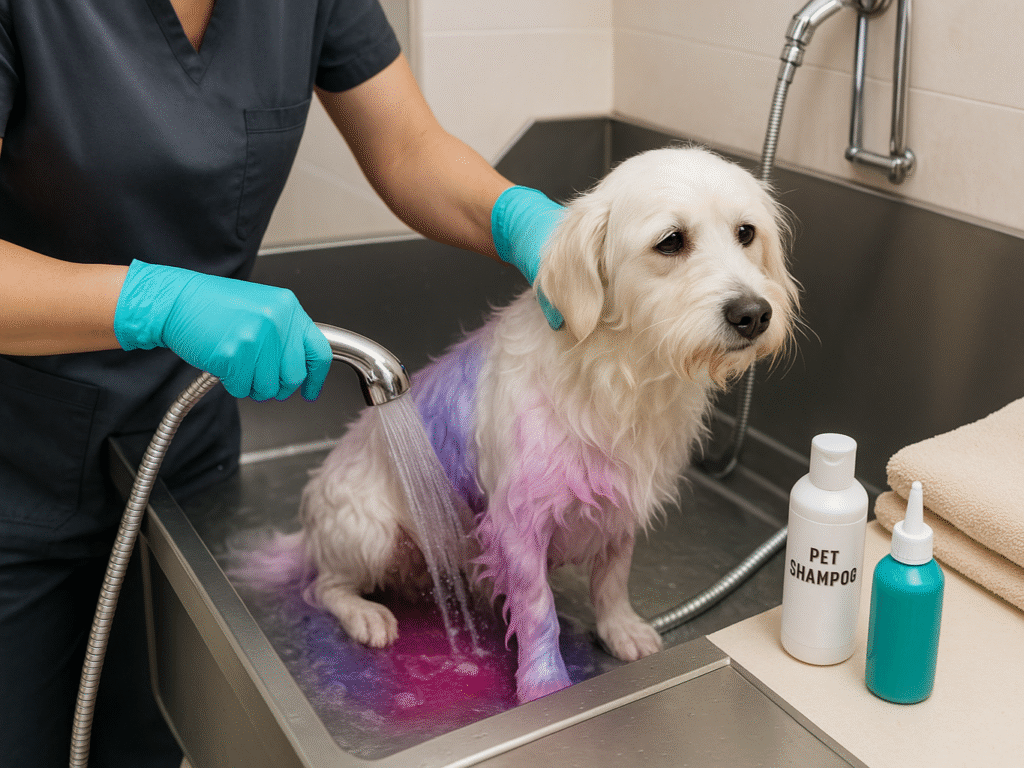
Once you’ve mastered how to dye a dog’s hair and the dye has been set correctly, the next crucial phase begins: removing excess color and safely washing your dog’s coat. Proper rinsing and drying techniques ensure both vibrant color restoration and your pet’s comfort after the dyeing process.
(i) Rinse with lukewarm water.
First, thoroughly wash your dog’s coat with lukewarm water until it runs clear. Temperature control is essential as hot water might irritate your dog’s skin or cause the dye to fade prematurely. Meanwhile, cold water can make the experience uncomfortable for your furry friend.
Begin rinsing at the neck area and work methodically toward the tail, just as you applied the dye. Continue rinsing until no color visibly runs from the coat, which typically takes several minutes depending on the amount of dye used. Complete rinsing prevents color from bleeding onto furniture or bedding later.
For semi-permanent dyes, expect to spend extra time rinsing, as these products often contain more pigment. In contrast, food-based dyes usually rinse out more easily. Throughout this process, wash your dog’s eyes, ears, and mouth from the runoff water, as even diluted dye can irritate these sensitive areas.
(ii) Use pet-safe shampoo if needed.
Afterward, follow up with a mild, pet-safe shampoo rinse, particularly for certain types of dyes. For extra-sensitive pets, finishing with a hypoallergenic shampoo can help remove any lingering chemical residue that might cause skin irritation.
Consider these scenarios when deciding whether to shampoo after dyeing your dog’s coat if your dog’s skin appears irritated or sensitive from the dye.
- When using semi-permanent dyes, it is recommended to follow up with a shampoo.p
- If your dog has particularly sensitive skin, normally the dye’s instructions specifically call for shampoo afterward.
Apply shampoo gently, lathering without vigorous rubbing that could cause the newly applied color to fade prematurely. A light, circular massage motion works effectively to clean without disrupting the dye job.
(iii) Towel dry or use a low-heat dryer.
Properly drying your dog after rinsing is essential for their comfort and to prevent skin issues. Damp fur can trap moisture, leading to bacterial growth, matting, and skin irritation, especially in dogs with dense or long coats.
To dry effectively, skip vigorous rubbing. Press towels gently onto the fur to absorb moisture without creating tangles. It reduces stress on the coat and preserves the evenness of the newly applied color.
- Use microfiber towels for faster, more efficient drying.
- Avoid rubbing, which causes matting; instead, use pressing and blotting methods.
- Have multiple towels ready if your dog has thick or long fur, as this will help keep them clean and dry.
In cooler weather or for double-coated breeds, use a pet-specific dryer or a human dryer with cool settings. Keep it moving and maintain a few inches of clearance from the skin to avoid heat concentration or burns.
Observe your dog throughout the drying process for signs of discomfort, redness, or irritation. After they’re dehydrated, finish with a gentle brushing to detangle and smooth the coat, enhancing shine and evenness of color.
Step 5: Monitor and Maintain the Color
The aftercare process begins as soon as your newly colored pooch is dry and ready to show off their vibrant look. Proper monitoring coupled with correct maintenance routines ensures your dog’s well-being and longer-lasting color results.
(i) Watch for skin irritation or allergies.
Even pet-safe dyes might trigger reactions in sensitive dogs. Carefully inspect your dog’s skin for signs of redness, bumps, or unusual warmth after dyeing. Common signs of allergic reactions include excessive scratching, licking of colored areas, and behavioral changes. If your dog develops any concerning symptoms, consult your veterinarian immediately to rule out potentially serious underlying causes.
(ii) Limit licking or scratching.
Despite using non-toxic dyes, it’s best to prevent your dog from licking colored fur. Excessive licking can cause the dye to fade faster, plus potentially lead to skin irritation. Consequently, maintaining clean, dry fur is essential; use gentle hypoallergenic wipes to keep dyed areas clean. For dogs prone to licking, providing distractions through toys or treats typically helps redirect their attention.
(iii) Reapply only after the color fades.
Dog hair dye usually lasts between 3 and 8 weeks, depending on the color brightness and product type. Permanent colors require fewer frequent touch-ups, chiefly for maintenance purposes. For those interested in longer-lasting results, our guide on permanent dog hair dye provides detailed information about semi-permanent and long-lasting options. Ultimately, avoid frequent dyeing applications, as they can become burdensome for your pet and possibly lead to coat and skin issues over time. Allow the previous color to fade substantially before considering reapplication.
(iv) Use color-protecting products if desired.
To maximize color longevity, certain maintenance practices can help. Incorporate color-enhancing products specifically formulated for dyed pet fur into your grooming routine. These products help your dog’s vibrancy without compromising their health. Altogether, using color-safe, gentle shampoos minimizes fading; indeed, avoiding frequent bathing helps preserve the dye.
Remember that different breeds with varying coat types may hold color differently. Throughout the entire coloration process, your dog’s comfort must remain the priority; any sign of distress signals that it might be time to reconsider your colorful pursuits in favor of your friend’s well-being.
Permanent Dog Hair Dye: Long-Lasting Color & Safety Guide: Learn about semi-permanent and long-lasting color options that maintain vibrancy for months. Discover professional-grade products and techniques used by groomers to achieve stunning, durable results while prioritizing your dog’s health.
Conclusion
Learning how to dye a dog’s hair can be a playful, creative way to celebrate special moments. However, safety must always come first. Use only pet-safe dyes or natural alternatives, such as food coloring or Kool-Aid, to avoid harmful chemicals. It ensures your dog stays healthy while sporting a fun, colorful look.
Following a proper five-step process preparation, application, rinsing, drying, and maintenance guarantees vibrant, even results and minimizes stress. Dogs react differently to the dyeing process, so it’s essential to monitor their behavior and stop if they appear uncomfortable. Prioritizing their comfort leads to a more enjoyable and successful grooming session.
Since most pet-safe dyes are temporary, you can experiment with colors for holidays or fun events without long-term effects. Just allow rest periods between applications. Ultimately, the goal is to express creativity while dogging your dog’s well-being at the center. A happy, healthy pup is the ultimate canvas.
FAQs
Q1. What is the first step in grooming a dog’s hair?
Start by selecting a pet-safe hair dye specifically formulated for dogs. These products are free of toxic chemicals and designed to be gentle on canine skin and fur, ensuring both safety and comfort during the dyeing process.
Q2. Why should human hair dyes be avoided for dogs?
Human hair dyes contain harmful chemicals like ammonia, peroxide, and heavy metals. These substances can cause chemical burns, allergic reactions, respiratory distress, and even poisoning in dogs, making them highly unsafe for pet grooming or coloring.
Q3. What are some natural alternatives to dog-syeing a dog’s fur?
Safe, natural dye options include beet juice (red), turmeric (yellow), carrot juice (orange), spinach extract (green), and blueberry juice (purple). These offer temporary color changes without exposing your dog to synthetic chemicals or toxic substances.
Q4. What precautions should be taken when a dog is near a dog’s face?
Use sterile ophthalmic ointment to protect the eyes. Apply petroleum jelly to the eye and ear areas, and gently insert cotton balls into the ears. These steps help prevent dye from entering sensitive areas and causing irritation or harm.