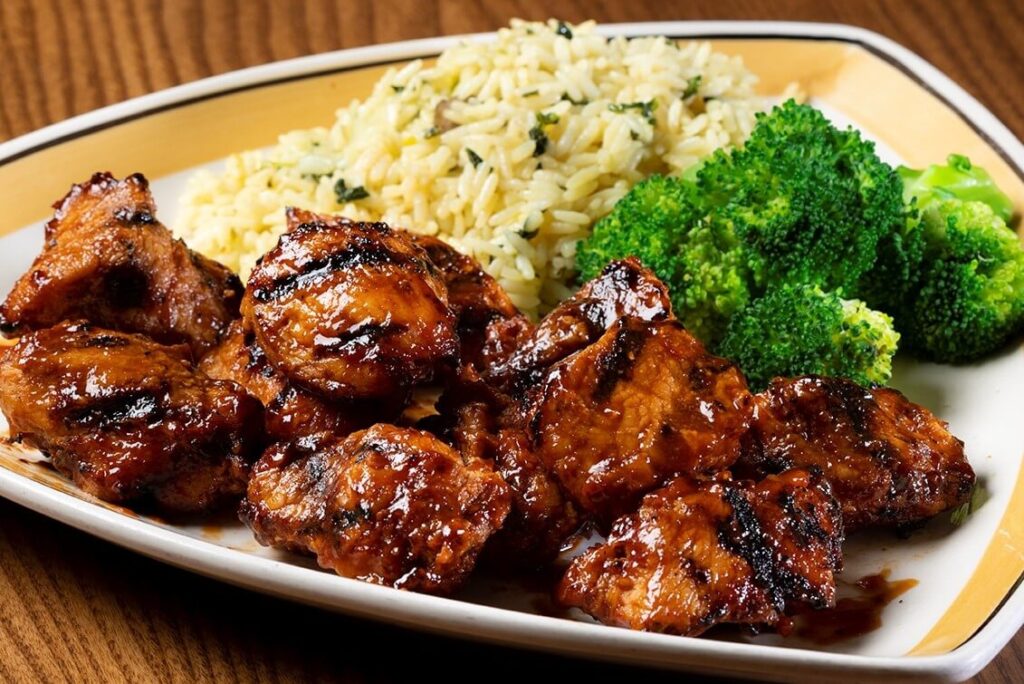
Turkey tips offer a delicious way to enjoy tender, juicy bite-sized pieces of fresh turkey breast without the hassle of cooking an entire bird. If you’re wondering how to cook turkey tips beyond the traditional methods, you’ve come to the right place.
These select chunks of white meat cut from the turkey breast are perfect for quick meals, cooking in just under 30 minutes. Additionally, turkey tips hold more marinade for excellent flavor compared to larger cuts. Beyond their quick cooking time, turkey tips are incredibly versatile; you can serve them as an entree or slice them up to add to salads and sandwiches. Furthermore, their ease of preparation and variety of cooking methods make them ideal for anyone looking to explore new foods without incurring significant time or financial investment.
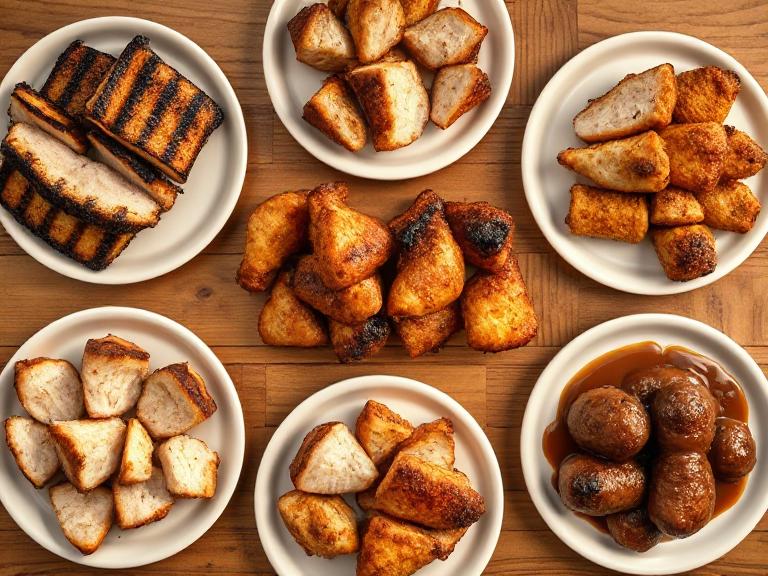
In this comprehensive guide, you’ll discover seven different ways to cook turkey tips using various kitchen appliances and techniques. From stovetop searing to air fryer convenience, grilling, slow cooking, broiling, smoking, and pressure cooking, we’ll show you how to achieve perfect results with each method. Whether you’re cooking for a weeknight dinner or planning a special meal, these techniques will help you make the most of this versatile protein.
Getting Started with Turkey Tips
Exploring turkey tips opens up a world of quick, delicious meal options that go beyond traditional turkey preparations. Before diving into cooking methods, let’s understand what exactly turkey tips are, why they deserve a spot in your meal rotation, and how to prepare them properly.
What are turkey tips?
Turkey tips are select chunks of white meat that come from the turkey breast. Sometimes called turkey tenders, these more minor cuts deliver the same great taste as a turkey breast but in a more manageable form. Much like steak tips, they’ve become staples in bars and pubs because they’re straightforward to prepare and offer menu variety. To learn more about the different types of turkey tips and how to select the best ones for your cooking needs, check out our comprehensive guide on what turkey tips are.
Unlike a whole turkey that requires significant preparation and cooking time, turkey tips give you that delicious turkey flavor in a fraction of the time. You might also encounter turkey rib tips (or turkey shoulder tips) in some markets. These are different cuts but equally delicious and can be prepared using similar methods.
The distinction is important: while regular turkey tips lean white meat from the breast, turkey rib tips come from the shoulder area, offering a texture and taste somewhat reminiscent of pork ribs. Both varieties provide excellent options for quick meals with distinct flavor profiles.
Turkey Tips Explained: Cuts, Uses, and Buying Guide
Understanding the different cuts and how to select quality turkey tips can make all the difference in your cooking results. Learn about various turkey tip cuts, their uses, and expert buying tips to ensure you’re getting the best value and flavor for your meals.
Why they’re great for quick meals
Turkey tips shine as a time-saving protein option for busy weeknights. First of all, they cook substantially faster than larger turkey cuts, typically ready in under 30 minutes rather than the hours required for a whole turkey breast. A 12-15 pound whole turkey can take up to 2 hours to roast, whereas turkey tips cook in a fraction of that time.
Moreover, their smaller size allows them to absorb flavors more effectively. The increased surface area relative to their volume means seasonings penetrate more thoroughly, resulting in more flavorful bites without the need for lengthy marinating times.
Turkey tips also offer impressive nutritional benefits as a lean protein. Since they’re cut from the white meat of the turkey breast, they’re naturally low in fat, making them suitable for many dietary preferences. Turkey is also incredibly versatile; its mild taste makes it perfect for absorbing different flavor profiles across various cuisines. Once you’ve mastered cooking with turkey, it makes an excellent addition to fresh salads. Discover creative ways to use them in our turkey salad recipe collection.
Another advantage is their meal-prep potential. Turkey tips freeze and reheat exceptionally well, making them ideal for batch cooking and planning meals for the week. Prepare a larger batch during the weekend, and you’ll have protein-rich meal components ready throughout the week for quick lunches and dinners.
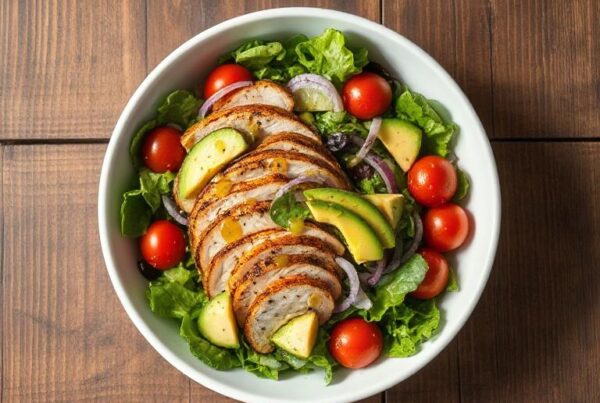
The Ultimate Turkey Tip Salad (Avocado Swap-In Guide Included!): Looking for fresh ways to use your perfectly cooked turkey tips? This ultimate turkey tip salad recipe is packed with nutrition and flavor. Plus, get our exclusive avocado swap-in guide for even more delicious variations!
How to prep them for any method
Proper preparation is essential, regardless of how you plan to cook your turkey. To begin, if using frozen turkey, ensure it’s fully thawed before proceeding with any cooking method. For optimal results, allow the turkey tips to reach room temperature for approximately 30 minutes before cooking; this promotes more even cooking.
When preparing turkey tips, pat them dry with paper towels before applying any seasoning. This step removes excess moisture, allowing for better browning and flavor development. After patting dry, season generously with kosher salt and black pepper at a minimum.
For optimal results when cooking turkey tips:
- Cut them into similarly sized pieces (about 1-2 oz each) to ensure even cooking
- Don’t overcrowd your cooking surface; leave space between pieces for proper browning
- Use a meat thermometer to guarantee food safety; the turkey should reach an internal temperature of 165°F
- Allow the meat to rest for a few minutes after cooking before slicing or serving
Regardless of your chosen cooking method, these preparation fundamentals remain the same. The beauty of turkey tips lies in their adaptability; once properly prepped, they can be cooked using virtually any method from stovetop to air fryer, slow cooker to grill.
Remember that turkey tips require significantly less cooking time than whole turkey parts. Overcooking can quickly dry them out due to their lean nature, so monitoring temperature is particularly important for this cut.
Method 1: Stovetop Searing
Stovetop searing is one of the best methods for how to cook turkey tips, giving them a golden-brown crust while locking in juices for maximum flavor. This quick method provides complete control over the cooking process, making it ideal for achieving a restaurant-quality finish at home.
Best pan and oil choices
Selecting the right pan plays a crucial role in successful stovetop searing. Stainless steel pans with a flat bottom are ideal as they distribute heat evenly across the cooking surface without creating hot spots. This consistent heat is essential for developing an even golden-brown crust on your turkey tips.
The pan’s construction matters tremendously. Look for pans with rigid, upright handles that are large enough to grip with oven mitts. Furthermore, tri-ply or fully clad construction conducts heat evenly, allowing for hassle-free searing. Avoid thin sheet metal pans that tend to warp under high heat and develop burned spots.
When it comes to oils, the smoke point should be your primary consideration. For optimal results, choose oils with high smoke points that won’t burn during the high-heat searing process:
- Avocado oil: Exceptional choice with a smoke point up to 520°F
- Canola oil: Good option with a smoke point around 430°F
- Grapeseed oil: Reliable with a smoke point of approximately 420°F
In contrast, avoid using butter alone (smoke point: 350°F) and extra-virgin olive oil (smoke point: 325-375°F), as they’ll burn quickly. However, you can finish with butter after searing for added flavor.
How to get a good seat
The secret to a perfect sear starts with properly preparing your turkey tips when learning how to make turkey tips. First, pat the meat thoroughly dry with paper towels. This crucial step removes excess moisture that would otherwise create steam, preventing proper browning and ensuring a more consistent result.
To begin the searing process:
- Heat your pan with oil until it’s lightly smoking
- Season turkey tips with salt and pepper or your preferred seasonings
- Place turkey pieces in the pan, ensuring they don’t touch each other
- Sear for 2-3 minutes on each side until golden-brown
Avoid overcrowding the pan at all costs. When too many pieces are cooking simultaneously, they release moisture that turns the searing process into steaming. Subsequently, this produces soggy rather than crispy exteriors. For ideal results, leave adequate space between each turkey tip.
Additionally, maintain high heat throughout the cooking process. Turkey tips cook best over high (not medium) heat for a short period, helping keep them moist and tender. This high-heat approach creates that desirable crust while sealing in juices.
Tips for juicy, tender results
Monitoring internal temperature remains the most reliable method to ensure perfectly cooked turkey tips. Use a food thermometer and cook until the internal temperature reaches 165°F (74 °C). It guarantees food safety while preventing overcooking.
Patience plays a key role in achieving juicy results. After cooking, allow your turkey tips to rest for 5 minutes before serving. This resting period allows the juices to redistribute throughout the meat, rather than flowing out when it is cut.
For exceptionally tender turkey tips, consider these additional techniques:
- Sear in butter for extra flavor (after initial searing with high-smoke-point oil)
- Add chicken or vegetable stock after searing both sides
- Cover the skillet after adding liquid to help the juices absorb into the meat
The cooking vessel also affects tenderness. Stainless steel pans maintain even heat, creating a more uniform sear that locks in moisture. This consistent temperature prevents some areas from overcooking while others remain underdone.
Finally, pay attention to thickness when cooking turkey tips on the stovetop. Thicker pieces may require longer cooking times. If your turkey tips are particularly thick, adjust the cooking time accordingly while still monitoring the internal temperature, as it remains your primary indicator of doneness.
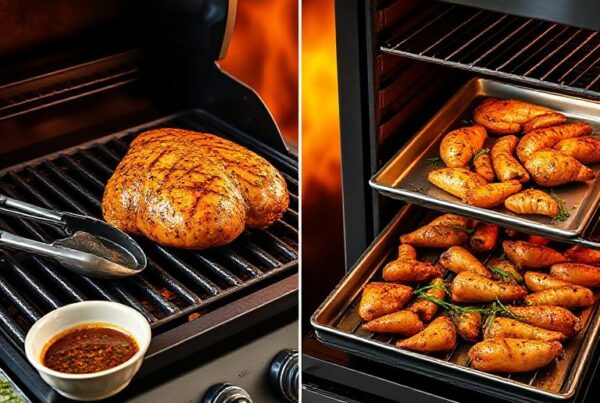
Method 2: Grilling
Grilled turkey tips impart a distinctive smoky flavor that indoor cooking methods can’t match. The high heat creates beautiful char marks while keeping the meat juicy inside. This method shines throughout the year; use your outdoor grill when weather permits or a grill pan on the stovetop when necessary.
Prepping the grill
Initially, you must decide between charcoal or gas grilling; both work excellently for turkey tips. For gas grills, preheat to medium-high heat (around 400°F) and ensure the grates are thoroughly cleaned. If using charcoal, arrange the coals in a crescent moon shape along one side of the charcoal grate for optimal heat distribution.
Properly oiling your grill is crucial for preventing sticking. Given that turkey tips are naturally lean, this step becomes even more critical. Try this professional technique:
- Fold a paper towel into a small square
- Grab it with long-handled tongs
- Dip into high-heat oil (grapeseed or vegetable)
- Brush across the hot grill grates just before cooking
For charcoal grills specifically, remove the grate first and place a drip pan inside. Then, surround the pan with approximately two dozen briquettes before heating them until they are covered with gray ash. This setup creates indirect heat, which helps the turkey cook evenly without burning.
Timing and flipping
Most importantly, patience is key when grilling turkey tips. To achieve those coveted char marks, place the tips on the grill and resist the urge to move them for approximately 7-10 minutes. Constant flipping or repositioning prevents proper scar marks from forming.
Once the first side has developed nice grill marks, flip the tips and cook for another 7-10 minutes. This is a crucial step in how to make turkey tips on the grill. At this point, check the internal temperature with an instant-read thermometer; it should read around 145°F. Remember that the turkey isn’t fully cooked yet at this stage.
For gas grills with three burners, a helpful technique involves setting the front and back burners to medium while turning off the center burner. On two-burner grills, set both burners to medium. It creates an ideal environment for even cooking without flare-ups.
Before removing the turkey from the grill, it must reach an internal temperature of 165°F to ensure food safety. More minor cuts, such as turkey tips, cook relatively quickly compared to whole turkey parts, so it’s essential to monitor them closely to prevent overcooking.
Finishing with sauce
Upon reaching an internal temperature of 145°F, it’s time to introduce sauce to your turkey tips. Remove them from the grill and place in a bowl, then thoroughly coat each piece with your preferred BBQ sauce.
After saucing, return the tips to the hot grill and continue cooking for an additional 5-10 minutes. During this final cooking stage, turn the pieces occasionally and brush on more sauce as needed to achieve layered flavor development.
Be mindful that sauces containing sugar should only be applied during the last 10-15 minutes of cooking to prevent burning. The sugar in many BBQ sauces caramelizes quickly and can char before the meat is fully cooked if applied too early.
Once your turkey tips reach the final temperature of 160°F, remove them from the grill and cover with foil to rest. This resting period allows residual heat to raise the food’s temperature to a safe 165°F while redistributing juices throughout the meat. The result? Perfectly grilled, juicy turkey tips with complex flavor and beautiful char marks. For more advanced grilling techniques and marinade recipes, explore our detailed guide on BBQ turkey tips.
BBQ Turkey Tips: Gas Grill and Oven Techniques with Marinades: Want to master the art of BBQ turkey? Discover proven gas grill and oven techniques plus amazing marinade recipes that will transform your grilling game. Your family will be asking for these flavorful turkey tips every weekend!
Method 3: Air Fryer
The air fryer has quickly become a kitchen game-changer for how to cook turkey tips and other proteins. This modern appliance combines efficiency with exceptional results, making it a standout option among the various cooking methods.
Why the air fryer is a top choice
Air fryers use rapidly circulating hot air to cook food quickly with minimal oil. When it comes to turkey tips, this method excels by preserving moisture while delivering a crisp, golden exterior.
They drastically reduce cooking time compared to ovens, locking in juices without drying out the meat. It makes turkey tips taste juicy, tender, and flavorful with minimal effort.
Cleanup is fast, and the air fryer frees your oven for other dishes. Additionally, it mimics a fried texture without added fat, making it ideal for lean cuts like turkey tips on busy weeknights or for health-focused meals.
How to arrange turkey tips
When wondering how do you cook turkey tips in an air fryer, properly arranging them in your basket is crucial for achieving optimal results. The golden rule? Never overcrowd the basket.
Place the turkey tips in a single layer, leaving space between each piece. This proper spacing ensures hot air can circulate freely around each piece, promoting even cooking and that desirable crispy exterior. Overcrowding leads to steaming rather than air frying, resulting in soggy turkey tips.
Temperature settings typically fall between 350°F and 400°F, depending on your specific air fryer model and the size of your turkey pieces. For standard turkey tips, many chefs recommend:
- 350°F for more controlled cooking of larger pieces
- 375°F for medium-sized tips
- 400°F for smaller, quicker-cooking pieces
In terms of positioning, consider starting with the skin side down (if your turkey tips have skin) for the first portion of cooking. Halfway through the cooking process, flip the tips for even browning on all sides.
Avoiding dryness and overcooking
Turkey tips, being lean cuts of meat, can easily dry out if overcooked. Consequently, monitoring internal temperature becomes your most important tool for success.
The best way to avoid dry turkey tips is to use a digital meat thermometer. Turkey is safely cooked once it reaches an internal temperature of 165°F at the thickest part. Removing it at precisely this temperature, not higher, ensures juicy results.
Resting your cooked turkey tips proves essential for juiciness. After removing from the air fryer, let them rest for 3-5 minutes under loosely tented foil. This resting period allows juices to redistribute throughout the meat, rather than running out when it is cut.
For optimum moisture retention, consider these proven techniques:
- Brush turkey tips lightly with oil or butter before cooking
- Flip halfway through cooking for even results
- Check the temperature early and often toward the end of cooking time
As for timing guidelines, turkey tenderloin pieces typically cook in about 25-28 minutes at 350°F, though smaller turkey tips may cook faster. Generally, for turkey breast tenderloins, 20-25 minutes at 400°F works well; however, always let the internal temperature be your guide rather than relying on strict timing.
Please note that cooking times may vary depending on the size of your pieces and your specific air fryer model. Therefore, checking the temperature remains more reliable than simply watching the clock.
Method 4: Slow Cooker
Slow cooking offers a hands-free approach on how to cook turkey tips, yielding incredibly tender results with minimal effort. This method excels at breaking down tougher proteins through low, steady heat, perfect for busy cooks who want delicious meals without constant attention. Setting up your slow cooker properly ensures optimal results every time.
How to layer ingredients
Proper layering in your slow cooker is essential when learning how to make turkey tips and ensures they cook evenly and stay tender. Elevating the meat above excess liquid is key; it prevents sogginess and promotes airflow, which results in better texture and more flavorful turkey tips every time.
Place halved onions at the bottom of the cooker to serve as a natural rack. They lift the turkey tips while subtly infusing them with flavor. For a deeper aroma and taste, add halved garlic heads alongside the onions to enhance the final dish with minimal effort.
Position the turkey tips breast-side up on the onion layer to allow the fat to render naturally through the meat. If onions aren’t available, foil balls can act as practical elevation tools. For extra flavor, layer sliced onion rings on top to infuse taste from both directions.
Best liquids to use
The question of whether to add liquid to your slow cooker when preparing turkey tips generates mixed opinions among culinary experts. Undeniably, turkey naturally releases a significant amount of moisture during cooking. Nevertheless, adding a small amount of liquid helps prevent sticking and enhances flavor development.
For optimal results, add half a cup of liquid to the base of your slow cooker. Your options include:
- Turkey or chicken broth (adds complementary flavor)
- Water (neutral option)
- Wine (introduces complexity)
The choice of liquid influences your final flavor profile. Broth creates richer results, wine adds sophistication, and water allows the turkey’s natural flavors to dominate.
Naturally, you won’t need to submerge the meat; the turkey will produce additional liquid as it cooks. This combination of added liquid and natural juices creates a flavorful base for gravy if desired.
Timing for tenderness
Cooking time primarily depends on the size of your turkey pieces and the temperature setting of your slow cooker. For consistent results, follow these guidelines:
- Turkey tenderloins: 2-3 hours on HIGH or 4-6 hours on LOW
- 3-4 pound turkey breast: 4-5 hours on LOW
- 4-6 pound turkey breast: 5-6 hours on LOW
- 6-7 pound turkey breast: 5-6 hours on LOW
- 7-9 pound turkey breast: 6-7 hours on LOW
For those short on time, cooking on HIGH reduces duration by approximately half, though LOW settings typically produce more tender results.
Regardless of timing, the most reliable indicator is internal temperature. Turkey is considered safe to eat when it reaches an internal temperature of 165°F in the thickest part of the meat. Using a meat thermometer provides certainty without risking dried-out meat.
Once cooking is complete, allow the turkey tips to rest for 10-15 minutes before serving. This resting period permits juices to redistribute throughout the meat rather than escaping when cut.
For the juiciest results, avoid opening the lid during cooking. Each peek releases accumulated heat and moisture, potentially extending cooking time and drying out your turkey tips. Trust the process; your patience will be rewarded with exceptionally tender turkey.
Method 5: Broiling
Broiling is an excellent method for how to cook turkey tips, imparting a chef-like quality and resulting in beautiful browning through direct heat from above. This often-overlooked method delivers quick results with minimal equipment while developing rich flavor through controlled high-temperature cooking.
How to set up your broiler
Broiling differs fundamentally from other cooking methods as it applies heat from above rather than below your food. To begin, locate your broiler, which is typically positioned at the top of your oven or in a separate drawer beneath. Ideally, use a dedicated broiler pan, which consists of two key components: a lower pan that catches drippings and an upper section with holes that allow fat to drain while exposing the meat to direct heat.
Adjust your oven rack position based on the thickness of your turkey tips. For thinner cuts, position the rack closer to the heat source (approximately 3 inches away); for thicker pieces, place them farther away (up to 6 inches). This distance management prevents burning while ensuring thorough cooking.
Before placing your turkey tips under the broiler, preheat for approximately 5-10 minutes. Unlike conventional baking, broiling requires this pre-heating period to ensure immediate searing once the meat is introduced to the heat zone.
Timing and distance from the heat
If you’re asking how do you cook turkey tips under the broiler, the relationship between distance and cooking time is crucial for successful results. Thinner turkey cuts placed closer to the heat source will cook faster, while thicker pieces positioned farther away require more time to cook. This balance prevents the outside from charging before the inside reaches proper doneness.
Keep a vigilant eye on your turkey tips throughout the entire broiling process. Unlike slower cooking methods that allow for periodic checking, broiling demands constant attention as the high heat can quickly transform perfectly browned meat into a charred disappointment within minutes.
After developing appropriate color on one side, use tongs (never a fork) to turn the pieces. Piercing with a fork allows precious juices to escape, ultimately resulting in drier meat. For optimal results, aim for an internal temperature of 165°F in the thickest part of the turkey tips.
Safety tips for even cooking
Consider starting at a higher temperature (around 425°F) to develop color, then reducing to 325°F after about 40 minutes for more controlled cooking. Furthermore, remove your turkey tips when they’re approximately 5 degrees below your target temperature, as carryover cooking will continue to raise the internal temperature even after removal from the heat.
To prevent dryness, a common challenge when broiling turkey, coat the tips lightly with oil before cooking. This simple step creates a protective barrier that helps retain moisture throughout the high-heat cooking process.
Once cooked, allow your turkey tips to rest for 20-30 minutes before serving. This critical resting period permits juices to redistribute throughout the meat rather than running out at first cut, resulting in significantly juicier results. If you’re looking to enhance your oven-cooking techniques beyond broiling, our marinated turkey tips in the oven recipe offers another excellent approach for achieving restaurant-quality results at home.
Maintain an appropriate distance between the heat source and your turkey tips to ensure they cook evenly without burning. Remember that broiling works best for thinner, flatter cuts of turkey, rather than whole pieces, making it ideally suited for turkey tips.
Marinated Turkey Tips in the Oven: A Delicious and Easy Recipe
Ready to take your oven-cooked turkey tips to the next level? This step-by-step marinated turkey tips recipe delivers incredible flavor with minimal effort. Perfect for busy weeknights when you want restaurant-quality results at home.
Method 6: Smoking
Smoking is perhaps the most flavorful way on how to cook turkey tips, creating an unmatched depth of flavor through a slow, gentle cooking process. This traditional method requires patience but rewards you with a distinctive taste that can’t be achieved through other cooking techniques.
Wood types and flavor profiles
When learning how do you cook turkey tips through smoking, the wood you select significantly impacts the final flavor. Fruit woods stand out as top choices due to their mild, sweet smoke that compliments turkey without overpowering it:
- Apple wood: Provides subtle, sweet fruity notes ideal for turkey tips
- Cherry wood: Adds mild sweetness and rich mahogany color to the meat
- Pecan wood: Imparts nutty, rich flavor with moderate smoke intensity
- Maple wood: Delivers subtle, mild, sweet, smoky flavor
Post oak offers a medium smoke intensity, making it a good option for those seeking a more pronounced flavor. Meanwhile, hickory provides classic barbecue flavor that’s robust yet complementary.
Naturally, some woods should be avoided. Mesquite burns hot and fast, typically creating an overpowering smoke flavor that can turn acrid with turkey’s longer cooking time. Indeed, milder woods work best as turkey absorbs smoke flavor more readily than beef or pork.
How to maintain low heat
For optimal results, maintain your smoker temperature between 225°F and 250°F. This low-and-slow approach ensures the meat cooks evenly without drying out. Alternatively, some chefs recommend smoking at 275°F for better skin texture.
A digital probe thermometer becomes essential for monitoring both the smoker and the meat temperatures. Turkey tips typically require 30-40 minutes per pound at a temperature of 225-250°F. For example, 12-pound turkey portions take approximately 6-8 hours.
Importantly, maintain a consistent temperature throughout the cooking process. Opening the smoker repeatedly releases heat and extends cooking time. When you must open it, work quickly and efficiently.
When to wrap or baste
Basting helps prevent the turkey from drying out during the extended smoking process. For best results, baste every 30-45 minutes with apple juice, broth, or a simple butter mixture.
Regarding wrapping, opinions differ. Many experts advise against wrapping turkey in foil during smoking as it shields the meat from smoke, essentially neutralizing the smoking process. Others recommend smoking uncovered for 5 hours, then covering with foil while increasing the temperature to 250°F for the final hour to crisp the skin.
Always cook until the internal temperature reaches 165°F in the thickest part of the meat. Once finished, allow your smoked turkey tips to rest for 15-20 minutes before serving to redistribute juices.
Method 7: Pressure Cooking
Pressure cooking transforms turkey tips into incredibly tender morsels in a fraction of the time compared to conventional methods. With its sealed environment and steam-based cooking process, this technique ensures your turkey remains juicy throughout.
Quick cooking with moisture retention
One significant advantage when you know how to make turkey tips in a pressure cooker is the dramatically reduced cooking time. Typically, a 6-pound turkey breast requires only 30 minutes at high pressure, while a 3-4 pound bone-in breast needs just 25 minutes. Notably, boneless breasts cook based on thickness rather than weight.
The sealed environment of pressure cookers traps steam and moisture during the entire cooking process. It creates an ideal cooking condition that prevents turkey tips from drying out, resulting in exceptionally tender meat.
Fortunately, pressure cooking works well for both fresh and frozen turkey tips. For a 2-pound frozen turkey breast, increase the cooking time to 50 minutes.
When setting up your pressure cooker:
- Add liquid (broth provides better flavor than water)
- Place the turkey on the trivet to elevate it above the liquid
- Season as desired before sealing the lid
- Set to high pressure for the appropriate time based on weight
How to release pressure safely
After cooking is complete, the pressure release method significantly impacts the texture of your turkey. A natural release for 10-15 minutes is highly recommended as it allows juices to redistribute throughout the meat.
For larger cuts, perform a full natural release until the pin drops (approximately 20 minutes). Alternatively, if you’re short on time, do a 10-minute natural release followed by a manual quick release.
When performing a quick release, be extremely cautious:
- Point the valve away from you
- Consider taking the pot outside to release steam.
- Open the valve slowly to prevent the turkey’s skin from separating.
Always verify doneness with a meat thermometer; turkey should reach 165°F at the thickest part.
Finishing with a glaze or sauce
Despite its many advantages, pressure cooking alone doesn’t create the golden-brown exterior many desire. To achieve crispy skin, try:
- Brushing the turkey with olive oil
- Placing under the broiler for 3-5 minutes until golden brown
- Watching closely to prevent burning
As an added benefit, pressure cooking creates flavorful drippings perfect for gravy. While the turkey rests, make gravy directly in the pressure cooker:
- Set to sauté mode
- For cornstarch gravy: Mix 2 tablespoons cornstarch with cold water to create a slurry, then add to the simmering liquid
- For flour gravy: Melt 1 tablespoon butter, whisk in flour until golden, then gradually add 1 cup of cooking liquid
Allow the gravy to simmer until it has thickened, creating the perfect complement to your perfectly moist pressure-cooked turkey tips.
Final Thoughts
After exploring these seven versatile methods for how to cook turkey tips, you now have an arsenal of techniques to transform this convenient cut into delicious meals. Turkey tips truly stand out as an exceptional protein choice for busy home cooks. Their quick cooking time, flavor absorption, and lean profile make them ideal for any diet.
Each cooking method offers distinct advantages. Stovetop searing yields a golden crust with precision, while grilling adds smoky richness. Air fryers offer a crispy texture with minimal oil, making them perfect for health-conscious eaters. Slow cookers, on the other hand, provide effortless tenderness with hands-free preparation, making them ideal for busy schedules and batch cooking.
Broiling is ideal when you need speed and caramelization, while smoking unlocks a depth of flavor unmatched by any other method. Pressure cooking is a lifesaver for fast, juicy meals, even from frozen. These techniques enable you to adapt according to your kitchen setup, time constraints, and desired taste, without compromising quality or nutrition.
Turkey tips are as adaptable as they are flavorful. From searing to slow cooking, each approach suits different seasoning profiles and culinary preferences. With proper prep, drying, seasoning, temperature checks, and resting, you can ensure moist, tender results every time. Whether you’re a beginner or an expert, turkey tips make every meal a success.