Your home accumulates around 40 pounds of dust yearly, and much ends up on your window blinds.
The sort of thing I love about dust is that it’s not just an eyesore; it attracts allergens like pollen, pet dander, and mold spores that can impact your home’s air quality. The good news is that regular cleaning every week or two will help your blinds last for decades. You can clean your blinds in under five minutes with the right tools, like a vacuum with a soft brush attachment.
The best way to clean blinds doesn’t have to be complicated. This guide covers everything you need, from fabric blinds that need gentle handling to solutions that tackle greasy kitchen blinds effectively. You’ll discover simple dusting techniques and deep-cleaning methods to keep your blinds spotless without removal.
Start with Light Cleaning: Tools and Daily Habits
The best way to clean blinds starts with the right tools and regular upkeep. The quickest way to clean blinds is by using simple methods that stop dust from building up. Whether you have wooden, vinyl, or fabric blinds, routine care makes a huge difference. A little dusting each week and occasional deep cleaning can keep them looking brand new for years.
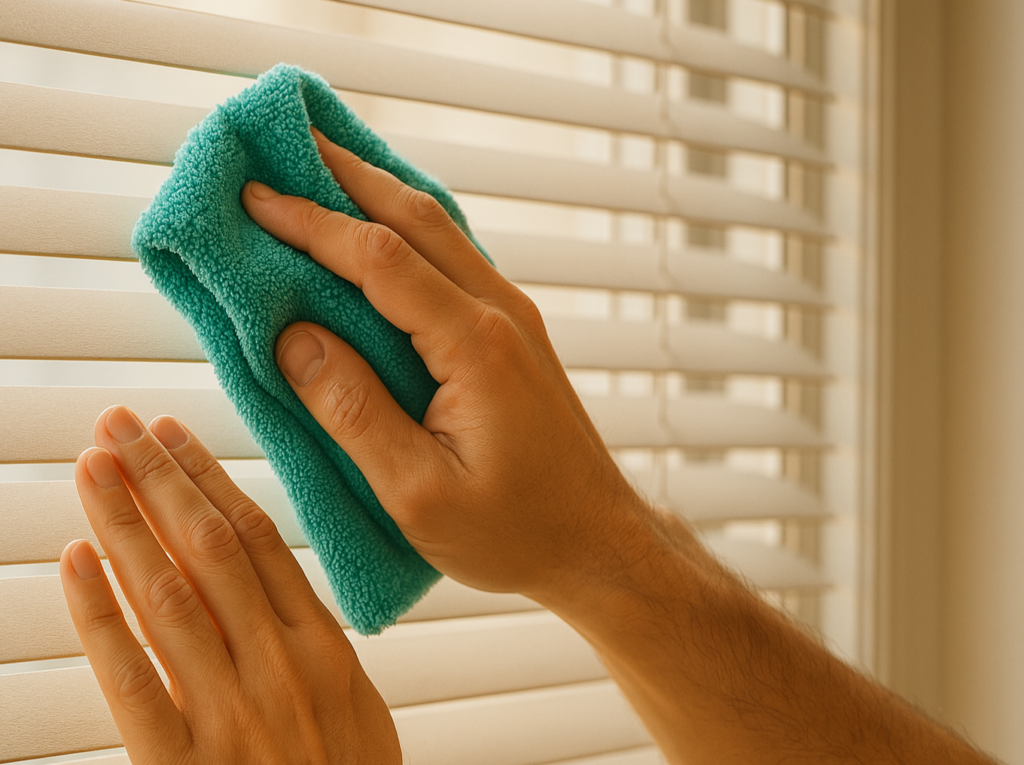
1. Use a microfiber cloth or blind duster.
Microfiber cloths excel at blind cleaning because they trap dust instead of spreading it around. You’ll get the best results by closing your blinds and wiping along the slats with a microfiber cloth, feather duster, or soft cloth. Blind dusters are explicitly designed to make the job easier with unique features:
- Standard microfiber dusters: These have electrostatic properties that attract dust like a magnet
- Multi-finger blind cleaners: These tools slide between slats (up to 2.25 inches wide) to clean both sides at once
- Adjustable head dusters: Some premium options let you lock the attachment at different angles
Look for washable dusters you can use again. Budget-friendly choices like the HIWARE Window Blind Cleaner Brush come with microfiber sleeves that grip blinds firmly without making them shake.
2. Vacuum with a soft brush attachment
Your vacuum cleaner becomes a great tool to tackle heavy dust. Experts suggest you vacuum first to remove loose dirt, dust, and debris. It makes the next dusting step more effective.
A small brush tool or upholstery attachment works best to protect delicate slats. Work from top to bottom (or side to side) systematically. This method stops dust from settling on areas you’ve already cleaned.
Specialty vacuum attachments made just for blinds can help, too. The Shutter Blind Vacuum Attachment uses soft bristles and a felt strip to protect surfaces while removing dust and allergens. These attachments fit standard 1¼-inch round vacuum wands and nozzles, which work with most vacuum models.
3. How often should you dust your blinds?
Home maintenance expert Bob Vila recommends dusting blinds at least once a week to prevent buildup. Regular cleaning keeps window treatments looking fresh and reduces the need for deep cleaning later.
A typical cleaning schedule looks like this:
- Weekly: Quick dusting with a microfiber cloth or feather duster
- Monthly: Deeper clean with a vacuum brush attachment
- Once or twice yearly: Deep cleaning with solutions that match your blind material
Your home’s environment might need a different schedule. Kitchen blinds need more frequent cleaning because of grease, while blinds in spare rooms might need less attention. Homes with pets, smokers, or allergy sufferers benefit from more frequent cleaning.
“Regular, thorough cleanings are the best tool in the box,” says cleaning expert Lucy Fierman. “Even using a Swiffer or hoovering up every time you clean the rest of the room will help in the long run.” Making blind cleaning part of your regular housekeeping routine stops dust from building up and helps your window treatments last longer.
How to Clean Blinds While Hanging
How to clean blinds while hanging? You can do it without taking them down. It’s quick and easy once you know the proper techniques. Unlike curtains that go straight into the washing machine, blinds need a hands-on approach, but you can clean them well while hanging.
1. The Best way to clean blinds without taking them down
Start by extending your blinds fully so you can reach all surfaces. Clean horizontal blinds from top to bottom to keep dust from falling on clean slats. With vertical blinds, work from one side to the other.
A step-by-step approach works best:
(i) Close the blinds completely to expose one side of the slats, making it easier to clean each slat thoroughly.
(ii) Wipe each slat with a microfiber cloth while holding the bottom steady to prevent the blinds from swinging.
(iii) Tilt the blinds the other way to expose the opposite side, ensuring both surfaces are cleaned effectively and evenly.
(iv) Wipe the newly exposed surface with a dry microfiber cloth to remove dust, dirt, and other debris.
(v) For tough spots, use a slightly damp cloth with a cleaning solution to lift any stubborn grime without damage.
Fabric blinds need different care; use a vacuum with a brush attachment instead of wiping. It gets rid of surface dirt without damage. Tackle stains by dabbing (never rubbing) with a slightly damp cloth and mild soap.
2. Using a sock or glove for quick wipe-downs
Here’s a clever trick: use a regular cotton sock as your cleaning tool. Just:
- Put a clean sock on your hand (turn it inside out to clean it better)
- Dip it in cleaning solution (water with mild dish soap works great)
- Grab each blind slat between your fingers and slide along
This method lets you clean both sides of each slat at once. The sock stays put on your hand, unlike clothes that slip around. Kitchen blinds with grease? Add a drop of dish soap to cut through it.
3. When to avoid cleaning blinds in place
Some situations need a different approach: In some instances, cleaning your blinds in place isn’t recommended. When blinds are fragile or excessively dirty, a more careful or specialized method is required to avoid damage.
- Never clean hanging wood blinds with water; it can warp them or damage the headrail.l
- Filthy blinds might need a good soak in the bathtub
- Cellular shades usually need professional ultrasonic cleaning because regular cleaning can weaken their adhesive
- Don’t spot-clean fabric blinds marked “dry clean only.”
Always follow what the manufacturer says about cleaning. Sometimes, it’s worth removing blinds to clean them properly, especially if they haven’t been cleaned in years or have lots of grease buildup.
Tackling Stubborn Dirt and Grease
Kitchen grease creates the most stubborn challenge when cleaning blinds. It needs special approaches that go beyond regular dusting. Airborne grease particles stick to blinds, creating a sticky, grimy surface that attracts more dust and dirt.
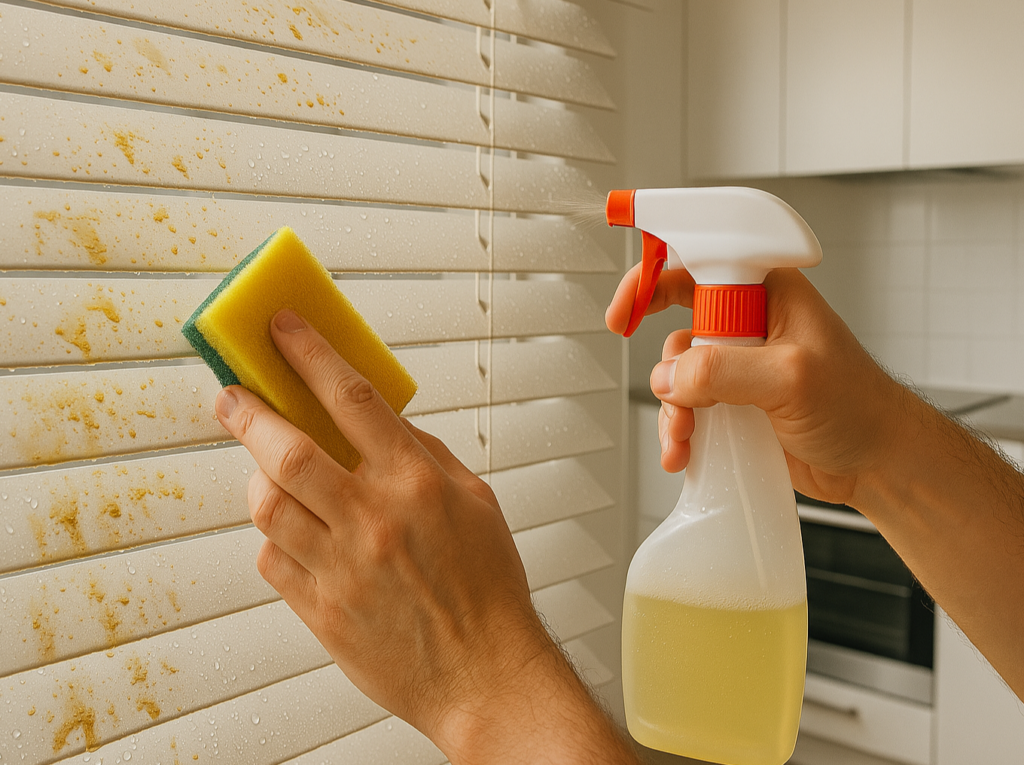
1. How to clean greasy blinds in the kitchen
Your kitchen blinds need frequent cleaning because cooking releases grease into the air. Here’s how to tackle those greasy kitchen blinds:
(i) Start with a dry microfiber cloth to remove loose surface dust
(ii) Mix warm water with a few drops of grease-cutting dish soap like Dawn
(iii) Dampen (don’t soak) a clean microfiber cloth with this solution
(iv) Wipe each slate individually and refresh your cloth often to avoid spreading grease
A solution of equal parts white vinegar and warm water works wonders on tough kitchen grease. This mixture cuts through grease and disinfects your blinds at the same time. Kitchen blinds often collect both visible and invisible food residue that needs cleaning.
2. Safe cleaning solutions for different materials
Each blind material needs its own cleaning approach:
(i) Vinyl or Aluminum Blinds
These rigid blinds handle moisture well. You can use a warm water and dish soap mixture or a 1:1 vinegar-water solution with a few drops of dish soap to deep clean.
(ii) Faux Wood Blinds
These can handle moderate moisture, as with vinyl. A disinfectant solution works great in kitchens; mix equal parts water and vinegar for the best results.
(iii) Real Wood Blinds
Skip vinegar or excessive moisture. Use a barely damp cloth with mild detergent, then follow up with a dry cloth. Wood preservatives or lemon oil treatments help maintain the finish.
(iv) Fabric Blinds
Mix lukewarm water with a tiny dish soap (less than ¼ teaspoon) to tackle tough stains. You can gently rub baking soda with a damp cloth on stubborn spots, then rinse with a clean, damp cloth.
3. Avoiding damage to wood and fabric blinds
Wood blinds require special care to prevent warping and damage. Avoid soaking or using excessive moisture, and steer clear of harsh chemicals that can strip the protective finish. Clean with light pressure to prevent scratches, and regularly apply lemon oil or wood preservative to maintain the finish.
Fabric blinds need similar attention. Never soak them in water, as it can distort their shape. Blot stains gently and clean them immediately before they set. Always test cleaning solutions on a hidden area first, and remember that ultraviolet cleaning or harsh solvents can damage most blind materials. Regular maintenance will keep them looking fresh, even after dealing with kitchen grease.
Deep Cleaning: When and How to Soak Your Blinds
Blinds covered in months of grime need a good soaking to look new again. A deep clean every six months will protect your window treatments from permanent damage caused by dust and dirt.
1. How to clean blinds in the tub step-by-step
Using your bathtub is the best way to clean blinds when regular dusting doesn’t cut it. It’s ideal for deep cleaning, soaking away grime, and restoring your blinds to spotless condition.
- Lay your blinds flat in the tub, ensuring they are evenly placed to avoid bending. This method prevents water from damaging the blinds and ensures they soak evenly, helping to lift dirt and grime effectively.
- Fill the tub halfway with warm water (not hot, as it might warp or damage the blinds). Add a tablespoon of mild dish soap; grease-cutting formulas work best to break down built-up grime and dust. Baking soda can be added to enhance cleaning power.
- Let the blinds soak for 20-30 minutes, allowing the solution to work magic and break down dirt, oils, and grime. During this time, the blinds absorb the cleaning solution and loosen any stubborn residue.
- After soaking, clean each slate with a soft brush or sponge to scrub away any remaining dirt. Empty the tub and rinse the blinds thoroughly with clean water. For yellowed white blinds, soak them in cold water with liquid bleach for 10 minutes.
This method keeps dust from floating around while you clean. You can even clean your windows as the blinds soak.
2. What blinds can be soaked safely?
Different blinds handle soaking differently: Aluminum, vinyl, and plastic blinds are safe for soaking due to their moisture resistance, while faux wood blinds can handle some moisture, but real wood should never be soaked.
(i) Safe for soaking
- Aluminum blinds are safe for soaking because their protective coating prevents rust, making them ideal for a thorough clean without worrying about damage. Just make sure to avoid abrasive cleaners that could scratch the surface.
- Vinyl and plastic blinds resist water well, making them perfect candidates for soaking. These materials won’t warp or absorb moisture so they can handle a deep clean in the bathtub without fear of damage.
- Faux wood blinds handle moisture better than real wood so they can be soaked for cleaning. Although they can tolerate some moisture, avoid soaking them for long periods to prevent any potential warping or fading over time.
(ii) Never soak
- Wooden blinds should never be soaked, as water can cause significant damage. Moisture can lead to warping, discoloration, and bowing, making the blinds lose shape and beauty. It’s essential to clean them with minimal moisture to avoid such damage.
- Fabric blinds are sensitive to water, so soaking them is not recommended unless labeled as washable. Water can distort the fabric or cause it to lose shape, so always check the care instructions before soaking.
- Woven wood or bamboo blinds can still suffer from soaking despite bamboo’s natural resistance to humidity. Water can weaken their structure over time, leading to breakage or fading. Use a light dusting or gentle cleaning method to preserve their integrity.
Faux wood blinds look like real wood, but their synthetic materials handle moisture better. That’s why they work great in kitchens and bathrooms.
3. Drying tips to prevent warping or mold
The proper drying technique prevents damage: Shake off extra water after rinsing. Then, lay blinds flat on clean towels or hang them where air moves freely. Your blinds must be completely dry before you put them back up. Damp blinds quickly grow mold and start to smell.
Heat drying causes more problems than it solves. Natural air drying works best in a well-ventilated space away from the direct sun, which could warp or fade the materials.
Fabric blinds need special care; hang them on a plastic hanger or rack to drip dry. If you’re drying them outside, bring them in before dark.
Prevent Dust Buildup with Smart Habits
Keeping dust from building up works nowhere near as hard as cleaning your blinds repeatedly. A few simple habits can reduce your deep cleaning needs significantly.
1. Use anti-static sprays or dryer sheets.
Your blinds act as dust magnets because of static electricity. Anti-static products help by creating a coating that keeps particles away:
- Anti-static sprays: These products fight static electricity charges that pull in dust and create static cling. A light weekly mist over your blinds does the trick; just don’t soak them. The spray reduces static charge temporarily, which helps dust slide right off.
- Dryer sheets: These budget-friendly sheets work amazingly well against static cling on blinds. Running a dryer sheet across each slat monthly helps surfaces stay cleaner. The positive electrical charge pushes dust particles away actively.
People who use anti-static treatments consistently report 65% less dust buildup between cleanings.
2. Change HVAC filters regularly.
Dust levels in your home depend heavily on your HVAC system’s condition. Dirty filters spread dust everywhere, including your blinds. Clean filters catch dust before it moves through your ducts.
Fresh HVAC filters do more than trap dust. They help your system run better, save up to 15% on energy costs yearly, and make your indoor air cleaner. High-use seasons need monthly filter checks, so set those reminders.
3. Choose dust-resistant blinds to make life easier.
Wise material choices can make a big difference if you plan to replace your blinds:
Vertical blinds beat horizontal ones to keep allergies away. Faux wood blinds resist both dust and moisture thanks to their non-porous surfaces. Wide-slat blinds and shutters give dust fewer places to settle.
PVC, vinyl, and aluminum blinds offer the best dust resistance. Their smooth surfaces make dust slide off easily during cleaning sessions.
Choosing the Right Product for Your Budget
The best way to clean blinds depends on using the right tools, and that comes down to your budget and what you need it for. Here are three great options at different price points that work well.
1. Budget: HIWARE Window Blind Cleaner Brush
The HIWARE Window Blind Cleaner Brush gives you amazing value at just $7-8. This clever tool resembles tongs but has three prongs wrapped in microfiber sleeves. You can clean the top and bottom of two blind slats at once. This design cuts your cleaning time in half compared to old-school methods.
You get five microfiber sleeves that you can throw in the washing machine. These sleeves grab and hold dust instead of just pushing it around. You can use this tool dry for quick dusting or wet when you need deep cleaning. One customer put it well: “For tougher dirt, you’ll want to use one of your favorite cleaning solutions and spray it generously onto this duster.”
2. Mid-range: OXO Microfiber Hand Duster
The OXO Good Grips Microfiber Hand Duster costs about $12 and proves worth every penny. This duster works on both sides and bends easily thanks to its flexible head. Long, fluffy microfibers reach deep into corners to pull out dust.
The slim design lets you clean tight spots while covering many surface areas with each pass. Users love how well it cleans ceiling fans, baseboards, and spaces between objects. You can remove the duster head and wash it in your machine; just use cold water and skip the fabric softener and bleach.
3. Premium: Eufy HomeVac H11 Cordless Vacuum
The Eufy HomeVac H11 Cordless Vacuum ($50-60) packs serious power into a super-light 1.2-pound package. This little vacuum pulls with 5500Pa of suction, enough muscle to pick up cereal and beads.
A single charge gives you about 13 minutes of cleaning time, and it needs roughly 3 hours to juice back up. The round shape helps you clean around blinds and other tricky spots. Hair won’t get tangled up inside since this vacuum uses pure suction without a spinning brush.
These three options tackle blind cleaning differently, from simple hand tools to powered gadgets. You can pick the one that matches your cleaning style and fits your wallet.
Conclusion
Clean blinds boost your home’s appearance and help maintain healthy indoor air quality. The best way to clean blinds is to ensure your window treatments stay fresh for years with regular upkeep using the right tools and methods.
Your blind material determines the best cleaning approach. Vinyl and aluminum blinds work well with soap solutions since they can handle moisture. Wood blinds need gentle care with slightly damp clothes. Fabric blinds work best with careful spot cleaning or professional services.
Smart prevention habits protect your investment and reduce how often you need to clean. Anti-static treatments, new HVAC filters, and dust-resistant materials minimize maintenance needs. You can keep dust under control with consistent cleaning schedules using budget-friendly tools like the HIWARE brush or premium options like the Eufy HomeVac.
Note that your blinds don’t need complex methods or expensive products to stay clean. Weekly dusting and occasional deep cleaning keep your blinds spotless and improve your living space. These cleaning techniques will turn your blinds from dust collectors into beautiful window accessories.